


I Painted My Kitchen Cabinets Teal!

Have you painted your kitchen cabinets? If not, do you want to? If so, why haven't you? It's not a difficult process, although it can be time-consuming. I painted our cabinets about 9 years ago and they have held up really, really well! And, it only took a day to do the project! (That would not be the case this time, though.....)
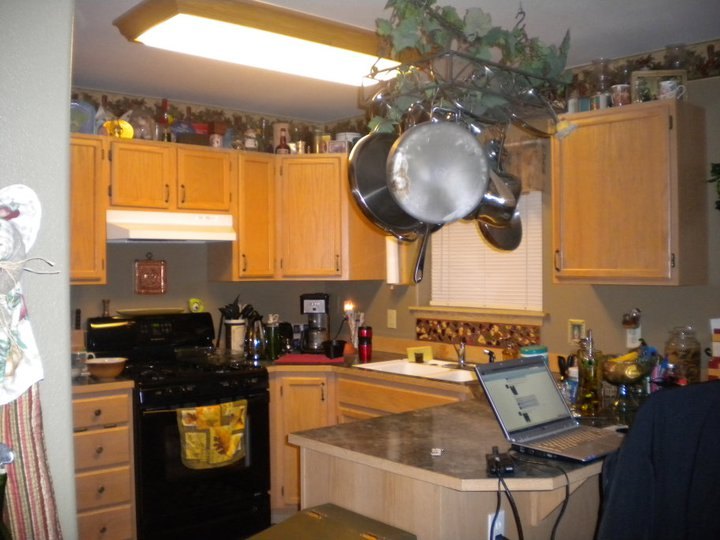
When we moved into the house, all the trim and wood were a light oak color. While I like light oak, it just didn't look good with the warmer colors in my decor, paint, or the countertop in the kitchen. Over the years, I have been removing traces of the light oak. I have either painted, stained, or replaced it. The only light oak left in the house is in the room that hubby uses as a home office. I'd like to change it but he says it's a reminder of what we started with; so, for now, it remains. 
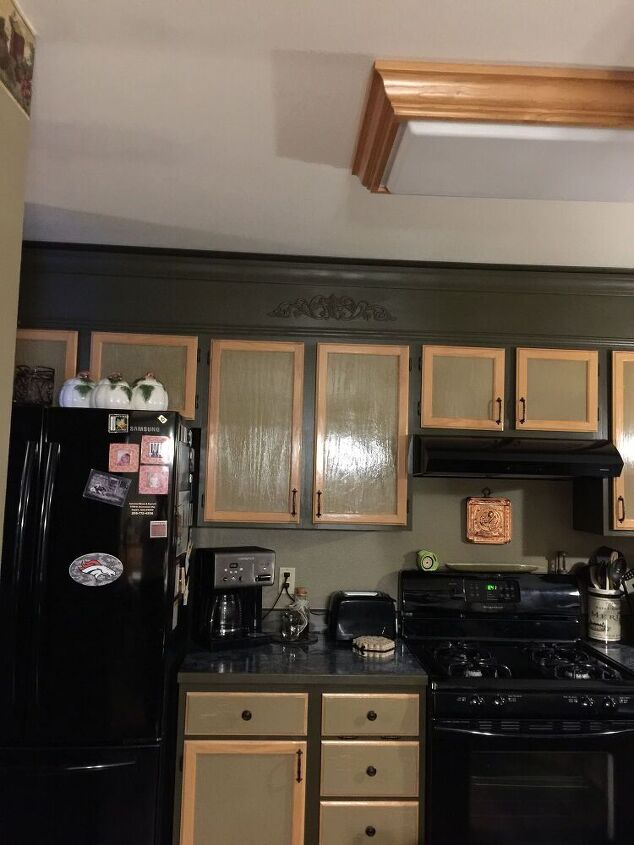
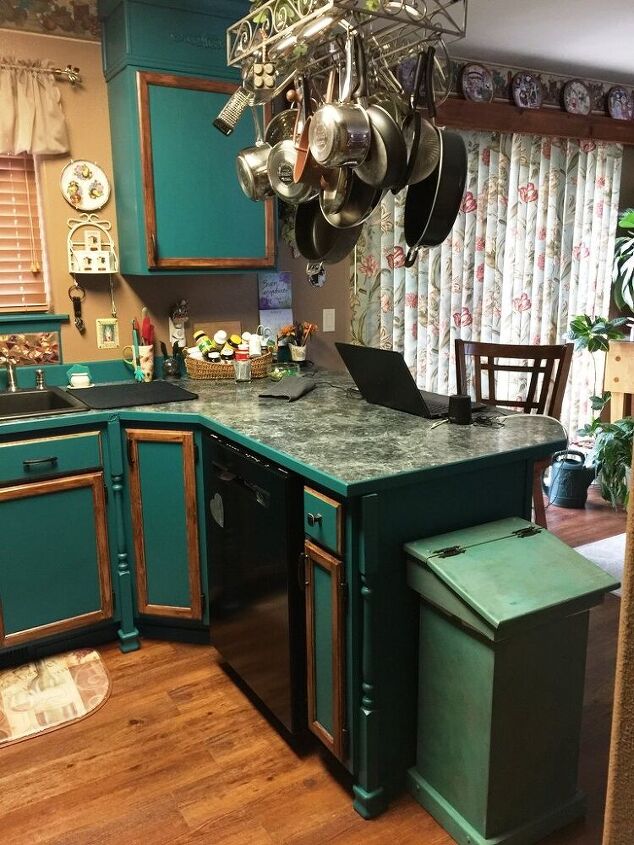
Here is the color I originally painted the cabinets. I used an interior satin paint by Behr. You can see that I left the frame of the doors (and the drawers) the light oak. After painting the inset using the crackle method, I applied a coat of lacquer. That's probably why the paint held up so well on them!
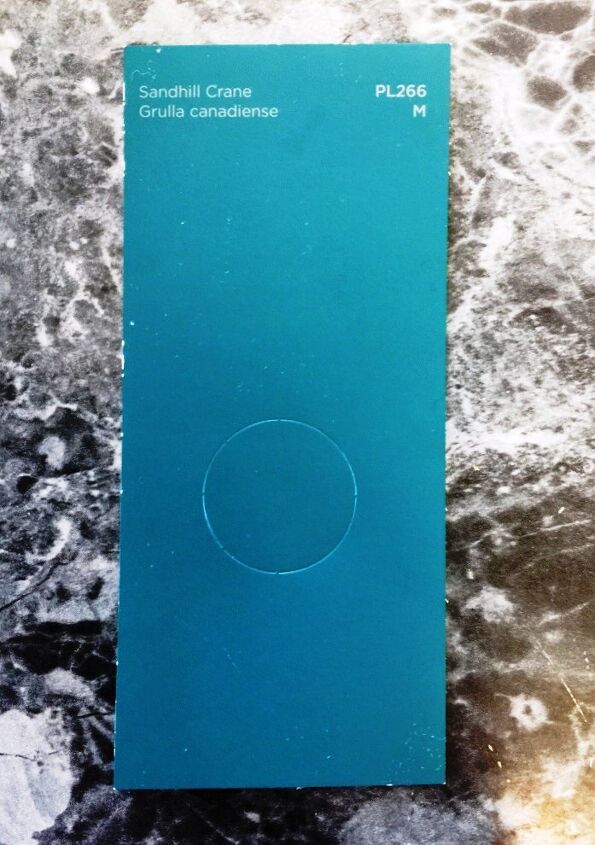
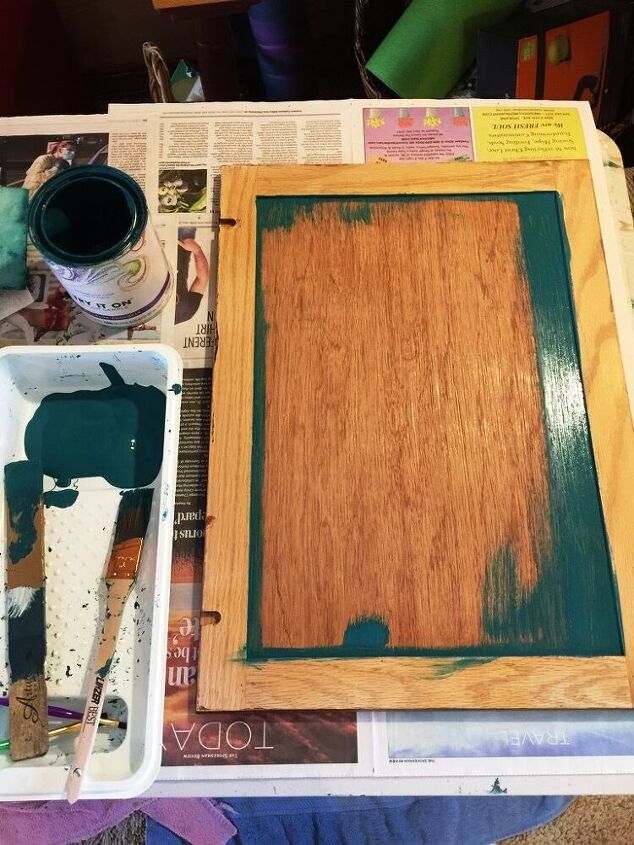
I found a new color that I really love! Teal! I bought a sample quart of it before investing in a gallon. The color is Sandhill Crane and is made by Pratt & Lambert. When I went to buy the gallon, the salesman asked what I was painting and when I told him kitchen cabinets, he suggested I buy gloss. I don't like gloss paint and asked for eggshell instead. He raised his brow but mixed the paint in eggshell. I know this is a risky choice for the kitchen but I took it anyway - time will tell if I made a bad decision.
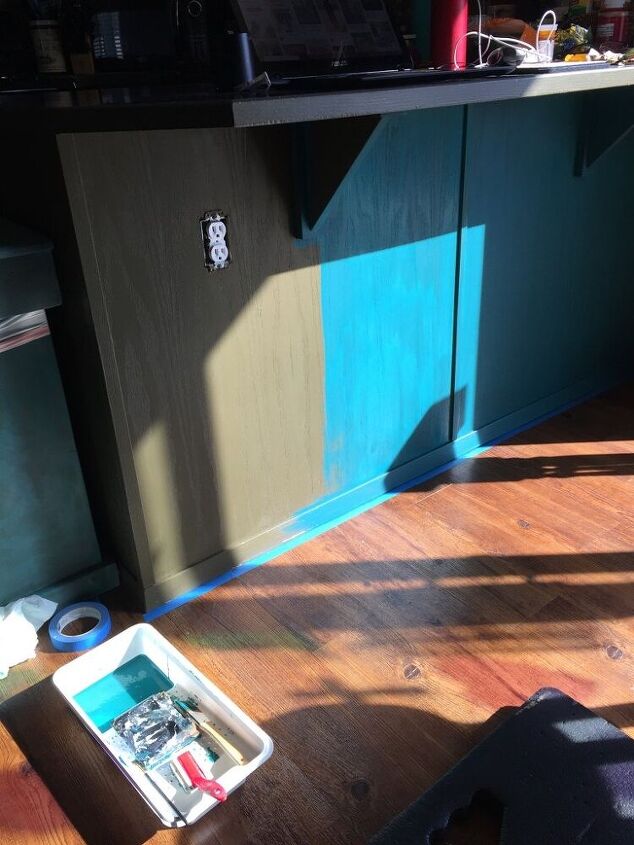
I started painting the lower cabinets & removed the doors & drawers as I went along. I have become pretty good with a 1 1/2" angled paintbrush and usually paint without using painter's tape. For this project, though, I decided to use tape. I taped along the baseboards, along the top of the wooden backsplash, and along the ceiling. Once everything was taped, I used a wet microfiber cloth and wiped down all the surfaces. This time, I did not sand before painting.
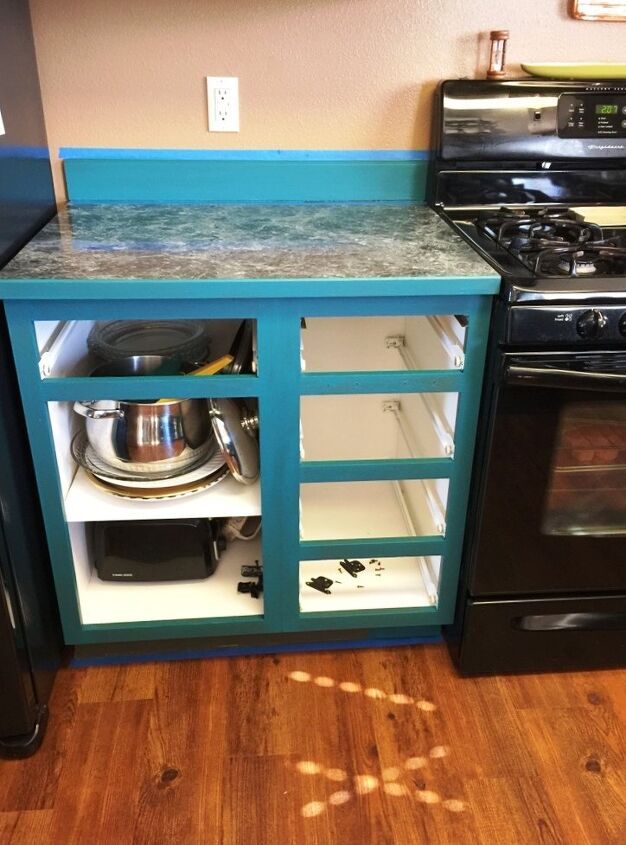
I did find that once the taping was done, the painting went a lot faster than when I paint without tape. Using both a small a regular-sized painting pad, I applied two coats of paint (I went back later and applied a 3rd coat on several areas), allowing the first coat to dry & cure for a couple of days while I worked on the doors & drawers, before applying the 2nd coat. While painting the lower cabinets, I also painted along the edge of the counter since that is also wood.
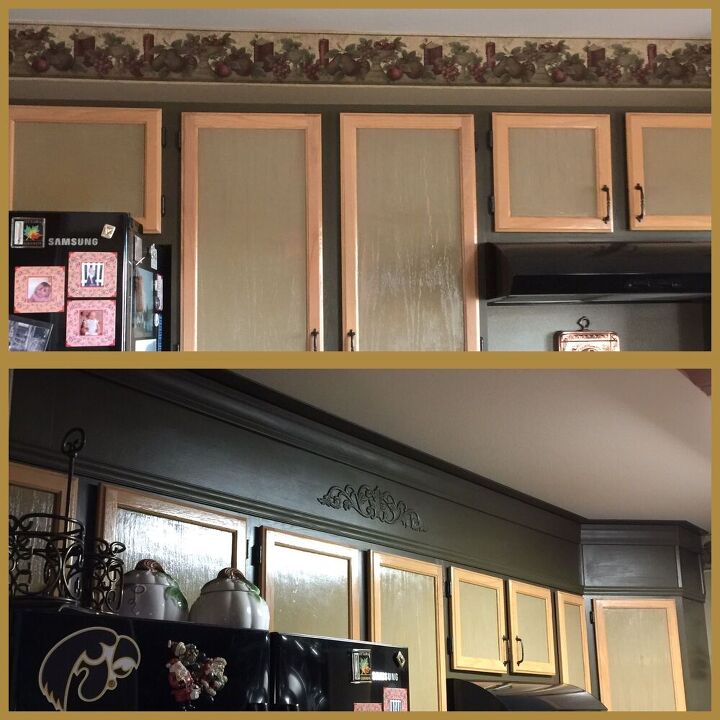
Several years after I painted the cabinets, I built a soffit. That's one of the reasons this painting job took longer than the first - more area to paint.
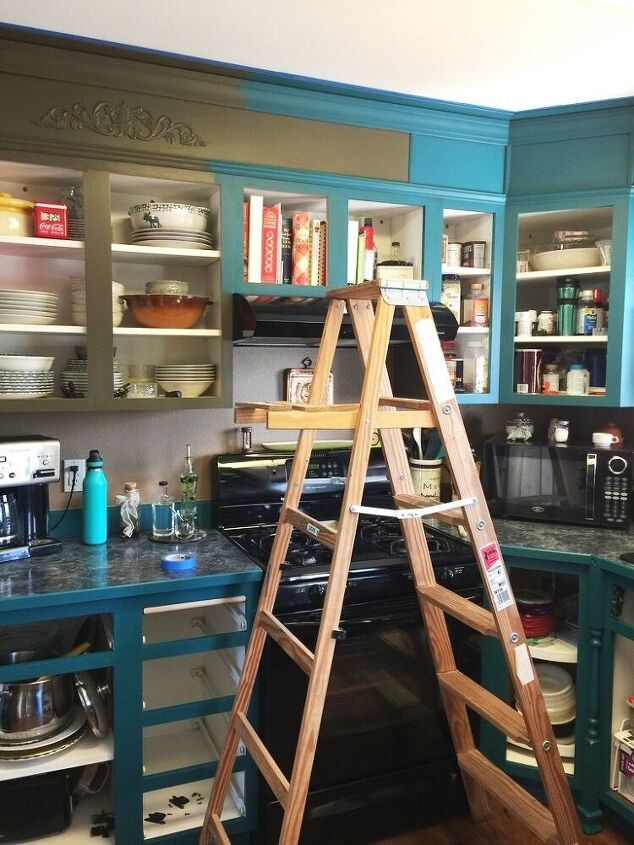
The flat surface of the soffit is 1/8" plywood and I felt that it needed 3 coats of paint. To paint the trim along the ceiling, I used a 1 1/2" angled brush. To paint the rest of the soffit, I used a 2 1/2" angled brush, and a small artist brush around the wood filigree accents.
The face of the cabinets was painted with a small painting pad & the cabinet sides with a regular-sized painting pad.

I don't know if the wood that runs along the top of the counter can actually be called a backsplash but that's what I call it :) I also applied 3 coats of paint to it using a painting pad on the flat surface & a small angled brush along the top.
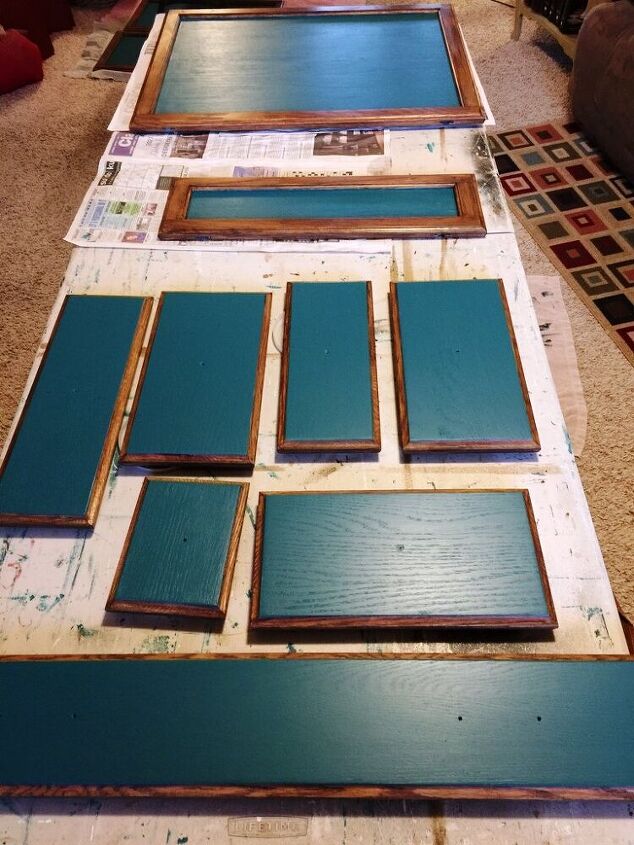
This is the part of the project that took the most time. There are 15 cabinet doors and 7 drawer fronts. The first time I painted the kitchen cabinets, I painted the inset part of the doors & front of the drawers but left the wood that framed the doors/drawers the light oak. I then applied lacquer over both the paint and the wood. I didn't realize how difficult it would be to strip the lacquer!
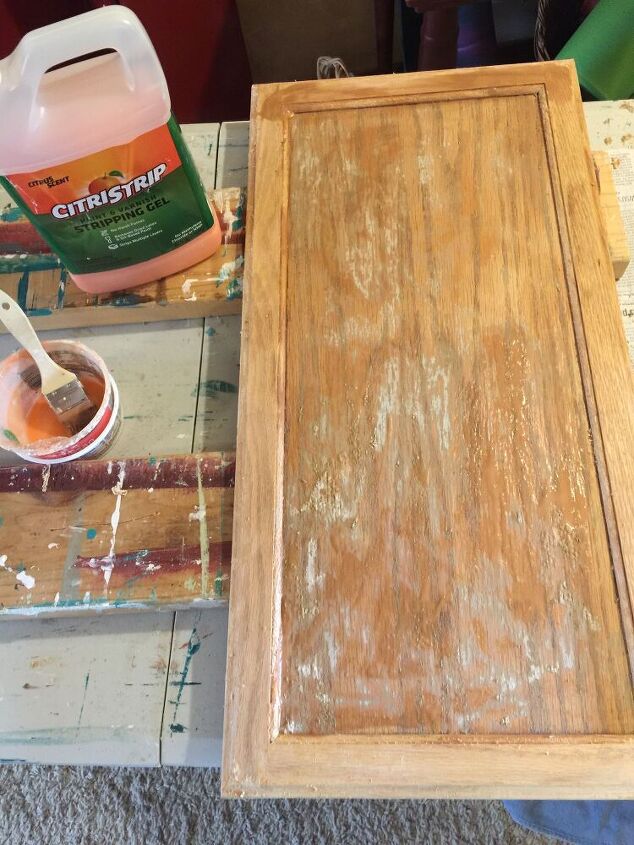
Since it was March and still cold outside, I was working on these pieces in the family room. Because I was working inside, I didn't want to use a harsh stripper so I used Citristrip.
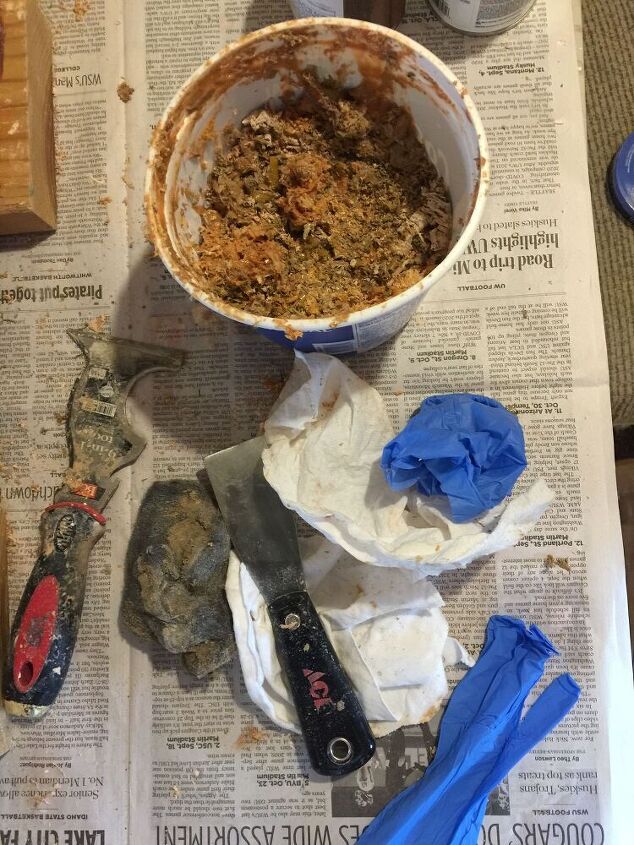
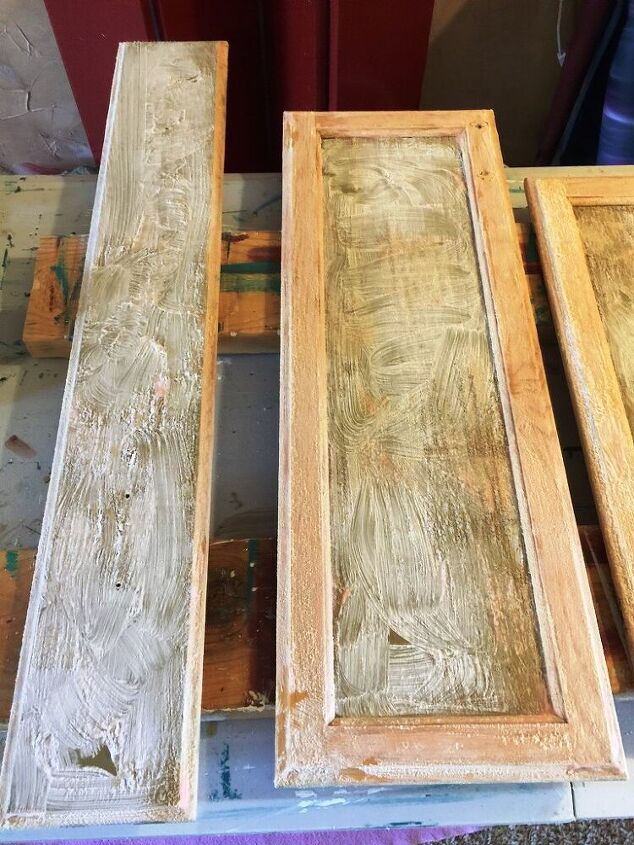
In order to remove all the lacquer from the doors & drawers, it took 3 applications of the stripper, each sitting overnight. It was quite messy and time-consuming but I wanted to make sure all the old finish had been removed. I used an inexpensive paintbrush to apply the stripper. To remove the stripper, I used a couple of different putty knives.
Once I had all the lacquer & paint scraped off a few pieces, I bundled up in sweats & took the pieces to the garage. With steel wool & mineral spirits, I wiped down each piece down to remove any leftover stripper.
**I have read that if you are going to be using water-based paint or stain, that you should not use steel wool as it can leave little bits of steel in the wood and those could rust....because my paint and stain are dark I took my chances and used it anyway**.
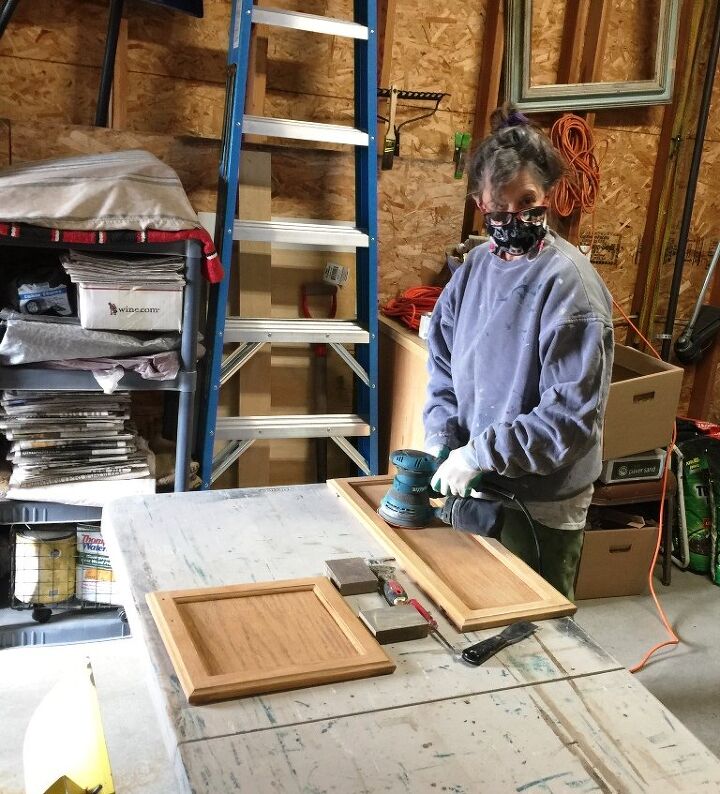
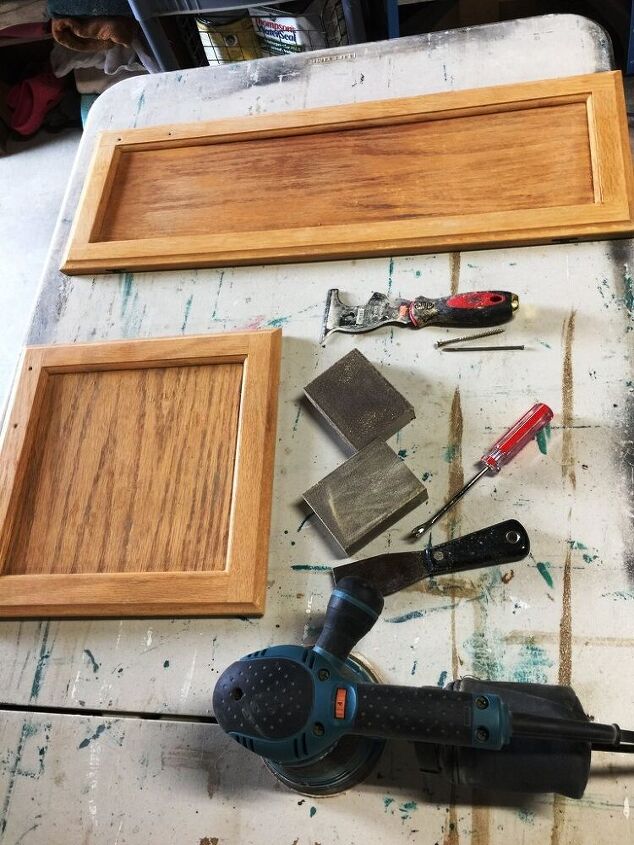
I brought the pieces back inside and allowed them to dry well before taking them back to the garage to be sanded. I used my orbital sander with 150 grit for the flat surfaces and a sanding block with the same grit for the area where the sander didn't fit. I then used 220 grit on all the areas. When each set was sanded, I vacuumed up the sawdust then wiped them down with a soft cloth, followed by a tack cloth. My hope is that the sanding has removed any bits of steel wool that may have been in the wood :)
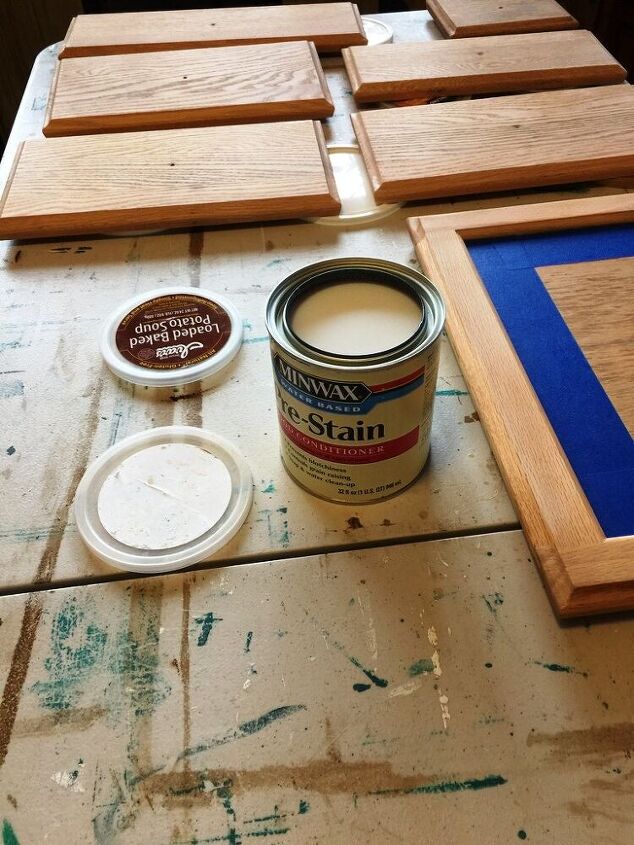
I was SO happy when all the stripping & sanding was done on the doors/drawer fronts! Now I could get down to finishing them! Before applying the stain, I used a wood conditioner. I've not used a conditioner for wood before but it is supposed to help the stain go on evenly. Using a brush, I applied a coat of wood conditioner to all the frames on the doors and the outer edges of the drawers. When the conditioner was dry, I started applying the stain.
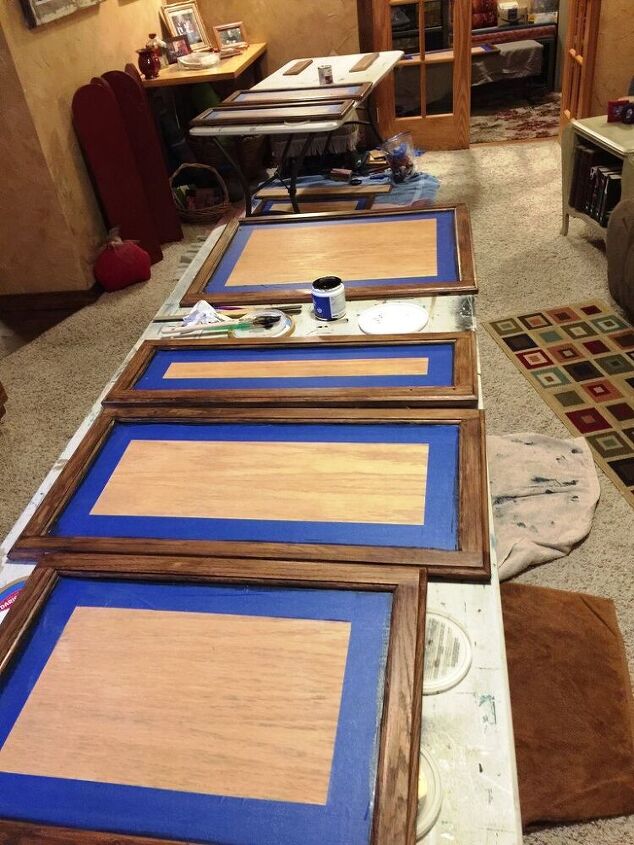
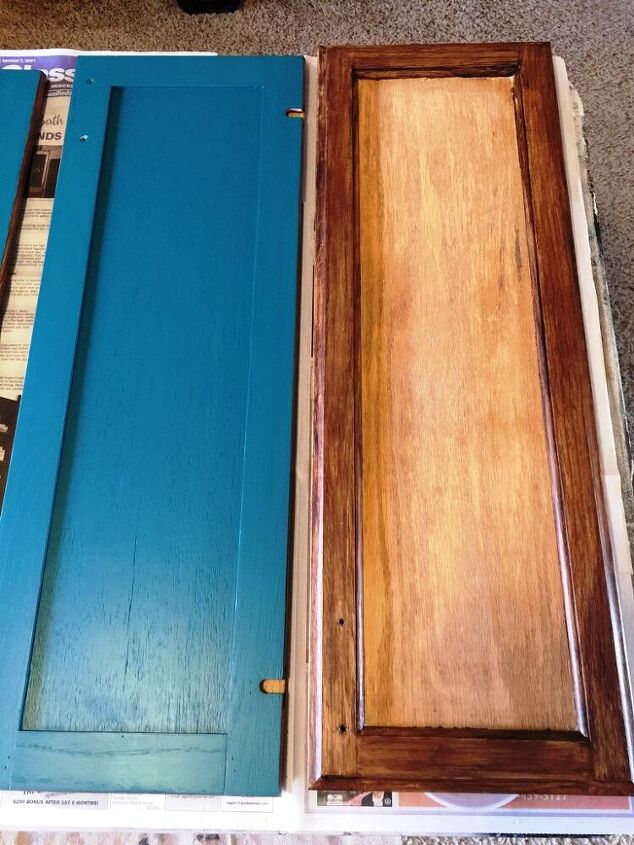
I had decided to keep the 'framed' look but use a darker stain. The one that I have been using in the house is Minwax Provincial. I usually use an oil-based stain, but because I was working in the house, I looked for Provincial in a water-based formula but couldn't find it. So, I bought a pint of water-based stain/poly mix by Varathayne in Dark Walnut. Well, that was too red. So, I bought a pint of Behr water-based stain in Jacobean. That was too black. No problem, I'll use them both! I applied some to a sample piece of wood, the Walnut first followed by the Jacobean. The color was perfect! I taped the inset area of the doors before starting to stain.
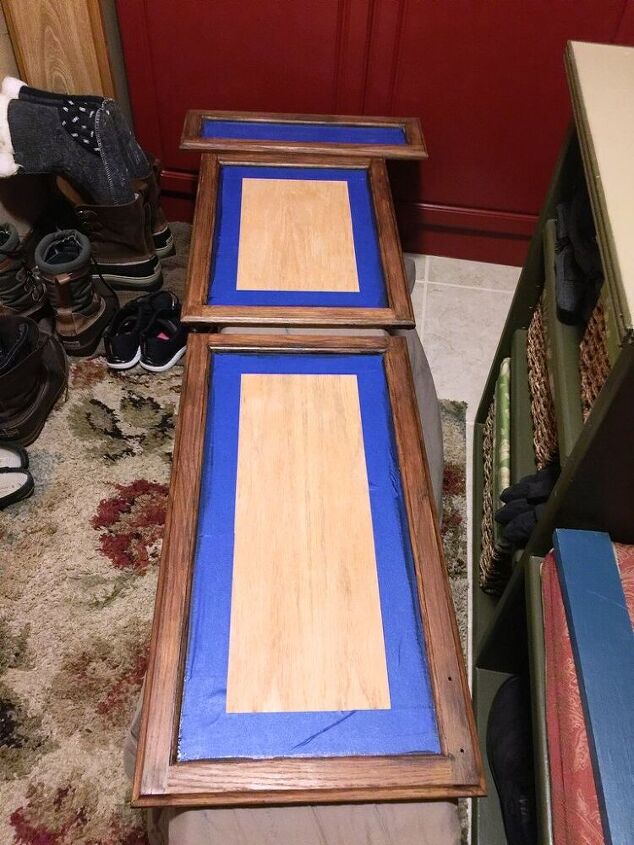
Once I started staining, I realized the mistake I made by buying a stain that had poly mixed in....if I waited more than a few minutes after applying the Walnut before applying the Jacobean, the Walnut was sticky! Ugh! I quickly learned to move quickly and once I got into a rhythm, the staining process went more smoothly. As I stained, I noticed spots where the stain did not soak in as well as the rest of the wood. I figure those areas are where not all of the previous finish was removed. I could have done another application of stripper but I wasn't sure that would even work. Besides, it gives the doors a more rustic look and I'm good with that.
The first time I painted the cabinets, I left the back of the doors and drawers alone. I did no painting or sealing. This time, I decided to paint them. I used two paintbrush sizes, a 1 1/2" & a 2 1/2". I applied 3 coats on all the pieces with a light sanding between coats using a sanding block in 220 grit.
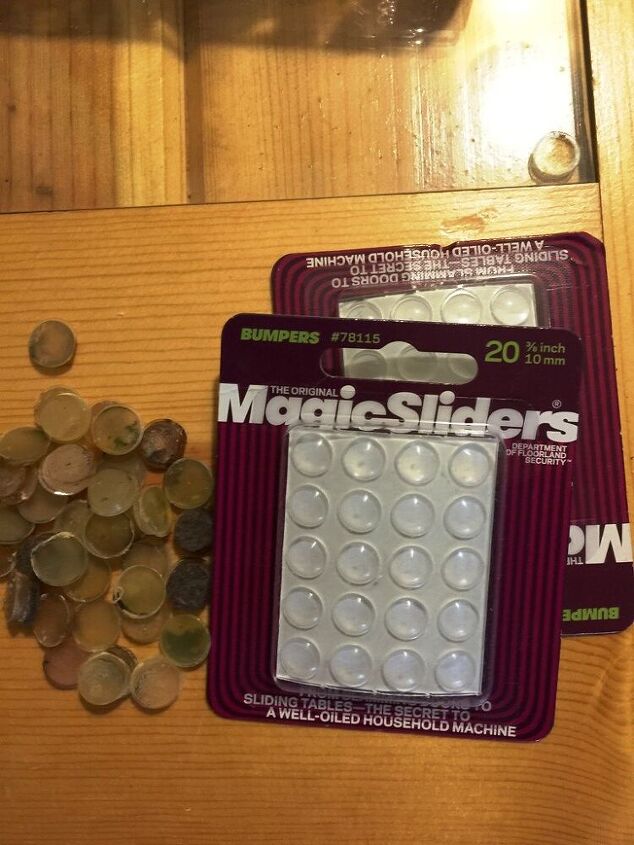
Before painting the back of the doors & drawers, I removed the silicone stoppers using a putty knife. I bought replacement ones since the old ones had yellowed. I also allowed the stain to dry overnight even though it is water-based and dries quickly.
After the backs were dry, it was time to paint the front of the drawers & the insets on the doors.
*Note: I stained the frames before painting the insets because I did the opposite with the doors on the hoosier where I painted first. What I discovered was that any paint that got on the bare wood didn't come off entirely so when I stained, you could see the paint. By staining first, any paint that got on the stain wiped off easier.
I removed the tape I had applied for the staining process and considered taping off the stained areas but then chose not to. After having to be SO careful or wiping up paint that got onto the stain, it would have been easier to take the time to tape. (I learned a lot of lessons on this project!) I also applied 3 coats of paint on this step.

For the drawer fronts, I used a painting pad; for the insets, I used the 2 1/2" paintbrush.
The last step on these pieces was to apply a water-based polyurethane in satin to the stained areas. I waited to do this step last because if the poly had gotten on the bare wood where I'd be painting, even though that was not likely with the tape, it would soak right in and prevent the paint from sticking well. I used a small angled brush to apply the polyurethane. I could have also applied it to the painted sections but that would have changed the sheen. Since the handles are attached to the stained/poly'd areas on the doors, and not the painted surface, it will be easy to wipe any fingerprints.

When I painted the cabinets last time, I changed the antique gold hardware to bronze using spray paint. This time, I decided to buy new knobs and handles.
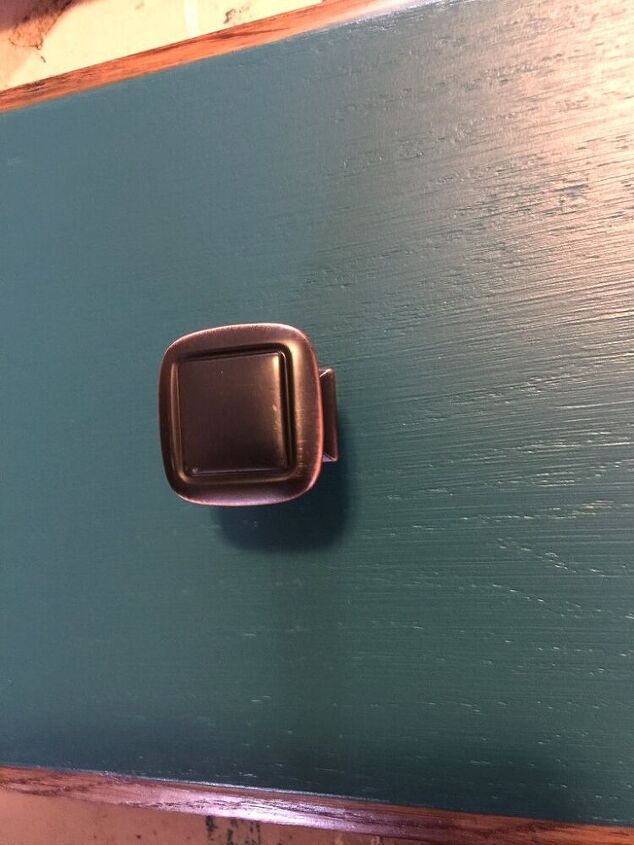
New knobs
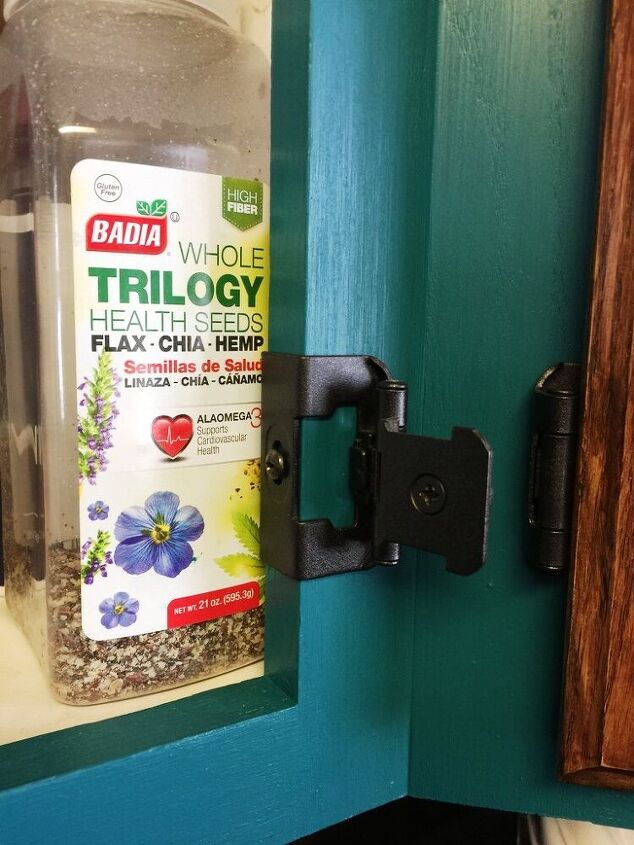
I originally thought I would be using brushed silver like the hoosier and if I did that, I was going to replace the hinges. I started looking for replacements and found that because they are the type that slip into the doors, they are very expensive so I kept the hinges that we have and bought new knobs & handles that are bronze with a hint of copper.
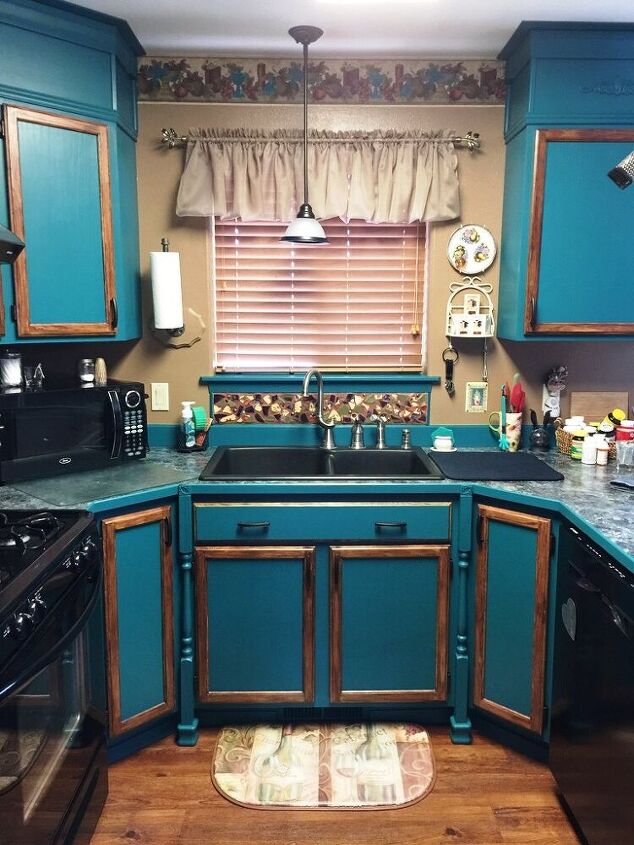
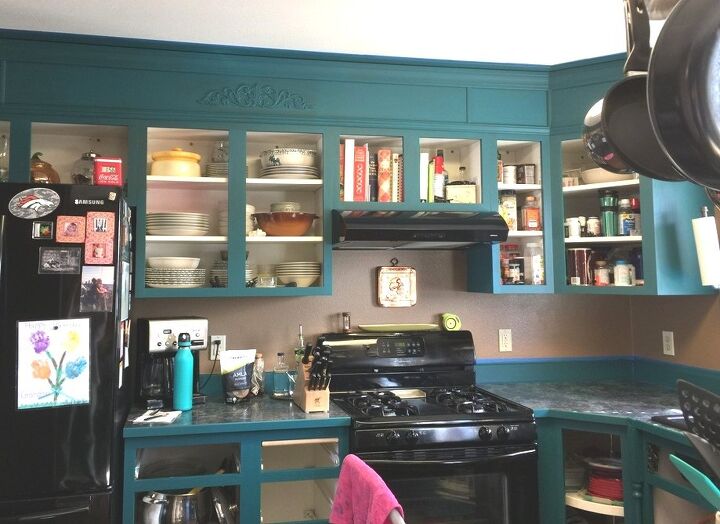
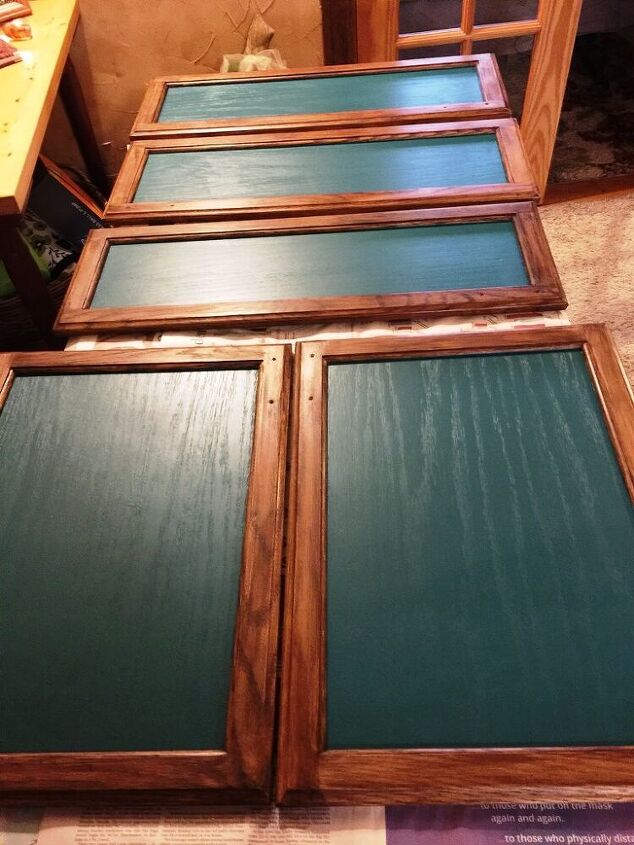
Well, after TWO weeks of working on them every day, the cabinets are done! Had I not used lacquer to seal the doors & drawer fronts the last time I painted, this project would have been much quicker!
They came out beautifully! Hubby and I love the color! The teal goes so much better with the black appliances and the color of the countertop!
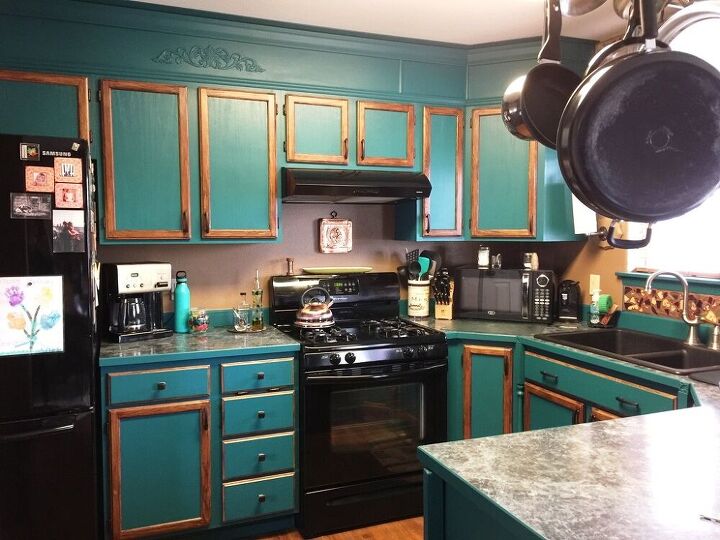
My oldest son said the new look is 'intense' and 'rich'. I would have to agree 
Resources for this project:
See all materials


Comments
Join the conversation
-
I absolutely love your cabinets! I would not have thought to leave the trim
stained, but it all looks wonderful. I use a lot of color in my house and also have the dreaded orange/light oak wood. This inspires me. Great job.
-
So glad to see color. I am not a fan of white kitchens at all. But I do like my oak cabinets so don't know why people paint them. Your color really pops and I bet you enjoy being in there.


Frequently asked questions
Have a question about this project?
Interesting design, but I do have 1 question : most cabinets need to be cleaned (or stripped as u did) sanded AND THEN primed (in your case the un-stained sections), but I do not see where you used ANY type of primer / sealer BEFORE painting....any reason why? And I believe there are some brands of paint that include a urethane / melamine sealer (so you don't need an extra coat of urethane after painting)
Wow! You do great work. I noticed the design above the stove and I really like it. Why not paint that black, to draw your eye up?
What is a hoosier?