


Corner Cabinet Makeover!

Yes!
Yees!
Yeeeees!
It’s another furniture makeover post.
No!
Nooo!
Nooooo!
If you hate painted furniture.
Which one are you?
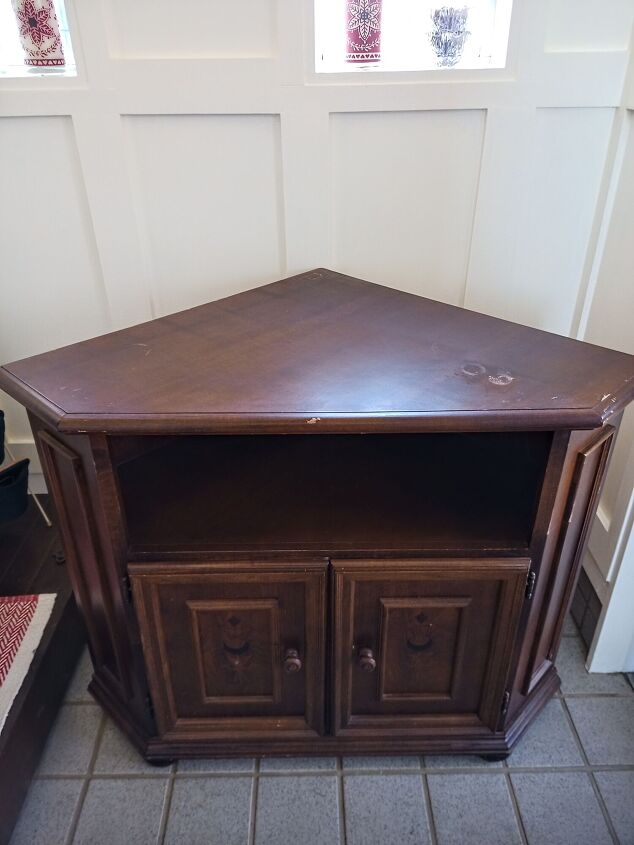
There it is, only $5 at a local used shop.
Funny thing happened too! The sales guy was surprised we wanted to buy it.
He was like: ”This?”

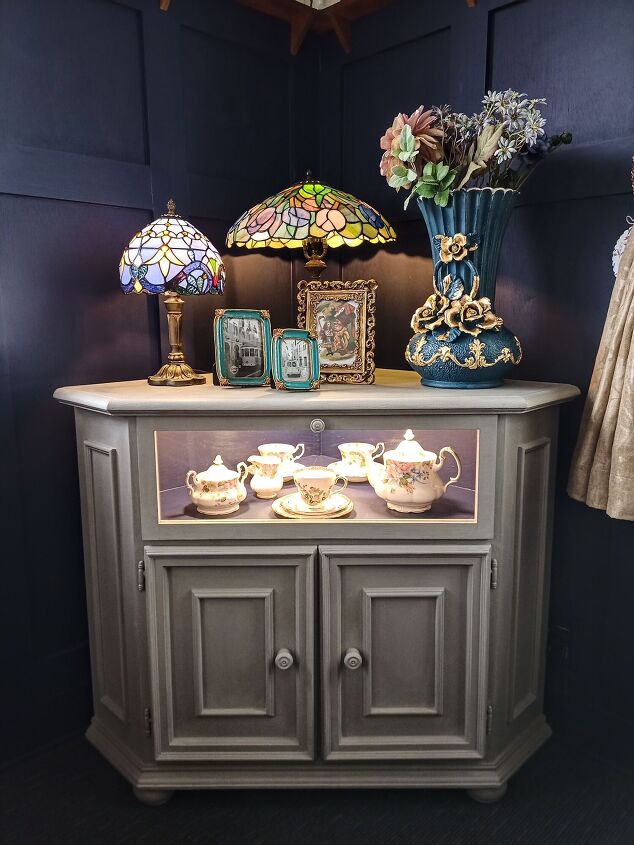
There it is, in its new spot.

As you know, you need to clean before you paint. This corner cabinet wasn’t too dirty, so warm water and a rag did the job.
We used Annie Sloan Chalk Paint and the best thing about most chalk paints is there‘s little prep work involved. There are really only two times prep work is needed.
1. The furniture has a really slick finish.
-You‘ll need to knockdown the finish or prime.
2. The furniture is deeply scratched, chipped or rough.
-You’ll need to fill in or fix the areas and sand.
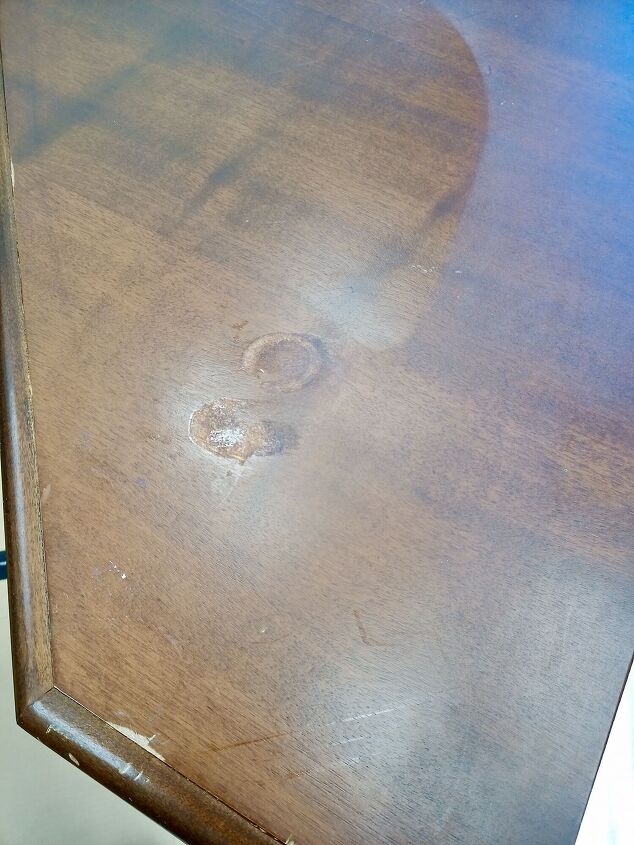
That mysterious residue took some extra elbow grease.
Ewwww! Mysterious residue!
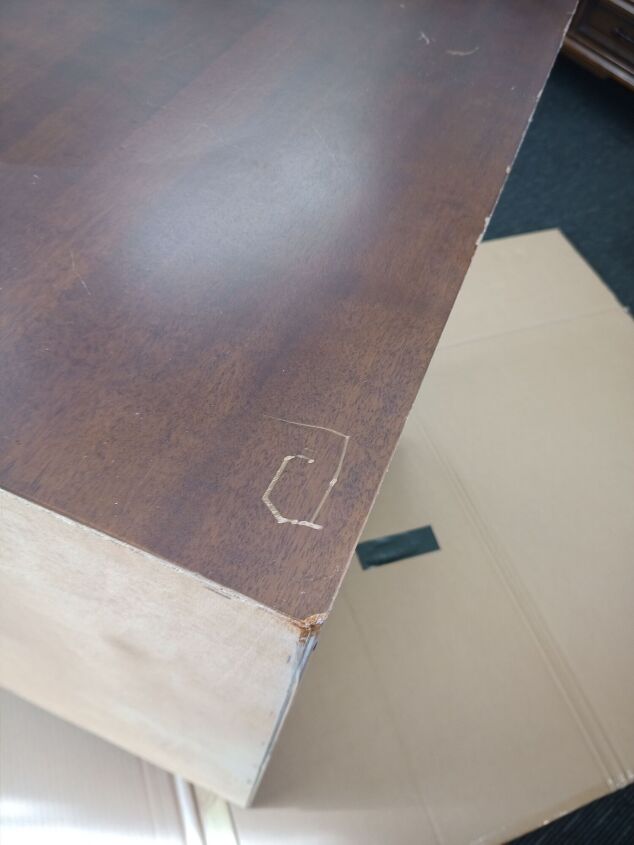
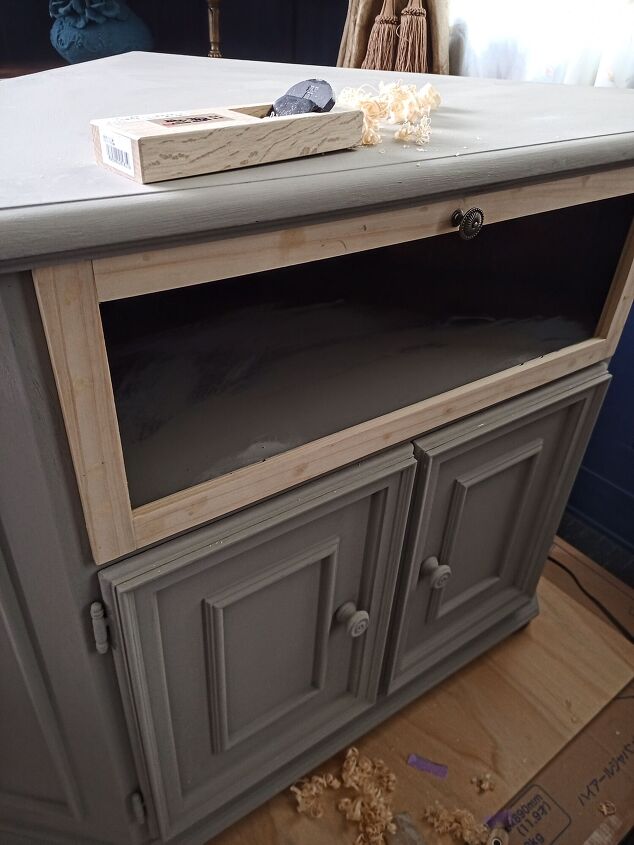
I hand sanded the scratch and used the sandpaper to round the broken corner.
The easiest way to sand is to:
1. Have humongous muscles like me.
2. Did I mention the muscles?
3. Muscles
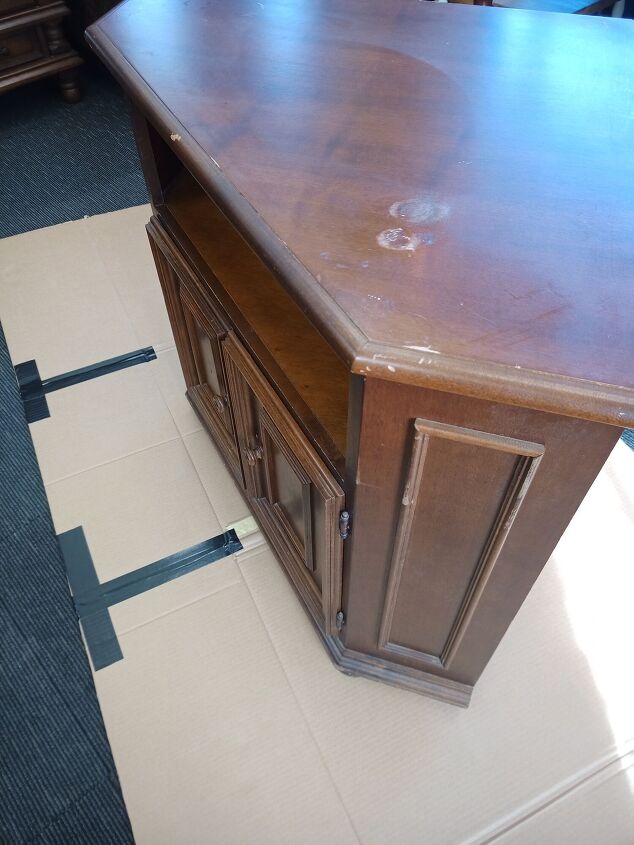
More pictures!
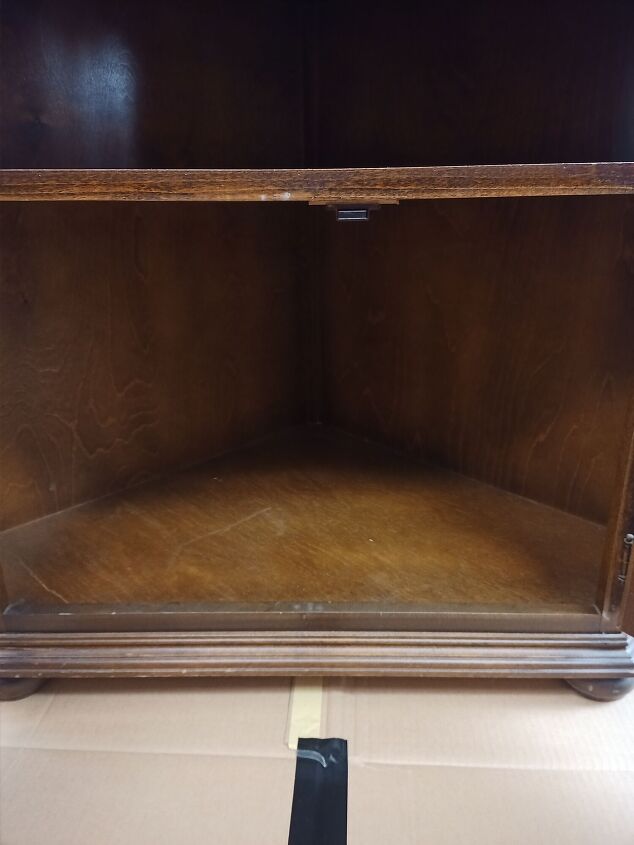
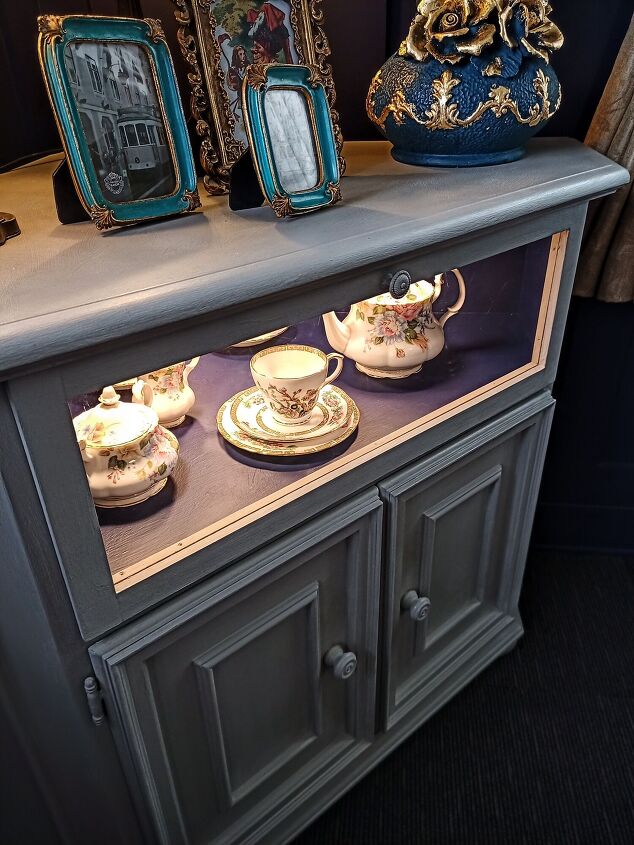
The inside.
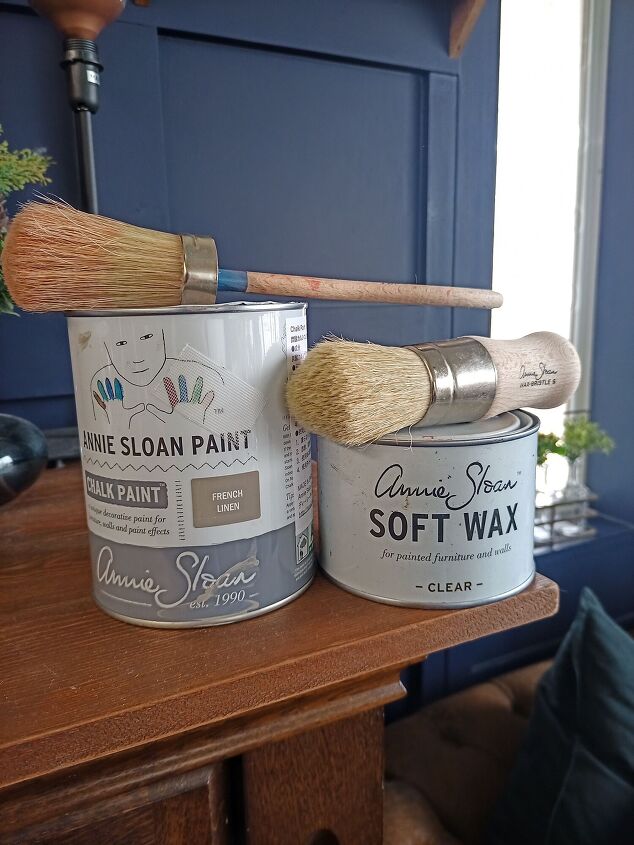
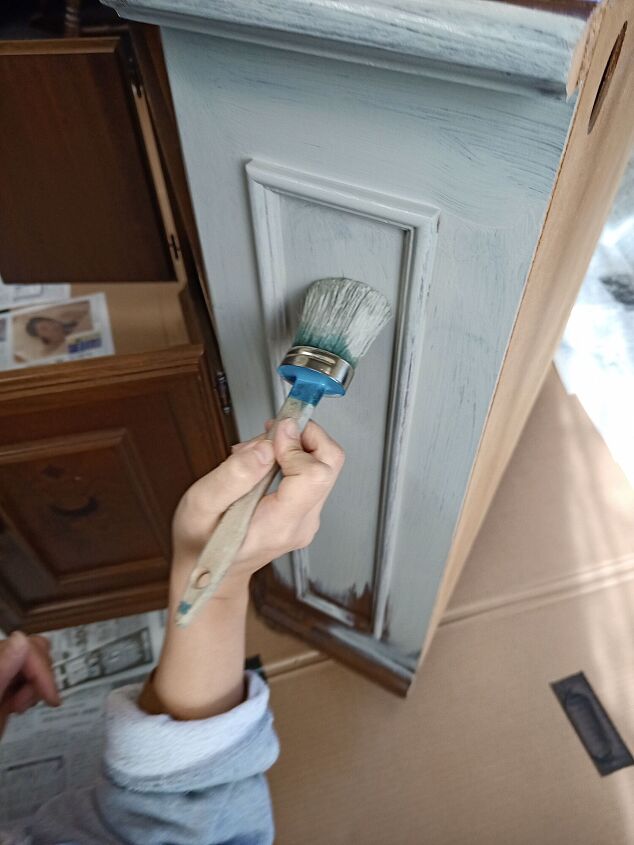
We used Annie Sloan French Linen and Annie Sloan Clear Wax for the outside. Yeah, Annie Sloan products are expensive, especially the brushes. Even more expensive here in Japan. The paints and waxes are quality and fun to paint with, so it’s great stuff to try at least once. We make our own chalk paint too and people love saying “make your own chalk paint,” but there is a difference. I think store bought is better…..hey, don’t attack!
My lovely wife Mariko uses the Annie Sloan brushes, but I do not. They’re so expensive, I don’t want to get them dirty…isn’t that crazy? Anybody else feel the same way?
It’s like my Dyson too…I don’t want to get it dirty…😂
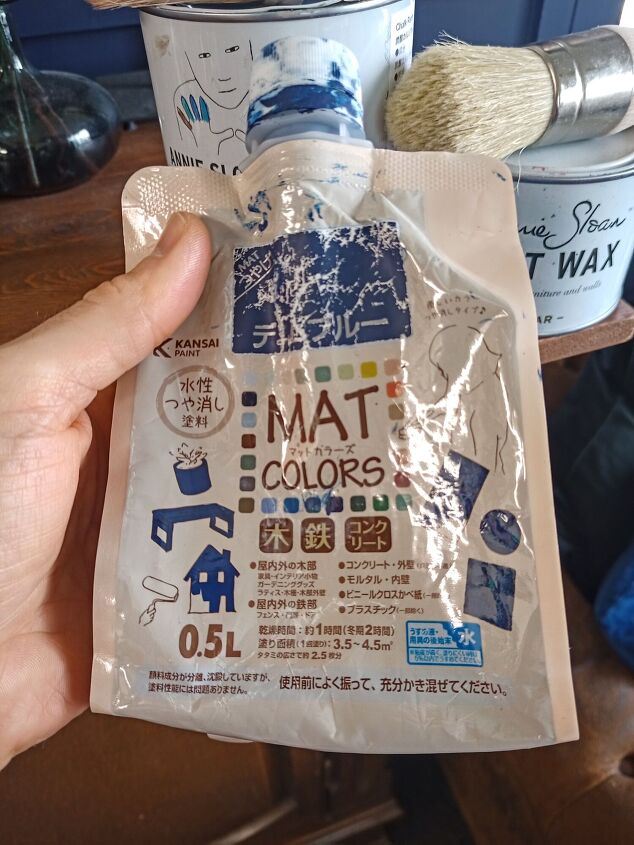
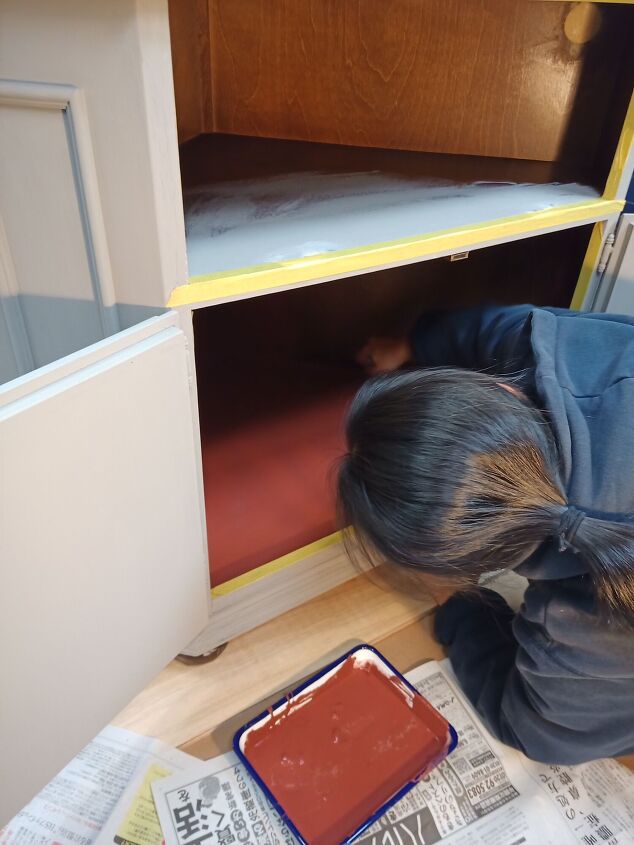
The inside was painted with Kansai Paint: Denim Blue. This paint is awesome, because it’s super pigmented and covers well, but it‘s best to wax or topcoat it. The color slightly transfers onto rags when you clean the surface.
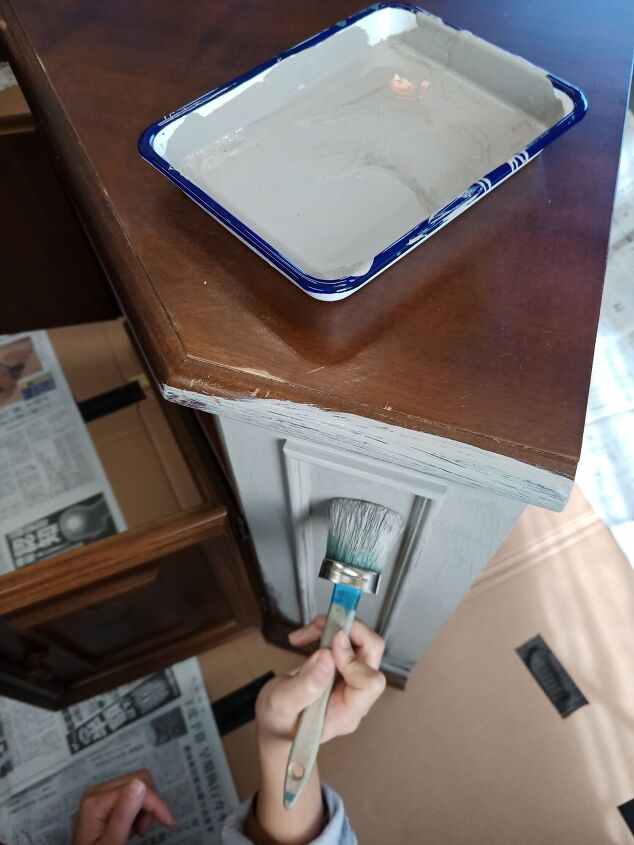
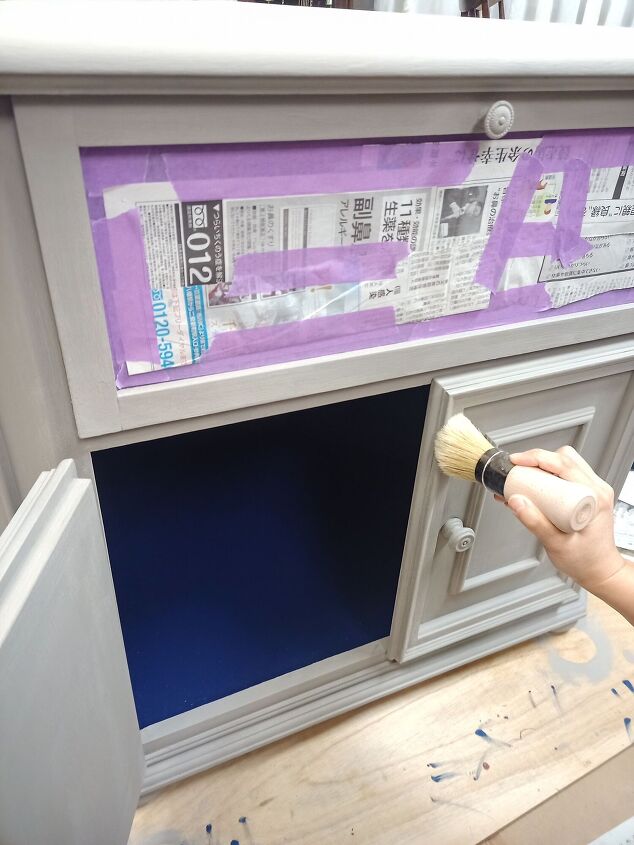
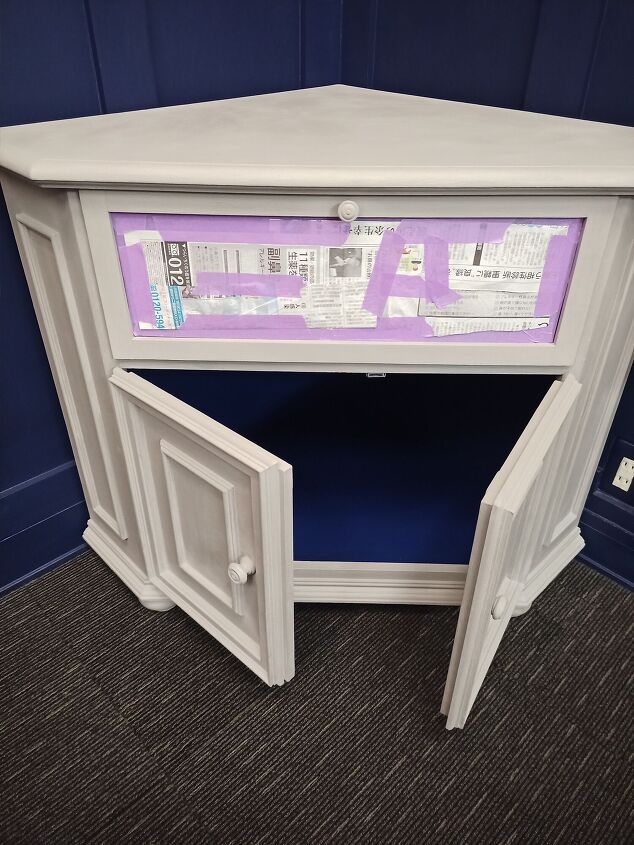
Painting time! Mariko handled the Annie Sloan work.
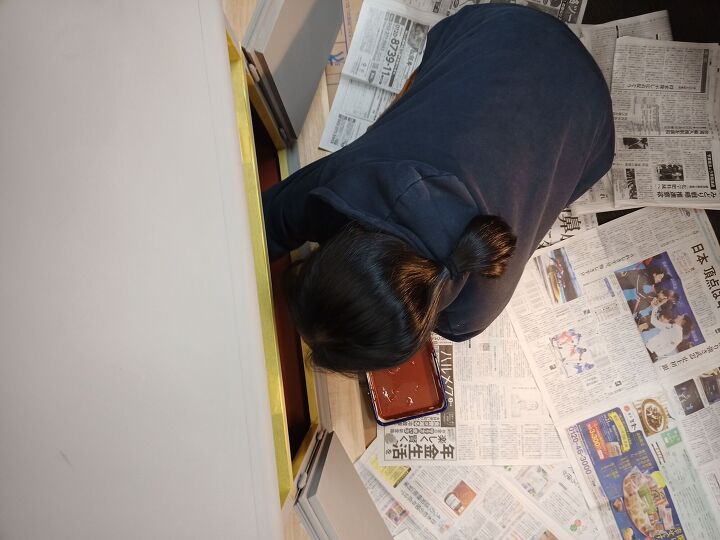
She used Annie Sloan Primer Red as a base coat on the inside.
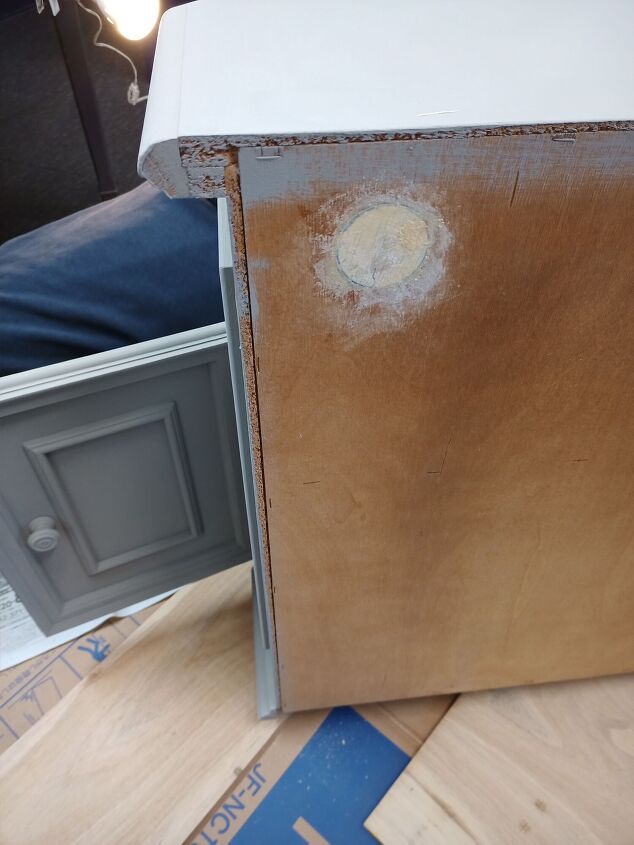
I matched the wood and cut out a circle to patch that hole.


If you didn’t know this already, I have the most gangster hobby ever. I collect teacups.
Mariko married a badboy and I have the teacup collection to prove it.
I made a window to display some of my gangster tea stuff and this window is an easy build.
Just three pieces of wood glued and screwed together.
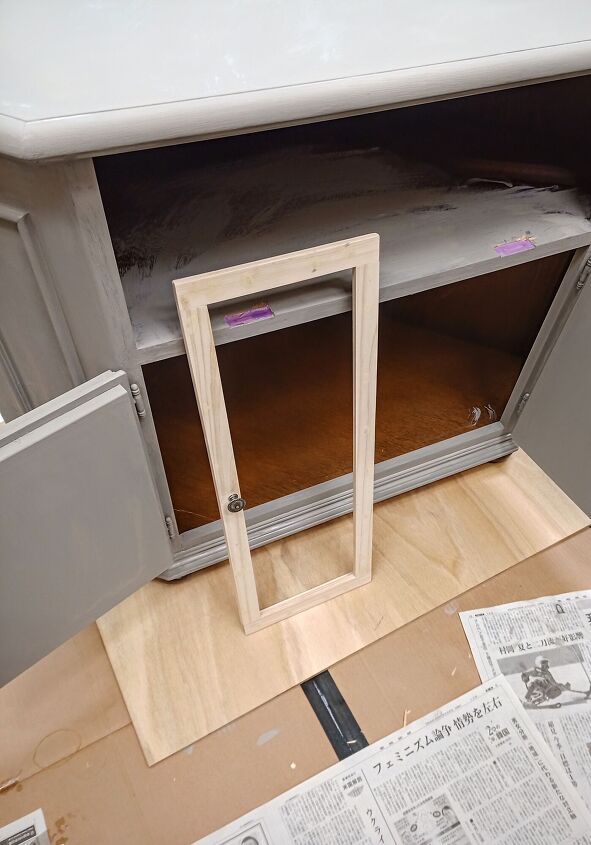
It‘s the same window design I use for all of my mosaic stained glass projects.
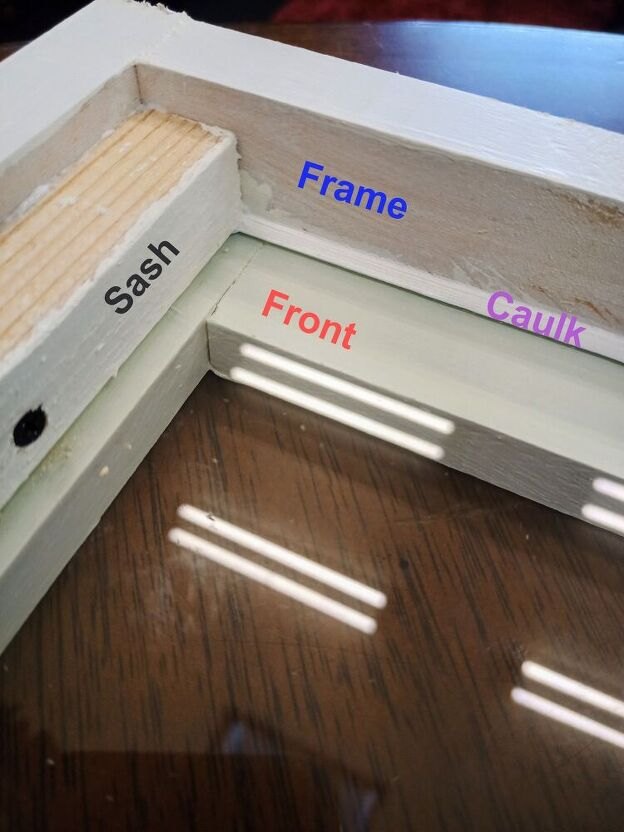
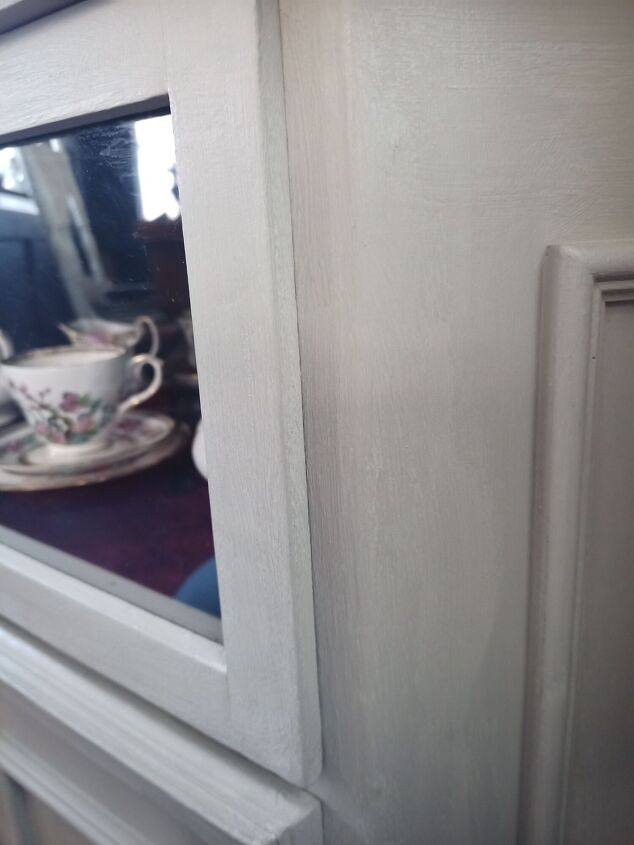
For the corner cabinet, I wanted a level look, so I used a sash piece the same thickness as the front piece. It’s difficult to see the two pieces, since they lineup, so I’m showing a different window frame, built the same way.
The caulk is optional.
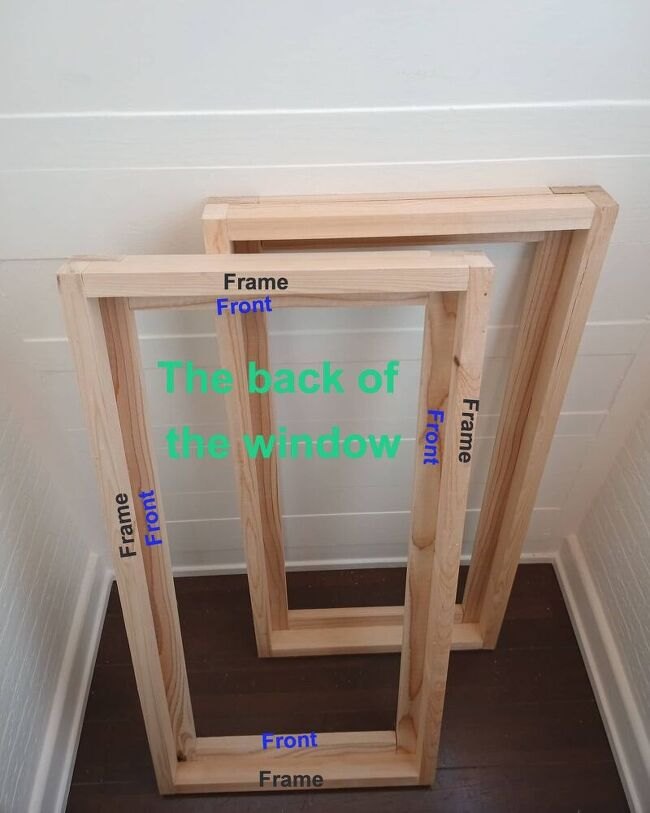
Frames without the glass or sash.
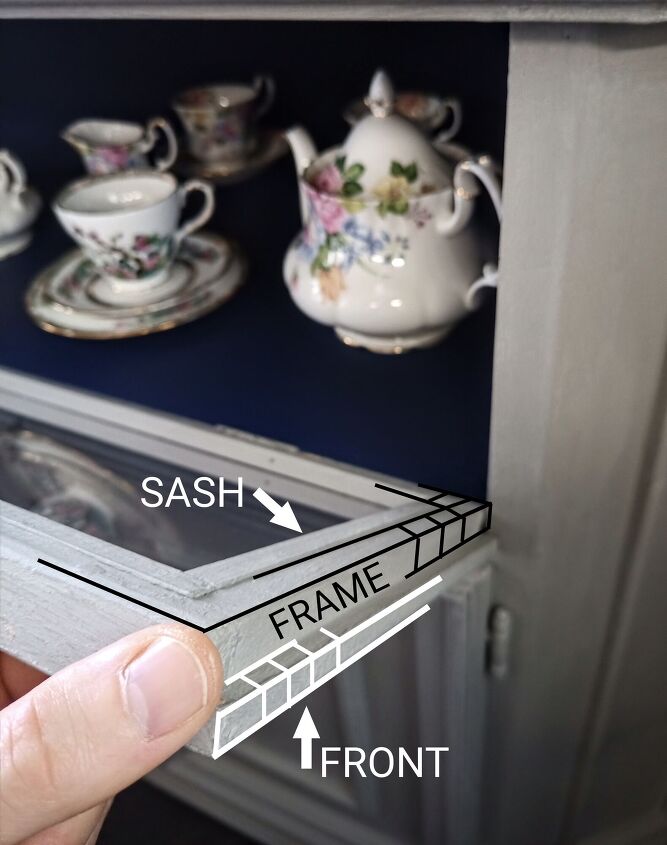
The corner cabinet window.
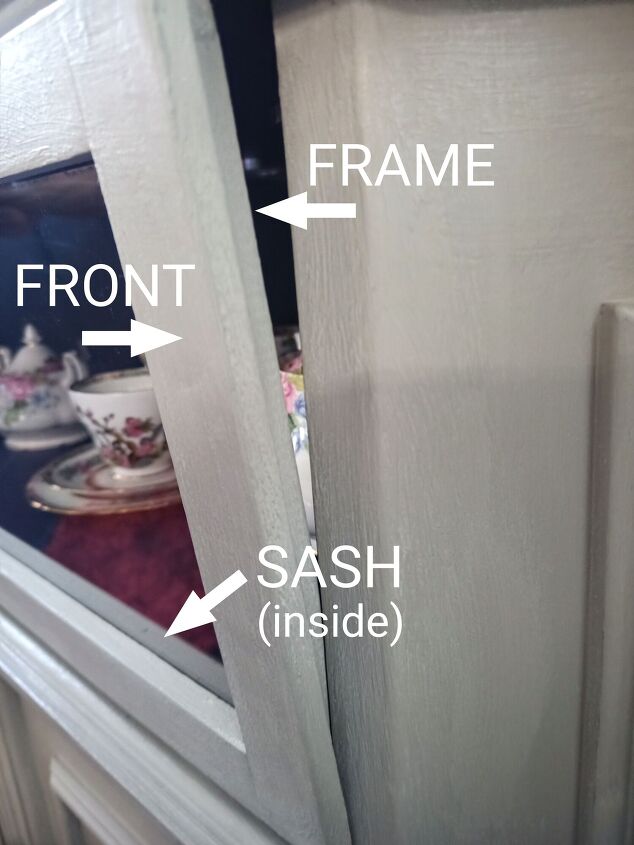

See, the sash and front piece lineup
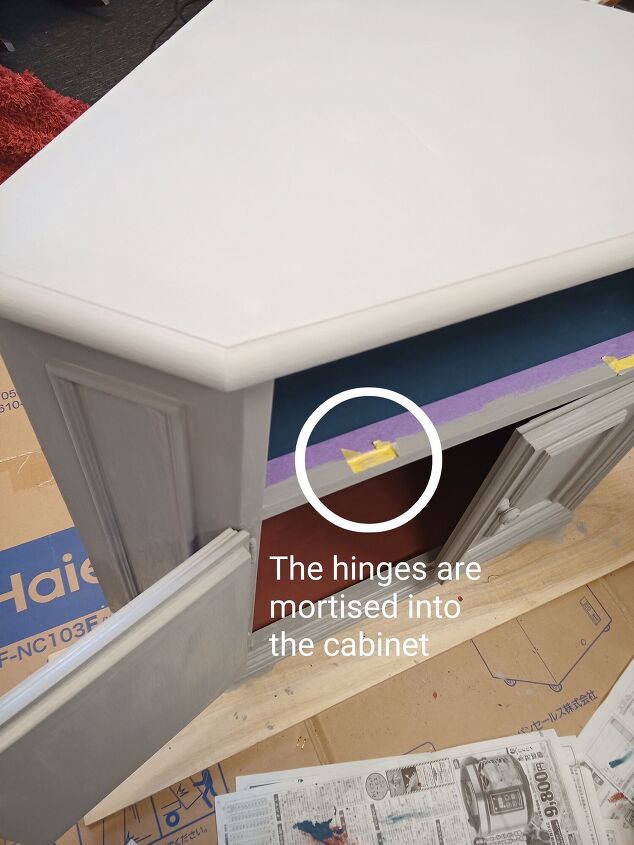
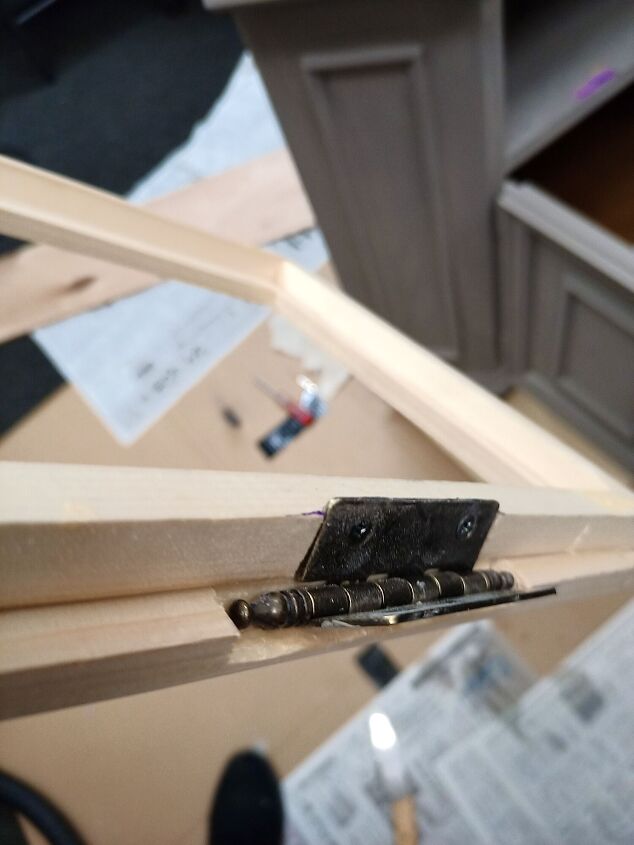
A mortise is a hole or recess, cut into a part which is designed to receive another part so as to join or lock the parts together. Mortise hinges are the ones where the hinge “leaves” are designed to lie on the plate or mortised into the door frame or jamb.
You don’t need to mortise the hinges, but I did to hide them. Just measure, make outline cuts with a box cutter and chisel out the depth you want.

I used these hinges, because I already had them in the workshop.
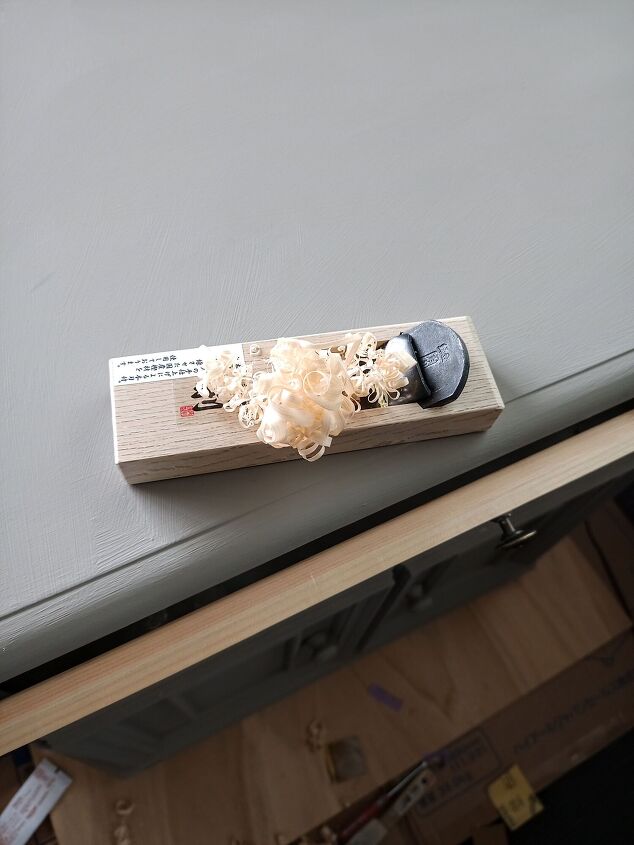
I used a wood planer on the window frame piece until the window fit perfectly. It took a long time, but I recommend a planer over a sander, because it’s easy to oversand.
Clear wax!

All good!
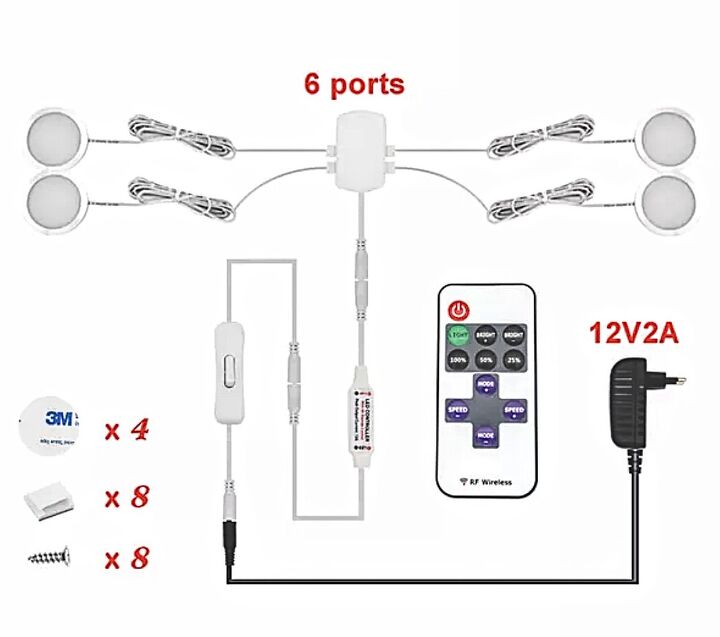
The lights!
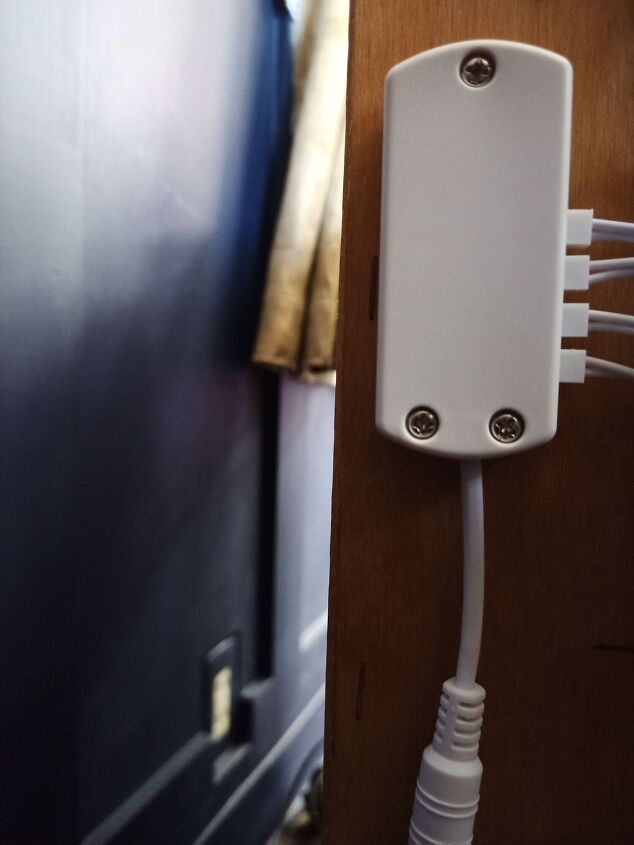
I attached the port hub to the back of the cabinet and drilled a hole to feed the lights in.
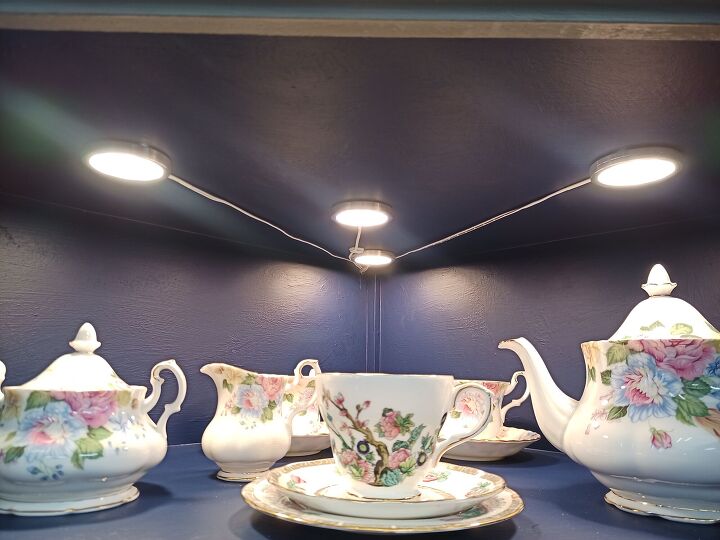

All finished!
So, yes or no? Let me know in the comments.
There’s also a gnarly little “snap vid” you can see by following the link. My daughter said it was cringe. That means really cool, right?
Comments
Join the conversation
-
Lovely! I'm the same way, whenever I find a piece that's somewhat different, I snatch it up. The color of paint makes the antique pieces stand out (I collect that stuff, too). The blue vase with gold flowers is eye catching! Great job!
-
A beautiful job well done by you both. Several years ago, I did something quite similar with a corner hutch we had. I had to convince my husband to cut the top hutch portion off in order to do what I wanted to do, but he finally did. I painted it (with left over spray paint) in a soft dark gray and highlighted it with copper accents. It isn't near as beautiful as yours is, but it has served us well over the years. Best yet, we were able to fit our larger screen TV on it and did not have to buy a new piece.


Frequently asked questions
Have a question about this project?
You guys rocked this project! You both truly made this piece come alive again!! What a great idea. Wow such a beautiful and awesome idea. Oh and KUDOS for the “how to tutorial” on installing the glass and lights! I am going to try this out myself. A PERFECT piece for my mom to display her beautiful pieces that have been handed down from generations! Thank you for sharing.....