


Dining Room Table Make Over

by
Missy Burch
8 Materials
$10
3 Days
Advanced
I had grown tired of my boring, scratched up dining room table. I found some epic scrap book paper after Halloween & an idea was born. I'm a huge fan of DIY ideas- DUH! I'm a Hometalker! LOL So rather than get a new table, of course I'm going to redo mine. It fits perfectly in my space, so why buy a new one right? This project was a serious time consumer & wasn't easy with the cold, wet weather this winter, but with some ingenuity & persistence, it came out pretty awesome I think.
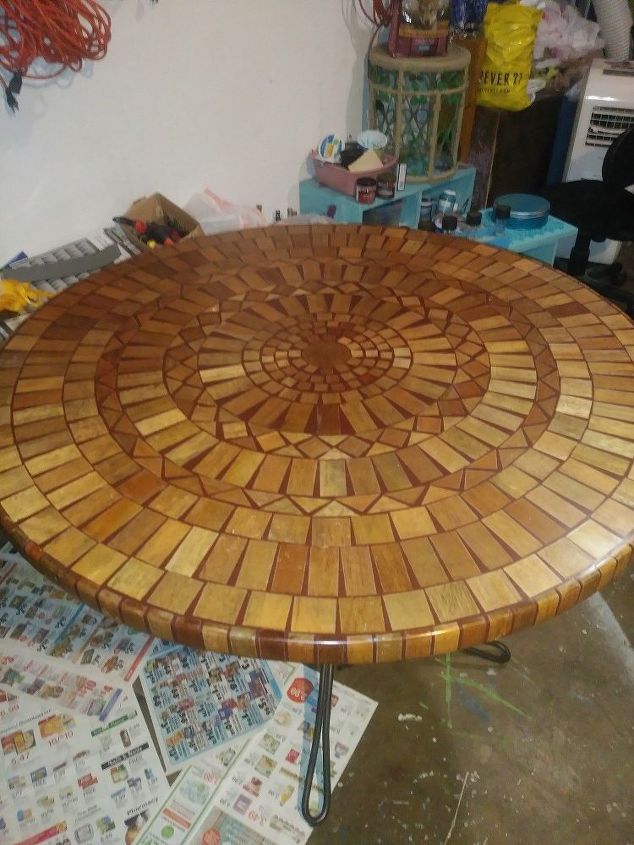
Here is my original table, bought at the Pier 1 outlet many years ago. It's seen better days!
I sanded it down with my trusty Black & Decker mouse sander & 120 grit sand paper. I went over the entire surface & sides, really well, to take off a good bit of the varnish, so my glue would stick.
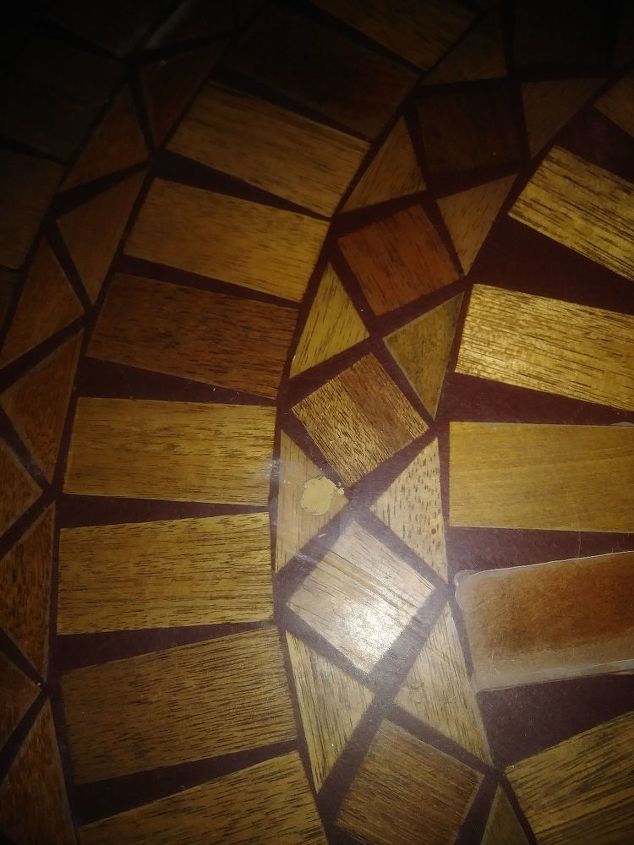
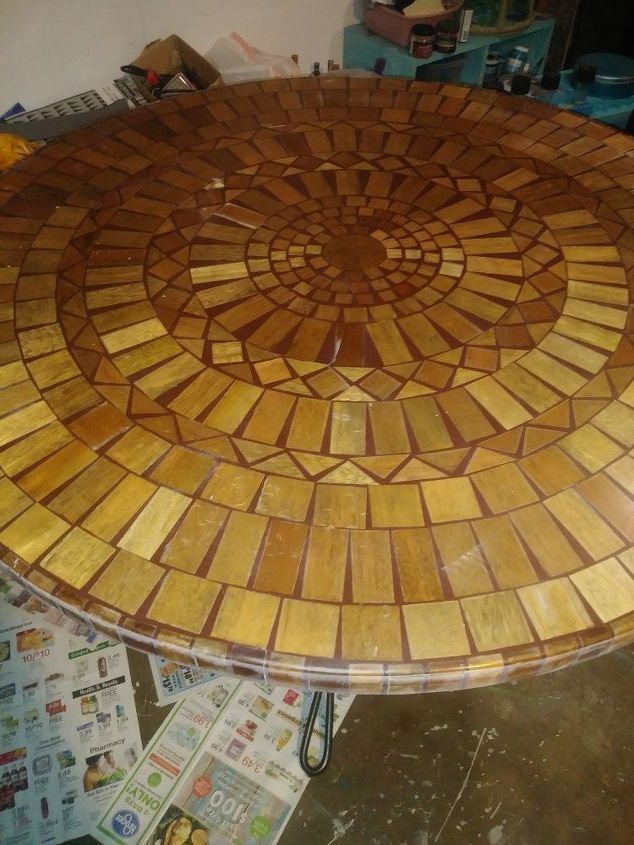
Next I had to fill in a huge hole I had made, doing crafts on this table- OOPS! I'm doing wood working on here for good! It's too pretty now!
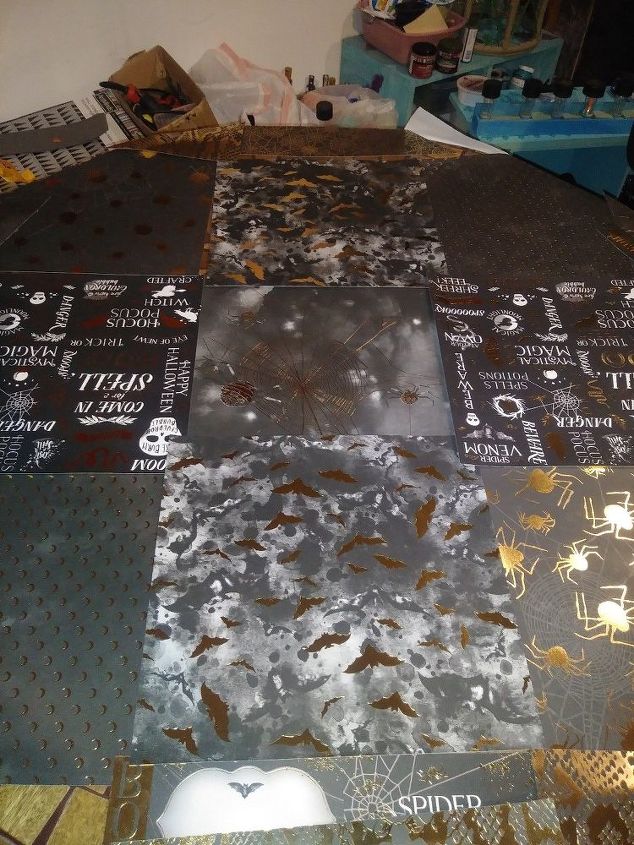
Next I mapped out my paper patterns. This was the tricky part. When working with large squares & a round surface- yeah- fun stuff! It's also super stiff stuff! I wet the paper a bit to soften it & mold it to the sides, taped it in place, to try & fix my design, once I'd cut it all out.
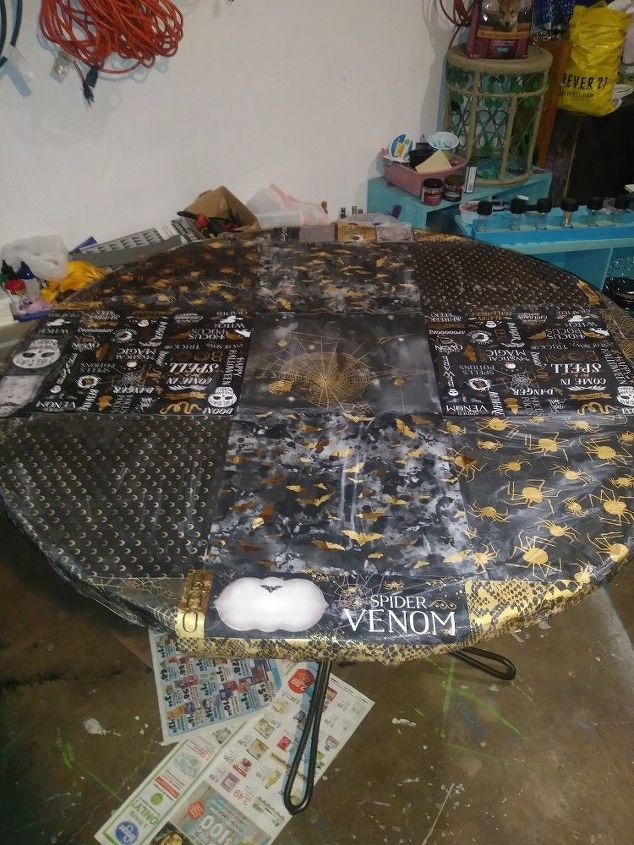
Then I glued it all down. If you saw my resin table project & how tedious the gluing process was- this one was even more so! I had to line everything up just right, over lap where things needed to be, cover up gaps, smooth out bubbles, fill in gaps, cut stips, frankenstein little pieces! Decoupage can be a real chore- but again I cranked up the music & went to town on this table. But to get all this glue to dry I had to take a different tactic- I turned on a couple small space heaters & 5 pot lights I have out in my garage. It worked flawlessly.

Here is my next step- the poly! This stuff is the bomb for almost any project. It really does only need one good coat. I used it when I painted my floors(check my older projects) & it worked beautifully on this. It dries fast, hard & clear!
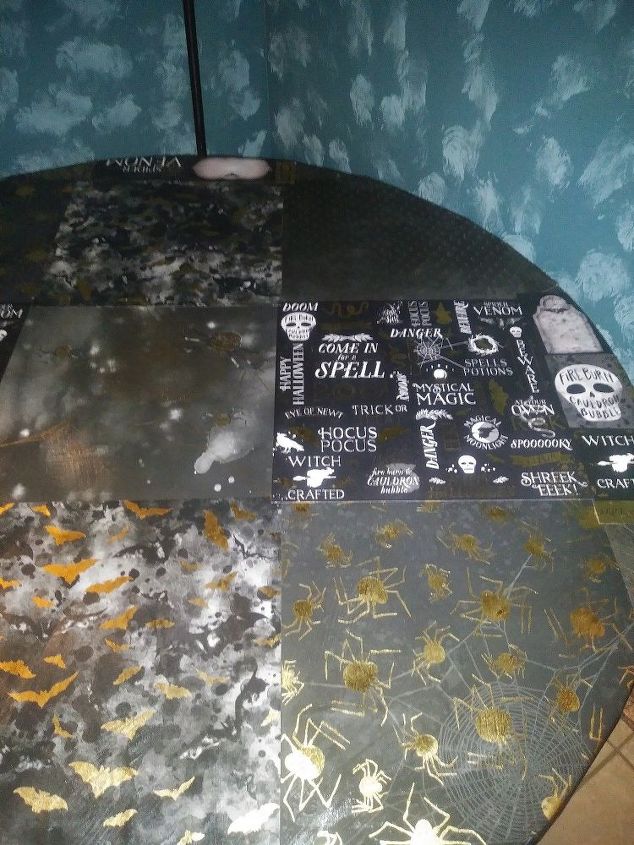
Here is a close up photo of one half.
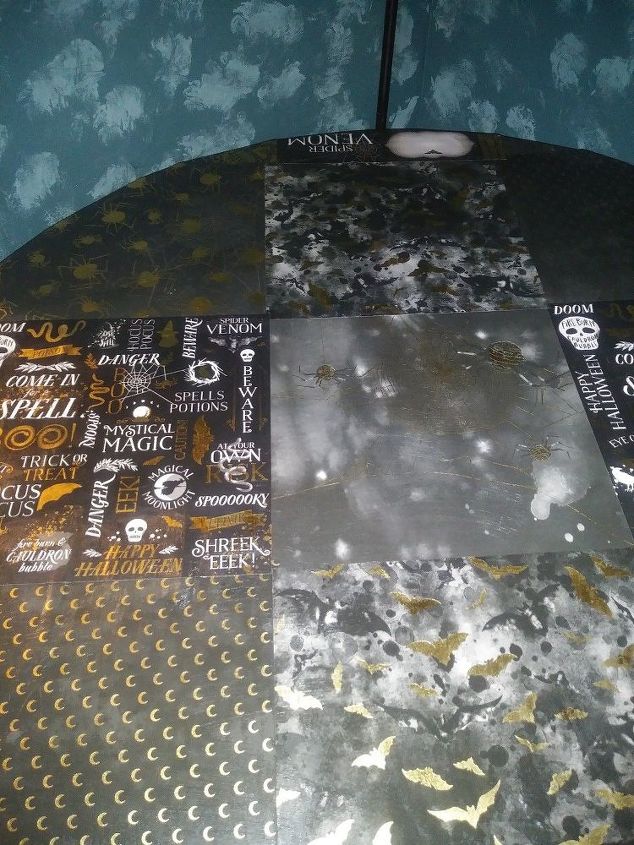
Here is a close up of the other half. I know this isn't everyone's taste. But it goes with my very gothic/halloween filled house.
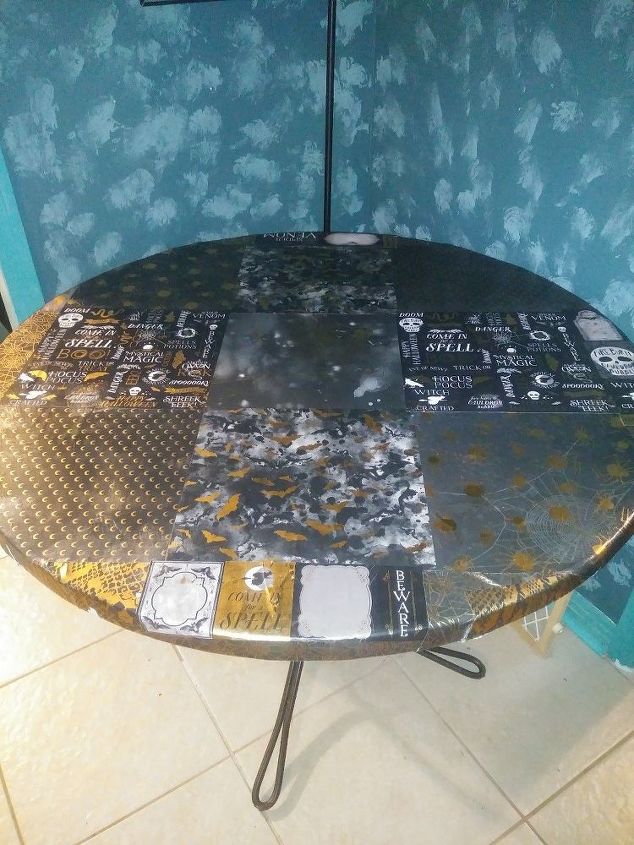
Here is the finished project back in it's place.


Frequently asked questions
Have a question about this project?