


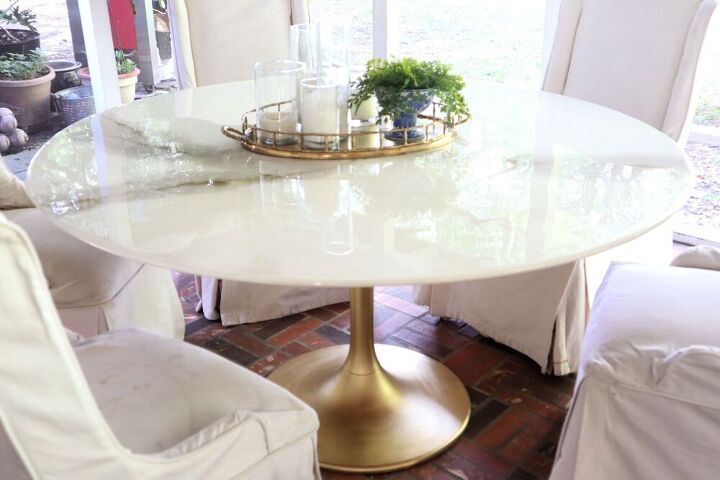
Epoxy Tulip Table Top
I bought a Tulip style table base at an auction years ago for $5. Like many of my project ideas, it sat in my garage until I could figure out how to make or get a table top. I absolutely wanted the table to be thin, or at least appear to be very thin, like the OG Saarinen tables.
Well…one day I stumbled upon an estate sale on the last day it was open, which happened to be FREE day. I didn’t know there was such a thing, but this estate sale was LEGIT. I was scouring the garage for tools when I came across the 60″ round table top in the picture below. I grabbed it quickly and ran…not really, but my heart was racing as I brought to the front.
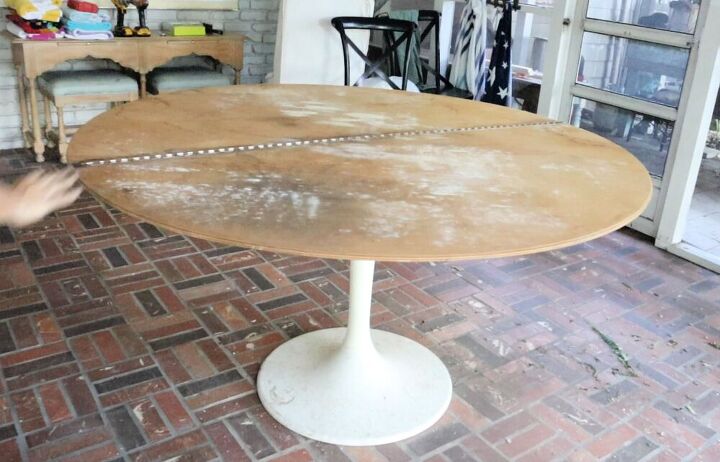
It is exactly what I wanted, 60″ round and thin.
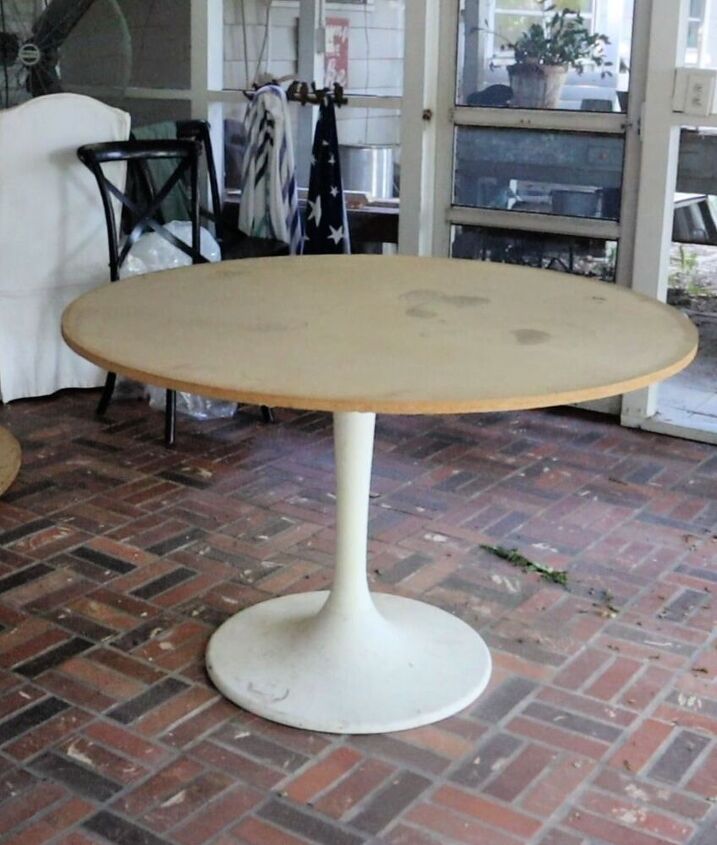
This MDF circle is another good story. The Mom & Pop type lumber yard in my area that I frequent to find unusual things, (I bought the plywood for my exterior ping pong table there), had these MDF table tops for years and years. I looked at them a number of times with my tulip base in mind, but the largest circle they had was 48″. I knew I wanted 60″ round, but I kept it in mind for the underneath support. When I was in the store for the ping pong plywood, one of the MDF circles was leaning near the register. It clearly was there for a long time because it was very dusty, and stuff was piled all around it.
I had to wait a very long time to get someone to help me get the 3/4″ plywood down and out to my truck, so when I asked the salesman that very often helps me, about the table top, he gave it to me for free. Wow! God is good.
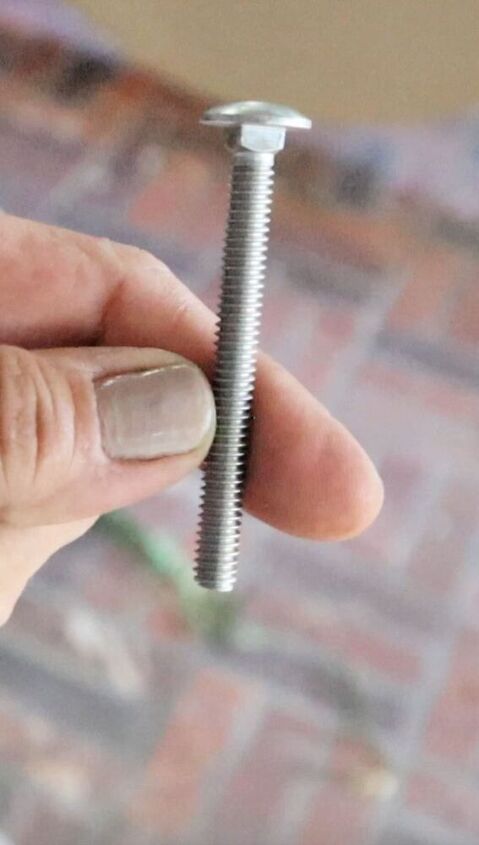
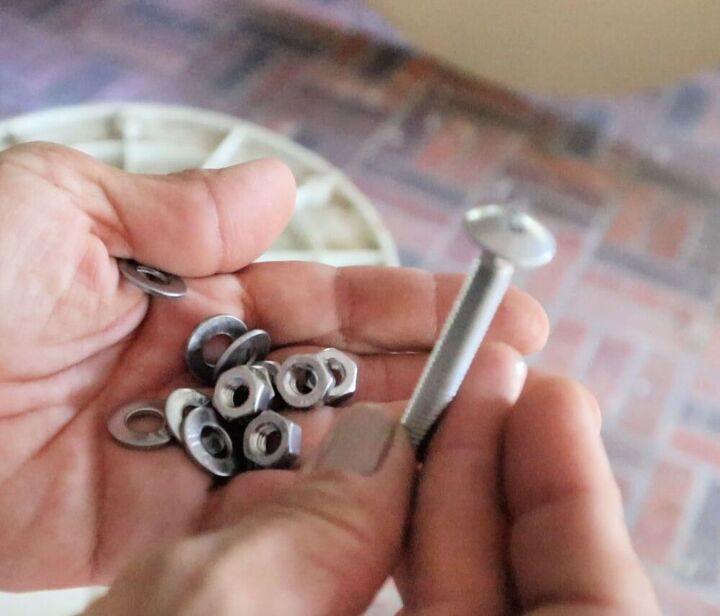
I decided to use carriage bolts, washers, and nuts to attache the MDF to the tulip base. I felt screws alone would just strip out the MDF when we leaned on the table.
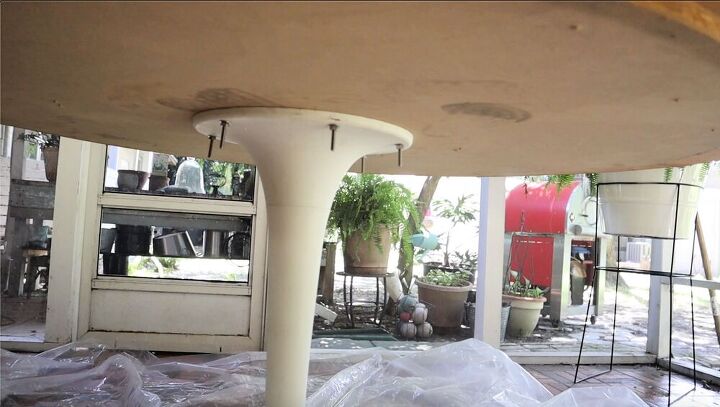
The carriage bolts I bought were a bit long but you can’t see them because they’re so far under the table. And I can cut them off if I want.
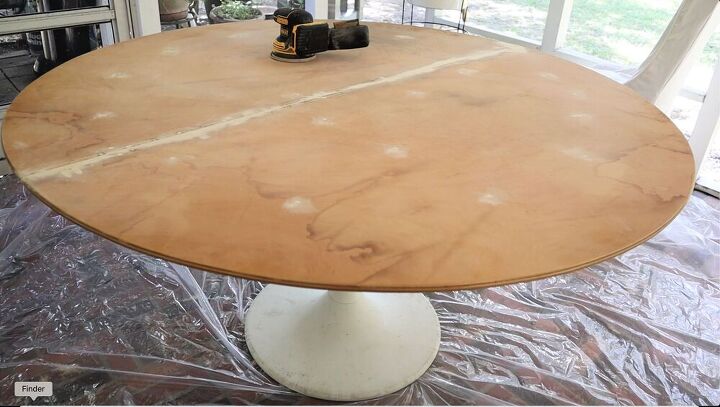
After I took the piano hinge off the table, I used my Kreg pocket hole kit to pocket hole fasten the two halves of the table together. Then I used screws to screw the thin plywood table top to the MDF and filled all the holes and the center seam with wood filler.

After the table top was all secure I painted the base. I used a straight primer first because gold paint doesn’t have good coverage.
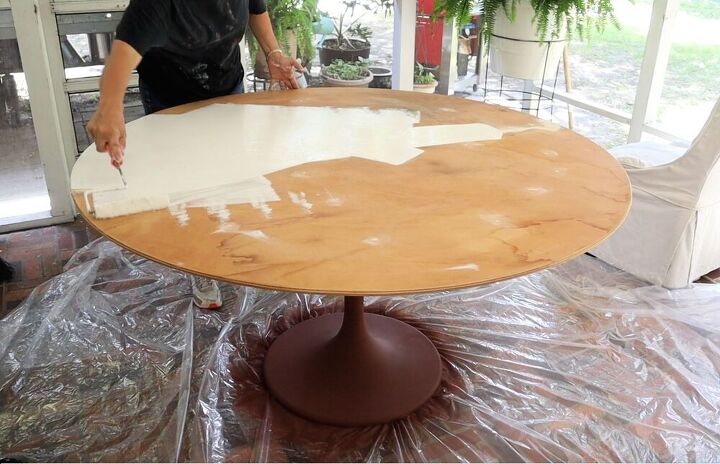
While the primer was drying I painted the white base coat on the table top. I used two or three coats of paint with a light sanding in between coats.
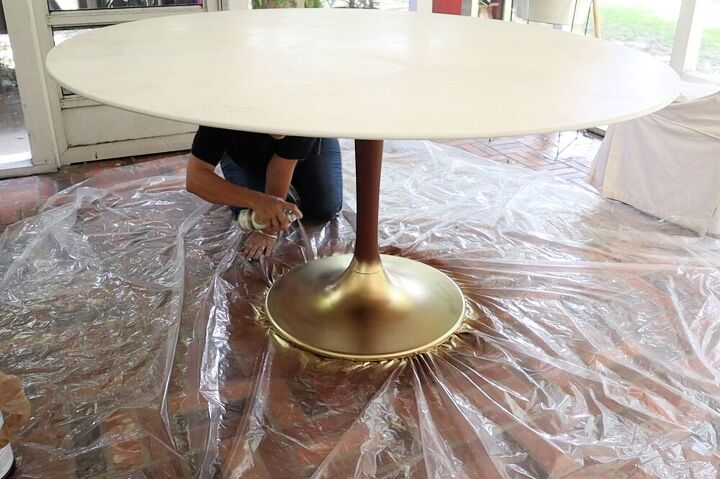
Then I painted the gold paint over the primer in back and forth sweeping motions.
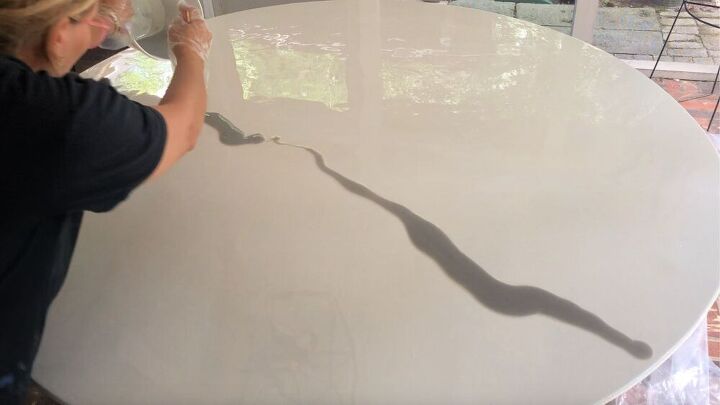
And onto the fun part, the epoxy! I mixed a bunch of white spray paint and a little black spray paint with a small amount of epoxy in my bucket to get this medium gray shade. Then poured it on the base coat of clear epoxy in a random vein-like shape.
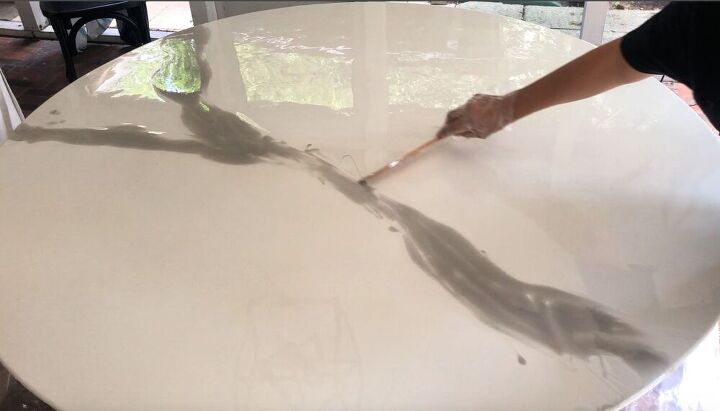
I manipulated the vein with my paint stick. You’ll have to watch the video below to get all the details of the epoxy pour. It should be a post all by itself.
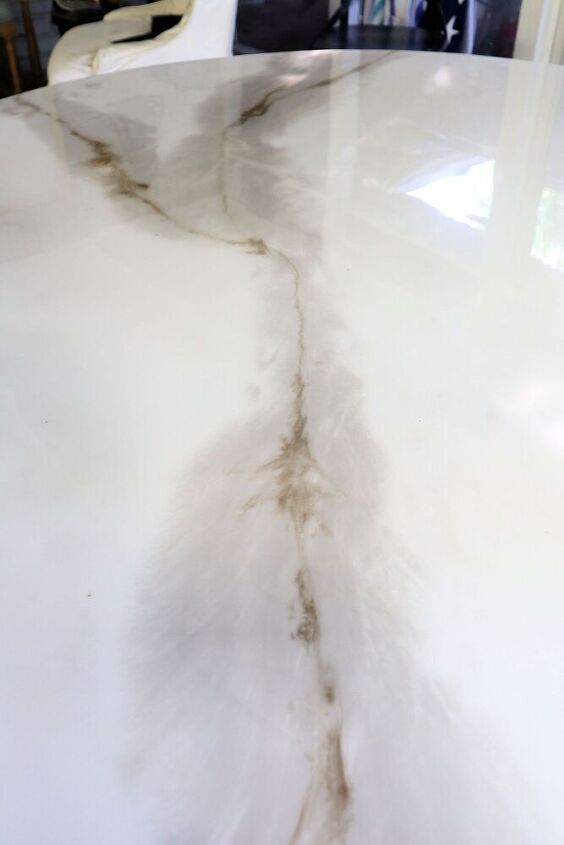
After the grey, I added gold metallic spray paint for more detail.
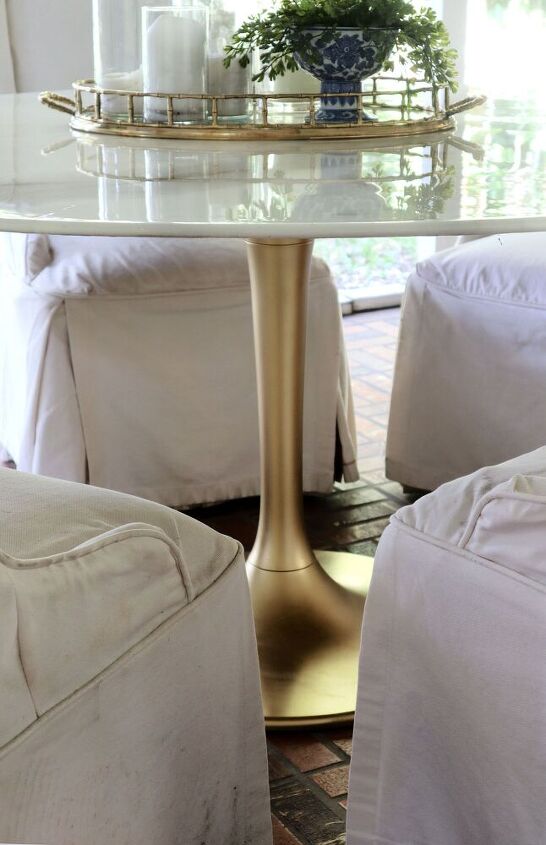
This photo shows how thin the edge of the table top appears.
Resources for this project:
See all materials


Comments
Join the conversation
-
You whole post made me smile! Sometimes--the stars just align--with some Divine help!!
-
Awesome work!!!


Frequently asked questions
Have a question about this project?
Beautiful!! Where did you get the chair slipcovers??
How much epoxy did you need for the project?
Was the ply used for the table top? If so, what disguises the layers of ply on the edges? Great job BTW!