


Shades of Gray: A Vintage Cabinet Makeover
$20
Easy
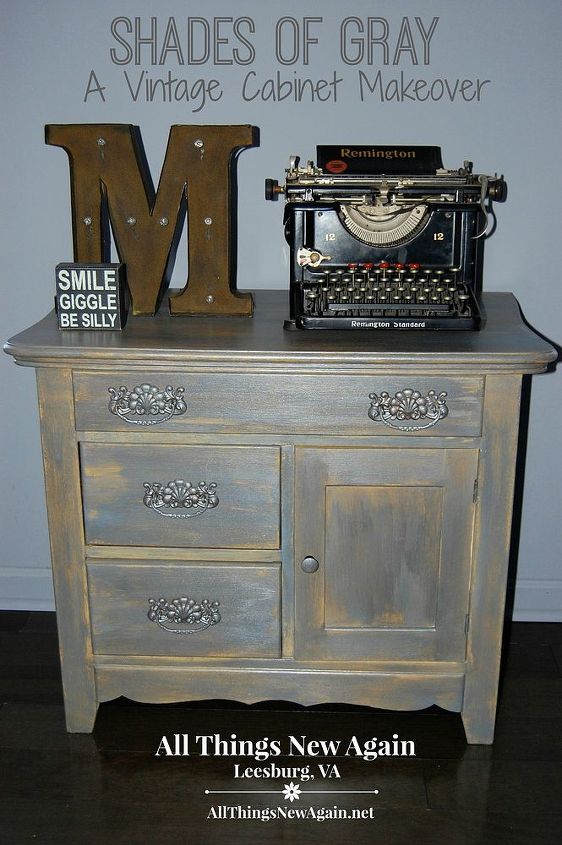
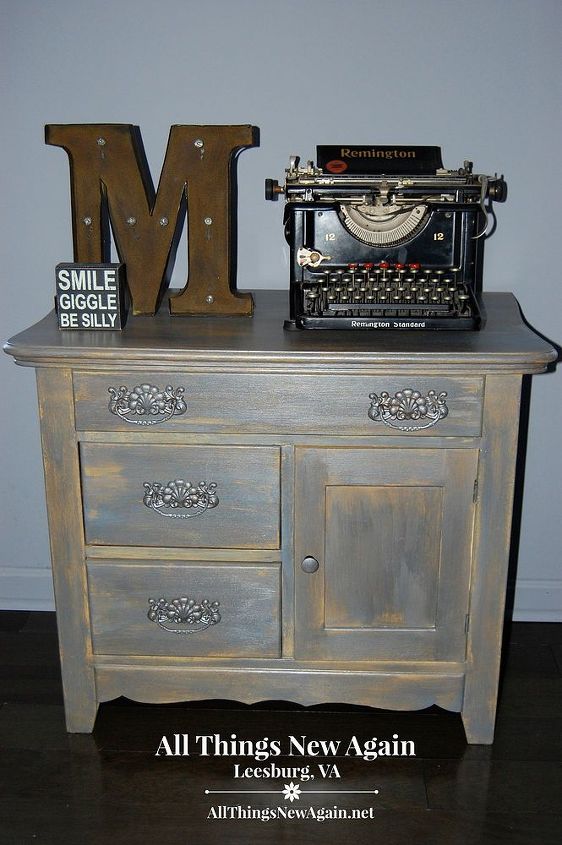
When I designed the new look for my home office, I completely forgot to include space for my printer and paper (two very important office things!) I found a cute vintage cabinet on sale at Goodwill and painted it to match my room.
NOTE: That ISN'T my printer on the cabinet. I know! My printer is ugly and the vintage typewriter just looked way cooler for the photos.
NOTE: That ISN'T my printer on the cabinet. I know! My printer is ugly and the vintage typewriter just looked way cooler for the photos.
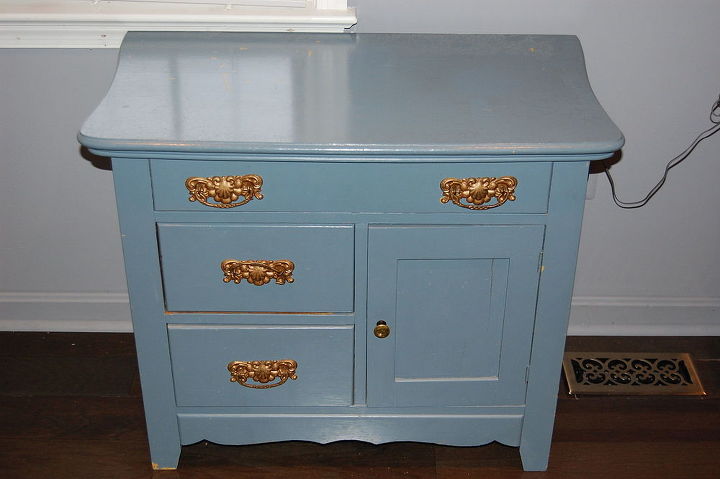
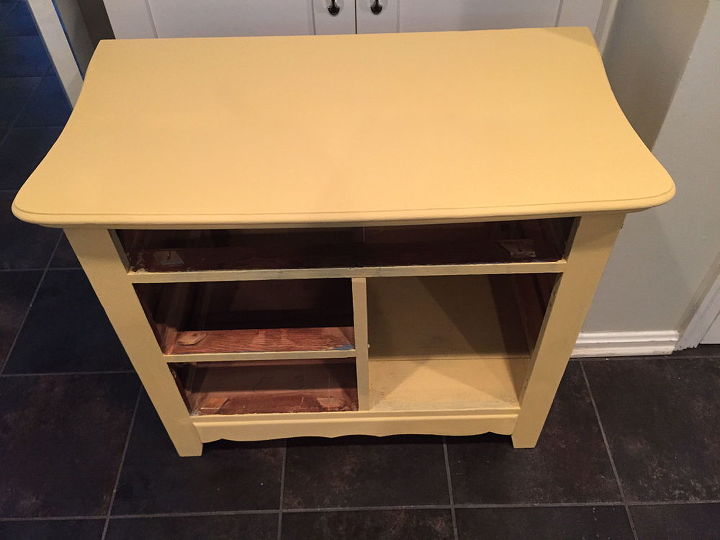
Here's the "before" shot. I lucked out and showed up at Goodwill on half-price furniture day (Woo hoo!) and got the cabinet for $20. It was painted in a high-gloss latex. You can't tell in this photo, but the top was badly scratched. I used American Paint Company products on this piece. I had the colors already from other projects I painted for this room so I did not include paint costs in this article.
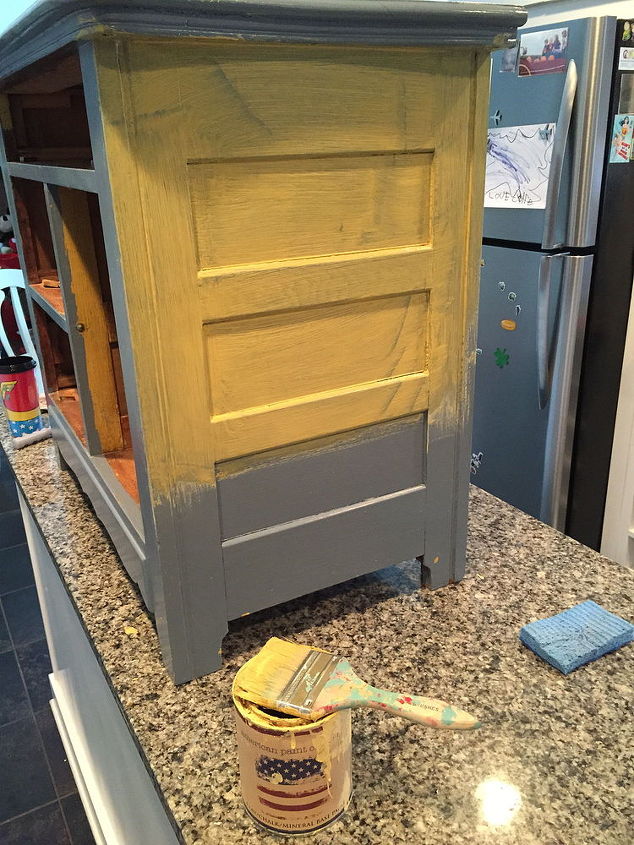
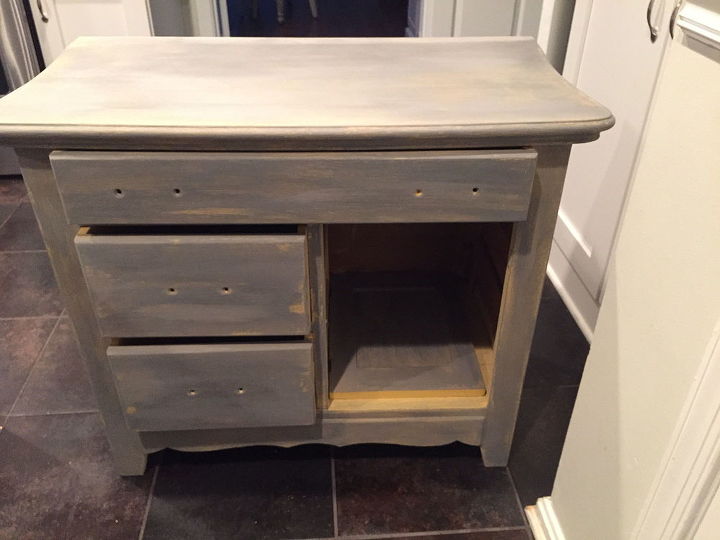
I started with a base-coat of a soft yellow called "Amber Waves of Grain". I did not sand or prime the piece. APC all-natural clay chalk and mineral paint sticks to high-gloss latex, but it does take 2 coats. To me that is worth it because I saved time by not having to sand or prime.
Here's a side-by-side comparison of the first and second coats:
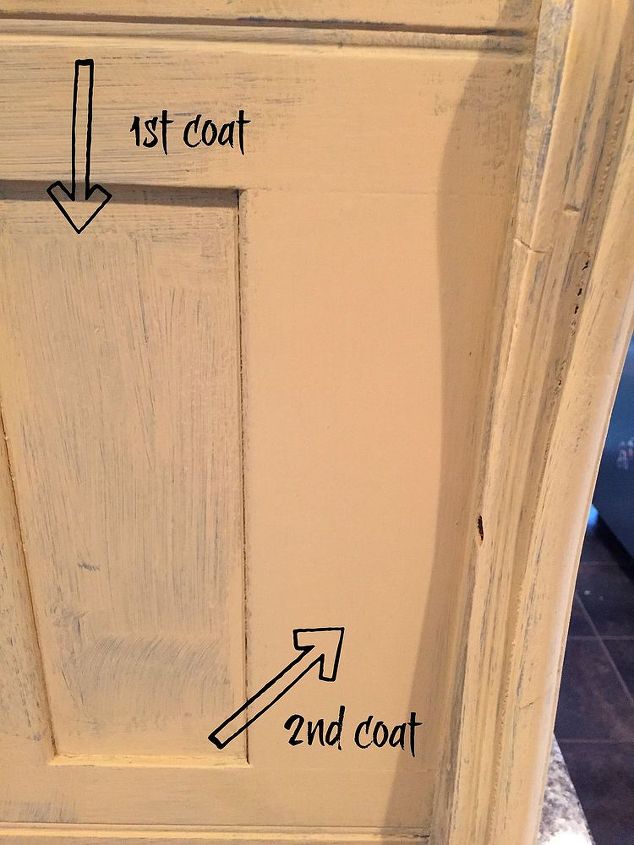
The trick to making it stick is simple: Just get the first coat on (it won't be pretty). Then let it dry overnight. For the second coat, I add several squirts of water to make it thinner so it glides over the first coat and sticks beautifully giving the piece a nice finish.
I could have stopped with the paint right there, sealed the piece and had a cute little yellow cabinet ... but then I wouldn't have a provocative title for this post!
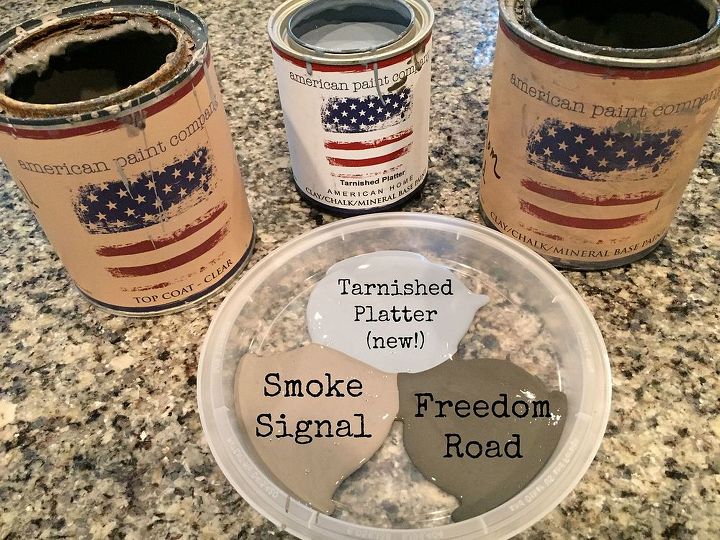
I used three shades of American Paint Company grays: Smoke Signal, Tarnished Platter and Freedom Road. I brushed them over the yellow--all of them--all at the same time--with the same brush. This is the fun part!
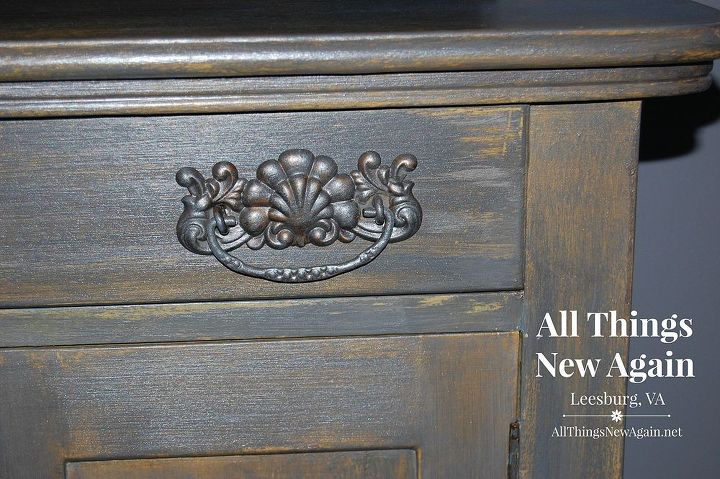
I finished with APC Hard Coat for durable protection since this piece will get a lot of wear and tear in my home office. I added a little pewter mica powder to the hard coat for some shimmer and used the same mixture on the piece's original hardware leaving a little bit of the original patina showing through.
For more photos and details on this project, please visit my All Things New Again Blog. Here's the finished cabinet. I love it!

Want more details about this and other DIY projects? Check out my blog post!
Comments
Join the conversation
3 comments
-
Awesome! Love that old typewriter!
-
Love it! Thanks.


Frequently asked questions
Have a question about this project?