Classic Coffee Table Makeover

Art is beauty
by Art is beauty
Have you ever been so excited to start on a makeover that in your head you had taken the picture and even virtually written the post, only to find out at the end that in you excitement it truly was ALL in your head..LOL I got so excited about picking out paint combinations that by the time my body caught up to my brain I didn't start taking pics until it was almost done.
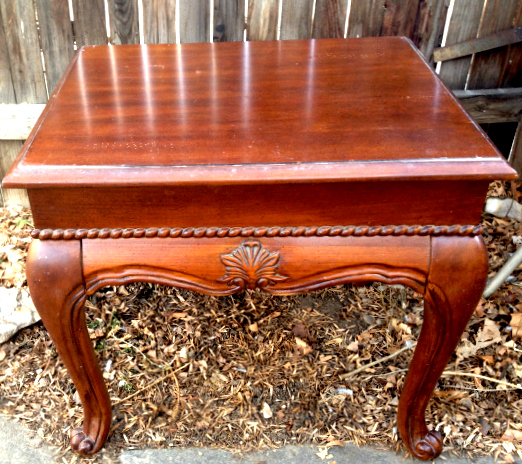
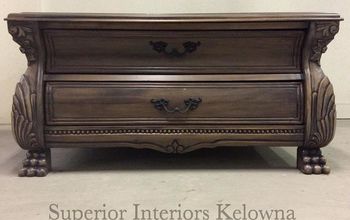
Thankfully I found close to what this looked like BEFORE on the internet...:)
So come kinda see what a great Before and After this was :)
Its and I have another furniture makeover up on the blog. Come see the classic coffee table makeover!
colors 
Good Morning my Beauties!


Its Monday Makeover day and I have been waiting to show you this super


simple and quick makeover for quite sometime.


Only one snafu....:)


Have you ever been so excited and I should add, BUSY; that in your head


you already took a picture for your before.


You are working out color combinations


and virtually writing your post out in your mind as you work;


only to put your chip in the computer to upload photos and realize you only


THOUGHT you took a before and didn't actually ever


take the photo?


I am honestly surprised that this is only the first time I have done it.


My brain is always a few steps ahead of my body, hence my ability to walk into a door frame instead of actually through the opening..(you see in my brain I have already passed through the opening and am free and clear to move, yet my body is a few seconds behind my brain yelling "WAIT UP")


This is MY LIFE...:)
So upon realizing that I had forgotten to actually take a picture


I had to go trolling the Internet to find something that kind of matched my before.


This was kinda what the table looked like before but not in nearly as nice condition.


It was scratched and had that kind of PLASTIC coating on the top.


This is the closest thing I could find..


so THANK YOU..anonymous person who took this photo and had no watermark or any other information to hunt you down to thank you and credit you.


And thank you Internet for helping a sister out. :)
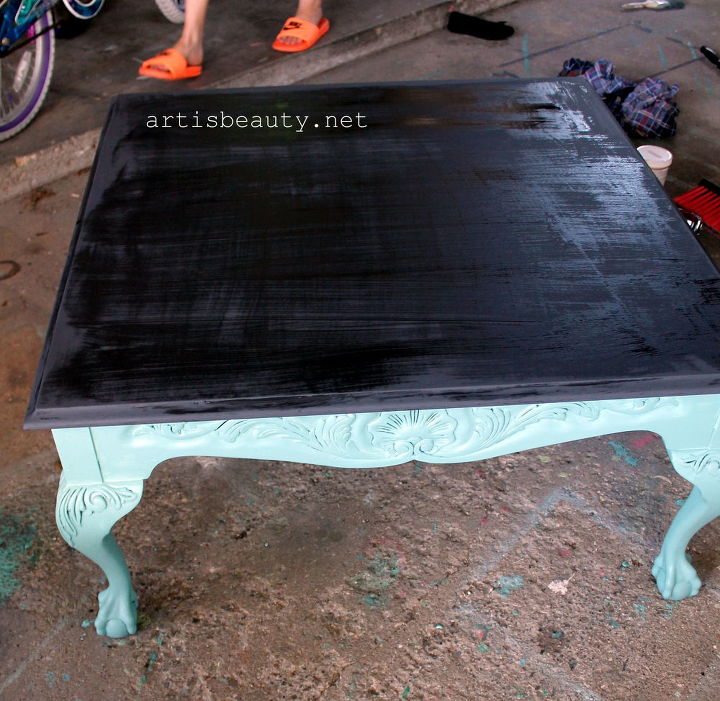
This is the point where apparently my body finally caught up to my brain


and started taking pictures.


I had already painted the entire thing Black.


Top and legs and apron.


After the first coat of black was dry I painted a custom blue on the bottom.


I made sure not to completely cover all the intricate details in.


I wanted some of that black to pop through and help show it off.


While that was drying I put a second coat of black on the top.


Once all was dry I waxed and buffed the whole thing.
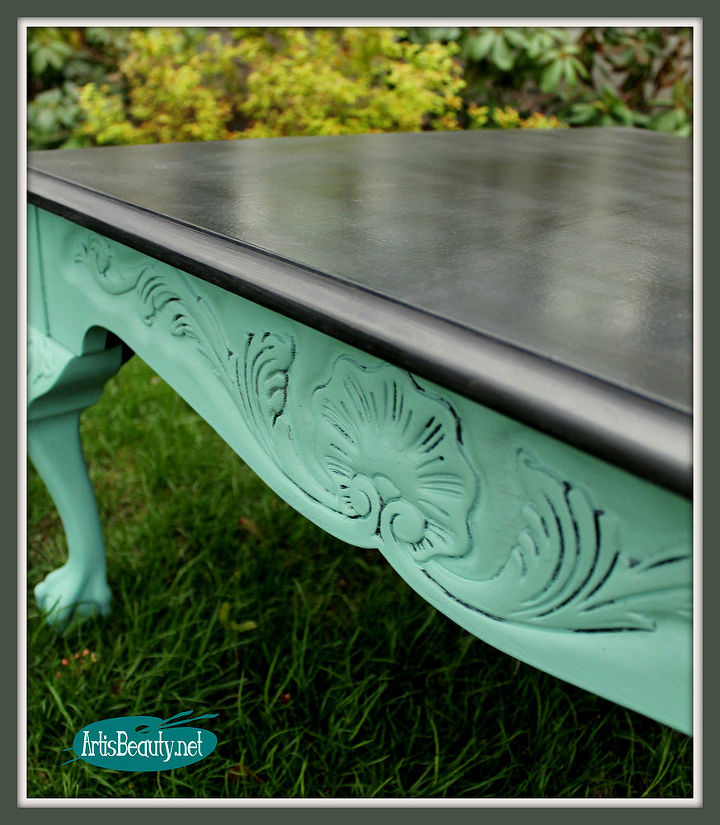
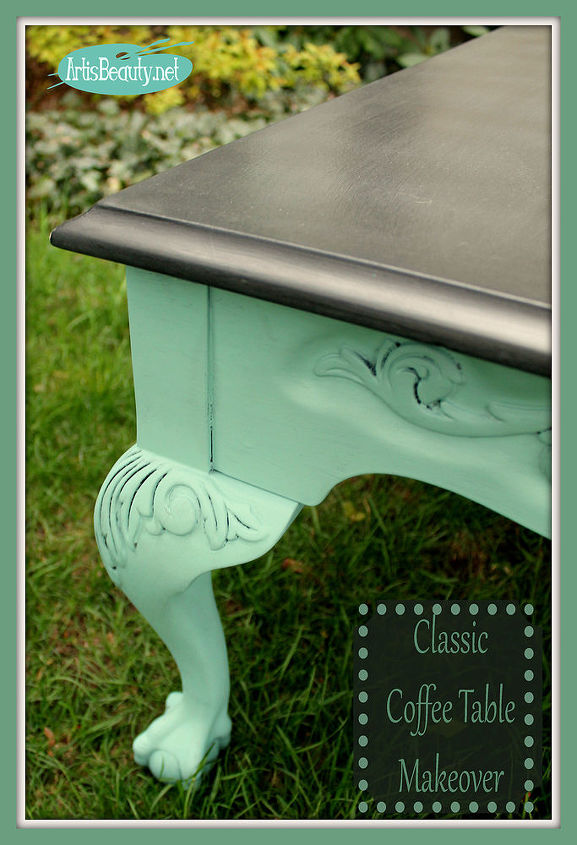
Leaving me with this!


I LOVED it.


You can see just enough of the black coming through that


it accentuates it nicely.
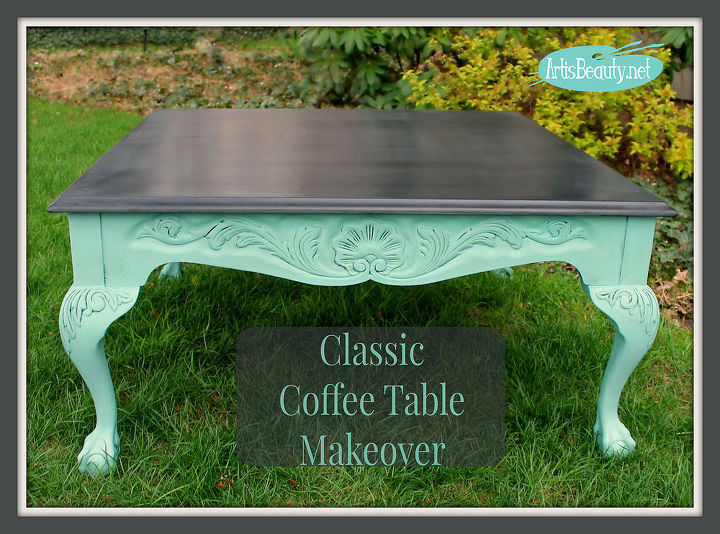
Just a simple and classic makeover.


Easy peasy once all my body parts were working together.
I hope you enjoyed this latest makeover


Make sure you come back tonight for TWIRL AND TAKE A BOW


to link up what you have been working on over the past week.


Until then, Go make someones day BEAUTIFUL!
Art is beauty
Want more details about this and other DIY projects? Check out my blog post!
Go
Frequently asked questions
Have a question about this project?
  1 question
Comments
Join the conversation
2 of 6 comments
Next