


Create Tool Storage When You Have No Garage
How do you create tool storage when you have no garage? By using an a underused closet, pegboard storage and creative storage solutions!
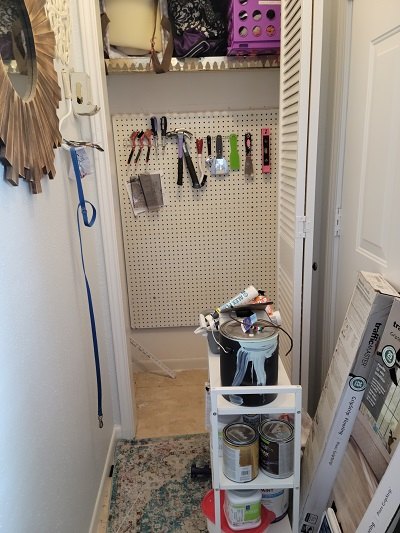
When space is at a premium organizing everything from craft supplies to tools must go vertical. And when I say vertical I mean on a pegboard! This is a project that even the DIY novice can tackle in a weekend (or less!). I used a coat closet to create tool storage in my cottage in the city because to be honest living in Texas we don’t really need a coat closet.
Pegboard For Tool Storage
In my Buy Nothing group in my community a family was giving away a garage storage piece. I jumped at the chance to pick this up. This was because although pegboard is inexpensive, free is even better. And I get to “fifth sparrow no more” something that was going out on the curb.
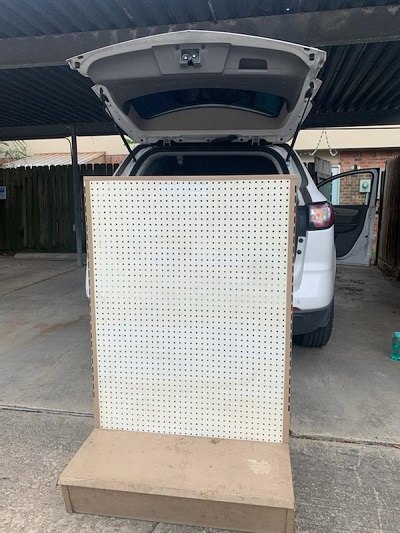
This garage storage piece was big and heavy. But where there is a will there is a way. And boy did I have the will and the way was with a hammer!
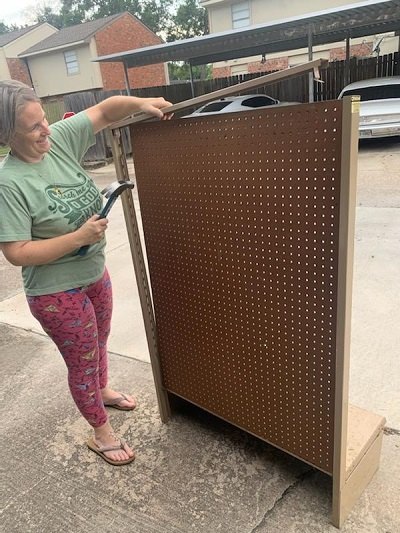
I removed the frame and shelf it was sitting on with a hammer and determination! Now it was time to install the pegboard in this embarrassment of a messy closet.
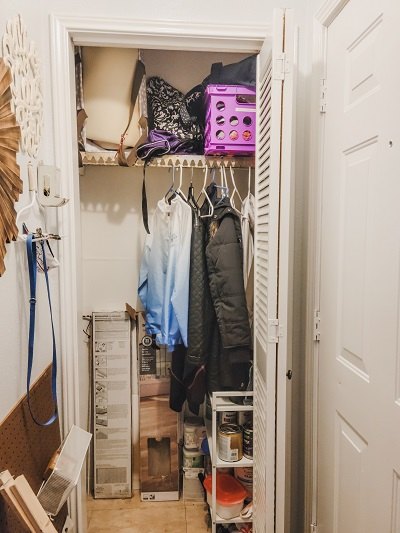
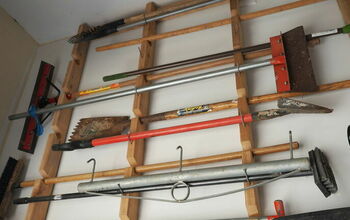
This is the underused coat closet where tools were just living in randomness. The closet needed this pegboard to become the best tool closet it never knew it could be. Let’s gather supplies and get started.
- Pegboard
- Yardstick or Tape Measure
- 3 pieces of 1 X 2 lumber
- 2 ” Wood Screws
- Level
- Stud Finder
- Drill
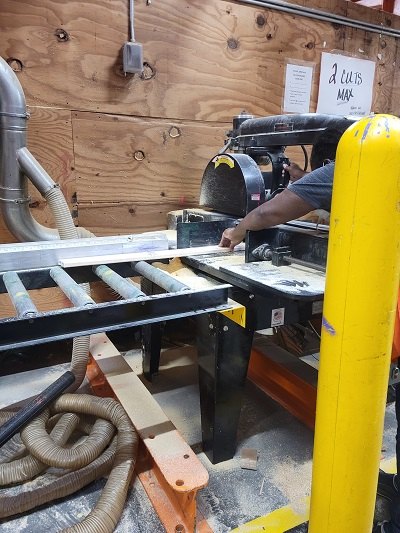
I was able to have my 1 X 2 wood cut to length at Home Depot. This is a great service for those of us who don’t have the tools necessary to cut wood at home. They do have a limit on cuts they’ll make so keep that in mind.
Start by finding the studs in your wall, and mark their placement with a pencil. You will want your 1×2 pieces to be mounted in at least 3 studs, so the location of the studs is very important in determining where you pegboard will be hung.
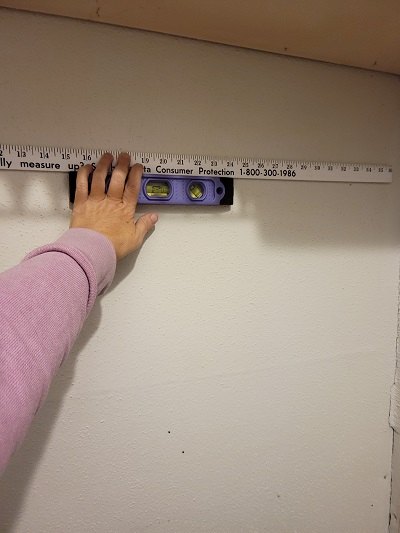
- Determine where the top of the pegboard will be on the wall and mark that height with your pencil.
- Using a level, line your first 1 X 2 with the mark.
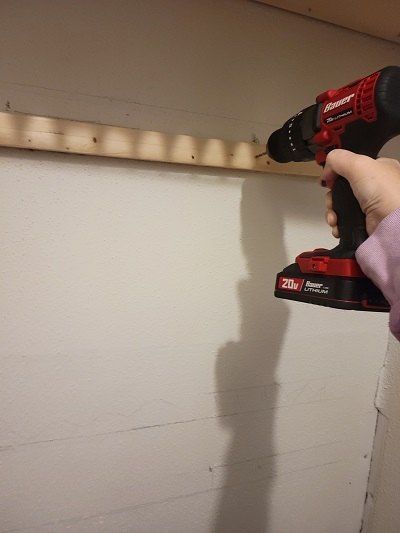
- Using a drill and wood screws attach the 1 X 2 to the wall.
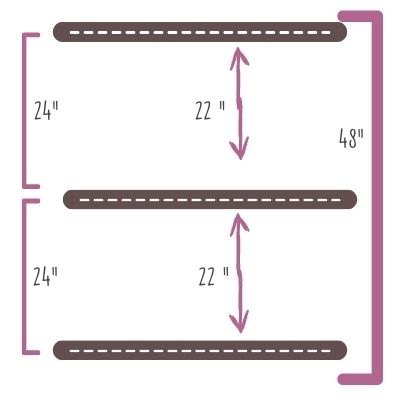
- Position the second or center 1 X 2 piece so that the top of it is 22″ from the bottom of the top piece.
- The measurement from the top of the first, highest 1 X 2 to the center of the middle 1 X 2 should be 24″.
- Use a level to ensure the piece is straight. Mount this piece to the wall into the studs with the wood screws and drill.
- Position the lowest 1 X 2 piece so that the top of it is 22″ from the bottom of the middle piece.
- The measurement from the top of the 1 X 2 in the center to the center of the lowest 1 X 2 should be 24″.
- Use a level to ensure the piece is straight. Mount this piece to the wall into the studs with the wood screws and drill.
Clear as mud, right? I’m including this drawing which I hope helps with the directions above.
After your 1 X 2 strips are attached to the wall you will need to attach your pegboard. Position the piece of pegboard on the 1 X 2 strips and secure it to each of the 1×2 strips with the wood screws and drill.
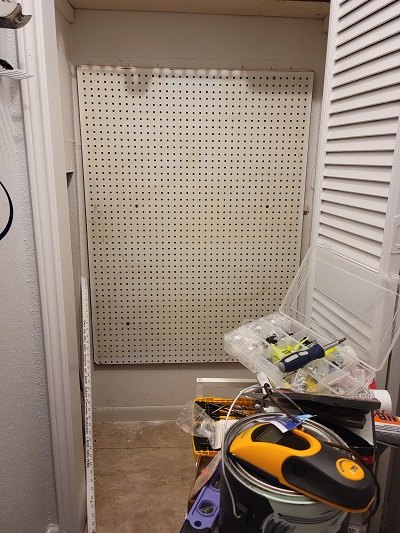
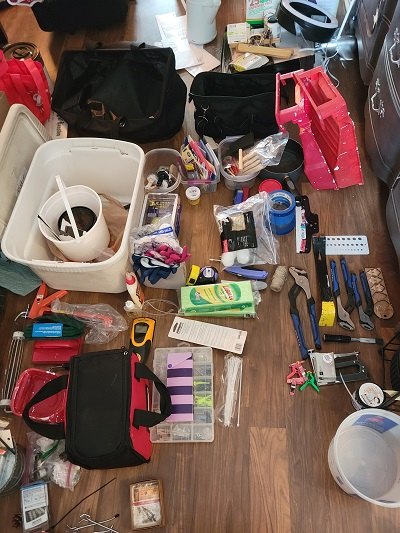
I cleaned out the closet and threw away anything broken and products that were almost empty. The tools and supplies going back in the closet were laid out on the floor. I used this kit of pegboard accessories to start and measured out how all the things would fit.
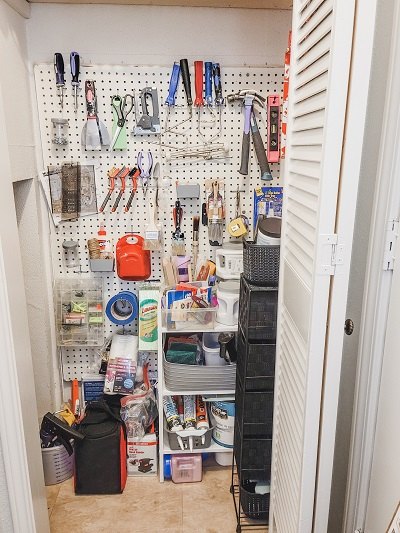
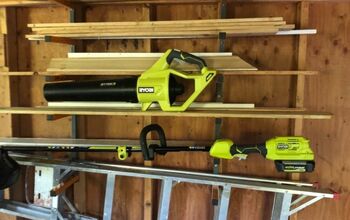
I am so happy with my new tool storage! No more tools spilling out into our newly decorated front entryway, everything has a place so it is easy to find and put away, and the closet is being using to its full potential!


Frequently asked questions
Have a question about this project?