


DIY Vinyl Cutouts for Even More Organized Storage!
If you're someone who likes to be able to put things back where they belong, then this tutorial is for you! Or perhaps, you know where everything goes, but others in your household do not, then this tutorial is also for you.
Using a Cricut Maker cutting machine, Steph created tool silhouettes to put on her metal pegboard wall. But this technique can be used for whatever you need to organize. If you sew, make cutouts of your sewing tools, or in the kitchen make cutouts so you know where the measure cups are stored. The uses can go from the garage to other areas of your home.
We always suggest watching the video first, but with this tutorial we think it's really beneficial to understand the complete process.
We'd love to connect with you. Please sign up for our newsletter right here.
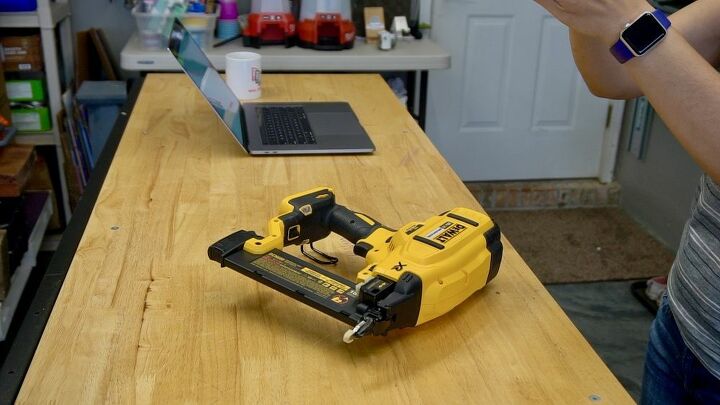
The process starts by taking a picture, Steph's using her iPhone, of the object for which you want to make a cutout. In this case, it's a nailer, but it could be anything. Send that picture to you computer anyway that works for you. Steph airdropped it to her Mac.
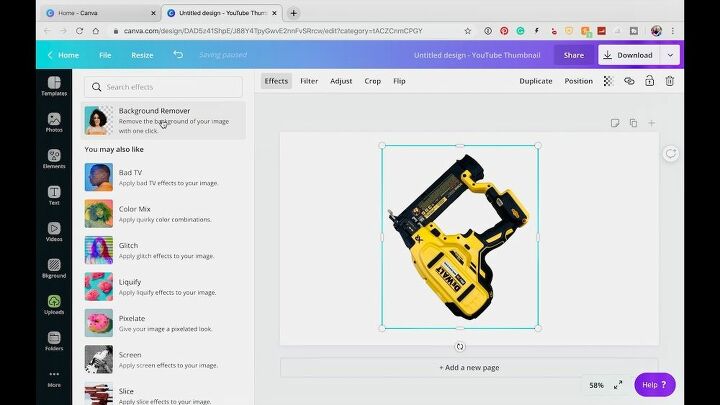
You'll want to open the photo in the photo editing software of your choice. Steph has found Canva.com to be extremely easy and efficient at removing photo backgrounds. Follow the instructions in your software to remove the background and to save it as a PNG file with transparent background. Save this newly edited photo. It's now going to be used in the Cricut software.
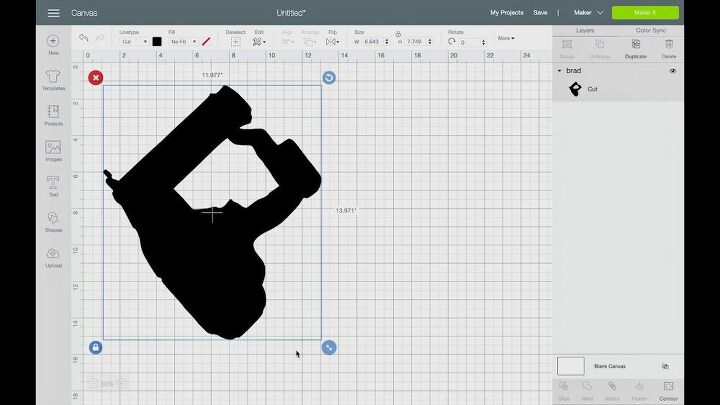
Open up a new project in the Cricut software and bring in your photo. You'll want to watch the video to see the exact steps to take. It's not hard, but it is hard to explain in still photos only.
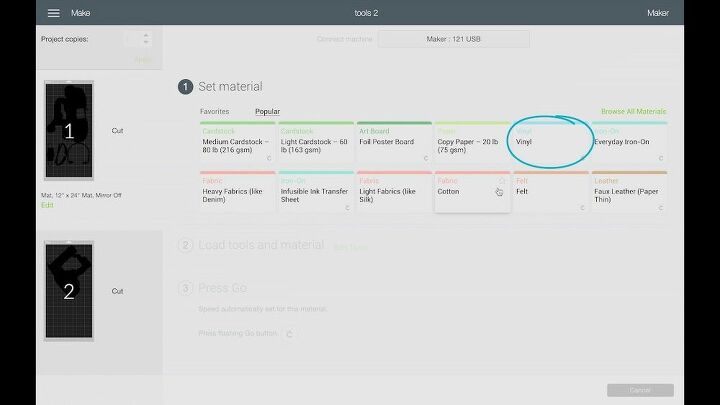
Since we are cutting vinyl, the standard vinyl setting worked.
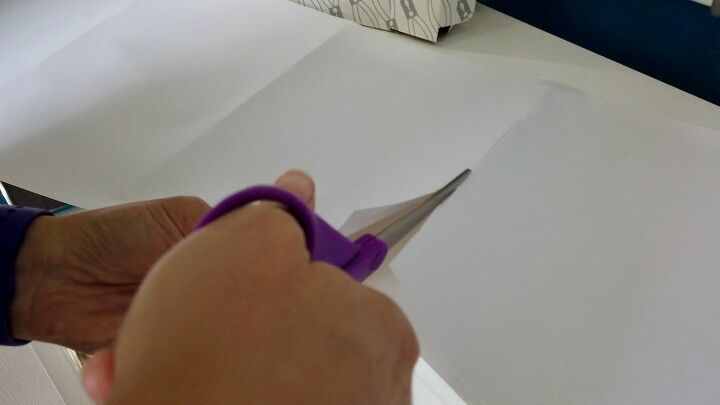
The Cricut uses a sticky mat to hold the vinyl in place as it is cut. We are using the mat that is 24 inches long. The vinyl we are using is from Wall Control. This particular vinyl has convenient cutting lines on the back to easily cut the vinyl to the 24 inch length that we need.
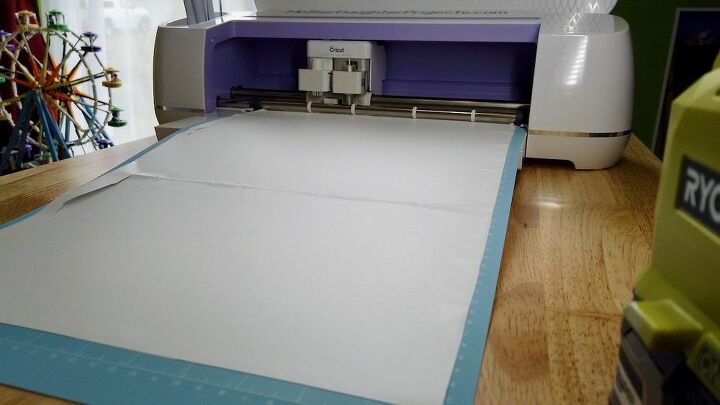
Once the mat is ready, feed it into the machine, and click the button. Sit back and watch it do it's magic!
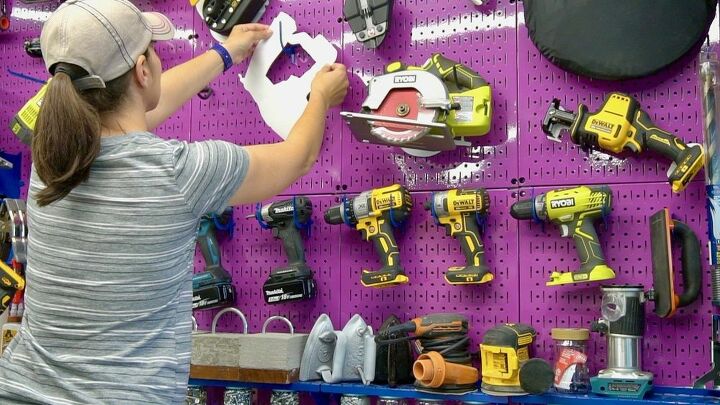
We added the stickers to the wall where each tool was going to be placed. All those drills got labels rather than cutouts. Words were more informative for them than shapes since they are all the same!
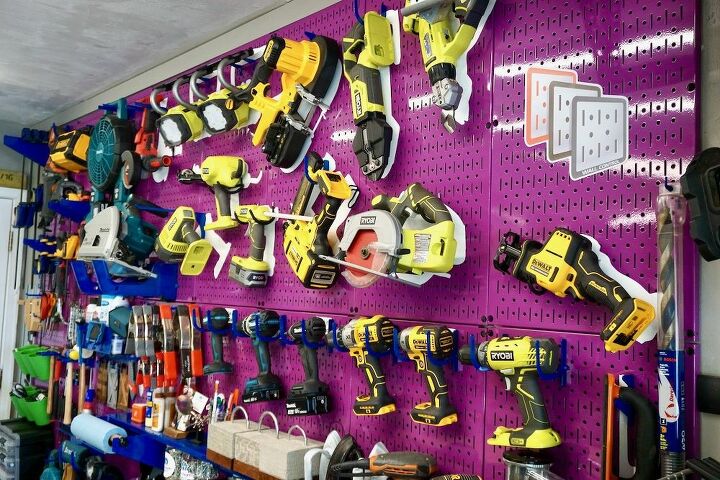
Here are all the stickers, which is also called a "shadow board" in place! Now it's easy to see what tool goes where!
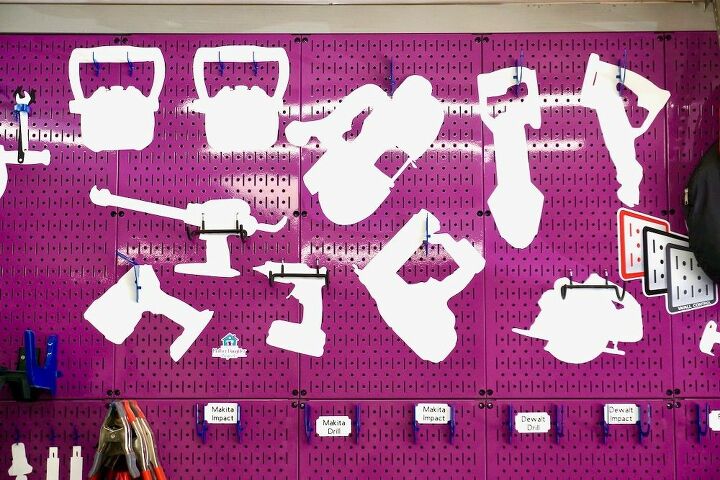
Everything has a place!
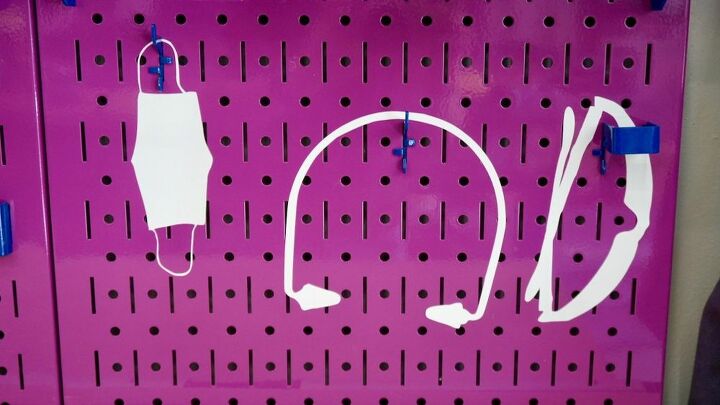
Can you tell what goes in this spot??


Comments
Join the conversation
-
I'm having pegboard envy! Where did you find that pegboard, was it that color when you bought it, and, if not how did you get it that color? It's totally gorgeous!
-
Great idea I love your peg board. Where did you purchase this product. Please inform. Thank you


Frequently asked questions
Have a question about this project?
Where did you get the metal peg board