


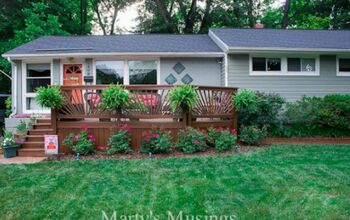
Build a Safety Gate to Match Your Deck

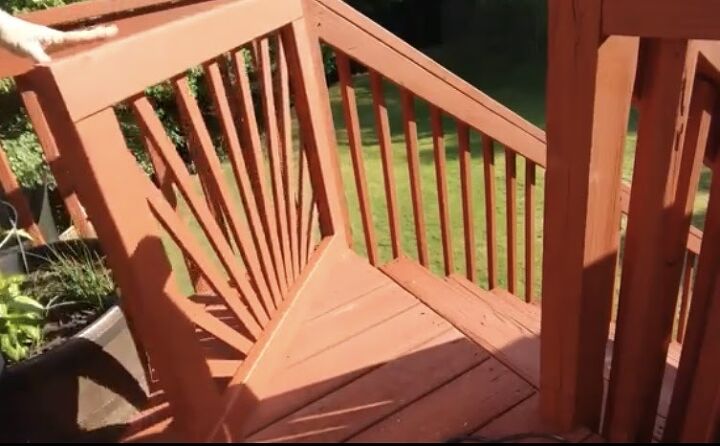
The steep stairs at the top of the deck were wide open and with a new puppy who loves to run, a gate was essential for his safety and to make sure he couldn’t run into the neighbors’ yards. I decided to create a swinging gate with a safety latch that matched the sunburst pattern on the rest of the deck. By cutting slats and attaching them in a similar pattern, I was able to produce a gate that matches perfectly with the design of the rest of the deck. It looks like it was built at the same time!
You Will Need:
- Lumber (2) 2x4x8 and (3) 1x2x8
- 11 Slats for sunburst pattern
- 2 Galvanized outdoor hinges
- Gate latch
- Deck screws
- Wood glue
- Exterior paint
- Clamp
- Chop saw
- Drill
- Hand saw
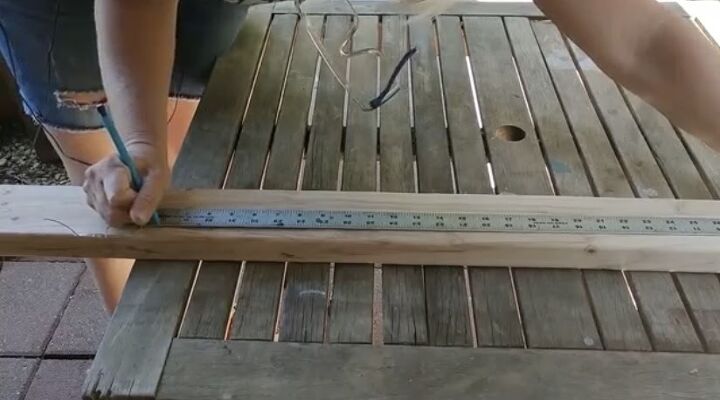
Step 1: Measure Opening and Mark Boards
I measured the space that would hold my gate and marked the width on the boards that would create the top, bottom, and both sides of the gate frame.
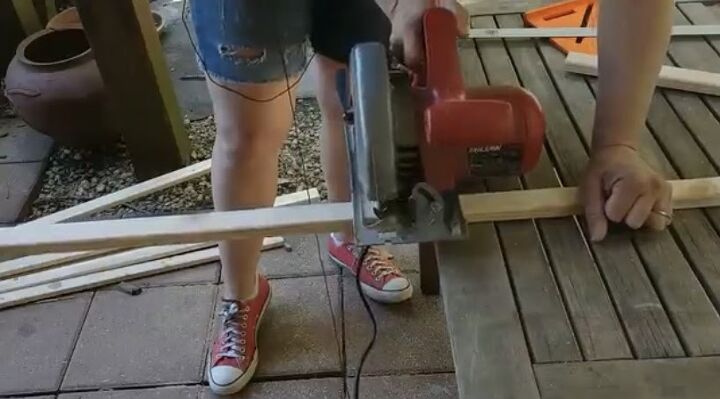
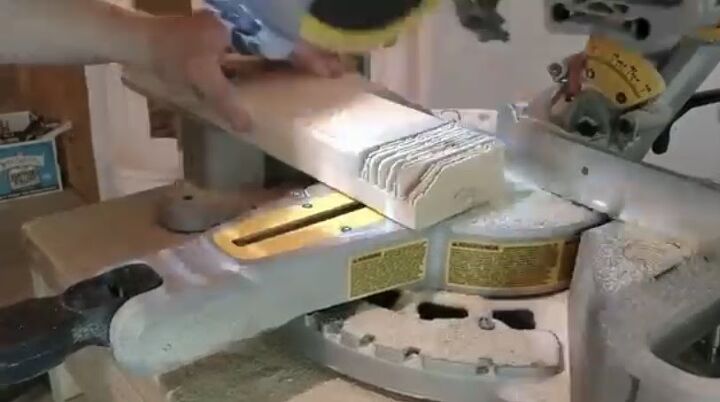
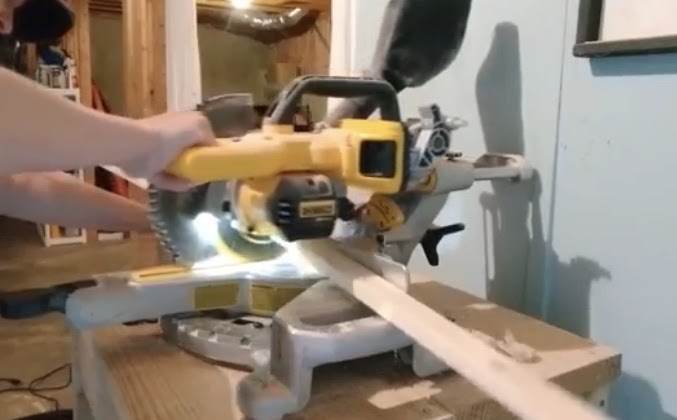
Step 2: Cut Boards
I used my circular saw to cut the boards for the square frame gate, the gate trim pieces, and the small, thin, planks to create the sunburst pattern after the gate was constructed.
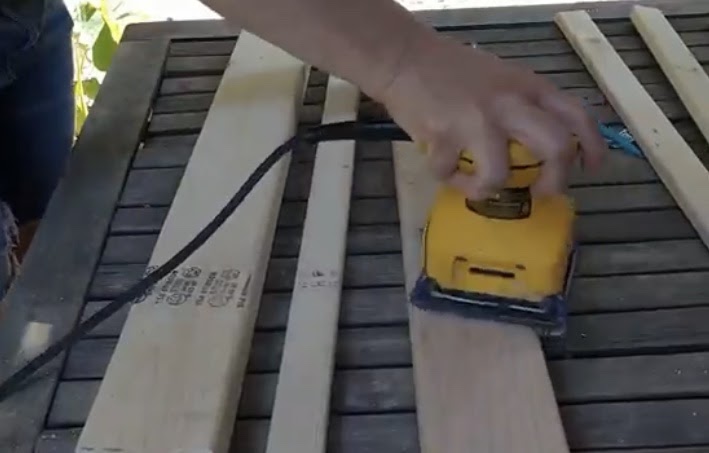
Step 3: Sand
I used my hand sander to smooth away any roughness over the surfaces of my boards. Use care to sand any surface that is going to be handled as much as a railing or gate to prevent splinters!
Step 4: Cut Notches in Boards
I ripped notches in the boards in order to join the four boards seamlessly using a chop saw. To make the notches at each corner, I cut slits in the wood and broke it apart by hand before chipping and sanding the notches out.
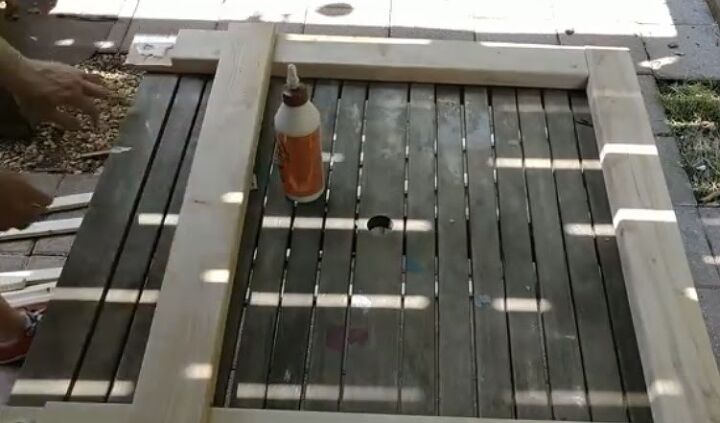
Step 5: Assemble Frame
I set the boards out in the shape of the gate to prepare to glue and screw them together in the following steps. My boards joined tightly together where I created the notches.
Step 6: Glue Frame
I used a waterproof formula wood glue to join the four boards at the corners in the notches I created in the previous step. I let the glue dry for a short time.
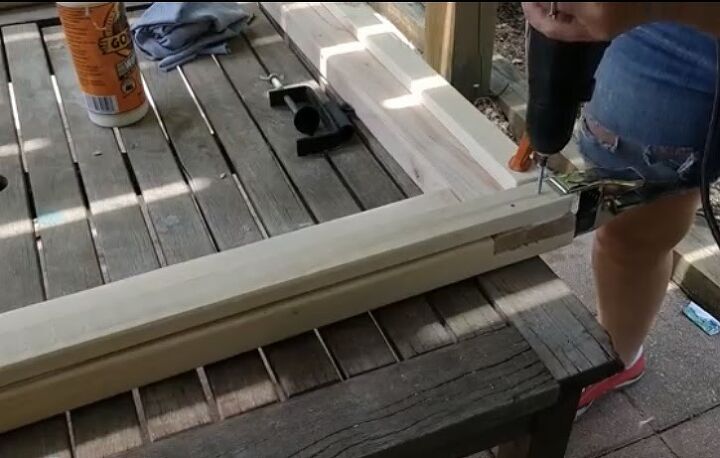
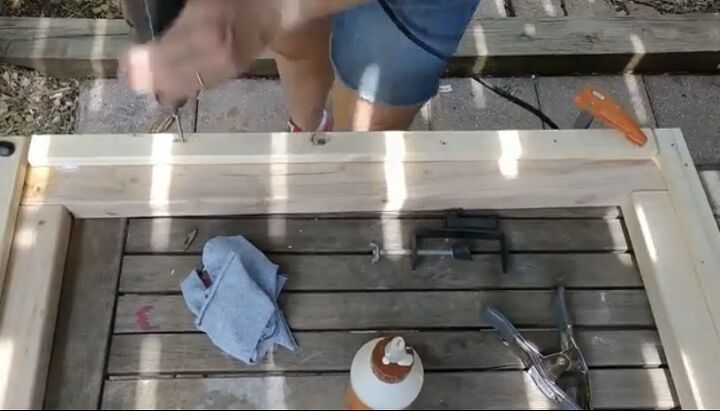
Step 7: Clamp and Drill Together with Trim
I clamped the corners of the frame that were just glued and drilled screws to securely fasten the boards together. At this point, I added the thin pieces that would serve as the trim on the gate. These small pieces created the frame for my sunburst radials to sit underneath for a clean look. I fastened them with the screws at the corners first and then worked my way around.
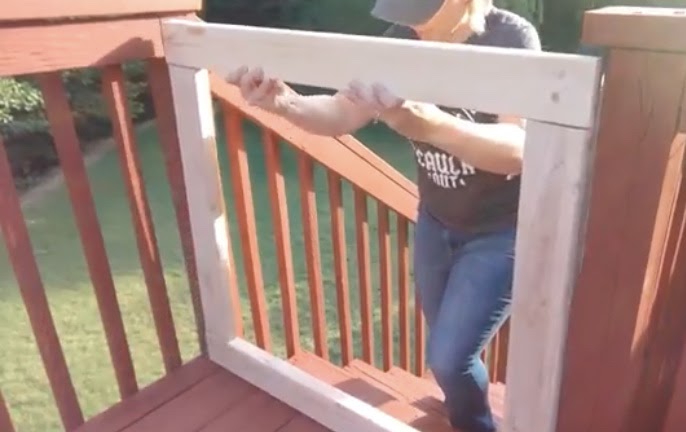
Step 8: Check For Fit
I held the gate frame in place to ensure a proper fit in the opening at the top of the deck stairs. My measurements were correct and the frame fit nicely in the opening.
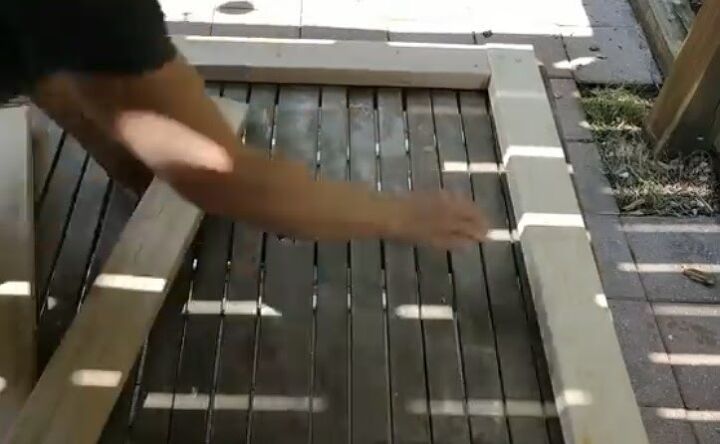
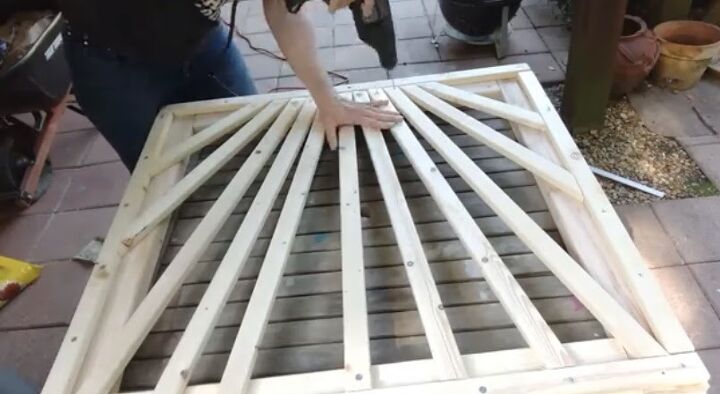
Step 9: Build Sunburst Pattern Center
I measured and re-cut the thin slats to the sizes needed to create the pattern on the gate. I cut a straight piece and installed it in the center of the gate.

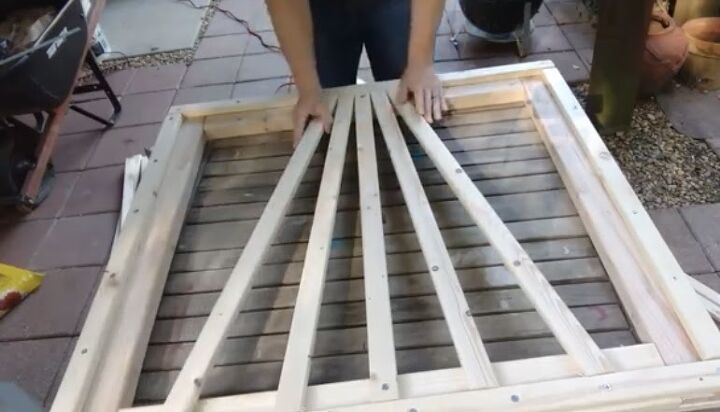
Step 10: Create Sunburst
After installing the straight board at the center point, I measured and cut boards to extend out from the center two at a time to look like rays of sunshine. I attached the rays with screws at the top and the bottom of the frame.
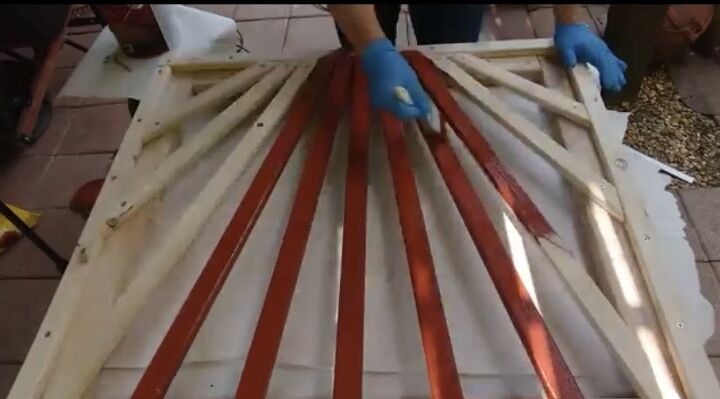
Step 11: Paint
I used a shade of exterior paint to match the existing deck. I used a brush to coat the wood evenly and let it dry thoroughly before moving on to the installation of the gate.
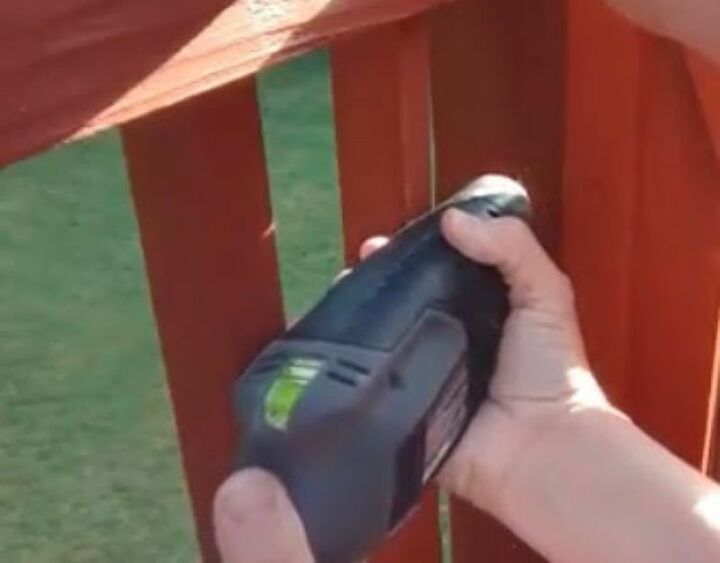
Step 12: Mark and Pre-Drill Holes for Hinge Hardware
I set the gate on top of two pencils to ensure installation for easy opening and closing of the gate without getting stuck. I measured and marked where to install the hardware and pre-drilled the holes for the screws. I used 2 ½ inch galvanized screws. You will install a hinge toward the top and another toward the bottom of the gate.
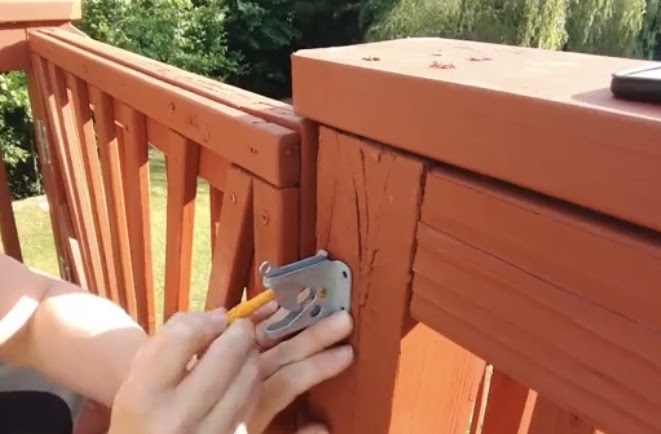
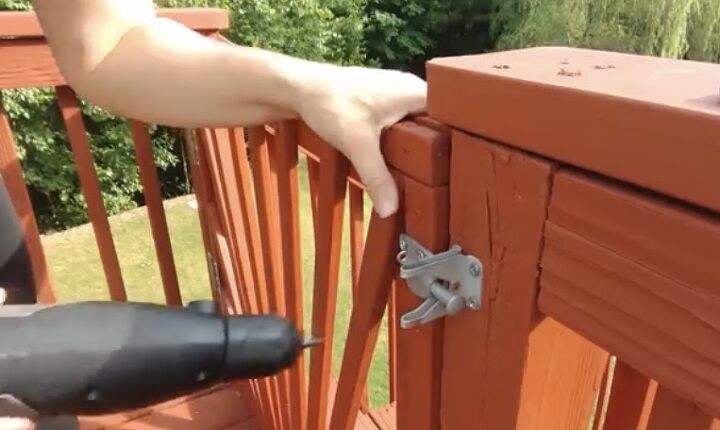
Step 13: Measure and Pre-Drill Holes for Latch Hardware
Just as I did in the previous step, I measured, marked, and pre-drilled the holes for my latch hardware and then securely fastened the latch hardware to the deck and the corresponding area on my gate. I used a latch that will catch easily when the gate swings closed so that there will be less risk of it accidentally being left open.
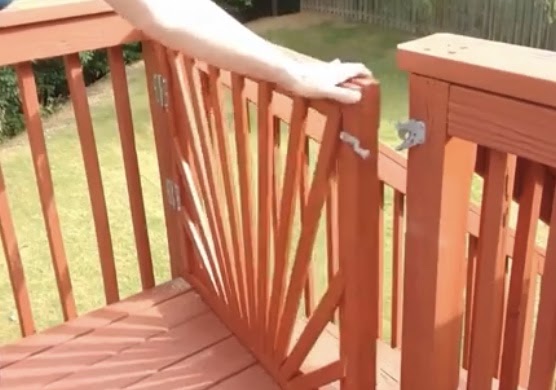
Step13: Check and Enjoy the New Gate
I opened and closed the gate several times to make sure that it was installed and working correctly and then let the new puppy test it out!
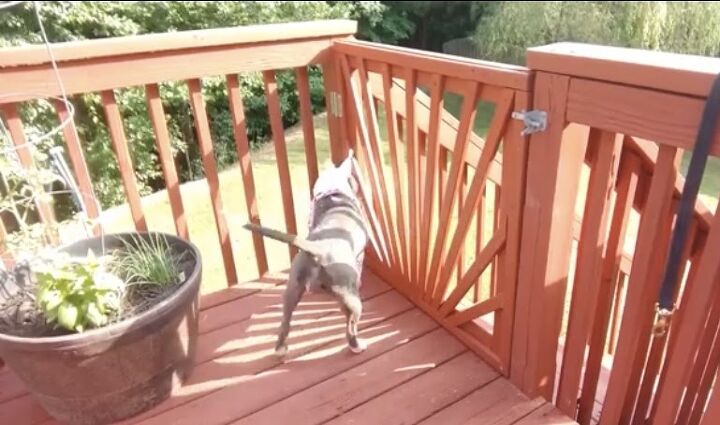
My DIY safety gate provides peace of mind for a new puppy owner but would also be ideal for a home with a small child. The sunburst pattern was fun to create and the way it matches the design of the deck railings makes the gate add not just function, but style, to the outdoor deck area. If you’re not making such a pattern, the gate will take a bit less time to create.
What DIY safety solutions have you added to your outdoor living areas? Share your tips and tutorials for your own DIY deck improvement—or any other projects—and find inspiration for all of your living spaces at Hometalk!
Resources for this project:
See all materials


Comments
Join the conversation
-
Love the gate. You are a very handy lady!!
-
Congratulations to you ! a great house and a great building. This innovative idea was developed either in the Scandinavian countries or in Holland. I know that you can even move these buildings because the modular base is solid and high-quality. I know that many millionaires invest in this business. I really like the flooring around the building. If I'm not mistaken, the same is on the site https://www.walshlandscaping.co.uk/millboarddeckingmaidenhead/. To me, this flooring resembles the deck of a ship from the movie "Pirates of the Caribbean." The fact that such flooring is durable and comfortable in every building, I say with confidence!


Frequently asked questions
Have a question about this project?