DIY Garden Obelisk

*Disclosure: This post is sponsored by Blue Ridge Tools.*
Recently, my husband and I were exploring a local nursery here in New Hampshire (well, I was exploring and my husband was holding my plants!). I saw these tall, unfinished wood obelisks lined up and I ran over to look at them; I’ve always wanted to add one to my garden. I almost dropped when I saw the price tag… $130! After studying how it was put together I was confident that I could make one on my own for so much less so I added it to my to-do list for Spring. An opportunity came up for me to work on a project with Blue Ridge Tools and I knew exactly what I was going to build! I hope after you see how my obelisk turned out and how easy it was to build that I give you the confidence to try it on your own.
SUPPLIES FOR THE OBELISK:
- 4- 2"x2"x8' lumber
- 4- 1"x2"x8' lumber
- 2 inch deck/ outdoor screws
- Stain or Paint
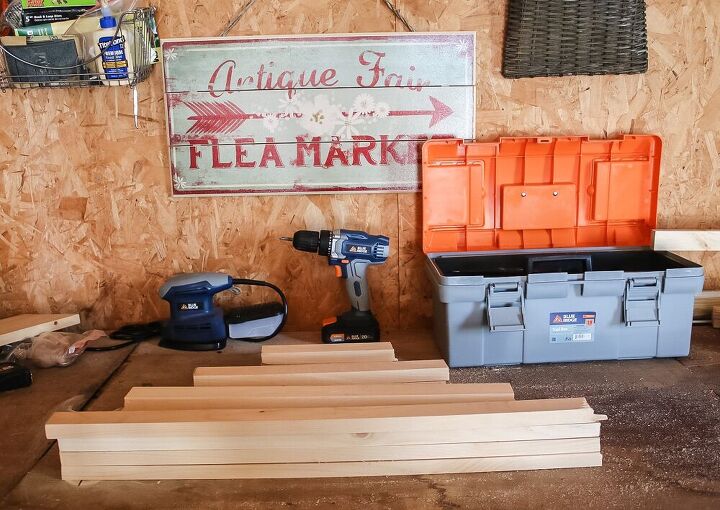
- Blue Ridge Cordless Drill
- Blue Ridge Detail Sander/Sandpaper
- Blue Ridge Measuring Tape
I decided that I wanted my obelisk to be 7 ft. tall. I cut 12 inches off the bottom of the thicker 2x2x8 pieces of wood that will make the frame. (Most home improvement stores will do this for you at no cost.)
The 1x1x8 foot pieces of wood will make the horizontal slats of the obelisk. There will be 4 slats on each side. You will need to cut 4 pieces to each of the following sizes: 8, 14, 21, and 27 inches.
Place 2 of your 7 ft. pieces of wood on a flat surface and touch the tops to make a teepee shape. Measure up 12 inches from the base of your frame and mark this spot with a pencil on both legs. This is the spot for your first board, the 27 inch size. Adjust the legs accordingly so the board runs to the end on both sides.
I spaced the boards out 16 inches apart: I marked the spot for each board with a pencil mark to make sure I kept them straight while drilling. This is what your frame should look like.
Using my Blue Ridge Cordless Drill I secured each board into place with a screw on each end of the board. The drill was so easy to use and not as heavy or bulky as most drills I have used in the past; it fit in my hand perfectly. I’m using screws that don’t require pre-drilling so I didn’t need to drill pilot holes first to prevent the wood from splitting.
Repeat the steps to make a second frame.
Now that I had the two main parts of the frame completed it was time to add the side slats. This part would have been a little easier with two people but it was early in the morning and really, who has time to wait for teenage boys to wake up!
I used a pole and a step stool to brace the frame. The side pieces will go on quickly; you just need to use the already finished frame pieces as a guide for where to place the side slats. Again, use one 2” screw on each end of the board. Flip the obelisk over and repeat on the other side.
All built!
Now it was time for a quick sanding. Using my Blue Ridge Detail Sander I went over the rough spots on the wood. This was a great little sander to get into all the corners and crevices.
I had originally planned on staining ( I had even bought the stain!) but decided that I wanted it to be painted white. I did two coats of an indoor/outdoor semi-gloss latex.
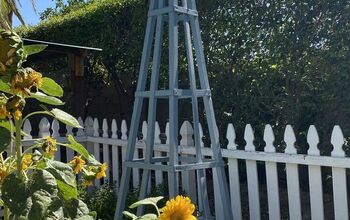
I couldn’t be more pleased with how this turned out! It’s going to be the centerpiece of my vegetable garden. You can read how I transformed this area from a yard to a lovely garden here.
*Thank you again to Blue RIdge Tools for sponsoring this post; all opinions about their products are my own.*
Enjoyed the project?
Resources for this project:
See all materials
Comments
Join the conversation
-
 Karena Stetson
on Jun 08, 2020
No question here, but I would place these over cucumber hills. They would allow more room in the garden and reaching the cucumbers would be easier too.
-
 Jennifer Howard| Cottage On Bunker Hill
on Jun 09, 2020
I love growing my cukes vertically too! I have a few pics of my garden on this blog post with my layout.
-
-
-
 Carole White
on May 26, 2021
Love it! I really would like to build one too, time permitting; thanks for the clear instructions
-
 Jennifer Howard| Cottage On Bunker Hill
on May 26, 2021
Thanks Carole!!
-
-














Frequently asked questions
Have a question about this project?
What type of finial would you use on these?
Could you make it three legged, or pentagonal, or octagonal?