


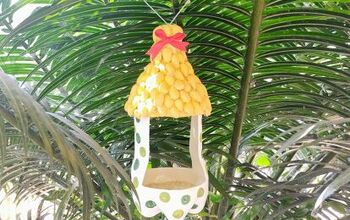
DIY Mason Jar Bird Feeder
Making your own mason jar bird feeder is an easy and fun way to attract backyard birds of all shapes and sizes to your backyard. Follow these step-by-step instructions for a beautiful decoration that will bring life to your space.If you’re looking for a fun and easy project to add a little charm to your backyard, look no further than a mason jar lid bird feeder. Not only is a homemade bird feeder fun to make, but they’re also a great way to attract birds of all shapes and sizes. They make for beautiful decorations or great gifts!
This DIY Birdfeeder great activity to do with kids or friends and is a great activity to get everyone outdoors and enjoying nature. DIY projects like this one is perfect for rainy days.
Plus, you can make some creative ideas with the design and make this fun activity as unique as you’d like. This DIY is a great way to recycle those old mason jars taking up space in your cupboards.
We’ll show you how to make this mason jar bird feeder project with just a few simple supplies. So get ready to spread some cheer to our feathered friends!
DIY Mason Jar Bird Feeder
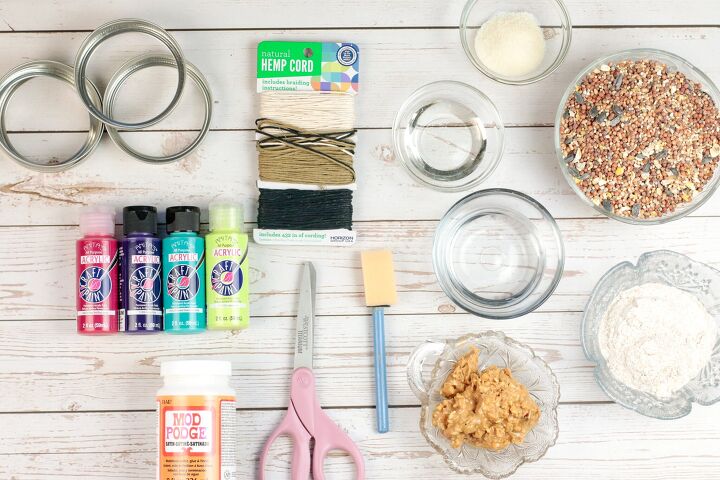
Supplies
- 2 cups wild bird seed
- 1- 1 ½ cups boiling water
- 1 packet of unflavored gelatin
- 1/2 cup peanut butter
- 1/2 cup flour
- 3 tablespoons corn syrup
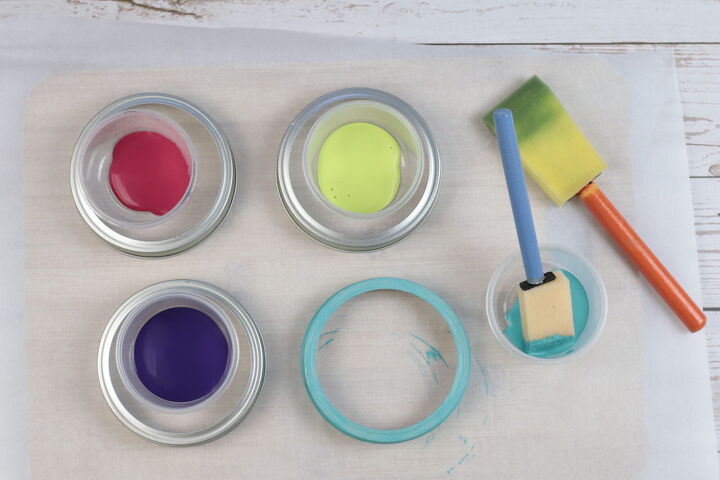
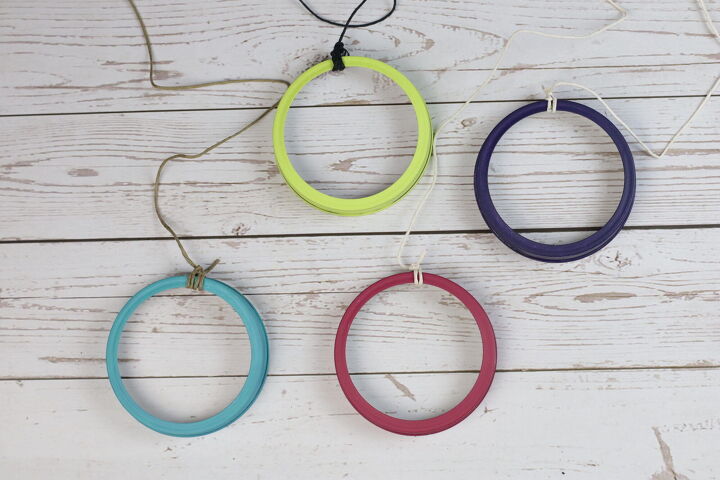
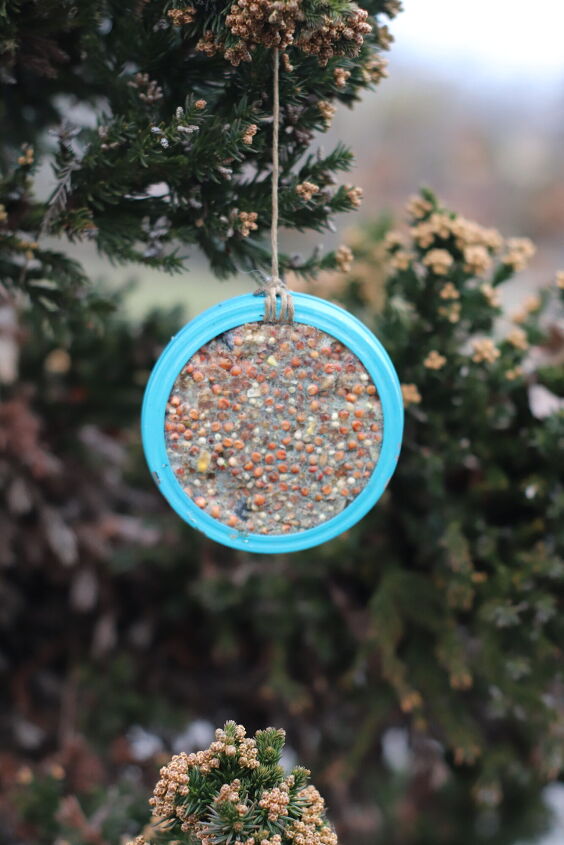
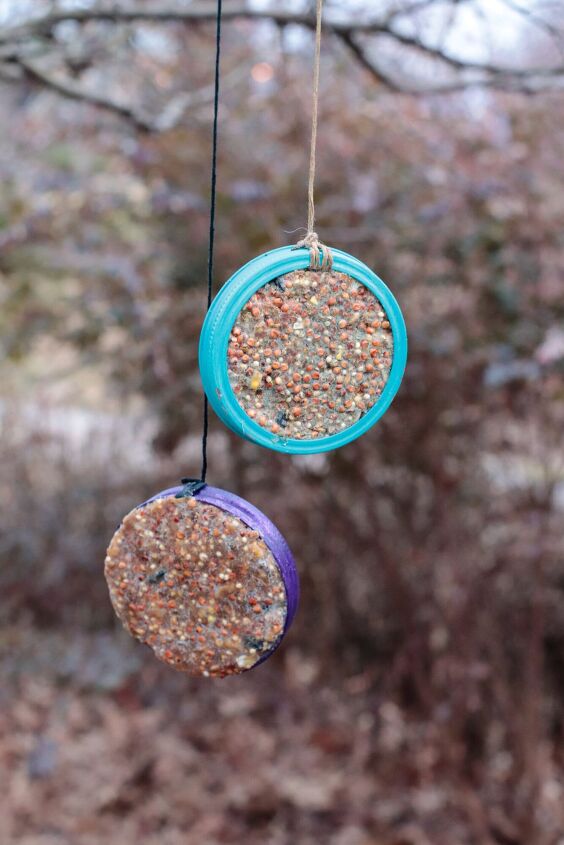
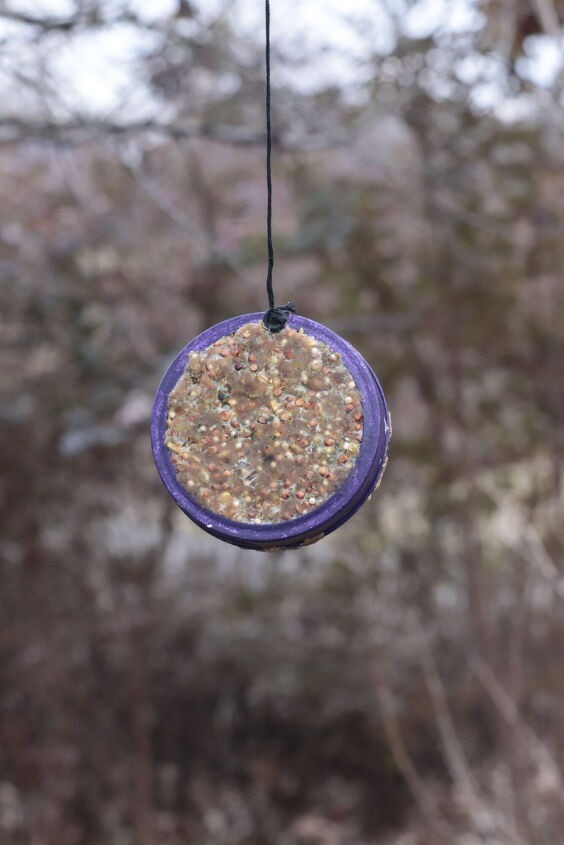
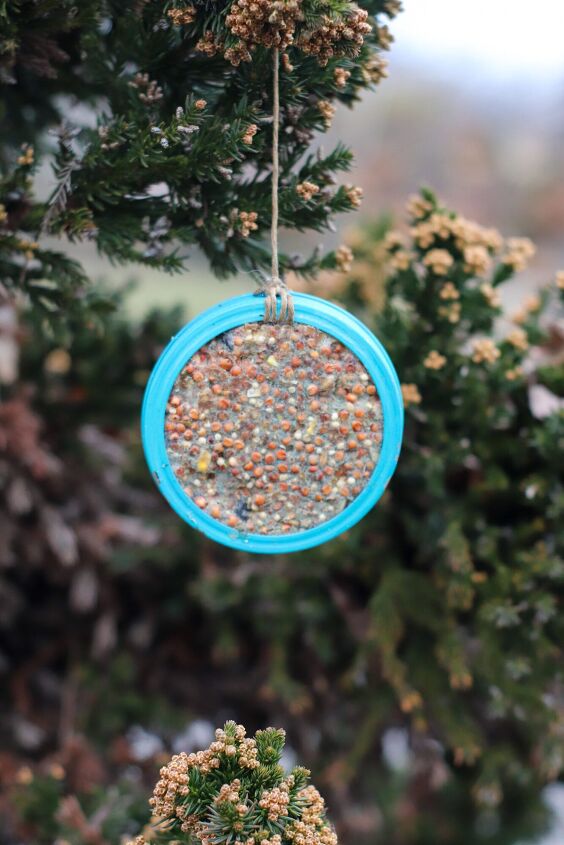
- 6-wide mouth mason jar rings
- Non-toxic acrylic paint in bright colors
- Craft foam brushes
- Mod podge
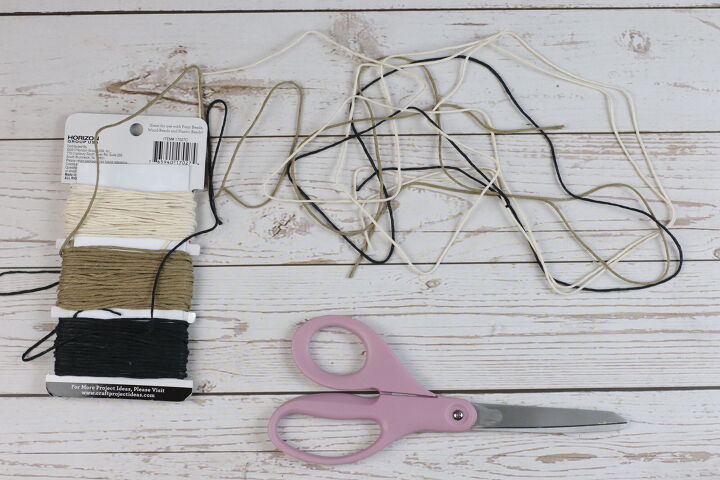
- Scissors
- Twine or jute cord
- Silicone baking mat or parchment paper
Skill Level: Child who can use scissors, paint, help with recipe. So almost every age group
Approximate time to complete: 30 minutes (excludes drying time)
Approximate cost to make the recipe for 6 rings is: approximately $1.00 per Mason Jar Ring Bird Feeder
Instructions:
For the Recipe:
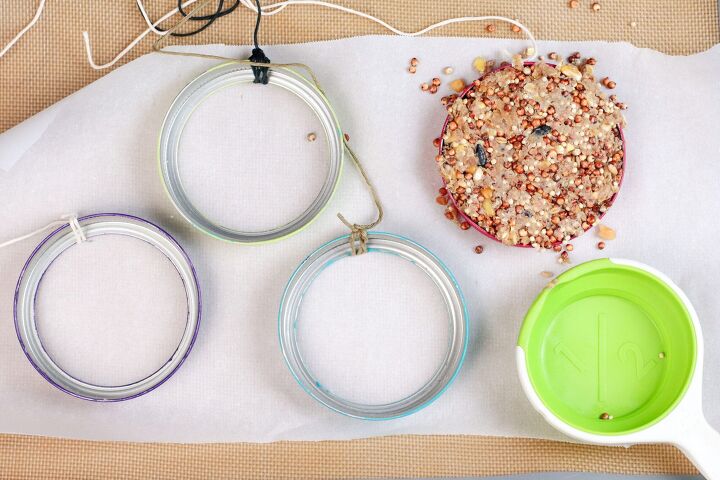
Add the bird food and flour to a large bowl and set aside.
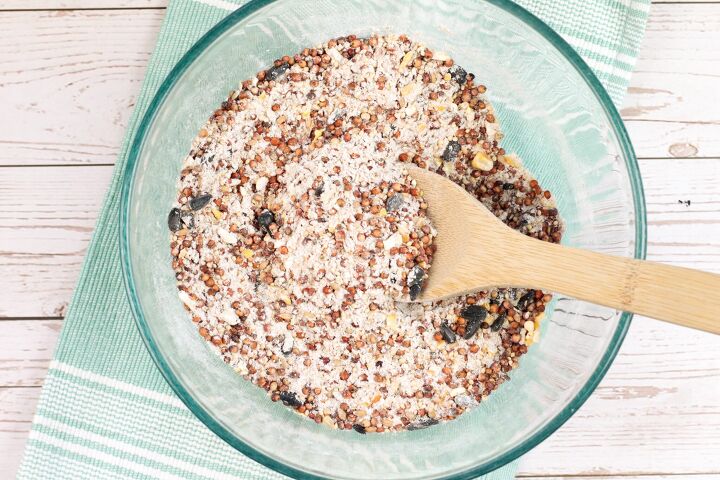
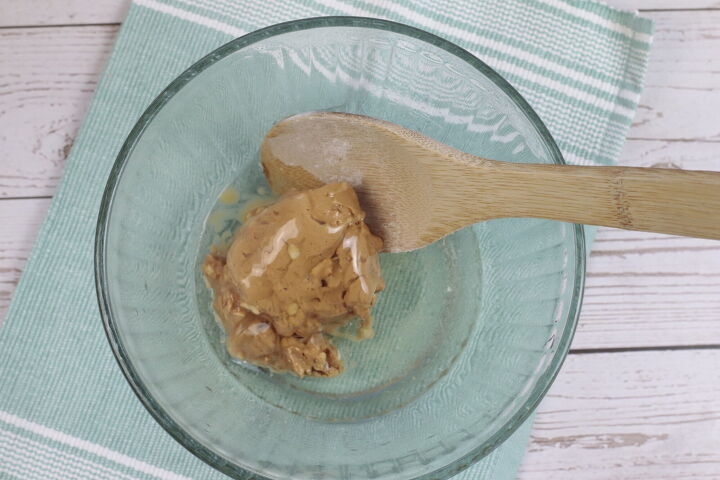
In a separate smaller bowl, using the gelatin and 1 cup of the hot water, mix according to the directions on the package. Mix in the peanut butter and the corn syrup until well blended.

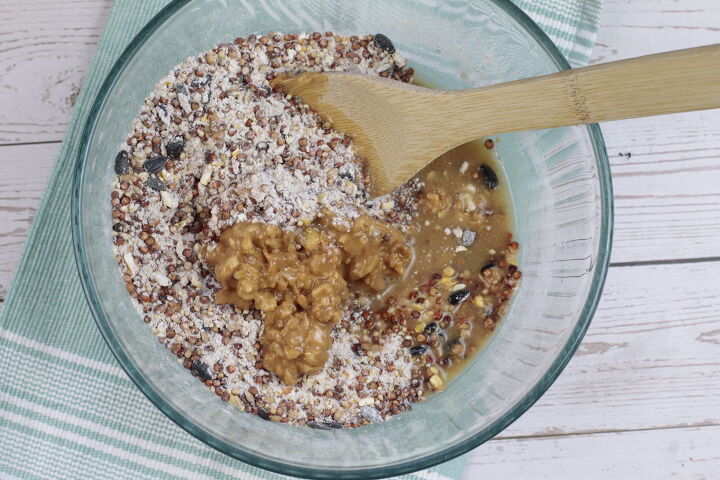
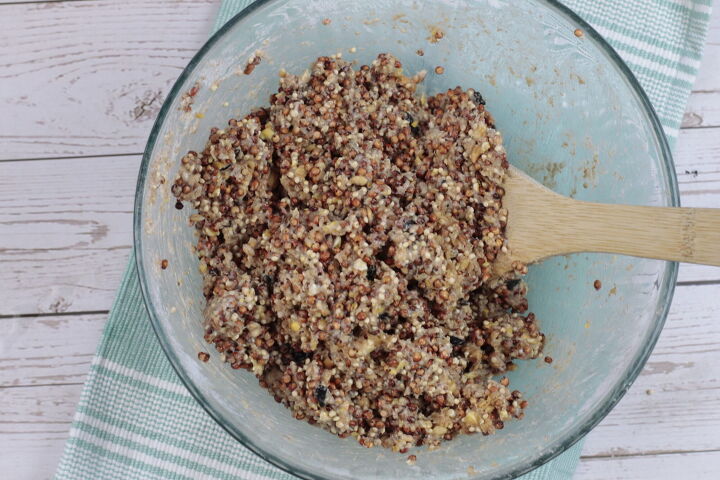
The next step is to add the liquid mixture into the dry mixture. Mix until well combined. It should feel like thick sand. If not, you may need to add more hot water. Set aside
For the Bird Feeder:
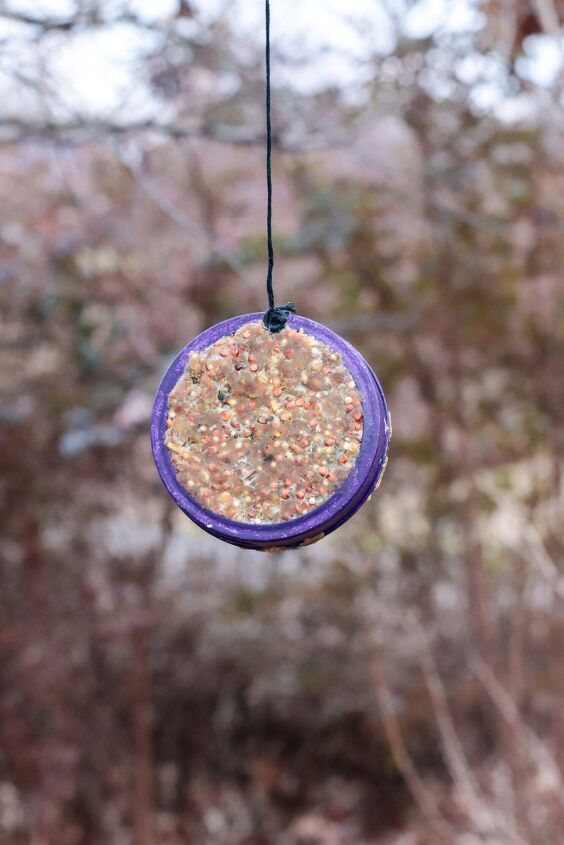
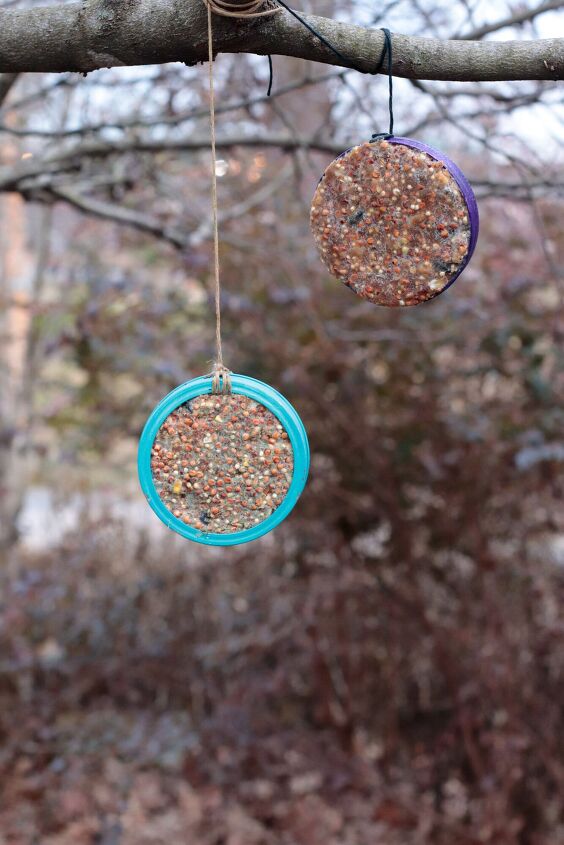
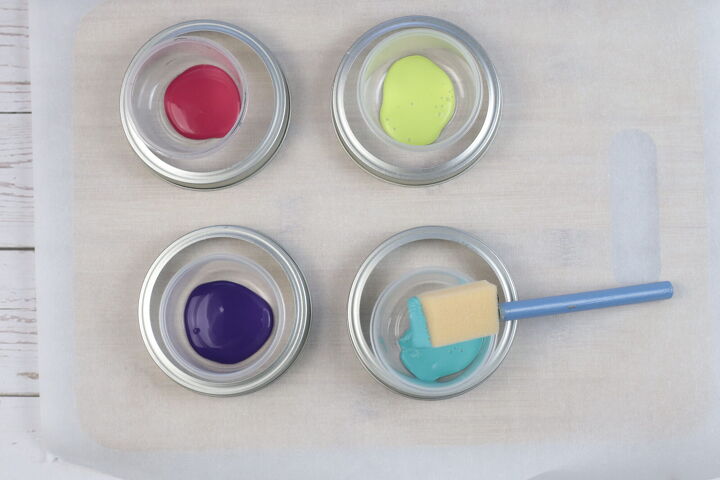
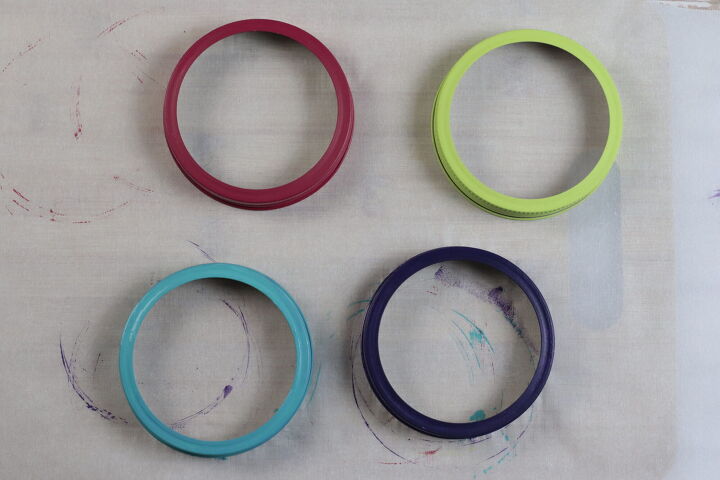
Wipe off your mason jar rings to be sure they are clear of dust, etc. Lay them on your parchment paper and using a brush, paint them and allow to dry completely (at least 30 minutes to one hour). I suggest giving each one two coats.
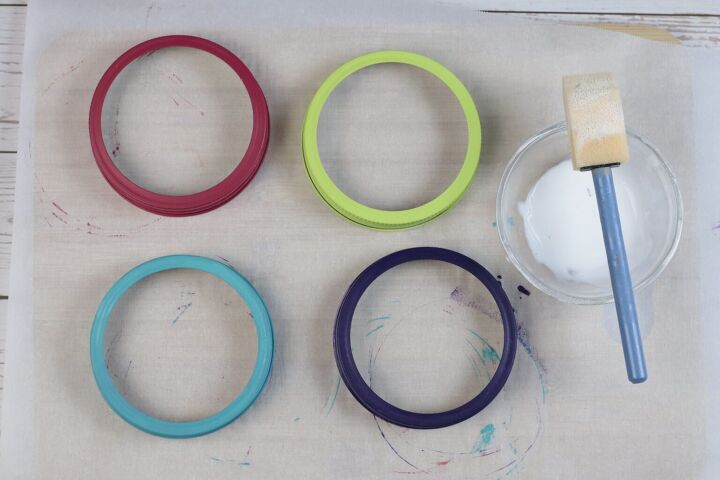
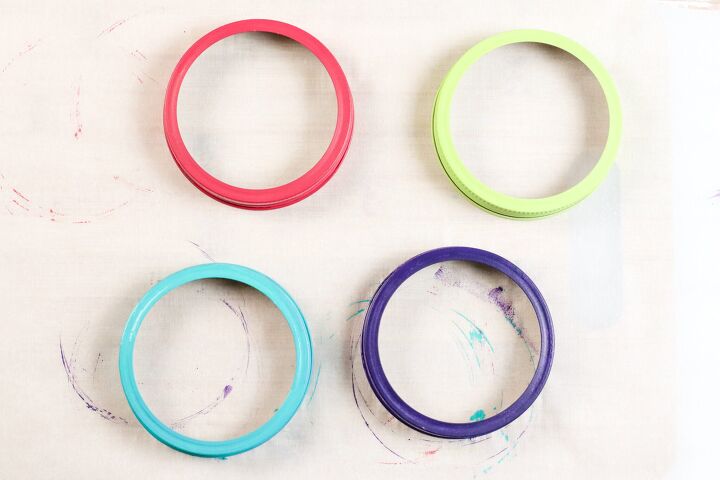
Once your paint is completely dry, using a clean brush, completely cover each mason jar lid with the Mod Podge and allow it to dry to completely (at least 30 minutes to one hour). Be sure to coat them inside and out.
Cut an 18” piece of twine for each ring and tie around each. You want to allow enough length for easy hanging from your branches.
Putting it Together:
Lay your mason jar rings with the flat side down, either on your silicone baking mats or your parchment paper.
Using a measuring cup, scoop up some bird feed mix and fill each ring until it is overflowing a bit. Press down with the bottom of the measuring cup. The ideal level is if the mixture is level(ish) with the edge of the ring, but it doesn’t have to be perfect of course.
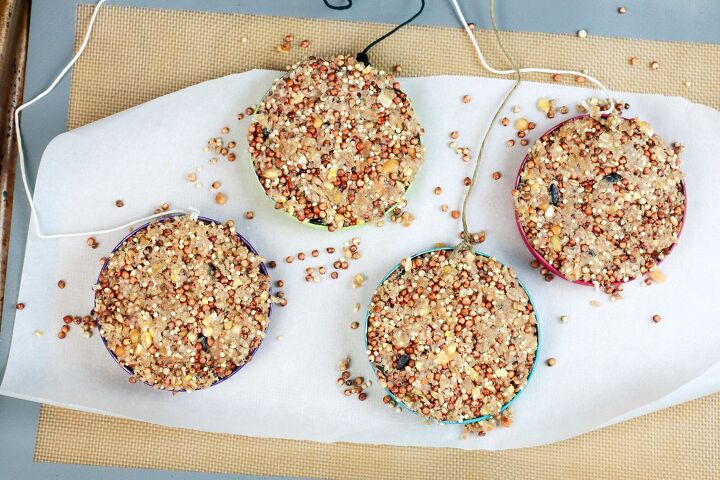
Allow your Mason Jar Ring Bird Feeders to dry overnight.
***Keep away from pets! Because this recipe has peanut butter, it may attract dogs.
Check the next morning to be sure the mixture is nice and hard. If not, it will fall out of the ring!
Hang the feeder from a tree branch or other sturdy surface, and you’re all set! Different kinds of birds will love having a new source of food, and you’ll enjoy watching them flit about in your backyard.
Where is the Best Place to Hang a Bird Feeder?
The best place to hang a bird feeder is near a window where you can watch the birds come and go. It’s also important to make sure that the bird feeder is hung in an open area so that small birds have a place to perch while they’re eating or you can put your feeder on a shepherd’s hook.
Easy Projects for Cool DIY Bird Feeders
Try these fun projects to make your own bird feeders!
- Hummingbird Feeder
- Homemade Hummingbird Nectar
- Chicken Feeder
- Ice Cream Cone Bird Feeder
*Contains affiliate links, which a small commission is received, at no extra cost to you.
Resources for this project:
See all materials


Comments
Join the conversation
-
What a fun project and now I have a recipe for a “suet” mix. Thank you!


Frequently asked questions
Have a question about this project?
I thought it was “ jars”. as listed? Maybe change that in the title - but good idea! Love the birds!