


Log Bird House DIY (Canal & River Trust Collab)
Here's 2 ways on how to make a log bird house, in collaboration with the Canal and River Trust charity. Using a cherry tree log, I'll talk you through various tools from beginner to intermediate, making several log bird houses if desired.
A few months ago, I had fun making bird houses. Well, ok... technically, each one was a log house but hollowed to mimic a natural bird house. I've noticed you can buy them as a bird house kit, but if you've stumbled across a free log on your travels, then you might want to consider this.
Here, I'm going to show you how to create your own bird house build using logs, two different ways. And there are many other ways you can design them, but I only gave myself a day to make them.
I also thought it would be fun to create them for the canal towpath in my local area, Doncaster, with the help (and permission) from the Canal and River Trust.
Tools and Materials For My Bird House Idea
Please note that as an Amazon Associate, I earn from qualifying purchases made through links.
- A Log (I used a cherry log)
- Hand saw
- Combi drill
- Auger drill bit (or mortice and tenon machine)
- Drill bit
- Stainless steel screws
- Offcuts to mount
- 25mm flat wood drill bit
- depends on the birds you want to attract
- Masonry drill bit and rawl plugs if mounting to a brick wall
Note, depending on the bird house design you prefer, if only using a hand saw and drill bit, you may need to clamp it in a vise. Or temporarily screw the bottom edge on an angle to a workbench.

How to Make a DIY Log Bird House
Log House Design Method 1
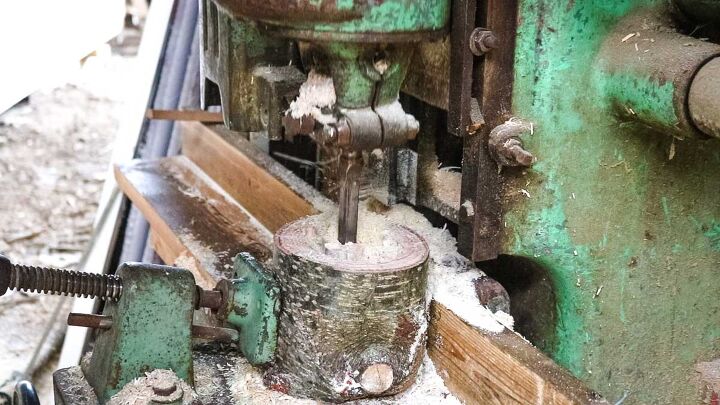
To be your own bird house builder, we'll start with method 1, which focuses on less power tools.* Side note, don't be put off by the industrial morticer below.
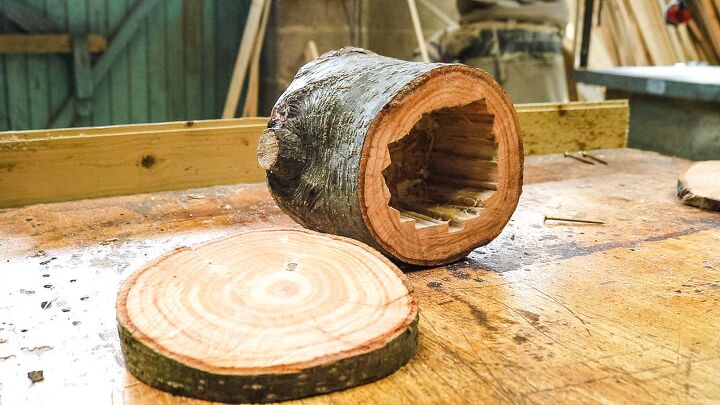
- Before you create hollow log bird houses, cut a top disc off but hand, roughly about 1" thick. It doesn't matter if your cut isn't straight. In fact, a slope will be beneficial for rain to drip off.
- Then make another cut about 7-8" further down, which will be the main body of the log bird box.
- You can cut another disc for the base if you prefer, but it won't be needed if not drilling holes deeper than its height.
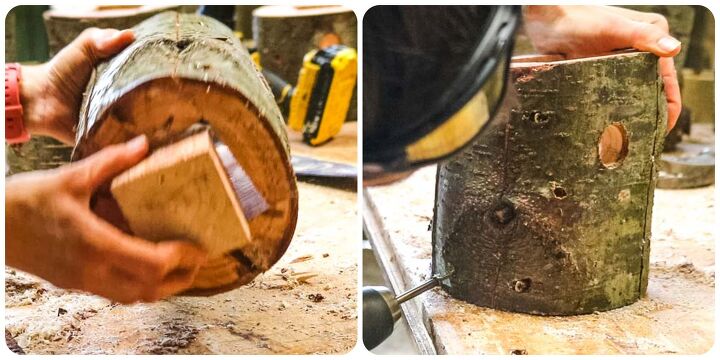
Hollowing the Centre of a Log Bird Box
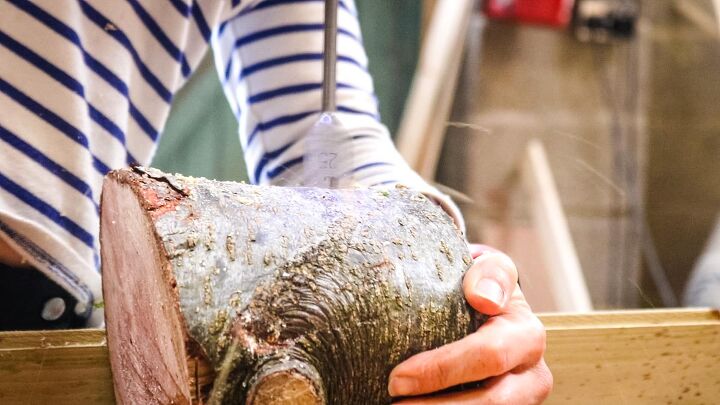
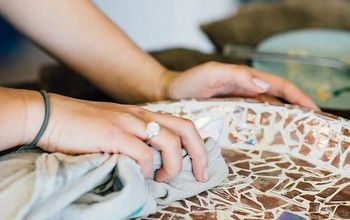
Now clamp the log to a vice, or partially screw the bottom sides down to keep it stable. Above, you can see I'm using a tenon and mortice machine, but I'm going to assume you don't have one.
Instead, using large auger drill bits, make a series of holes in the centre of the log. I recommend starting dead centre as this is the softer area, called the "pith".
Tips on Hollowing
- To remove any loose excess, you'll find a rasp is a great tool
- You could even use a chisel
- Also, if you decide NOT to go all the way through, you won't need the 2nd disc to screw on the bottom
- Although this method is the longest out of the two, you'll be able to hollow more of the log for a more spacious log nest box for birds
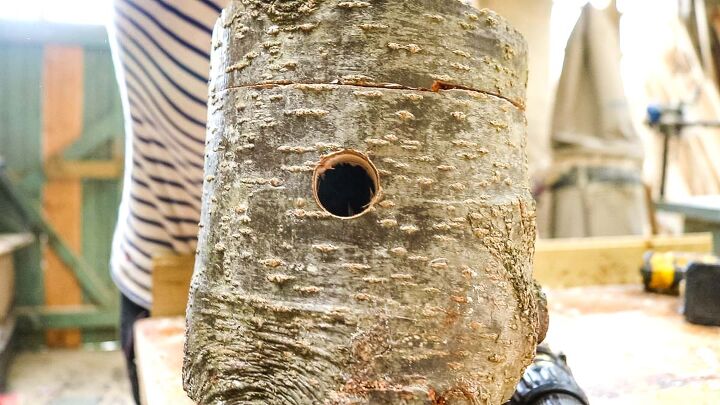
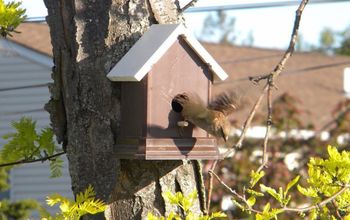
What Bird House Hole Sizes Should I Use?
Depending on the types of birds you want to attract, you'll need to choose your bird hold size wisely. Also, as my cherry tree log wasn't massive, I felt that I needed to focus on small birds so it wouldn't get cramped.
Here's a quick guide to help you:
- 25mm = Blue tits, marsh tits and coal tits
- 28mm = Tree sparrows, great tits, pied flycatcher
- 32mm = Nuthatches and house sparrows
- 45mm = Starlings
Please note that I am not a bird expert, but after several searches online, I have found the entrance height of 10-15cm (4-6") from the base is quite standard.
DIY Bird Nest Box Method 2
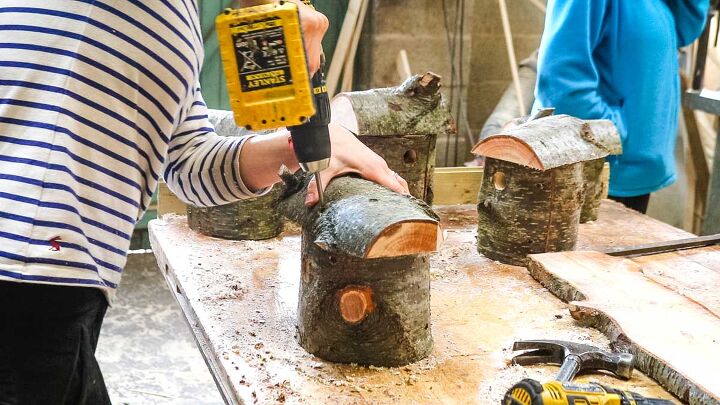
For the 2nd method, can be again, done with by hand or with serious power tools. If opting for the latter, it is no doubt quicker to make a batch of them as I did here.
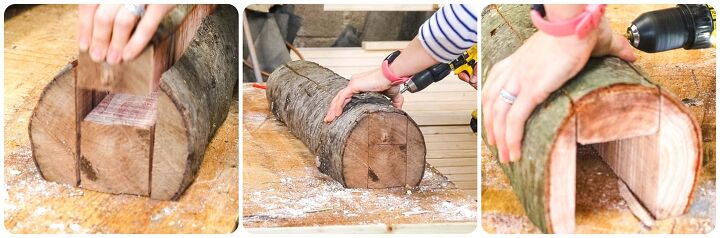
But the idea is that you cut 4 sides off, leaving a square innard, which will be removed. But don't discard it, as we'll use them as the bases too.
Types of Tools You Can Use
- Band saw* method my Dad used*
- Chain saw
- Hand saw
For a heads up, my Dad used his industrial band saw, hence why I didn't use it. I was only going to make one and by hand. But due to the machinery at my Dad's woodyard, he insisted on ripping the log down in minutes.
I've also seen one being made with a hand saw, then axe to finish off splitting the sides.
Screwing the Log Back Together
Once you've got 4 sides and an innard to your bird house, it's time to screw it back together.
Predrill and screw the 4 side pieces off, but make sure you don't do it on an angle, so you avoid screwing to the centre piece. And that's speaking from experience!
Then remove the square innard, which temporarily helped to hold its shape. Also, ensure you put enough screws in, so when you do cut them, it won't fall apart.
Adding a Base to the Bottom
I then cut blocks from the innard and slot them back in to form its own base. Then predrill and screw from the bottom sides.
The beauty about this method is that when you come to screw a mounting piece on the back, you can how deep the sides are.
This gives a depth gauge of how long your screws can be because you don't want to cause injuries!
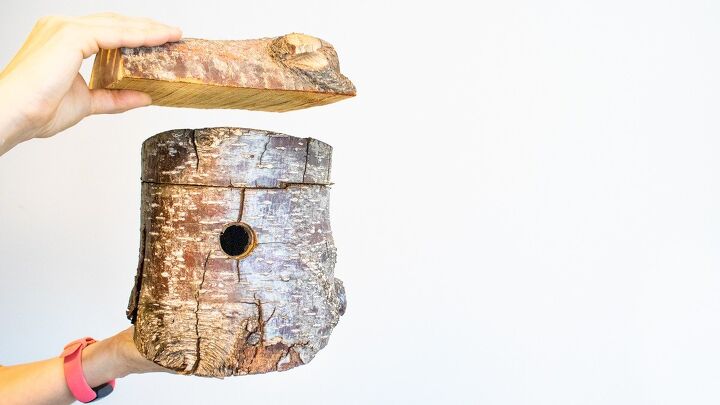
Screwing a Roof on Top
And finally, it's time to add a roof on top of your log bird nest box!
Because I had more cherry logs accessible, my Dad ripped another one down. Yes, you could absolutely hand saw an edge off. The drill and screw it on top.
Alternative Bird Box Rooves
- If you've cut on a slope, you could screw a piece of flat wood on top and felt it
- Glue pennies on top
- Slats of wood
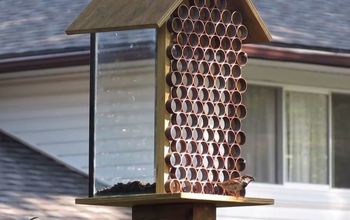
- Copper sheet
- Piece of slate glued on top with good strong adhesive
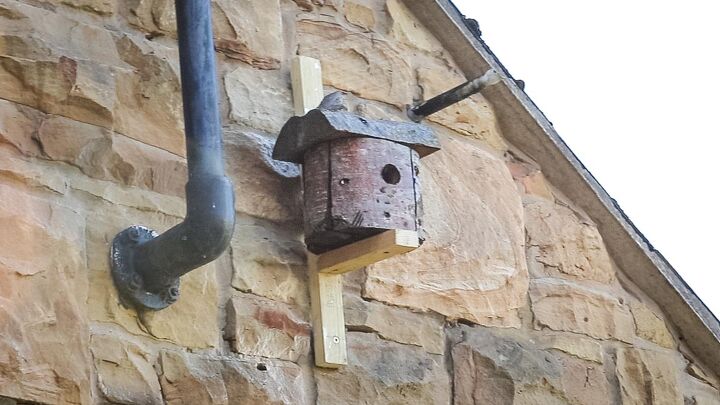
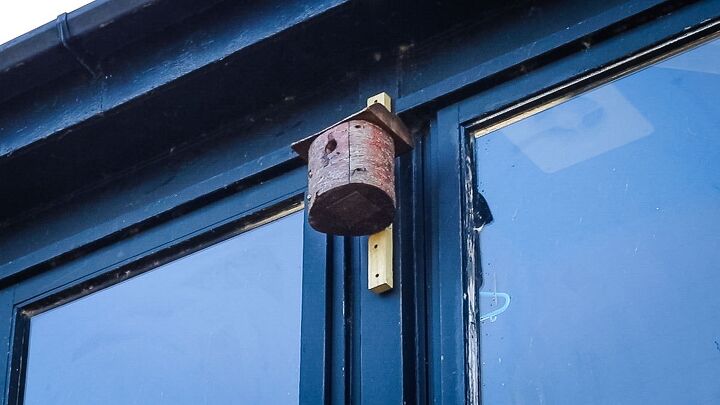
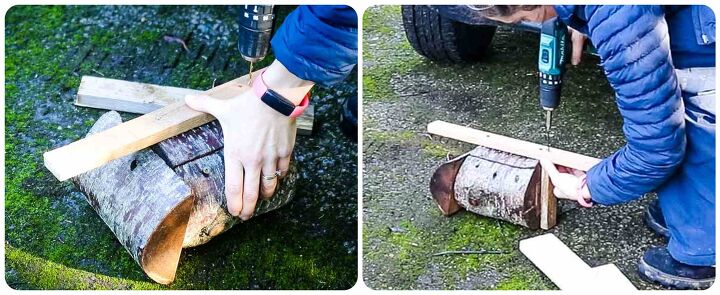
Mounting Bird Boxes
There are several ways you can mount a bird house to a wall or tree. A more expensive, but tidier option is using metal brackets - preferably stainless steel so they won't rust.
However, as we had 6 log birdhouses to hang, we chose the quick and cheap way using offcuts screwed to the back.
On areas where they were fairly sheltered, we used one strip. But, if you want them even stronger, you can screw a bottom piece to form an L shape. And, an extra step could be to add a mitred piece for a gallows bracket if yours are really heavy.
Choosing the Right Location For Your Log Bird House
While working with the Canal and River Trust, we carefully selected our bird house locations so they were safe and comfortable.
Here's a few factors we considered:
- avoid South facing spots, to prevent birds from overheating
- We ensured each nest box was at least 2m off the ground, on a wall, watch tower, tree or under eaves
- No clutter in front, so it had a clear flight path
- Sheltered from rain and wind where possible
- Didn't position them close together, to avoid disturbances*
*As you can see from our What Three Words locations, we positioned them miles apart in various Doncaster (South Yorkshire) canal locations.
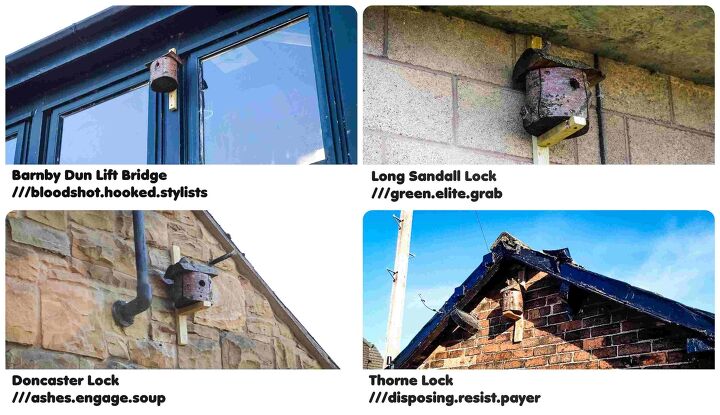
What3Words Log Bird House Locations in Doncaster
Here's a list of outdoor birdhouses you can find in the Doncaster area.
- Barnby Dun lift bridge tower ///bloodshot.hooked.stylists
- Long Sandall Lock ///green.elite.grab
- Doncaster Lock ///ashes.engage.soup
- Thorne Lock ///disposing.resist.payer
- Sprotbrough Lock ///dispose.tinted.majors
- Mexborough Low Lock ///multiples.slurred.dote
You Might Also Like
- Wooden bird feeding station with DIY suet log feeder
- How to make a bird table
- DIY chicken pen
- How to build a chicken coop
- DIY dog kennel
- Dog lead holder
Materials
- Log
- Stainless steel screws
Tools
- Hand saw
- Auger drill bits
- Combi drill
- 25mm drill bit* depending on what birds you want to attract
- Band saw* if not using a hand saw
Instructions
Method 1 (Flat roof)
1. Hand saw a 1" thick disc off a log.2. Then cut about 8 inches further down.
3. Clamp the log and using an auger drill bit, make a series of holes in the centre to hollow the log, but avoid going all the way through. *Adding masking tape on the drill bit helps as a gauge.
4. Drill an entrance hole with a 25mm flat wood drill bit.
5. Predrill and screw the disk back on top, then mount to a wall or tree using offcuts screwed on the back.
Method 2 (Cut 4 sides off the log)
1. Cut 4 sides off the rounded edge of the log using a band saw or clamp in a vise and do with a hand saw leaving a square inner.2. Put everything back to a log and drill and screw the 4 sides to each other, avoiding the square inner.
3. Drill an entrance hole with a flat wood drill bit
4. Cut a block from the square inner and slot into the base, then drill and screw it in.
5. Using another tree face, drill and screw on top, or use a piece of wood, felted, etc.
6. Then mount an offcut on the back so you can use it to fix to a wall or tree.


Comments
Join the conversation
-
Anyone making this really nice project, please use a vise. A "vice" won't work!
-
Wonderful, have you seen any birds in them yet? Thanks for sharing.


Frequently asked questions
Have a question about this project?
Very charming. Wondering if I placed in side yard, would Carolina wrens nest there rather than my wreaths on front door? So sick and tired of welcoming guests with bird dirt everywhere, notwithstanding they fly into the house if you don’t knock before opening. This is a bird house I could enjoy