


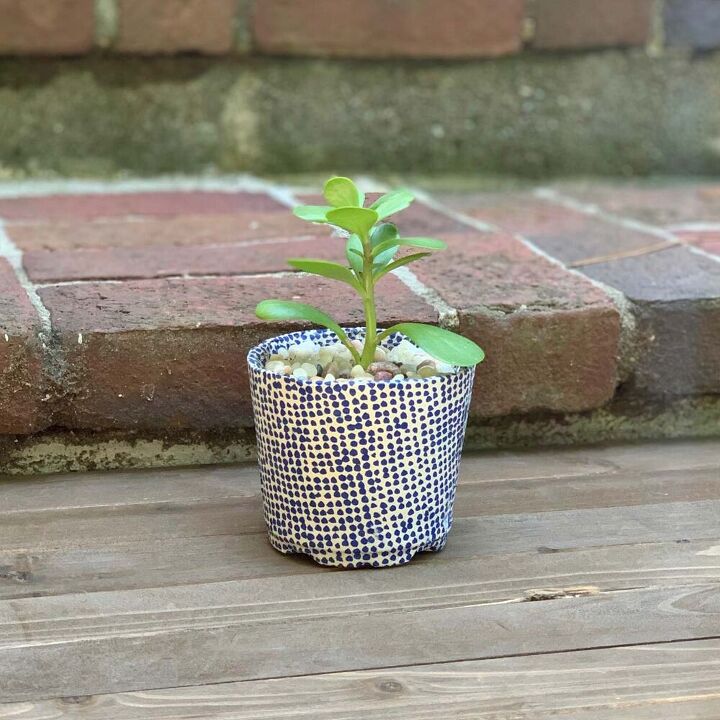
Transform A Plastic Plant Pot Into A Durable Planter
Use a cheap plastic pot and turn it into a durable outdoor planter, using cement. Decorate it with designer decoupage napkins.
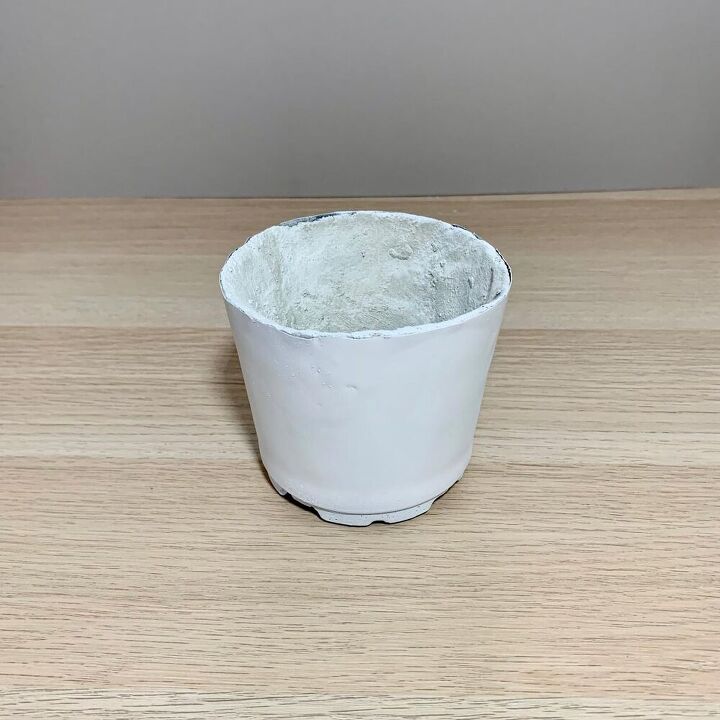
Here’s a neat trick! Take a cheap plastic pot- you know, the ones that you take the new plant out of and throw anyway, and coat the inside with cement! It’s easier than making a whole cement planter.
This way you don’t have to look around for the perfect inner mold. You also don’t have to worry about demolding anything. It’s so easy!
Now you might be asking, why not just keep it as a plastic planter and not use cement?
Okay, fair question. Here are multiple reasons I wanted to do this.
- Durability and convenience are the biggest reasons. I don’t keep plants indoors until the dead of winter, so I need something that won’t blow over in the wind and not start cracking in the hot sun. I’ve had this problem many times before with plastic pots and they just really aren’t practical for outdoor use.
- Using a skim coat of cement allowed me to keep the smooth plastic sleeve on the exterior so I could easily apply a decoupage printed napkin to it and it should maintain its look. I’m a few months in and so far it looks the same as it did the day I first put it outside with a potted plant.
- The idea of keeping the plastic sleeve is to allow you to do a beautiful decoupage design on a cement planter that won’t peel off or turn brown. You see, the plastic sleeve is important because it protects the designer napkin print from getting icky.
- Once the soil gets wet, the minerals in the soil as well as moisture, would come through if this was a typical cement planter.
- There would be plenty of issues if you decoupaged the napkin right onto the cement. Even if you seal the cement first, it’s risky. This is a great way to keep the printed napkin intact.
See what I mean? It’s just basically a sleeve- a protective coating around the planter, but not on the bottom. This allows some extra evaporation to take place. Do you see it now? The best of both worlds! ;0}
- My plants are all succulents and will do by far and away better in a cement pot, than a plastic pot. If you live in an area that gets a fair amount of rain, then you are asking for root rot with a plastic pot- despite using gravel, perlite or other drainage materials.
- If you’ve made a concrete planter before, then you know one of the bigger challenges is that you need to find a suitably size inner and outer container to use as your mold. If the inner mold is too large, the walls may crack.
- If the inner mold is too narrow, then you are probably cheating your plant out of sufficient growing room. This method of making a planter took half the amount of time that it would take me to make a standard concrete planter.
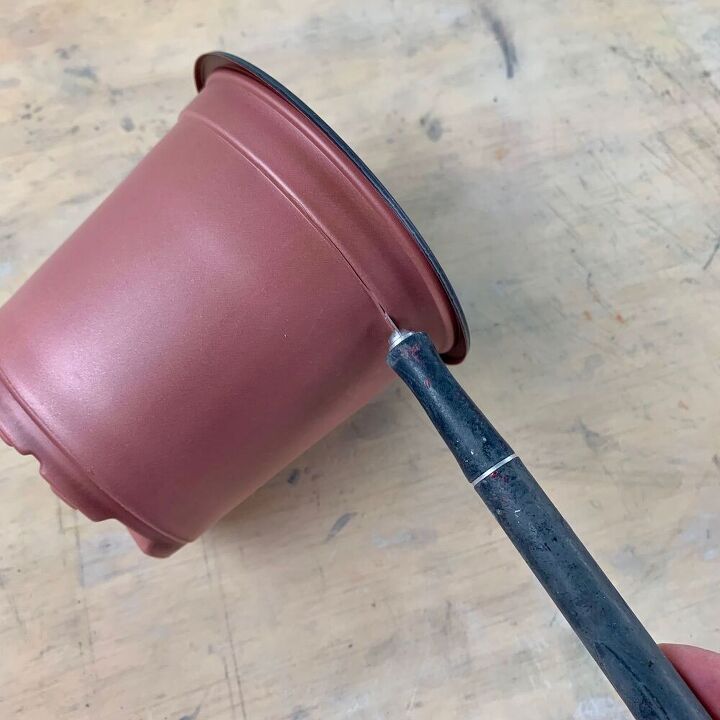
When you go to add the decoupage napkins, it will look nicer if you have a clean straight edge, rather than the beveled lip, so trim the lip off the top of the plastic pot using an X-acto knife.
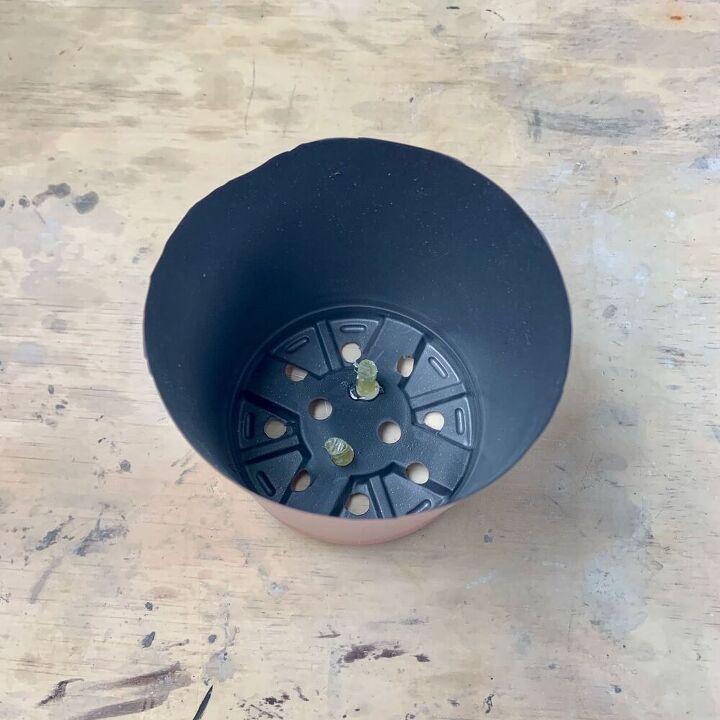
Heat the glue gun and cut 2 pieces of straw, each about an inch long. Glue both ends and stick through the holes and glue in place. Be sure to have at least ¾” coming up into the planter.
**If you love making concrete projects, then check out my Pocket Guide to Concrete Mixes! I tested 6 mixes and made a handy reference chart. It's a FREE download. 😉
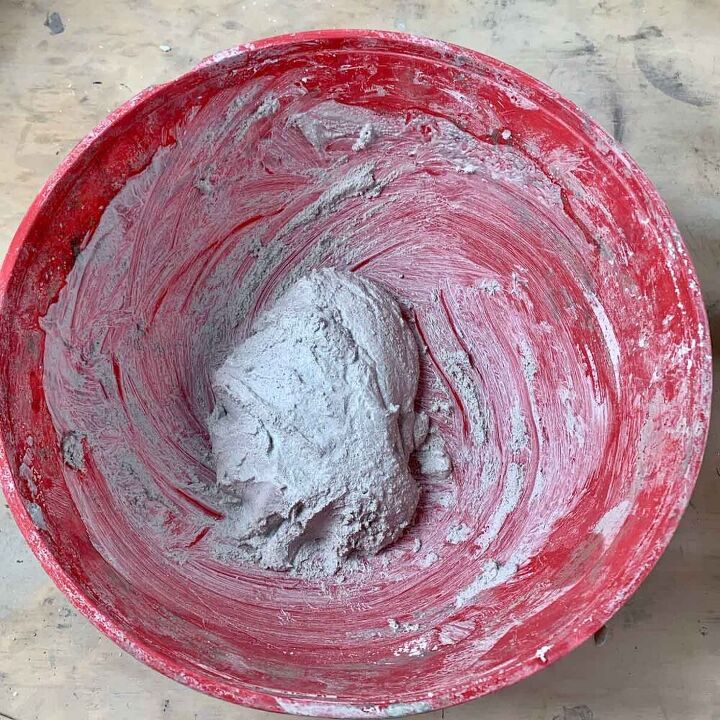
Mix the cement to a moldable consistency. It should be fairly thick, like dough.
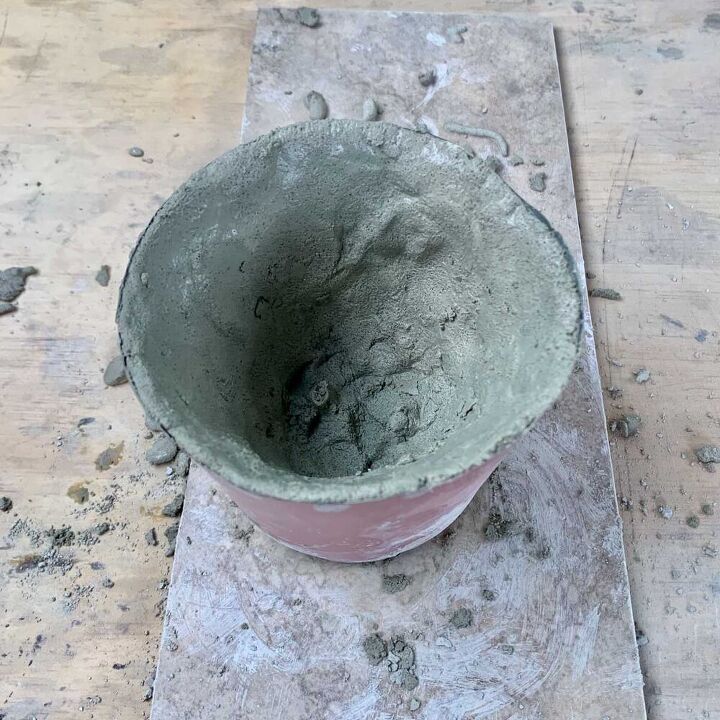
Apply the cement to the sides of the container and the bottom. The bottom should be about ¼” thick- take care to not cover up the straws. Now push the cement around the inside edges.
These pots are made from a very flimsy plastic that is almost paper-like making it difficult to mold the walls. So hold one hand on the outside in the same place you are applying the cement on the inside to provide some rigidity as you apply.
Build the walls up to about ¼” thick. It probably took me about 20 minutes to get a sufficient build up. As you work with it, this rapid setting cement will begin to set which will make it easier to work with after the first 10 minutes or so.
The planter walls don’t need to be perfectly even since the inside won’t be seen. Let this cure for about an hour, depending on climate conditions.
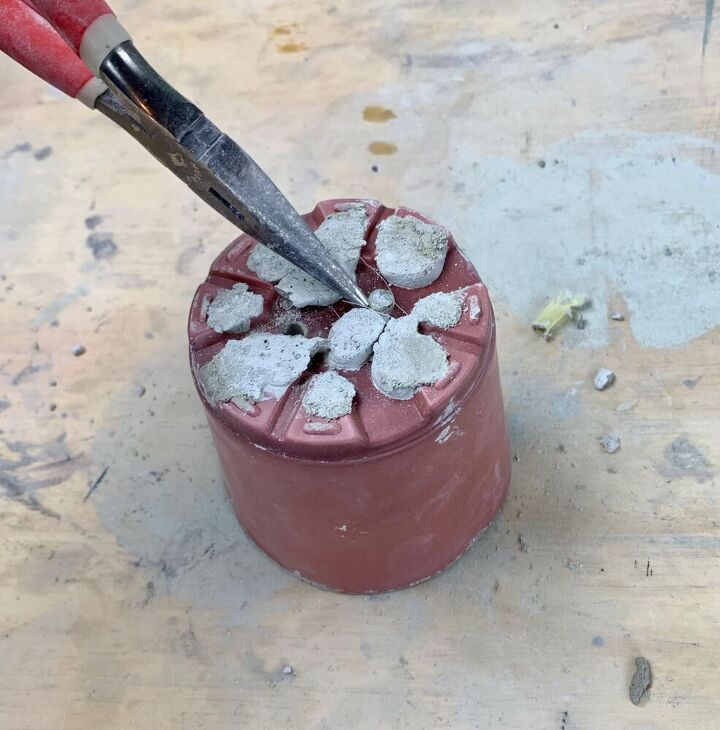
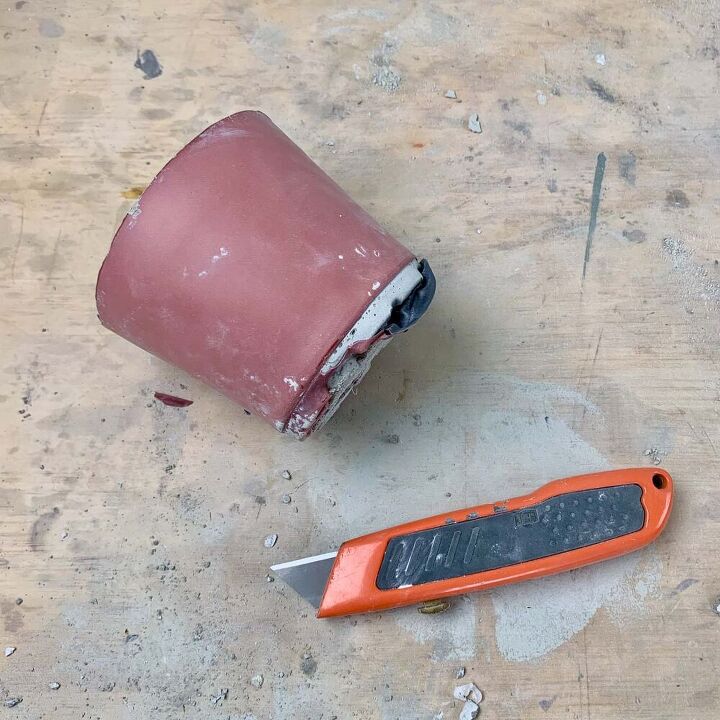
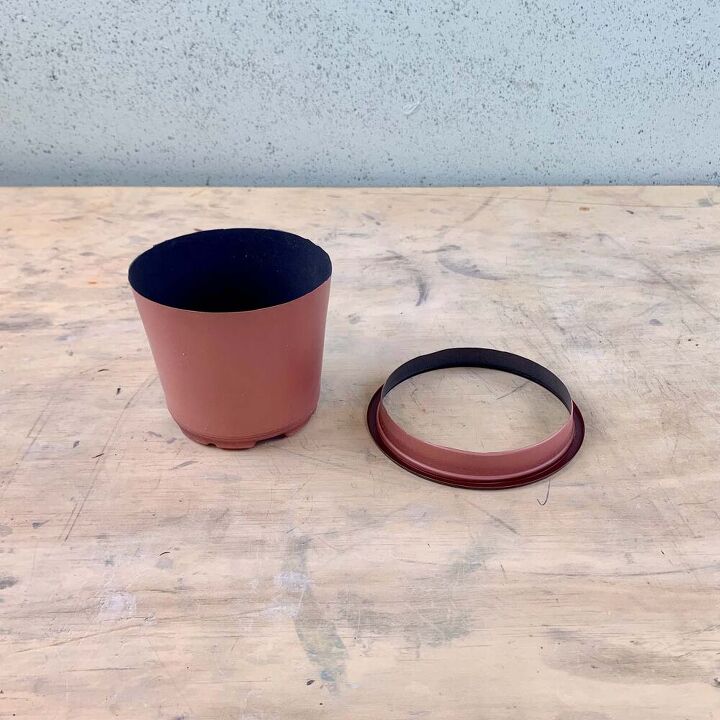
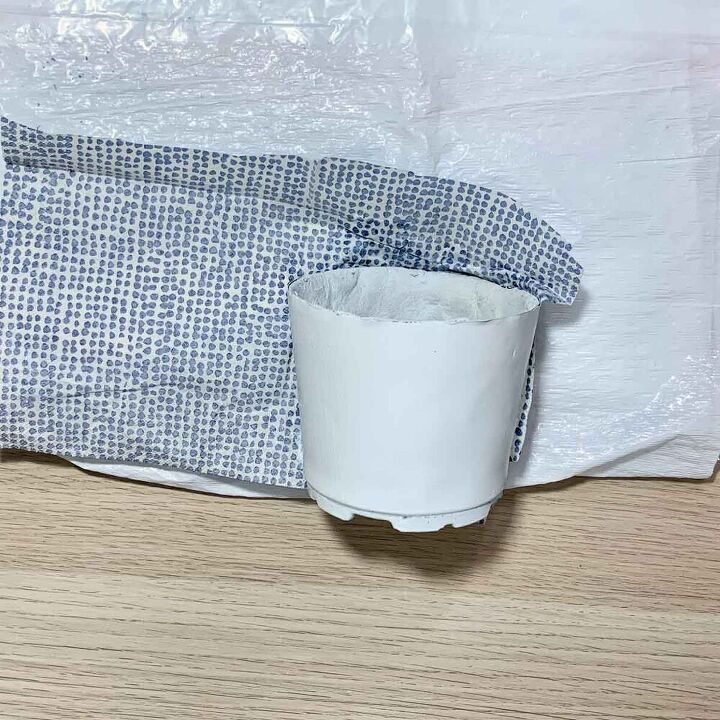
To make this planter function better for plants, you will want to trim off the bottom. This will allow the moisture in the soil to evaporate, keeping a better environment for your plant. This is especially true if it’s a succulent, who prefers a dry environment.

First, start by removing the drainage straws. Pliers will work best for this. Next, use the X-acto and make a slit around the planter where it starts to bevel in. You should be able to peel away the plastic
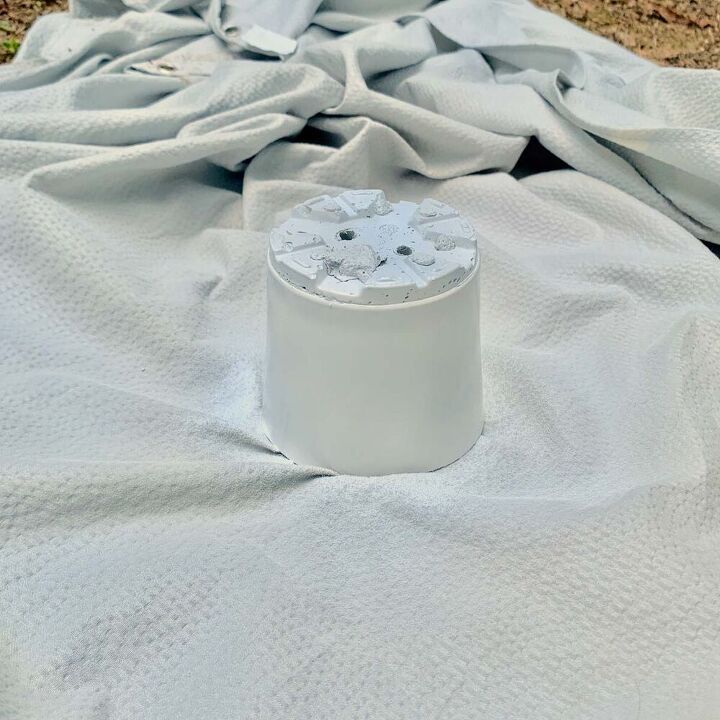
Next, prime the plastic with a base coat of paint. Follow the manufacturer’s instructions on the can and spray the pot. Let this dry completely before moving on to the next step. I waited until the next day to be safe.
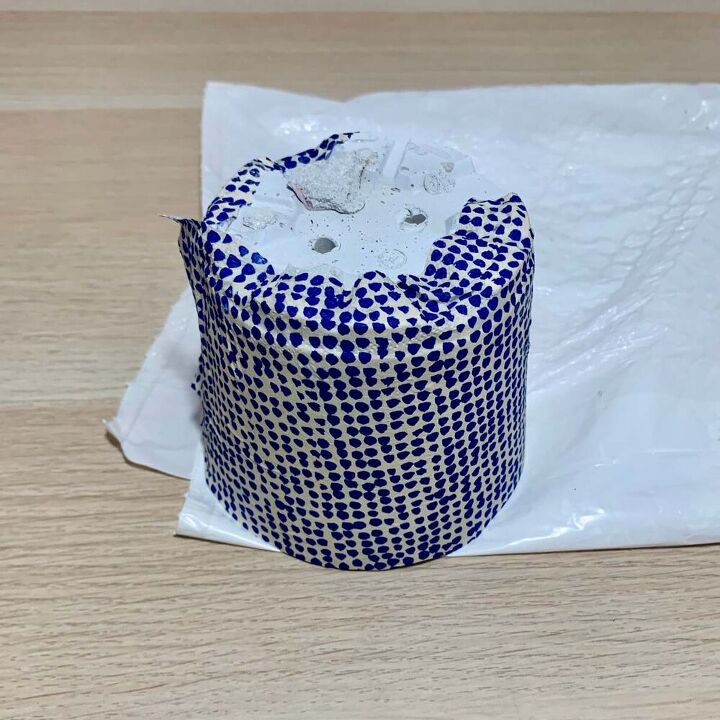
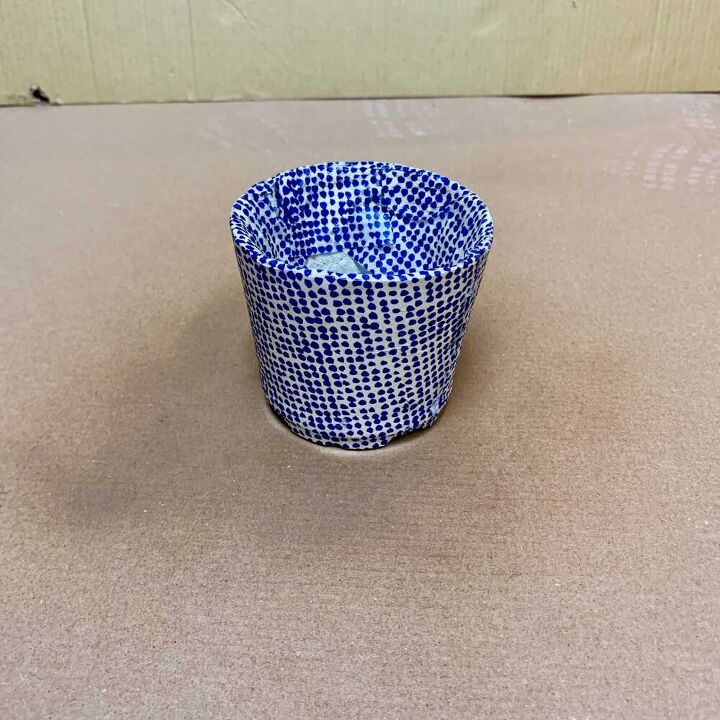
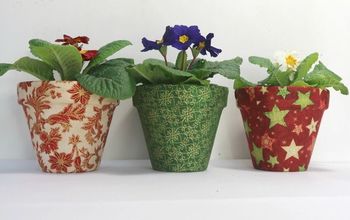
Now you can decoupage the outside of the cement/plastic pot. First, open the napkin so it is full size, then test where you place it on the planter and check to see if it covers the whole way around the container.
If not, then you will n, then you will be able to cover the pot without adding a second piece like I needed to since I used cocktail sized napkins.
You can position the printed napkin any way you’d like. I wanted mine to run over the top and a few inches down inside so that you would see the pattern until where it hits the soil. I also tucked mine underneath the bottom.
Once you have made a mental note of how it will be placed, peel away the white backing from the napkin. Some napkins have one layer, some two. Often if there are two layers, they both come off together when separating from the printed layer.
**For other neat planter tutorials, check out my other planter projects. 😉
Lay the napkin on your table with the non-printed side facing you and in the direction you will have it placed on the planter.
Apply the Mod Podge in an even coat on one side of the container. Some people apply this directly to the napkin, but I find it much easier to apply to the pot.
Don’t apply the Mod Podge to the whole pot because the glue will dry too quickly. Be sure to apply the glue evenly and lightly.
Now, starting at one end of the napkin, lay the pot on top of it and roll it slowly.
Smooth the napkin with your fingers as you go. When you get to where there isn’t any glue, stop and apply the Mod Podge to the rest of the pot. Continue pressing the napkin around the pot until you reach the beginning again.
You’ll have a seam to deal with and the easiest way I found to finish it is to trim the napkin so that it goes about ¼” past the seam. Then very carefully tear the ends. This will look more natural than making a straight cut.
If you have wrinkles or bubbles, use the water sprayer to spray a light mist over those areas and gently smooth it with your fingers.
If this was your first time trying decoupage and it didn’t turn out the way you wanted, you can redo this part. Just grab a second plastic pot (they should have come in a pack of 4) and trim off the bottom and top lip, then spray the base coat and try it again.
To make this plastic/cement planter durable enough to be outdoors, add a protective layer to it with the urethane spray. I recommend applying two coats if this planter will be fully exposed to rain.
Resources for this project:
See all materials


Comments
Join the conversation
-
OK,cool.
-
Love the idea of not throwing the pot away and upgrading it.


Frequently asked questions
Have a question about this project?
In step 5 you say to cut off the plastic with an X-acto knife where the pot starts to bevel in. Could you please explain what exactly should be cut off? The entire bottom of the pot or ?