


Upcycle an Old Watering Can Into a Solar Light Display
Aarrgh!!!! It won’t stop raining here! I know getting all of this precipitation is good to fight against the fire season and inevitable drought. The flowers I just planted are probably loving all of the moisture. But I am personally ready for some sunshine. I don’t know about you but I am one of those people whose mood is definitely affected by the weather. The good news is that there were enough breaks in the weather for me to get my latest project done and it has solar lights which most definitely is not sunshine but they are sparkly and cheerful and fun.
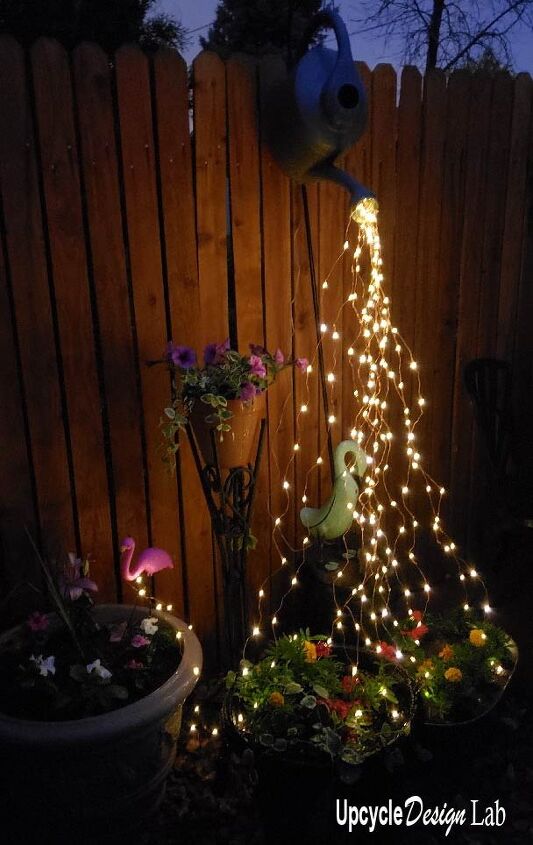
Have you seen those lighted watering can displays all over Pinterest? I have really been wanting to make my own. I thought it was going to be a simple project but I did run into a few bumps along the way. There must be different types of solar lights that you can buy but I used a single 72-foot strand so I had to think about how to string the lights and where the solar panel was going to go. Anyway, after a little trial and error, I was able to figure out the project.
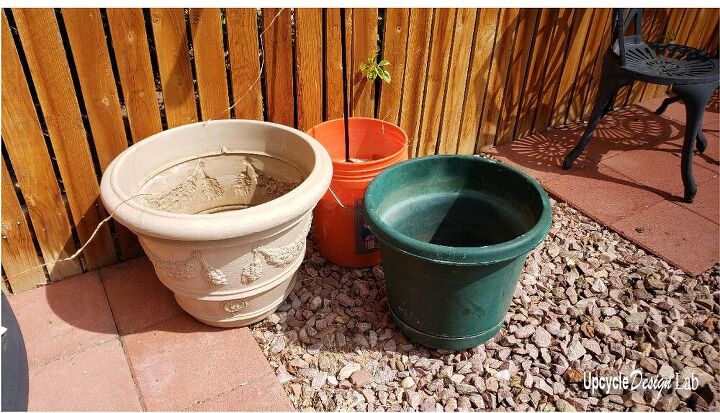
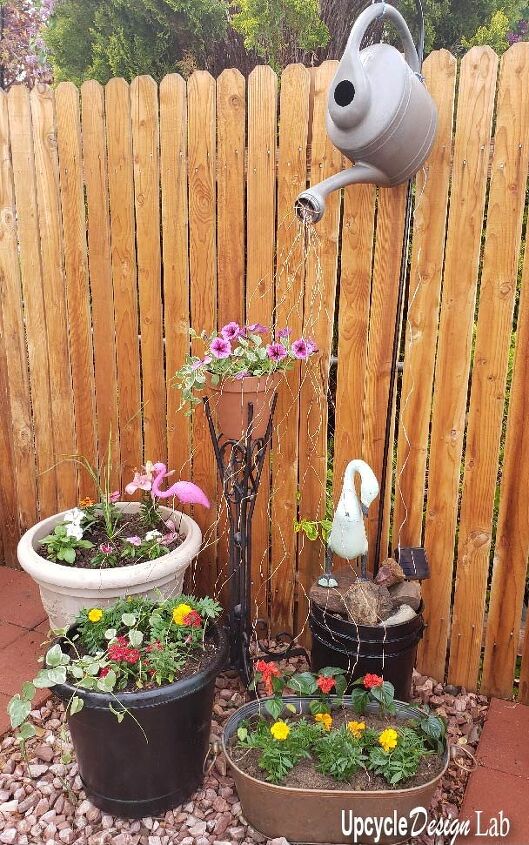
When I started the area looked like this and I thought that I was going to spray paint the watering can and the planter, add some flowers, string the lights, and be done. In the end, the whole display got a lot bigger but I am pretty happy with how it turned out.

When I did a mock-up of my idea I discovered that the watering can I had was way too big for one little planter. Fortunately, I found some other pots and things to use as planters and it also meant that I needed to plant more flowers another item that is full of cheer.
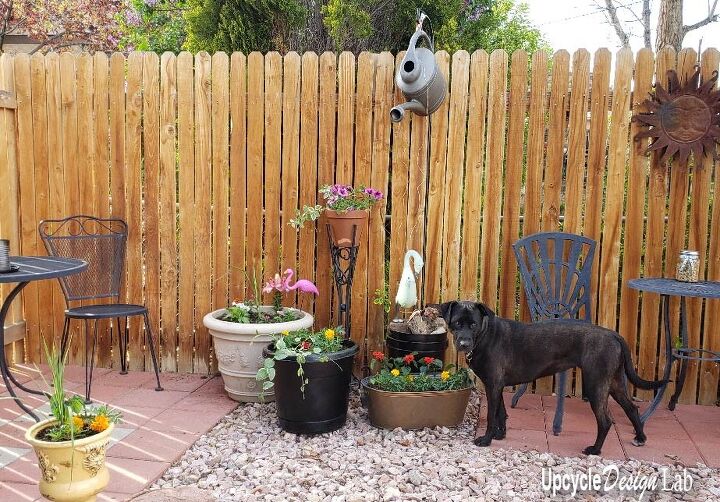
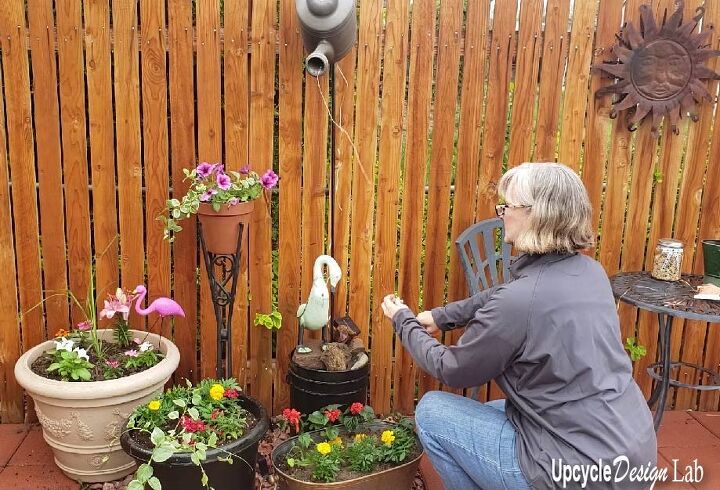
I moved the pots quite a few times before I got the arrangement that I wanted. To hang the watering can I used some beaded wire and a shepherd’s hook. Once the pots and shepherd’s hook were in place I got to work planting all the flowers.
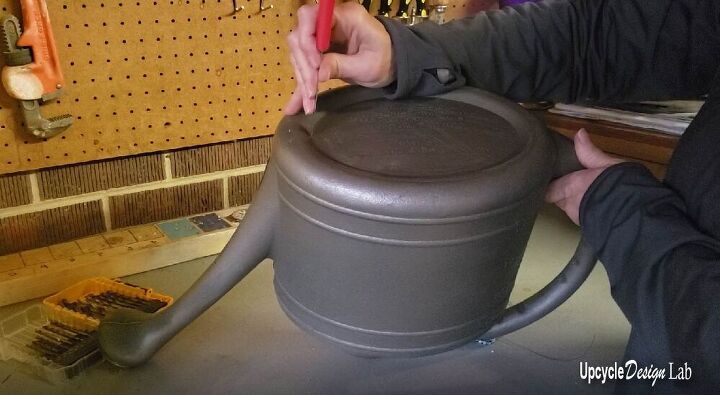
To be able to string the lights through the watering can I cut through the bottom of the plastic watering can with a knife and then pulled the light strand through the spout of the can.

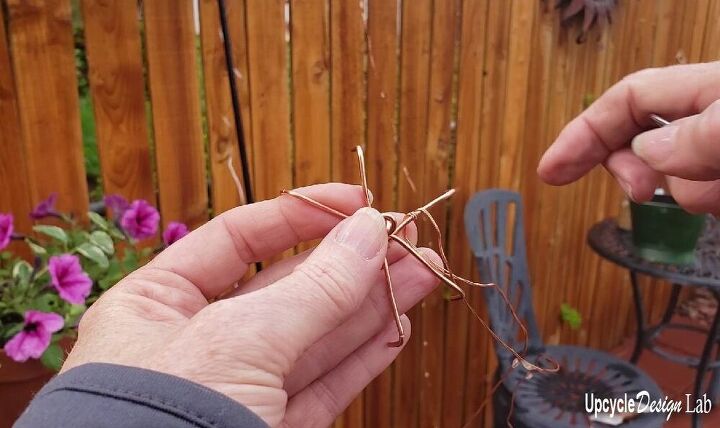
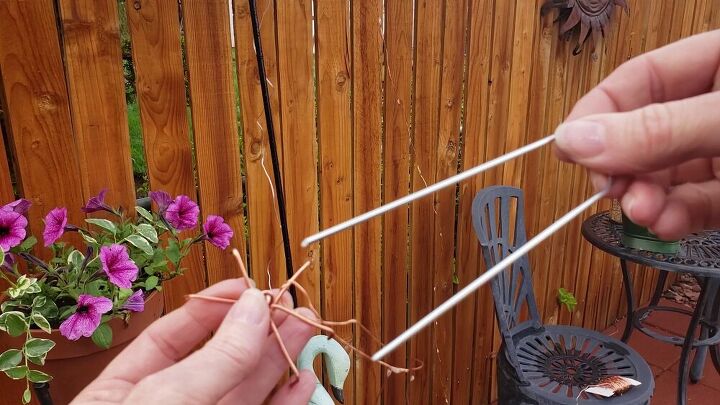
To hold the string of lights to the watering can I made a sort of pie shaped wire cap to fit over the end of the spout.
For the bottom I used metal garden staples to hold the lights in place.
I was a little worried about getting the lights all tangled up but once I started working on hanging them the projects went quite smoothly. So even though it is still raining every day I have a little bit of sparkly magic in my backyard. 🙂
You can find more details in the video below.
Thanks for stopping by.
Happy Upcycling,

Advertising Disclosure: Upcycle Design Lab may be compensated in exchange for featured placement of certain sponsored products and services, or your clicking on links posted on this website.
Resources for this project:
See all materials


Comments
Join the conversation
-
I made one with a tin bucket and string of solar lights.....punched holes in the bottom of bucket and stuck lights in the holes..then put clear celophene paper in the bucket to make It look like water ....had so many compliments about It from family and friends...LOVE It....Regards from Catalonia....borders with south of France......
-
I'm working on mine now. Thanks for all the tips.


Frequently asked questions
Have a question about this project?
Have you considered painting the watering can with glow in the dark paint? I think the effect could be very effective.
what did you use for the lights coming down from the watering can, are they also on a timer or a solar light?
Where did you put the solar panel?