


The Perfect Small Balcony Makeover in 10 Simple Steps

Like millions of Indian city-dwellers, my apartment comes with a teeny-tiny balcony. For most people, this small space tends to be forgotten, only used on rare occasions. However, I'm a firm believer that every single inch of someone's home has the potential to be put to good use. No matter where you live in the world, it's likely that you also have a balcony that you think is too small to be a meaningful addition to your living space. However, this is not the case.
With the right inspiration and a few cheap materials, you can begin a small balcony makeover that will transform the space into somewhere that is truly worth spending time. I always wanted a quiet space to read and be alone with my thoughts, which is why I turned my balcony into my own cozy retreat, where I can happily spend a summer afternoon lounging around with a good book. No matter where you are in the world, you can benefit from a balcony makeover India style. Here's how I did it.
Tools & Materials
The best thing about doing a condo balcony makeover is that you really can go in any direction you want with it. I personally opted for a more traditional Indian aesthetic for my tiny balcony makeover, but it's really all about personal taste. What is key is being thrifty and crafty, as this will allow you to create a truly personal space without breaking the bank. With this in mind, here is everything I used for my balcony makeover:
- Glue Gun
- 'Long Birds on a Wire' decals, bought from Amazon.
- A vintage-style Jute rug, also from Amazon.
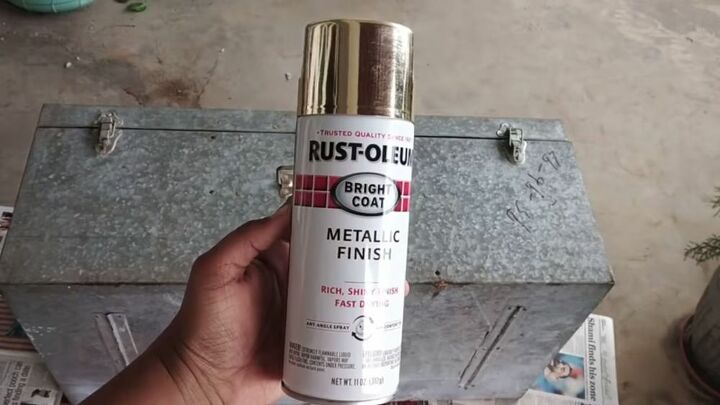
- Gold spray paint.
- Some old stools and planters.
- A vintage luggage trunk.
- Wall fabric.
- An embroidery hoop.
- White chalk paint.
- A roll of faux English ivy.
- Zip ties.
- Home cleaning products.
- Aluminum windows.
- Roll-on window mesh sheets.
The first thing I did was to gather all of my materials in one place so that I could complete my balcony makeover in a single afternoon. I made sure to lay out plenty of newspaper on the floor, as my makeover involved a lot of chalk and spray paint, which you don't want to accidentally get on your new rug! Since my balcony is, of course, tiny, I quickly realized that I was best off assembling all of my furniture and decorative pieces in my living room, where I had more space to move. Also, if you're using spray paint, as I did, don't forget to make sure your workspace is well-ventilated.
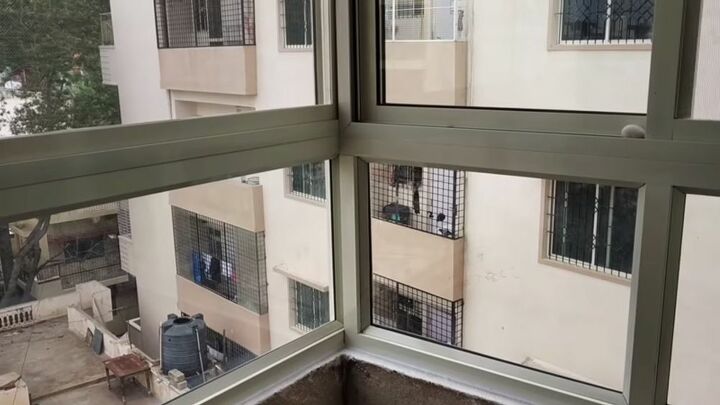
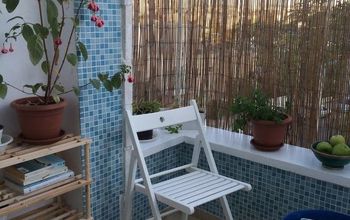
If, like most condo owners, you have an open balcony, you can still transform it into an extra room. My balcony was open-air, so I just used some plastic window shutters to create the missing walls and seal-off the space from the outside world. I also added some roll-on sheets of window mesh to give the space some much-needed privacy from the neighbors. Once the balcony was sealed, I got to work giving the space a thorough clean, before applying a few coats of white paint to the walls to freshen up the room a little bit.
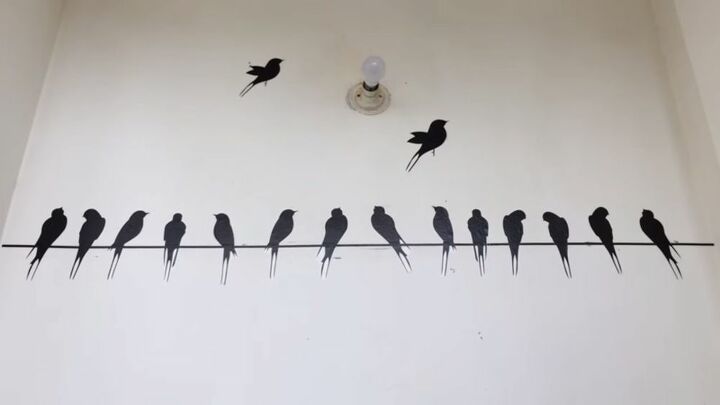
Once my tiny balcony was starting to look like a new room in my home, it was time to add some personal touches. I started with some beautiful bird-themed wall decals from Amazon, which only cost a couple of bucks and had a dramatic effect on the overall vibe of the space. Decals are a great option, because all you need to do is peel and stick however you please. Also, if you feel like redecorating further down the line, the decals can easily be removed and replaced with something else.
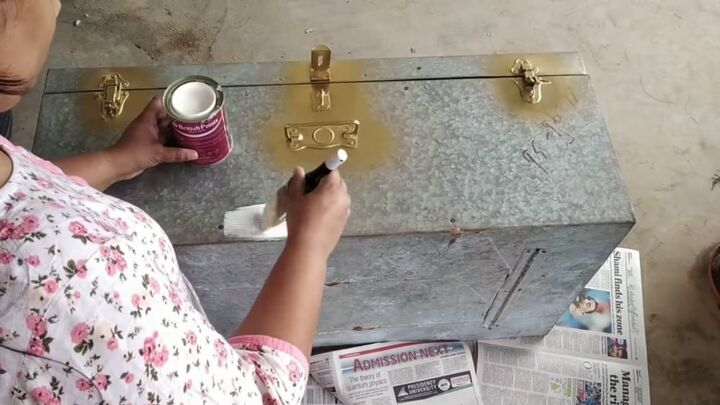
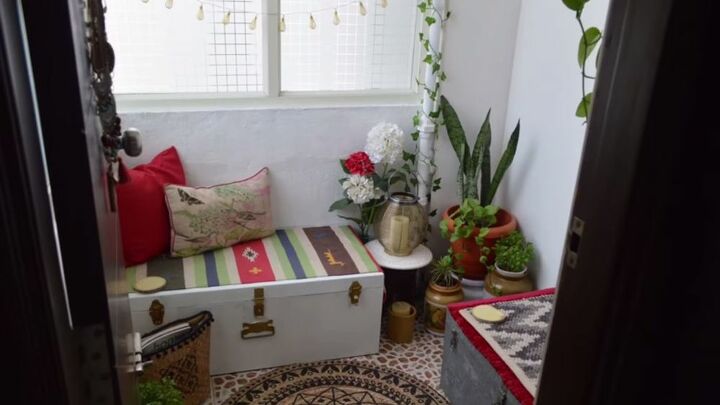
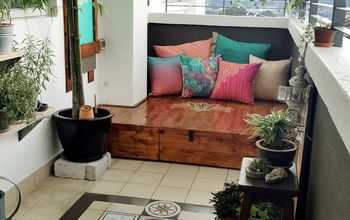
I opted to use an old vintage luggage trunk that I had lying around as the main seating for my balcony. The trunk was looking a little worse for wear, so I thought I'd breathe some new life into it with the help of some gold spray paint and white chalk paint. I started by applying the gold spray paint to the metal fixtures, such as the hinges and locks. If you do this, don't worry about doing it perfectly, as you will be painting over any overlap with the chalk paint. I then used some generous layers of chalk to cover the rest of the trunk. The whole process will take time since you'll want every inch of the trunk to be smoothly painted.
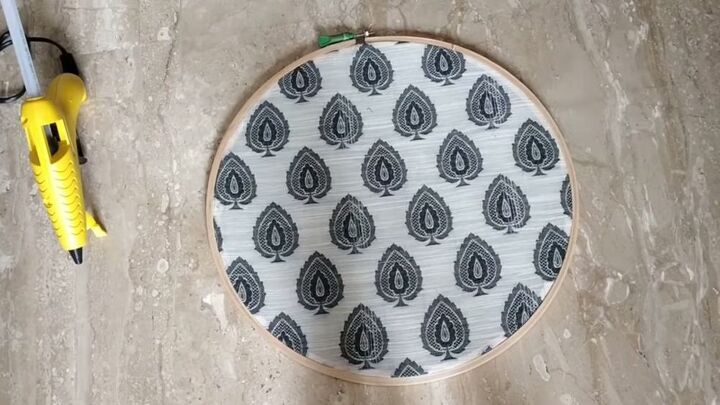
All the nails and hooks that were on my balcony walls inspired me to put them to use by creating my own hanging wall decor. I dug out some scrap fabric that had a beautiful pattern on it. I then placed an embroidery hoop on top of the fabric sheet and cut around it to give me a perfect circle of fabric. After this, all I had to do was stretch the fabric around the edges of the hoop and stick it down using a hot glue gun. The whole process takes less than a minute, and will leave you with a unique and truly stunning piece of wall art to complement your tiny balcony makeover.

Any condo balcony makeover is not complete without plenty of houseplants to bring the space to life. In order to give a little bit of landscaping to the balcony, I decided to create some plant stands and planters that would complement the overall aesthetic of the room and give me a way to space out the plants. For this, I simply used some old planters and stools, applying some chalk paint and spray paint to give them a new lease of life. After this, they were ready to hold up my beautiful house plants!
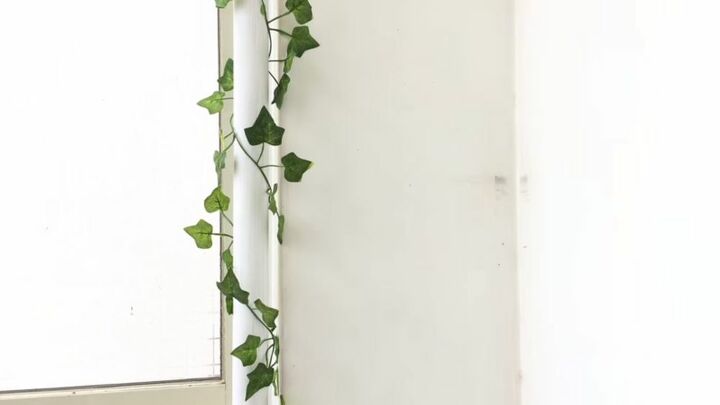
A hugely effective way to create the effect of an urban oasis is with a few rolls of faux ivy. I picked up some plastic faux English ivy and wrapped it around the unseemly heating pipes in my balcony to give them more of a homely aesthetic. To keep the ivy attached to the piping I just used some zip ties to pin it down at regular intervals. As long as you keep the zip ties at the back of the pipe where no-one can see them, the natural effect should remain the same.

The best part about a project like this is that you can really let your imagination run away with you. While I was decorating my balcony, new ideas kept coming into my head that I was eager to try out. I started by digging out a gorgeous harem-style lantern that had just been gathering dust somewhere. I was able to hang it from an old lightbulb holder that wasn't getting much use. I also laid down a jute rug that complimented the rest of the space beautifully.
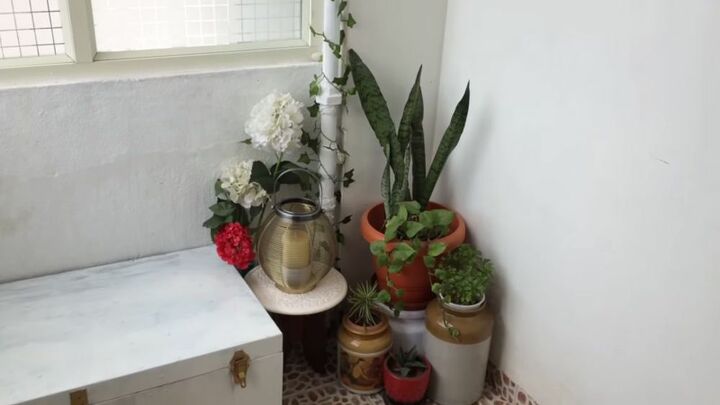
Once the small balcony makeover started to really take shape, I knew it was time to add my finishing touches. For a light, airy, and summery space where I could spend plenty of time reading, I knew that plants were an absolute necessity. With a combination of palm, eucalyptus, aloe vera, weeping fig, and jade plants, alongside some faux flowers, I was able to turn my tiny balcony into a garden in the sky. I arranged most of my plants on one side of the room, as I like my plants to give a dramatic statement and draw the eye of guests. However, you can place yours however you see fit.

While the aluminum windows we used to seal off the balcony provided us with plenty of natural light, that didn't do me much good once nightfall arrived! If, like me, you don't have a working light fixture on your balcony, then you'll want to pick up some battery-powered lighting instruments. I opted for some strings of fairy lights to maximize the coziness factor, as well as some scented candles to help create some additional atmosphere. Battery-powered lamps, fake candles, and floor lamps will also do the trick nicely here.
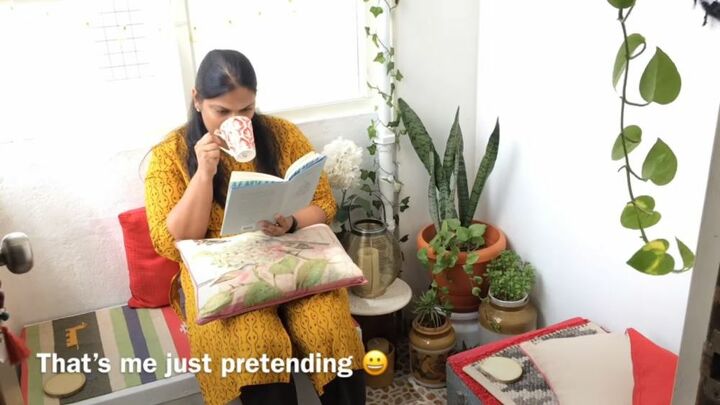
And that's it! In no time at all, I was able to complete my small balcony makeover from scratch and with minimum expense on my part. Once you're happy with your new balcony space, all that's left to do is to sit back, relax, and enjoy the fruits of your hard work. Remember, the beauty of smaller balcony makeovers is that you have the opportunity to create a hideaway space that is truly your own, so don't be afraid to add as many personal touches as you want.


Comments
Join the conversation
-
You are an artist! Your balcony is wonderful.
-
Beautiful! Nice work transforming your balcony into a mini retreat.


Frequently asked questions
Have a question about this project?
Very nice and peaceful, lovely spot to relax.