


How to Build a Lean to Shed + Free Plans
What do you do when you can't fit all of your tools in one shed? Well, you build another and attach it to the existing one or a house! Here, I show you how to build a lean to shed along with free plans and a full YouTube video to follow along with.
You can . Then follow my step by step video on how I built it.
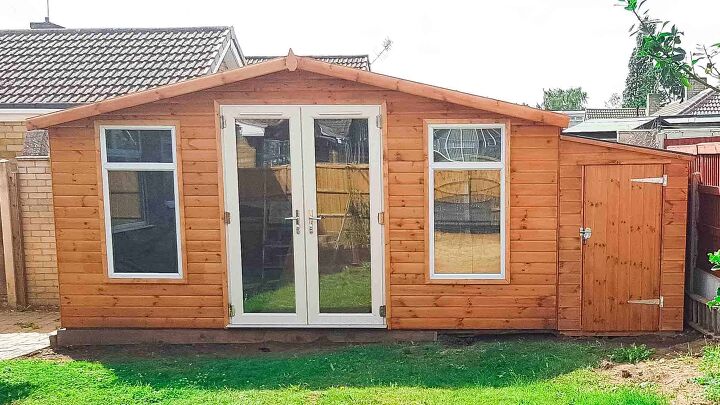
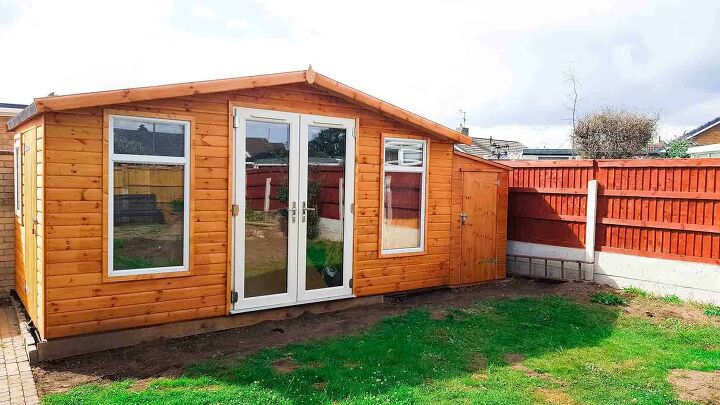
I'm finally going to share the small lean to shed that I built to attach to our DIY Summerhouse. Call it a lean to garden shed, or a lean to Summerhouse if you will. Although the latter is technically my workshop.
With the DIY Summerhouse now being my workshop, I felt I needed to separate our forever-growing collection of gardening tools and car maintenance stuff.
Also, with my homemade lean to wood shed being built of 3 side panels, it's a bit quicker to make.
Lean tos are built with three walls where the fourth is attached to an existing wall. They're are really useful to separate things from your main shed or house, such as a:
- Lean to bike shed
- Storing firewood, but you could make it more like an open lean to, minus building a door!
- Lean to potting shed
- Small gym shed or other sports equipment
- Attach to a garage for a motorbike shed
- BBQ supplies
- Garden shed tools (our use!)
- Car maintenance
- And much more!
There's absolutely no need to buy any lean to shed kits. Instead, put the money towards materials and . Then follow my step by step video here on how I built it from scratch.
Although I've measured twice, this slant rood shed has only been built once. Therefore, there could be the odd mistake in my lean-to shed plans, which you'll find in a downloadable free PDF. So, please be mindful as you build it or want to customise it.
Also, my plans only cover the framework. There's no cutting list for framework or cladding, otherwise, I'd have to charge for my time.
You also may need to make different cuts, depending on the wood you use, how thick your blade is, etc.
Throughout the build, we used CLS timber that's 38mm x 63mm. BUT, it was all ripped in half using a table saw EXCEPT when it came to the base.
If you're not able to rip it down, which is more cost-effective, you could use 40mm studwork instead. Note, for much larger sheds, like the Summerhouse, we used unripped pieces.
These free shed lean to plans should ONLY be treated as a guide. The size of cuts can differ due to what thickness of timber you're using, how thick your saw or mitre saw is, etc. And whether you want a more narrow lean to shed!
- Shovel
- Earth rammer/tamper
- Drill driver
- Drill bits
- Wood screws
- Hand saw
- Tape measure
- Hammer
- Wood preserver
- Staining brush
- Nail gun
- Safety goggles
- Ear defenders
- Impact driver
- Circular saw
- Stanley knife
- Clout nails
- Caulk gun
- 300mm Hinges
- Oval pad lock bolt
- Coach bolts with nuts
- Multi tool or angle grinder
- Workbench or sturdy sawhorses

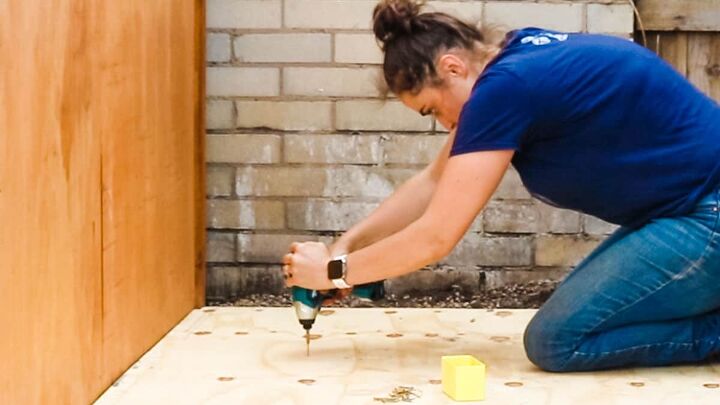
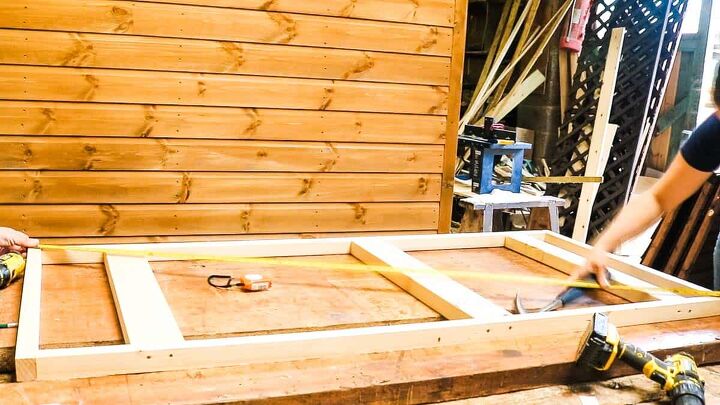
After building my workshop in our new bungalow's garden, we had a little spot on the right. And as a team, a few of us dug up and removed the topsoil. Then tampered it down before layung some weed control on top.
To make the shed base, I'd cut two two structural pieces of timber down to the same depth of the existing shed. Placed them on the ground to get a measurment of how wide the spars needed to be cut crossways. *Scroll up to download my plans for the measurements!
After cutting, I predrilled and screwed it all together with the spars being evenly positioned.
If funds allow, ideally, you'll be working with pressure treated structural timber (also known as CLS). But all timber has now gone up in price and has become difficult to come by.
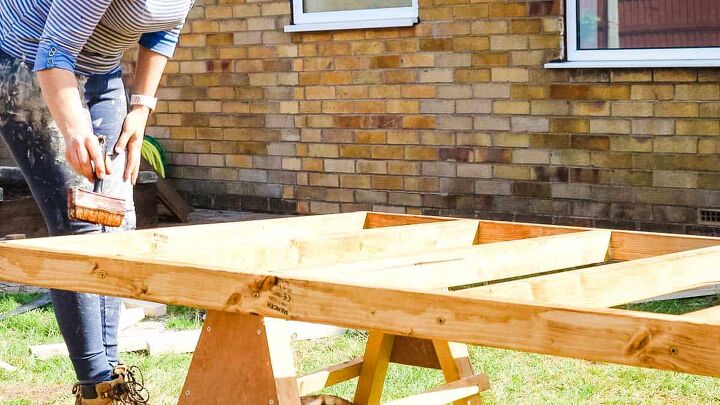
Above, I'm treating untreated CLS with a preservative. Make sure it states preservative on the bottom and give it as many coats as you can.
But whichever timber you're using, always treat the end grain cuts. This is the area that will suck up moisture the most.
With this only being a small lean to shed, while getting it level, we just sat the base ontop of treated pieces of timber and gravel for drainage.
You could prep a concrete base, use sand and paving slabs, bricks, or even a few pressure treated fence posts. It can be as expensive or cheap as you wish!
To build mine, I headed to my Dad's woodyard because all the facilities to make made to measure lean to sheds are all there. But I'll be sharing a space saving trick that can be done at home.
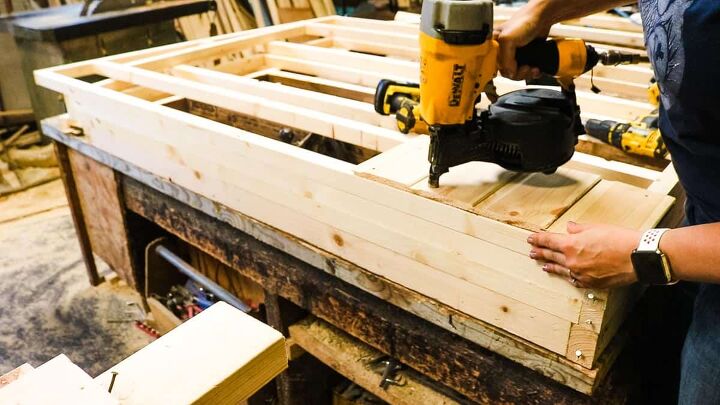
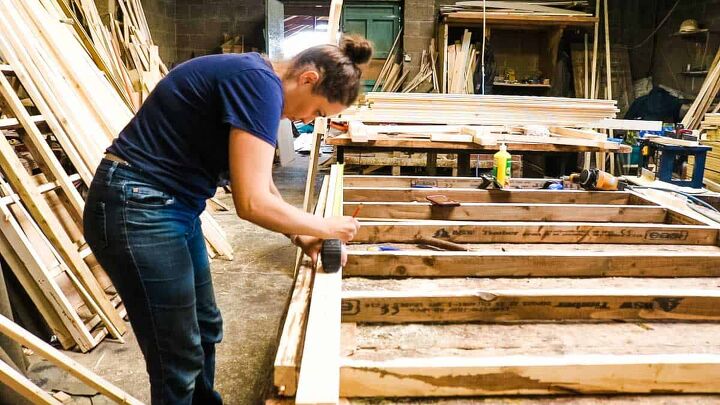
Above, I started working on the longest side panel using ripped structural timber. For our large Summerhouse build, I used un-ripped CLS.
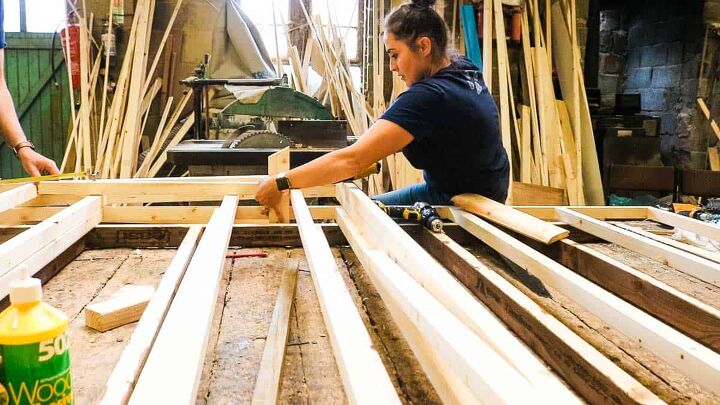
I've got 2 ripped structural pieces of timber - the top and bottom of the side panel and lined up. I measure and mark on both, evenly, as to where I want my upright spars to go.
Note, all measurements are in my free DIY shed plans. BUT, if you're working to a taller or shorter height, then keep the wood together first.
Next, hold another piece against it, going the opposite way and run a tape measure along it and mark on the "opposite way" piece as to the height you want.
NOW, you have your spar's cutting length.
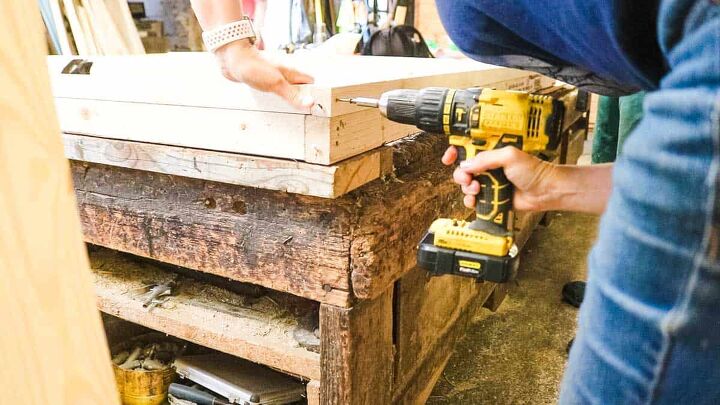
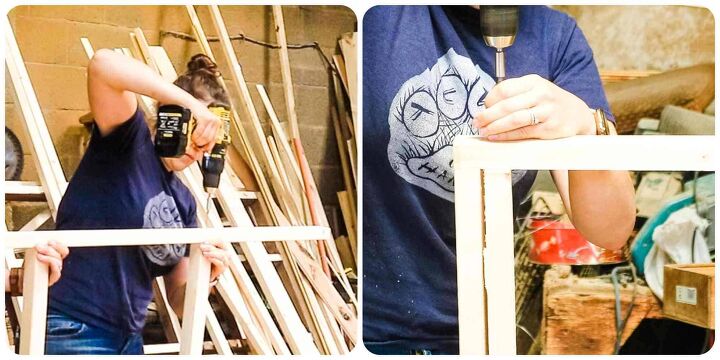
After cutting the spars, which are the upright shed panel supports, I then predrilled and screwed them alltogether, while lining up to my pencil marks.
Note, it helps to build it directly on top of a square workbench, so you can partially toenail a few sides. Then check for square using a tape measure from each corner, diagonally.
But, as we'll be building the rest of our frames while stacked on top of each other, we only need to check for square once. And that's because I'll be copying the rest. It also saves a lot of space, without the need build panels and leave them hanging around.
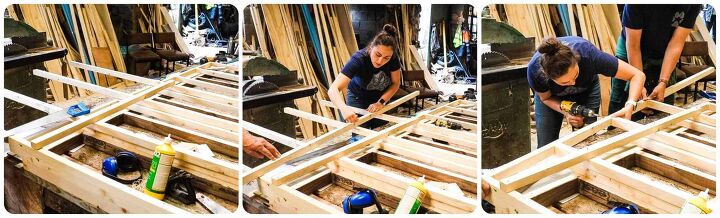
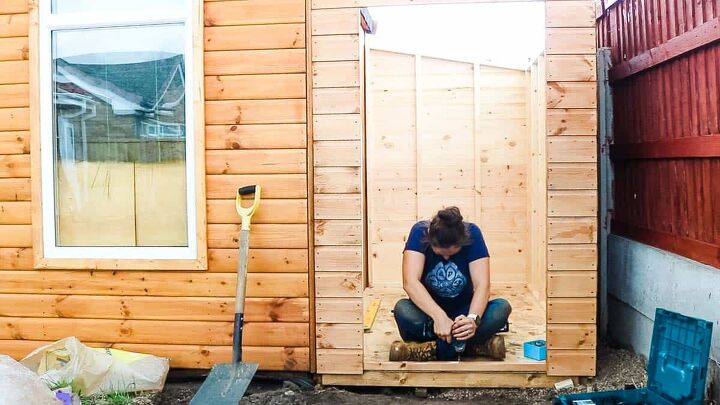
Once we'd built the first panel, our last two panels were the lean to sloping roof. These are narrower panels.
As we know the first panel is square, I toenailed two sides of the framing timber directly on top, and a bottom stud. But, to cut a slope on top, we laid middle spars that were longer than we needed.
We've also got a temporary piece with spars marked, which is temporarily holding the middle ones in place. Then, a long sloping piece starting at the height of the first panel we built. The opposite end is the height we desire, but must be shorter than the building it's attaching to (and minus the roof going on top!)
Then draw on the inside and hand saw the spars before screwing directly on top. Any overhang on the sides needs to be cut with a hand saw to make it flush with the two sides.
For our other matching sloping panel, which the outside must be exactly the same as before. BUT, this one will be having a door, so the inner spars will be different.
Above, I've screwed a spar 8 inches from either side. Then another one going along the top, with a small noggin cut on an angle. If you plan on fitting heavy duty hinges and a 5 lever mortice lock, then use un-ripped CLS timber instead.
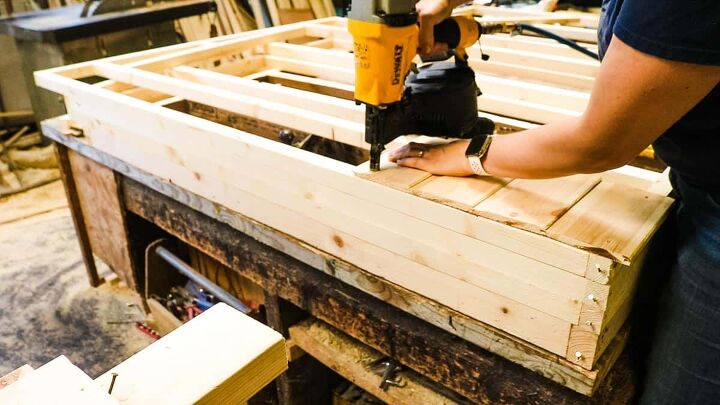
Once your 3 side panels are done, remove the toenailing off the top duplicate and flip over and toenail down again. Otherwise, you'll clad the wrong side.
As per my plans, I'm screwing the roof's framework together. The length of this is the same as the whole shed's width, plus 6 inches, or sometimes 8 inches for an overhang.
*When I say the shed's width, I don't mean the width of the longest panel. I mean the width while it's built. (Please refer to my plans!)
Another stud is then screwed inside of the 3 inches mark, which will be the section the shed it screwed to while screwing on the roof. We'll clad this later on site in case we have any issues!
There are several types of cladding you can use, such as OSB and plywood for a simple lean to shed. Athough they're less attractive and best with trim detail throughout.
Above, I'm using tongue and groove cladding, but starting with an overhang on the bottom to act as a skirting around the base.
I nail gunned 3 strips at a time, but absolutely make sure they've slotted in the grooves properly. Why? It can look odd around windows, doors, or when the panels are screwed on.
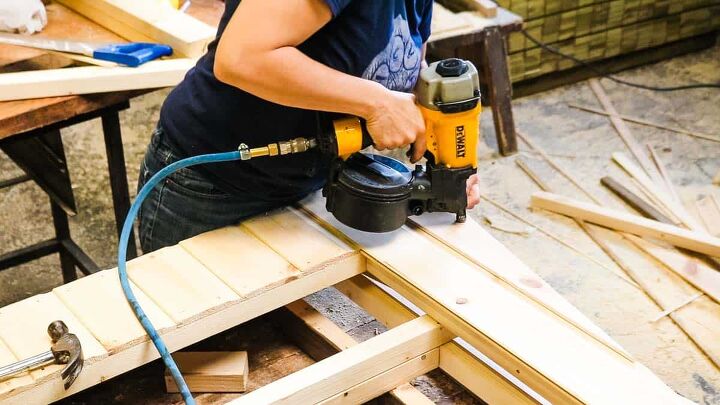
It's important to remember to stop cladding with shorter pieces until you get to the tops of doors and windows.
These require longer continuous pieces. But for any sloping sections, these are great for damaged offcuts to save any waste.
You can either:
- Cut an angled piece first before nailing on
- Nail a whole piece and trim with a flush trim router bit
- Hand saw the excess
- Jigsaw the excess off carefully and check when you feel resistance
Then it's just a matter of removing the toenails and set aside the cladded panel to work on the rest!
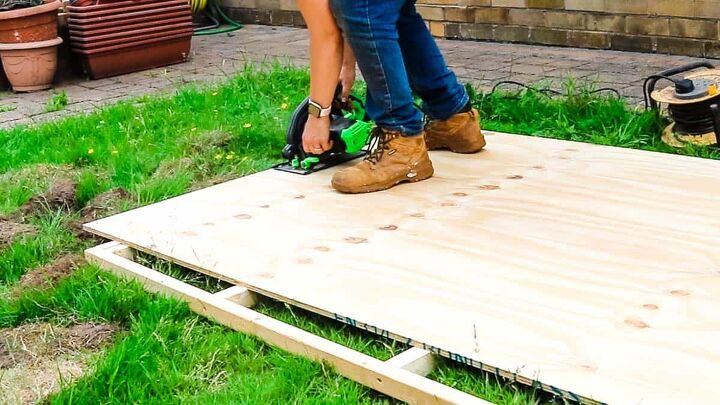
Once the shed's base is level with gravel around for drainage, and screwed to the existing building, it was time to line with plywood.
Above, I'm screwing it down to the spars with an impact driver for quickness.
Don't pick a thin plywood as it needs to be strong enough to walk on and any heavy items.
After treating the shed's cladded panels twice, I then screwed directly on top of the base.
And although you can't see it, I'd also nailed some flashing trims on the corners where the panels meet on the outside.
Read my DIY Bike Shed for more info on shed flashing and which way they should go!
When it comes to cladding the roof, there's several ways you can do it as it will be covered with felt, etc. This is particularly useful during a wood shortage here in the UK.
- Strips of pallet wood, butted together where the joins rest on the spars*
- Tongue and groove offcuts, (same as above), but in the style of a running bond for extra strength
- Or long pieces of course if you can!
- Sheet of plywood cut down
- OSB
*It won't look like offcuts from inside the shed!
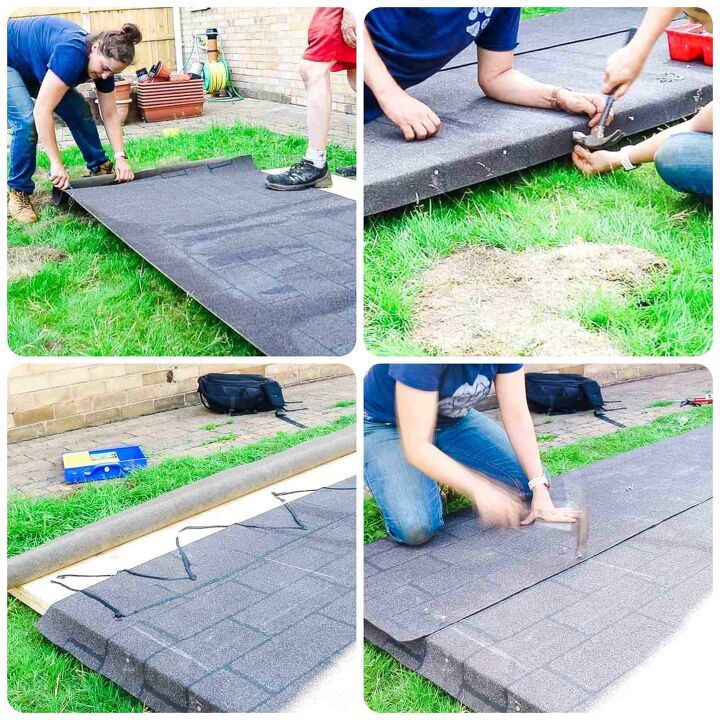
To guide you, you can find my previous how to felt a shed roof here. The only difference is, make sure the overlapped section is the one towards the top so rain won't run under.
As usual, we used clout nails to nail the overhang. Blanket folded on the corners and stuck down with bitumen.
I then nailed treated trims around the 3 edges of the roof. Don't add one to the side that will be next to your shed, house or garage.
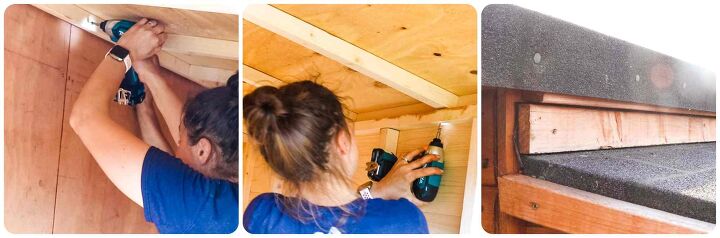
As it's like a pent roof, it's much simpler. We placed the roof on top and screwed it on to the existing shed.
Then screwed the tops of the shed panels to the roof.
We also added an extra piece of felt and trim between the two sheds to prevent rain from dripping into the lean to.
Again, this is something I've previously covered in my how to build a shed door tutorial.
But to get the door's framework you need to:
- Measure the untrimmed shed door opening
- Deduct the thickness of 4 trims (2 for the door, 2 for the opening)
- Take off hinge and bolt clearance - in our case, this was 15mm
Also, it's vital that the z brace is aiming downwards towards the hinge side as you can see during my DIY double wooden gates.

Once you've cladded and nailed on your notched door trim, it's time to add your hinges, pad bolt, etc.
I screwed a hinge top and bottom where the supports were behind. Then a pad bolt. For more help, read my collaboration with Hiatt Hardware during my bike shed here.
I then returned to the shed and screwed on more shed trim on the door's opening and a stop lat to prevent the door from pushing in. *It also prevents pressure being put on the door's overhang cladding and hinges.

To prop up the door on your own, above, I'm getting yet another demo off my Dad to use a plank of wood resting on a brick. This allows you to control the door with a foot, while screwing the hinges on.
Don't add all the screws immediately. Just add ONE screw per hinge so you can check whether it opens and closes properly. Once you're happy, you can add the rest of the screws in!
Once the door's screwed on, add a strip above for detail!
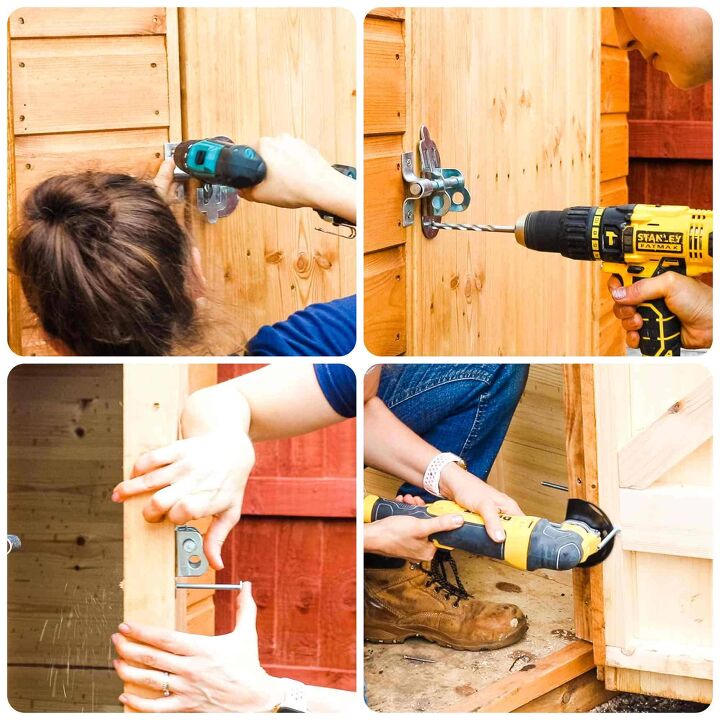
To make it a secure shed, I removed some screws from the hinges and pad bolt lock. Then drilled holes for coach bolts before adding nuts on.
To remove, you can either use an angle grinder, or my favourite, which is a multi tool as there's less sparks involved!
You can find more tips on securing a shed here.
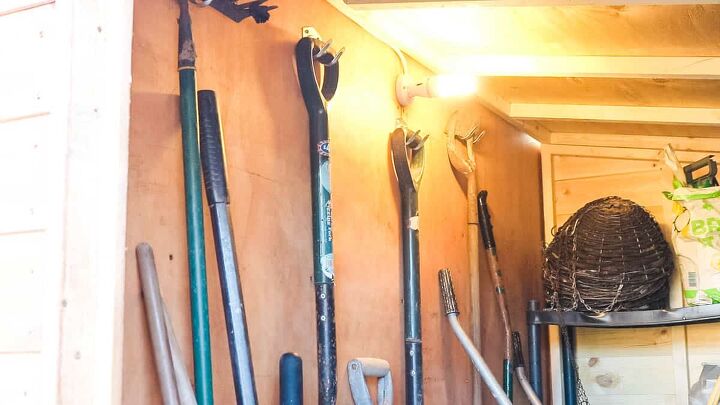
Once it was complete, I screwed some garden shed storage hooks to the existing shed side where the spars were. These have been great for gardening tools, such as spades, etc.
Then for the remaining walls, I used plastic shelves and shallow twin slot shelves to change them when I wanted.
What would you use yours for?
-
Wood screws -
Wood preserver -
Staining brush -
Clout nails -
300mm Hinges -
Multi tool or angle grinder -
Workbench or sturdy sawhorses
-
Shovel -
Earth rammer/tamper -
Drill driver -
Drill bits -
Hand saw -
Tape measure -
Hammer -
Nail gun -
Safety goggles -
Ear defenders -
Impact driver -
Circular saw -
Stanley knife -
Caulk gun -
Oval pad lock bolt -
Coach bolts with nuts
- Prep the ground for the shed
- Make a shed base and treat
- Cut the framework as seen in the plans, or follow the step by step and screw together
- Ensure square and clad using a nail gun
- Ensure the shed base it level and fixed to the wall where it's going
- Line it
- Screw the shed panels on top
- Line the shed's roof
- Add roof felt and add clout nails to secure it
- Screw treated trim on 3 sides of the roof *not the panel-less side
- Make the shed door as per post with trim
- Fix trim to the door opening
- Screw hinges on to the door
- Fix the door to the shed
- Add the pad bolt and replace some screws with coach bolts
- Angle grind any excess off
- Fill your shed!

Comments
Join the conversation
-
Great tutorial. Looks great! Good share


Frequently asked questions
Have a question about this project?
Did the project cost you 240 Pounds, or 200 Dollars?
(At present conversion rates, 240 Pounds = $335USD or $425Cdn.)