


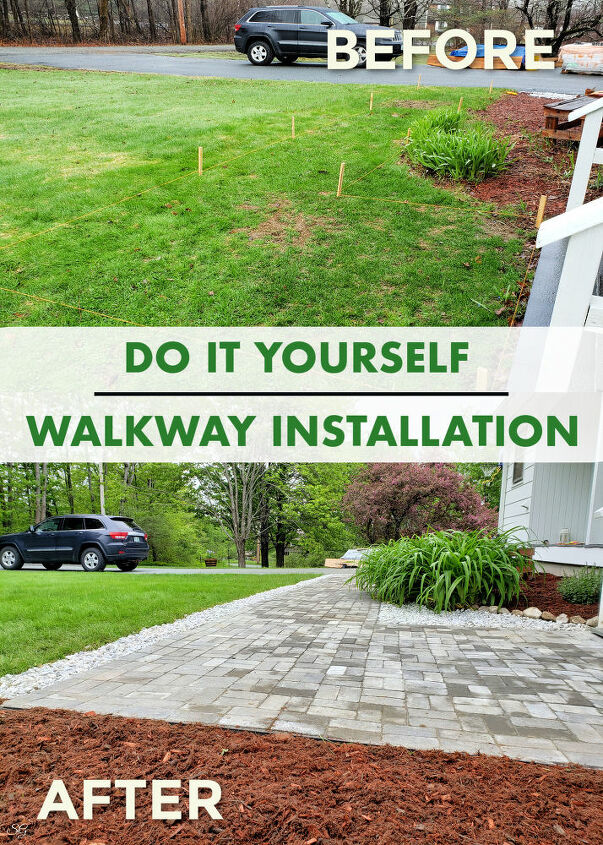
DIY Paver Walkway
We ran into some issues while we were creating a paver walkway for the front of our house. Luckily, we found an awesome new product that saved us a hassle, and a headache!
What you'll need
- Pavers – measure your paver area and add 10% for cut-offs and scrap
- Paver Base – Polyethylene PaverBase Panels or 4 to 8 inches of gravel hard pack material.
- Paver Sand – this is not playground or beach sand, it’s a special formula intended for this application.
- Weed Block Material – no, it’s not just for weeds. This will prevent the sand from trickling down into the sub-base
- Paver Edging
- Shovels
- Hard tined rake
- Hand-tamper or rent a compactor
- 1/2″ pipe and a 2×4 lumber – for screeding the sand level
- Mason line and Line bubble level
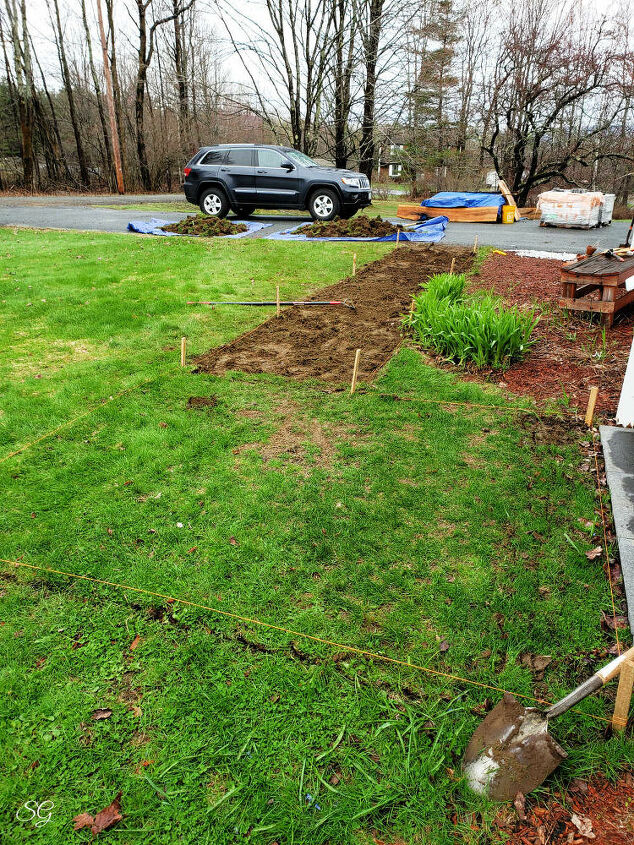
Step 1
Prepare the ground. For us this meant digging out the grass. We strung mason lines around the area where we were going to put our walkway. Then we dug out the ground.
----
Remember that issue I said we had? Well, apparently there was an old field stone walkway about 4 inches under the grass from when the house was originally built.
Normally you'd dig down 6-10 inches and fill with a hardpack material for a sturdy base.
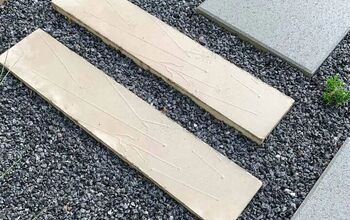
However, we found a product called "Paver Base". These are poly panels that replace the need for the huge amount of hardpack. And it worked amazing!
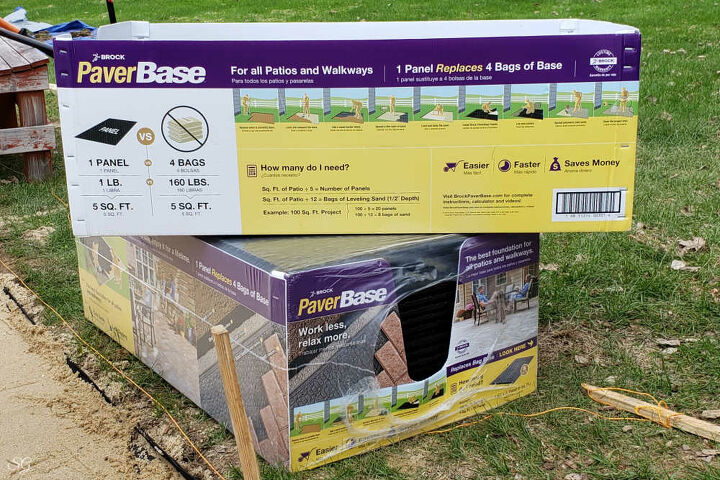
There they are. These two boxes replaced literally TONS of hardpack material, and loads of labor on our part!

Step 2
Compact the ground with a hand tamper or a vibrating plate compactor.
Note: The hand tamper is very labor intensive. Probably the hardest part of the entire project is tamping everything down.
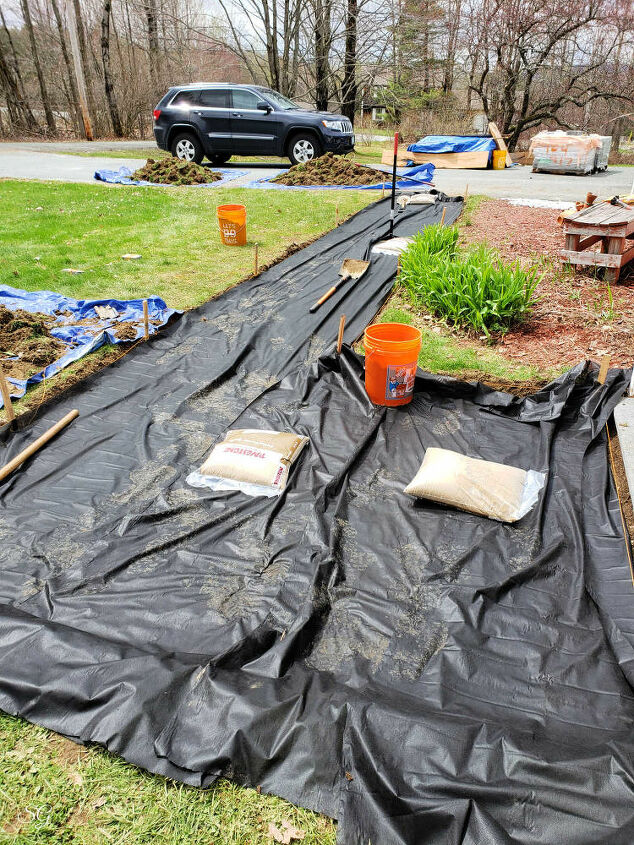
Step 3
Roll out layers of weed blocker. This is when, of course, the wind will decide to start blowing like mad. Right? That's why you see so many wrinkle.
Nevertheless, the weed block material is not there to prevent weeds, but prevents the layer of sand from seeping into the dirt below.
Step 4
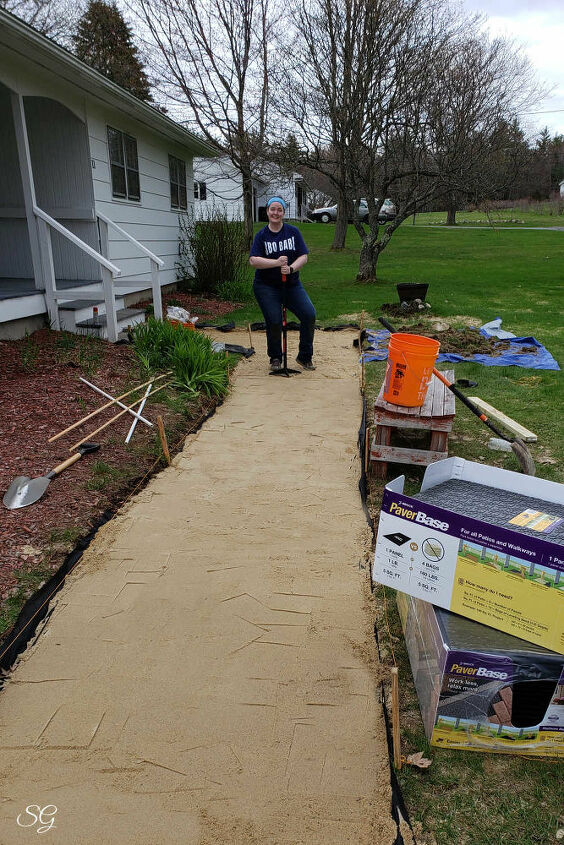
Add a 1/2 inch layer of sand over the weed block. Use your screed poles and straight board to get the half inch layer built up.
Then tamp it down with your hand tamper.
Step 5
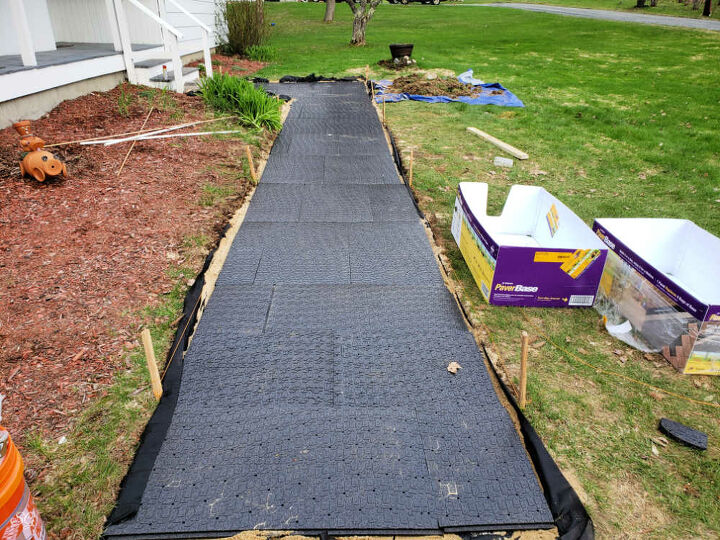
Lay out the paver base material over the sand.
These paver base panels interlock and went down really easy. Unbelievably easy!
At first, I was totally unsure if they were going to work, but as we got them all down and then started laying the pavers - it eased my mind. Our walkway is rock solid!
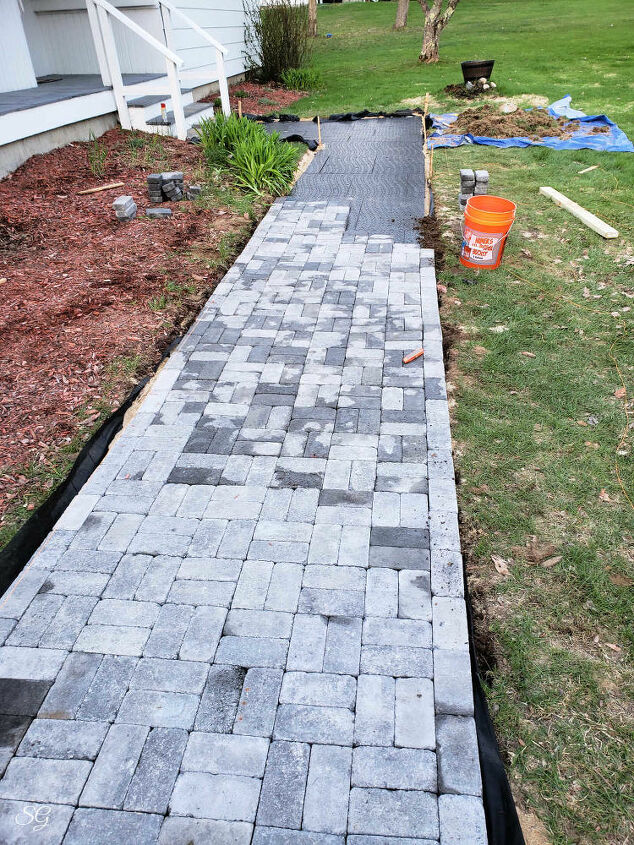
Step 6
Lay out the pavers. Of course, choose your own pattern if you wish. We decided to run a row of pavers all the way around the boarder, and stack them in a two horizontal/two vertical pattern.
Step 7
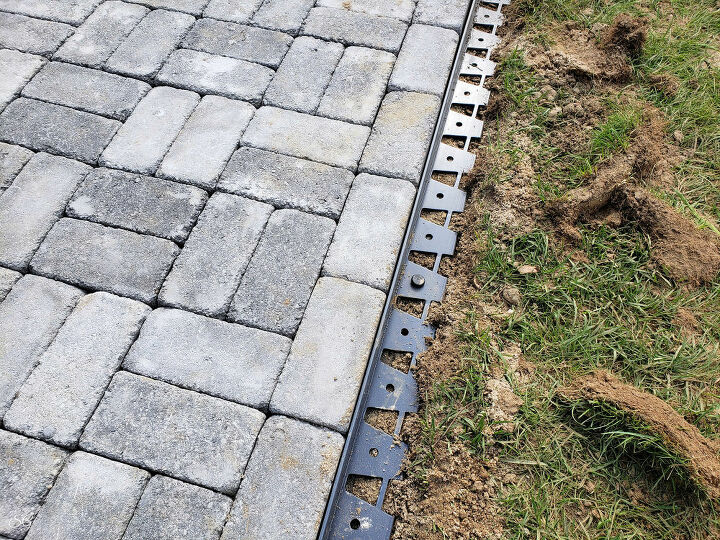
Install the paver edging. Run the paver edging up against the outside pavers and drive the spikes into the ground to secure them in place. You'll back fill after all is said and done and only see the very edge of the paver edging closest to the pavers.
Step 8
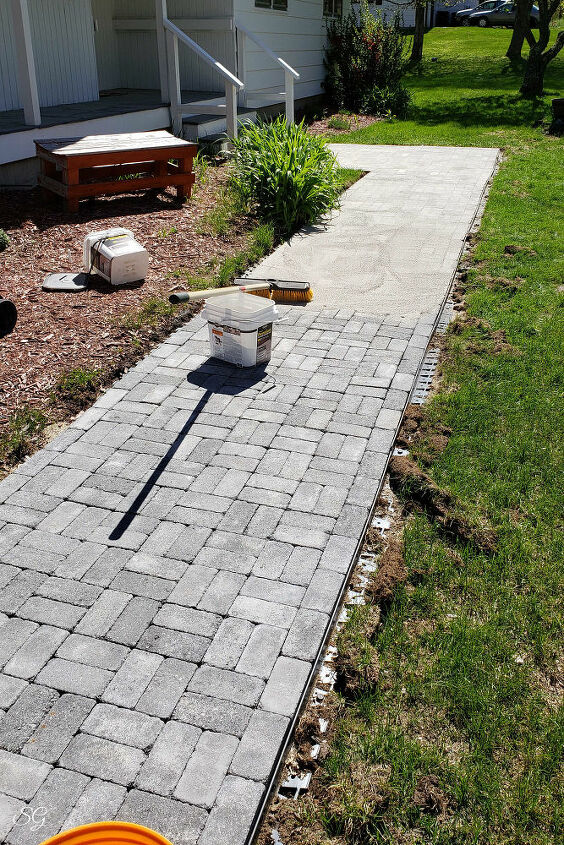
Add polymeric joint sand. Spread the sand out with a broom and tamp down lightly on the pavers. This will help vibrate the sand down into the joints. You'll need to go over areas more than once as the sand settles due to the tamping. Fill the joints until the sand is no longer settling as you tamp.
Finally, broom off, blow off the remaining dust with a leaf blower, and spray with water according to the directions on the sand bucket.
Spraying with water is what activates the polymers, and hardens the sand in place.

Step 9
Finally, once you've allowed the polymeric sand to dry and do it's thing, add your boarder (back fill). We went with mulch and stone - and also, at a later point in time we did add a rock boarder to the outside edge of the stone and mulch where it meets the grass.
Click to see our DIY Paver Walkway Project on my blog!


Comments
Join the conversation
-
If I went to that much work,think I'd just have poured a concrete walkway.Just my thought.
-
Concrete is ugly this is beautiful and classy! Great job!


Frequently asked questions
Have a question about this project?
Did you leave the old walkway where it was? Under my lawn, I found enough flagstone for a 25' x 4' walkway with enough left over to do some edging around plants. Interesting what can be unearthed. Looks great!
How much did this project cost total? How many hours did it take?
are those paver base panels cuttable? I want to do similar but in a large circle where the above-ground pool was for a nice fire pit/sitting area.