


Easy DIY Outdoor Stone Steps for Your Yard You’ll Love
Creating outdoor stone steps on a budget.
Certainly one of the main reasons we purchased our current home was the wooded and secluded lot. Steve and I immediately knew this was the backyard we were looking for.
We love to hike and enjoy nature and that’s exactly what this property offered.
However, it did come with its challenges. In particular, with the entire backyard on a slope and many areas very steep, we needed to come up with an affordable idea to create a series of stairs.
At first I thought flagstone or fieldstone stairs would be amazing until I priced them out. Yikes! That would never fit into our budget.
Then the idea came to me, why not make steps like I see on hiking trails. Where there is a rock or log retaining soil behind it.
As it happens we even had a large amount of leftover stacked stone from a little retaining wall we had built. So the cost of this project would be minimal.
For centuries stone has been used for stairs, in fact they may be some of the oldest structures. Whether used outdoors or indoors these stone structures have stood the test of time.
Outdoor stone stairs constructed thousands of years ago still exist.
Excavation of ancient settlements in Pakistan feature stone steps that they date back to 2500 BC.
The first stairs made from flat stones or hewn logs that were stacked to overcome the challenges of the terrain.
No doubt, I feel large stone slab steps are visually appealing in a landscape. However the cost to install these in your landscaping can be prohibitive.
While they vary in costs depending on the type of stone and your location.
In fact, in my area each stone step was $100-200 without installation.
Installing outdoor stone steps typically costs around $2,200. However, that cost can range between $1,000 and $12,000 depending on the type of material and size of project.
Bluestone slab costs around $1,400 including installation. Granite can range as high as $12,000.
When installing our outdoor stone steps we used basic gardening tools:
The supplies we used to create our stone steps for backyard:
- flagstone chips
- stacked stone
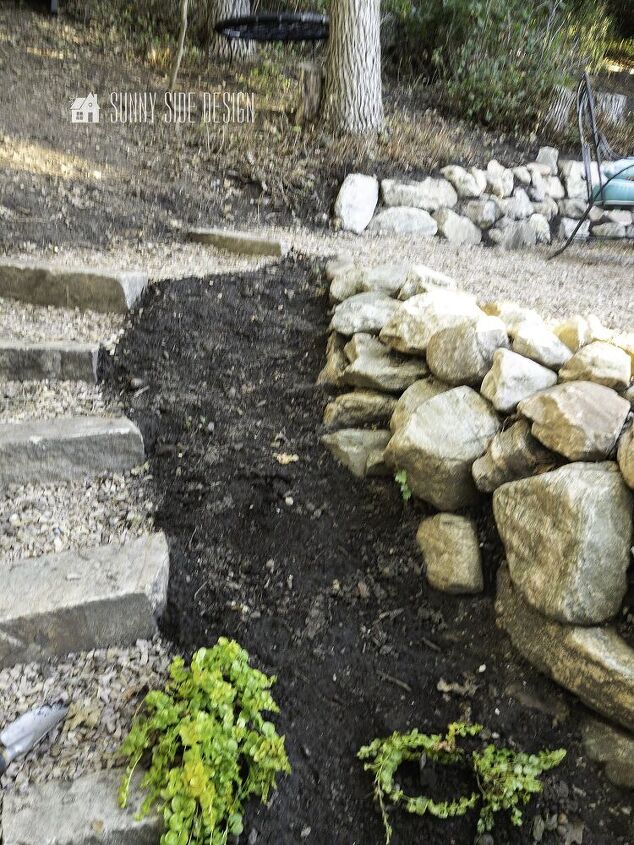
The stacked stone we used for our steps were leftover from our small retaining wall we built for our garden area.
In fact, we found the stacked stone through the online classifieds. As luck would have it someone was taking out a retaining wall and we were able to get 3 trailer loads full for only $100.
After building our wall, we moved the remaining pieces to the backyard, just waiting for another project.
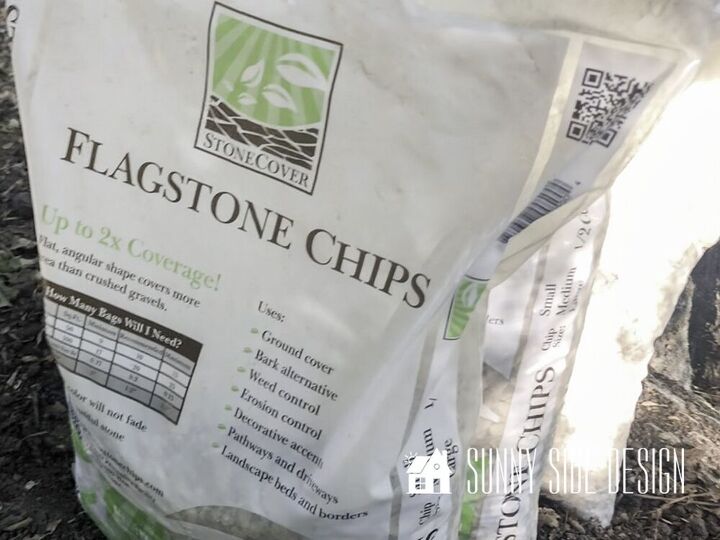
Flagstone chips are a great choice for pathways or steps because of its natural binding ability and compaction. We had already used it for a pathway and around our raised garden beds.
To find flagstone chips in your area, do a google search. You’ll find it located at local nurseries and landscaping companies. We have purchased it in bulk and had it delivered as well as by the bag for smaller areas.
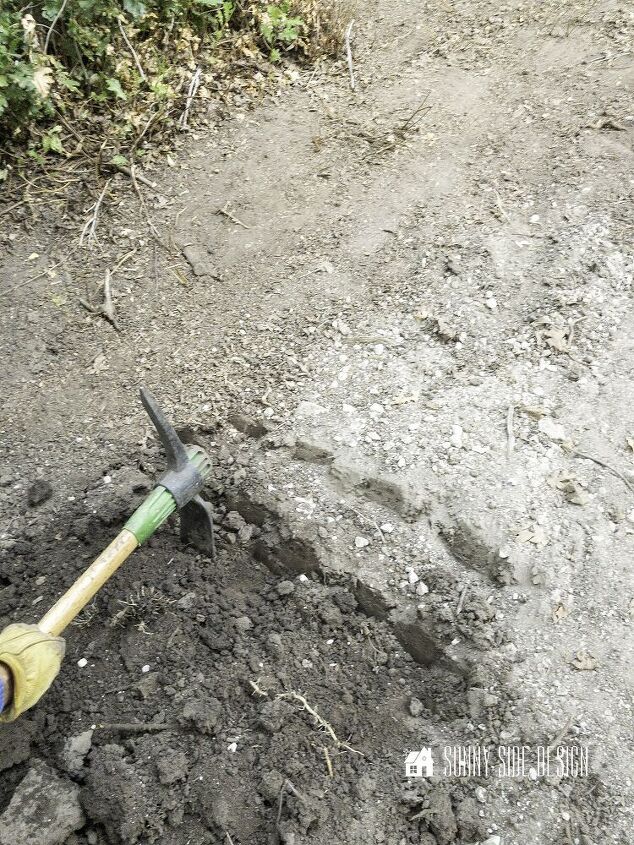
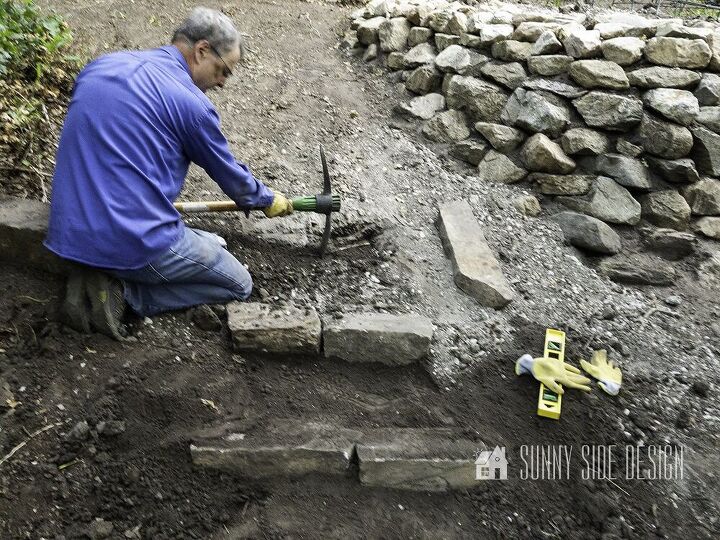
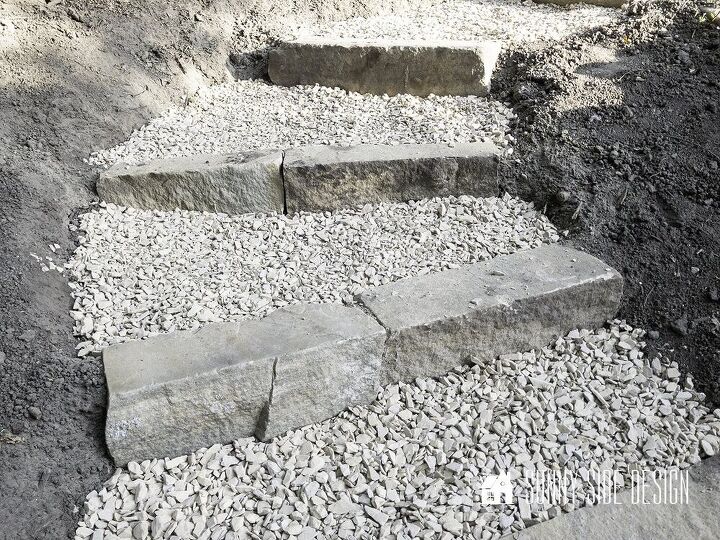
First we decided on the placement of the first stone for our steps. Then using a shovel or a pick loosen the soil and remove enough dirt so that the front end of your stone is about 2″ below the dirt line. This will ensure that your stone will stay in position as it is walked on.
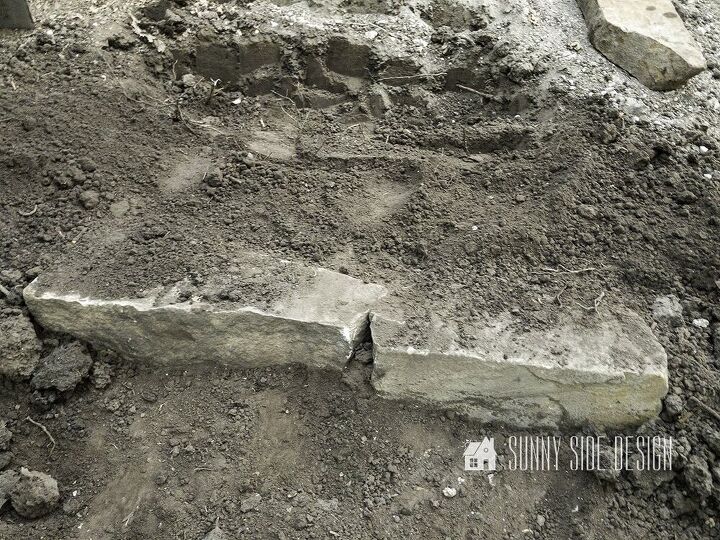
Next place your stone into position.
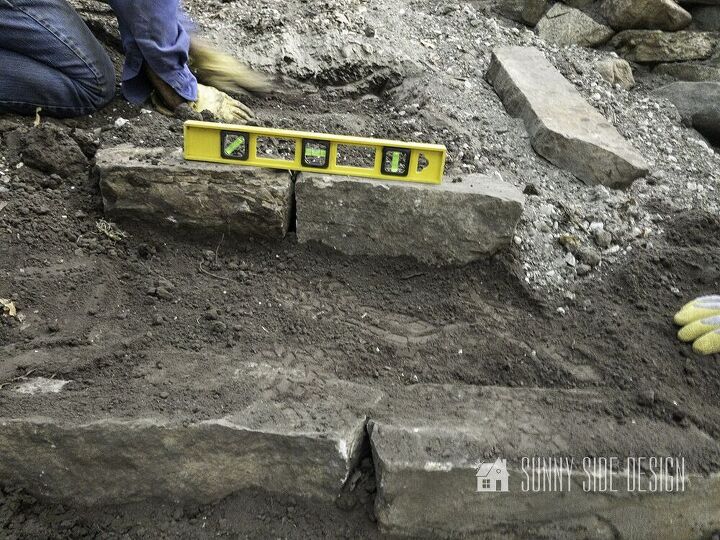
As each stone step is placed into position you’ll want to make sure that they are level. Not only did we make sure that the stones were level side by side, but also that the stone didn’t tip forward or backward.
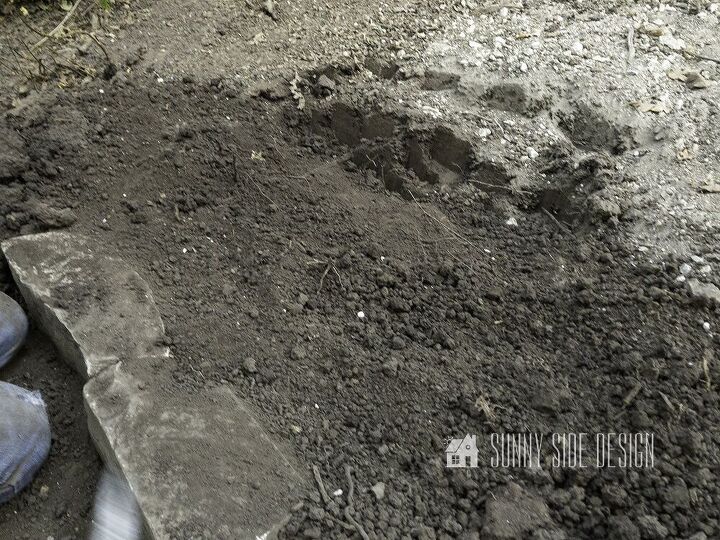
Once you are happy with the placement of your stones, backfill behind the stones.
Later we will sprinkle the area with water which will help compact the soil and make it more secure.
Now to create a large landing pad for each step, level the soil towards the area where the next stone step will be placed.
And repeat the process for each step.
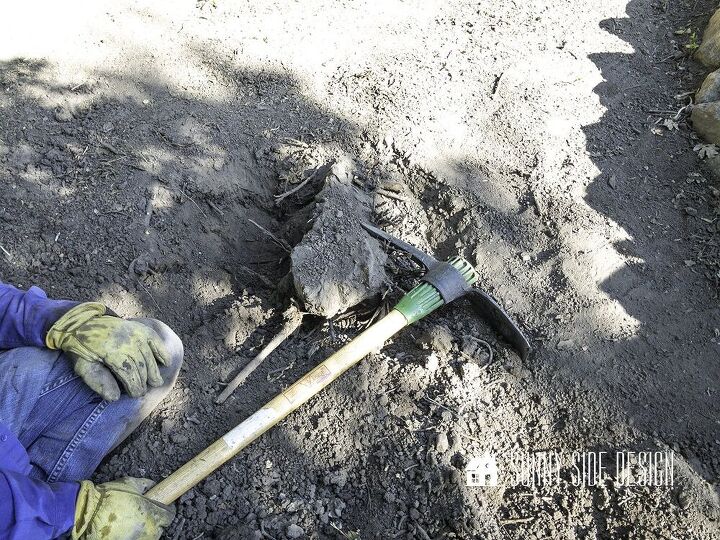
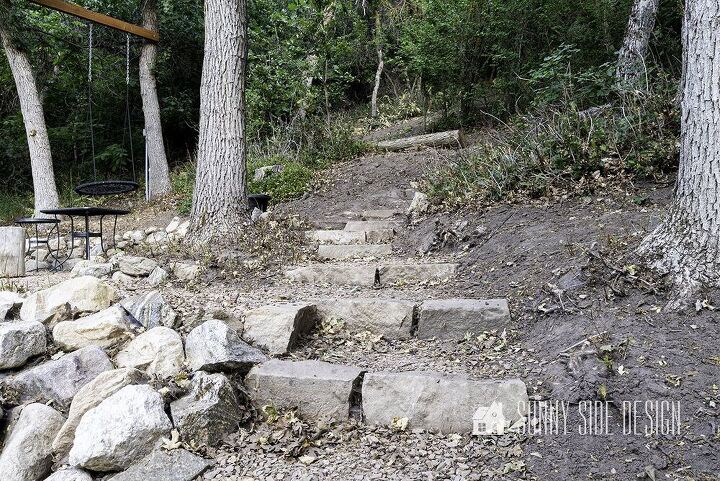
Clearly the most challenging part of creating our outdoor stone steps were tree roots.
Often with the pick mattock we were able to chop at the root and remove it.
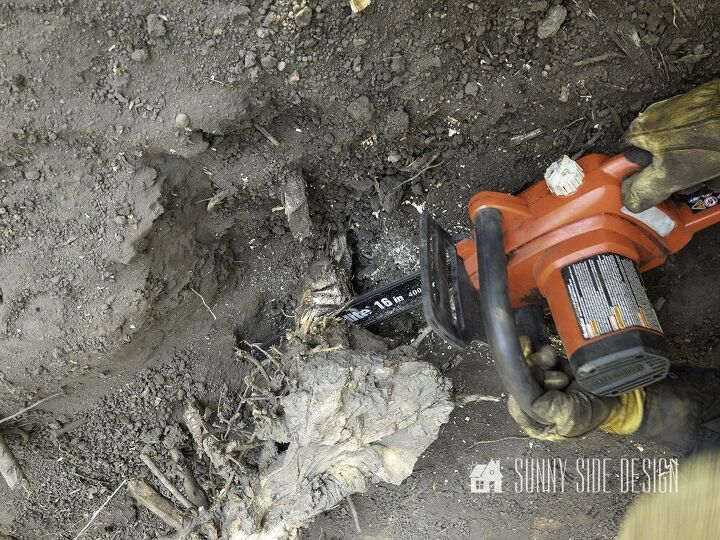
However right in the path of our outdoor stone steps was a large root mass.
After picking at it for sometime, Steve decided to get out the chain saw.
Within a few minutes it was out of the way and we were able to complete the stone steps.
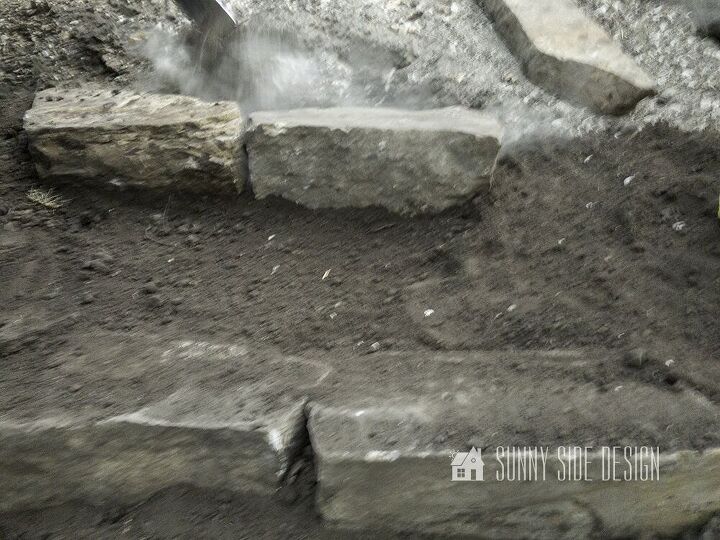
Once all of the large stacked stone pieces are placed, sprinkle the area with water. This will help settle the soil and add in compaction.
You will want the soil to be about 1/2″ lower than the top edge of the stack stone on each step.
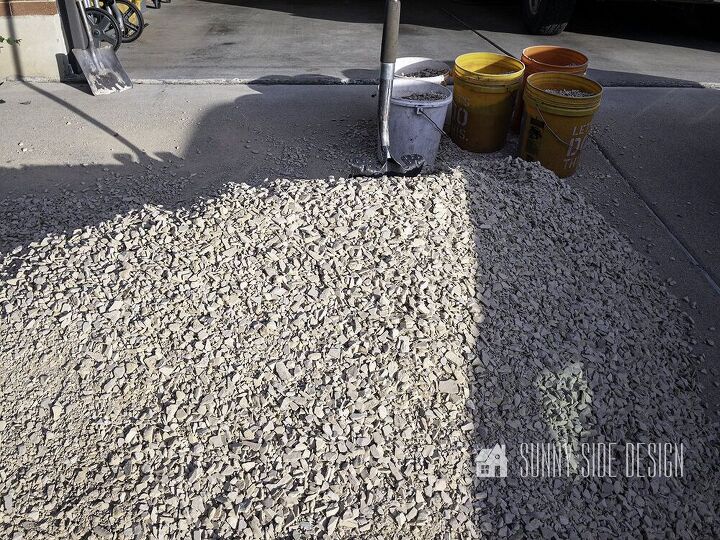
For our first section of outdoor stone steps, we purchased our flagstone chips in bulk and had them delivered.
We were also creating a fire pit area and this was the most economical way for us at the time.
However, for subsequent stone steps added to our outdoor living space we’ve purchased the bagged flagstone chips from a local nursery.
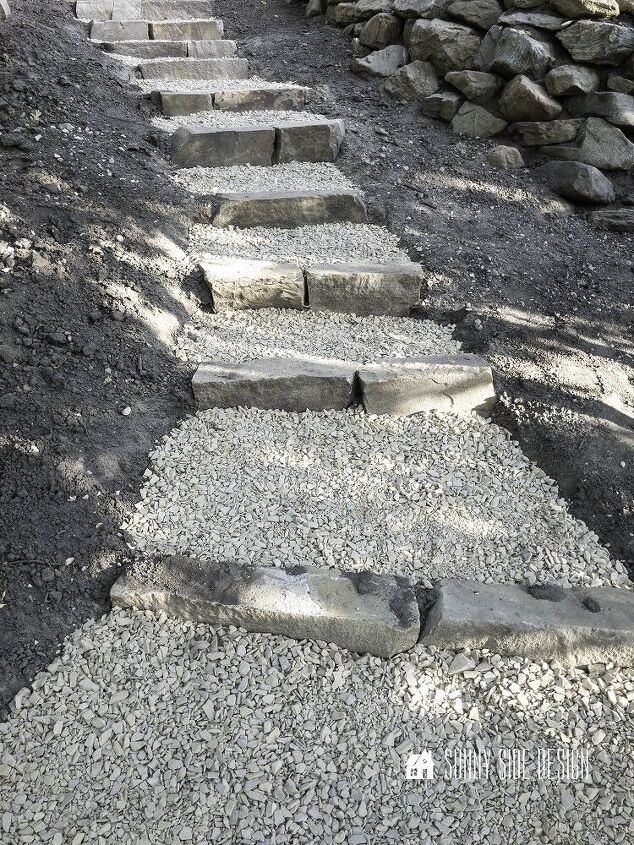
Fill in the area behind each stone step with the flagstone chips, about 1/2″ deep.
Next take a tamper and tamp the stone chips. Then once again sprinkle with water
as this will help the stone chips to compact.
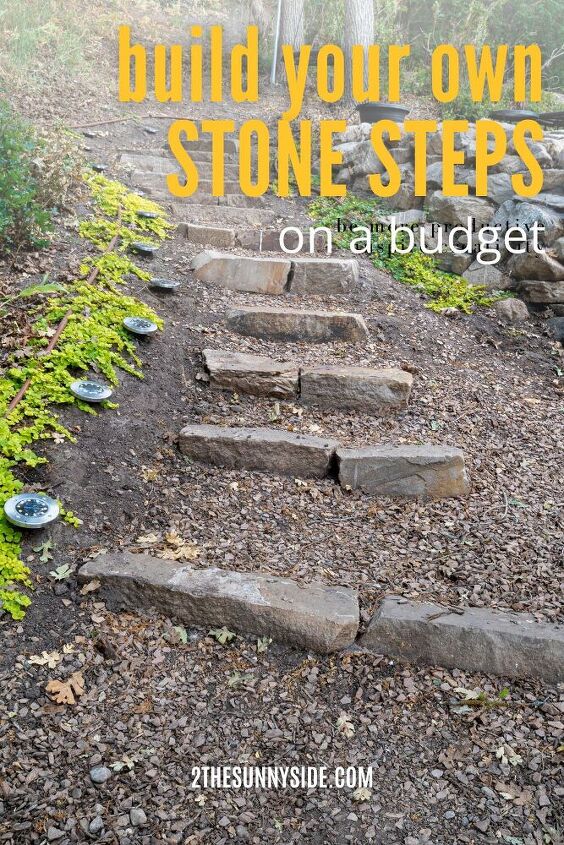
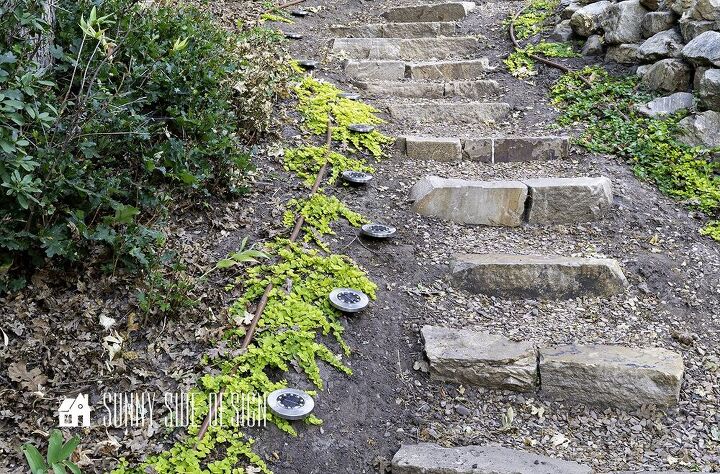
To finish off the area for our main outdoor stone steps to the fire pit we planted ground cover.
Hopefully soon this area will fill in with Creeping Jenny.
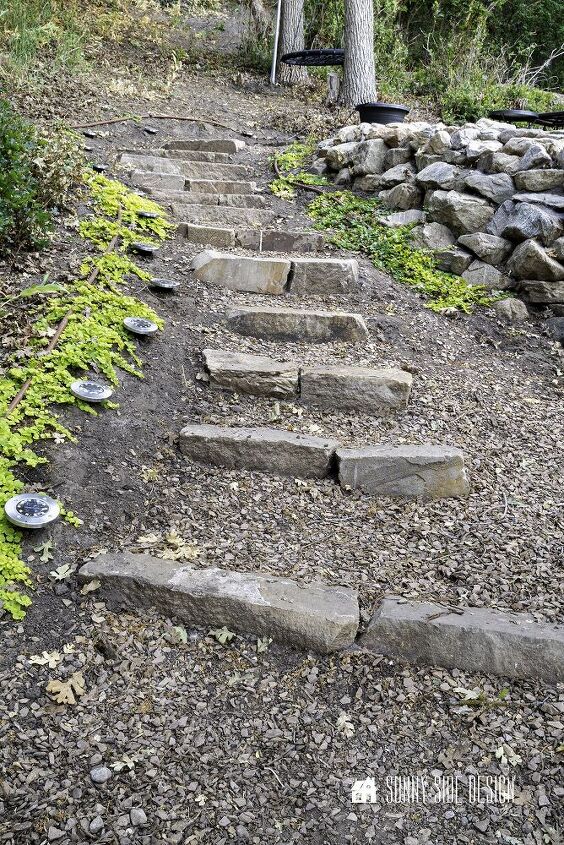
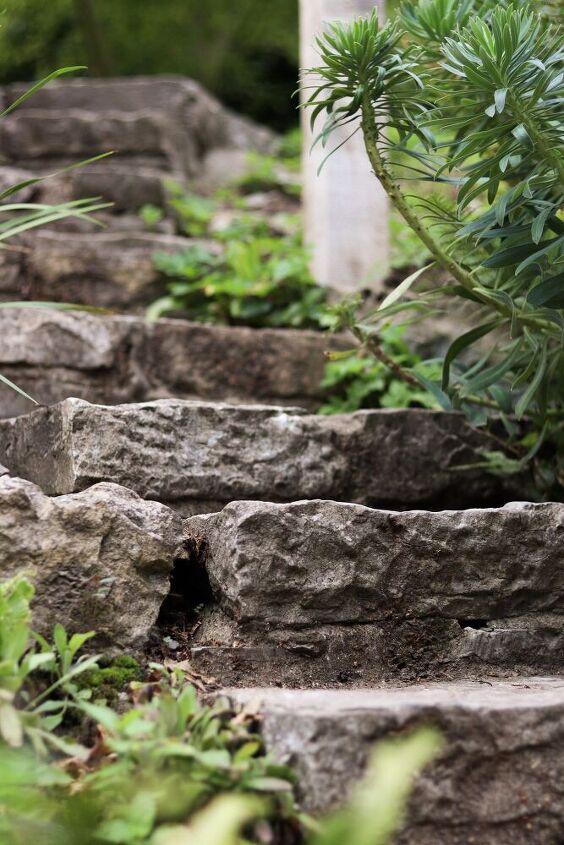
Clearly these stone steps have held up really well. The stack stones have remained secure and it makes navigating our slope to the fire pit so much easier.
Each summer we add a new set of stone steps leading to another destination in our outdoor living area.
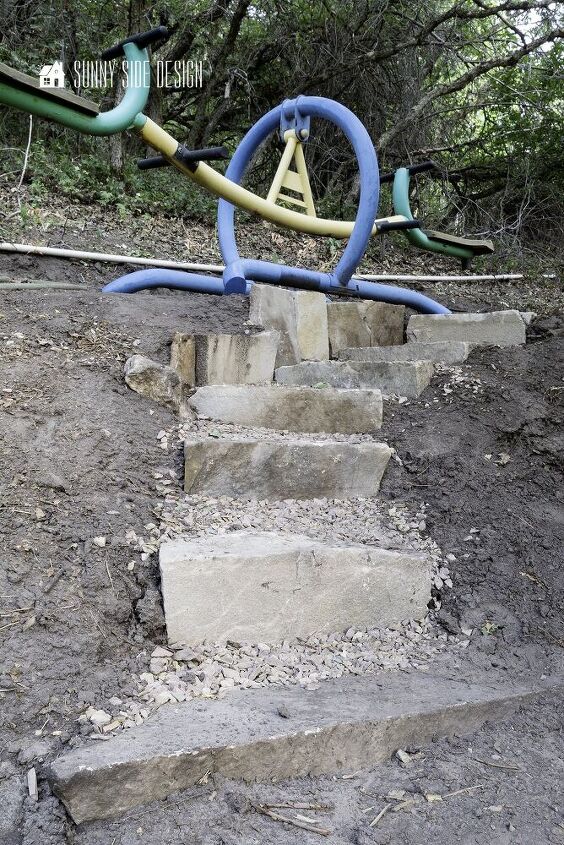
Just like in years past, this year we added more stone steps to our outdoor space. Now the kids have an easier climb to the teeter totter area.
In fact, you can see the complete installation of these stone steps on the YouTube video link.
One of our favorite spots to relax in our backyard is our paver patio. It’s the perfect place to unwind in the evening and enjoy our dinner al fresco.

These stone steps have truly transformed the slope in our backyard. Making it possible to easily arrive at each destination of our yard. In fact, we’ve created a fire pit area, a couple of areas with swings, as well as a zipline. Now each area is easily accessible with stone steps.
Do you have a slope in your yard you’re wondering how to make it usable space?
Is this a project you are interested in trying?
We hope you’ve found some ideas that you can use in your home.
You know we love to hear from you, drop us a comment below.
Please PIN and share with your friends! Sharing is caring! If you’re new here, WELCOME! We love to meet new friends.
Say hi in the comments below, we’d love to hear from you. You can also learn more about us here.
Thanks for spending some time with us today!
And as always here at Sunny Side Design
WE HOPE TO BRING YOUR HOME TO THE SUNNY SIDE OF THE STREET!
Be sure to follow us on Pinterest for even more home decor and DIY ideas.
To see what we are working on before it’s on our blog, follow us on Instagram.
You can also find our video tutorials on our YouTube channel.

Resources for this project:
See all materials


Comments
Join the conversation
-
Boy, oh boy does that look like it's been there the whole time! FANTASTIC!
-
You did a great job, the entire project is daunting and above my pay grade. We had a downslope in our yard, I paid someone to do something similar.


Frequently asked questions
Have a question about this project?
WOW! That's sure a big project, but, you only have to do it once! Does the gravel between the steps slip at all? I'm starting to not be as agile as I once was so am being more conscientious when I do yard or house.
Thanks!🤩
I love it but I wonder if the stones were at all slippery? Also, a hand rail. Please do not get my wrong. I love it, you did a great, very hard working job. Will it be used a lot?