


Easy Harlequin Pattern

3 Materials
$8
1 Hour
Easy
The coveted harlequin pattern. How I love thee..........but I hate creating thee. I am not a hand painter like my great friend Tracey of Tracey's Fancy. She hand paints patterns because she's an uber talented genius. I can't even draw stick people so hand painting is most likely a no for me. So where does that leave me and my pattern obsession? TAPE! The bane of my existence. It's just too much work, it bleeds, it doesn't go on straight, etc, etc, etc. If you've tried it, you know what I mean. There has to be an easier way........so I created it.
Join me LIVE on Hometalk on Friday, 12/22/17 and I will show you how to create this LIVE on the air.
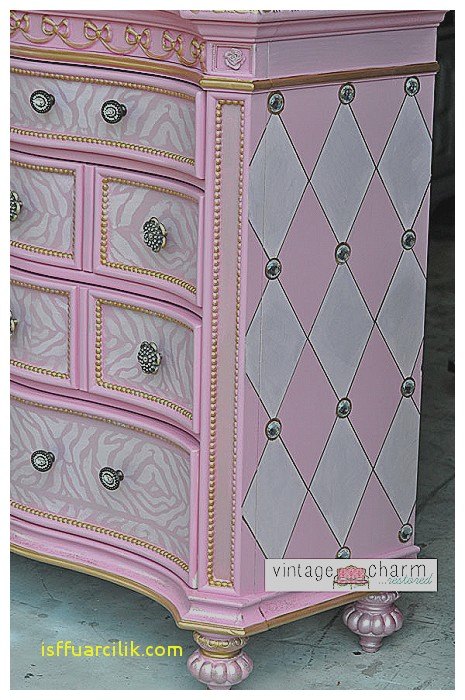
Patterns galore from my friend Tracey's Fancy. This is similar to the look we'll be doing live. We'll be doing harlequin in a mix of Tea Rose and Cappuccino which are both from our All In One Paint line. I'm choosing this paint because you know I hate to wax and top coat so I'm all about a paint with those things built in.
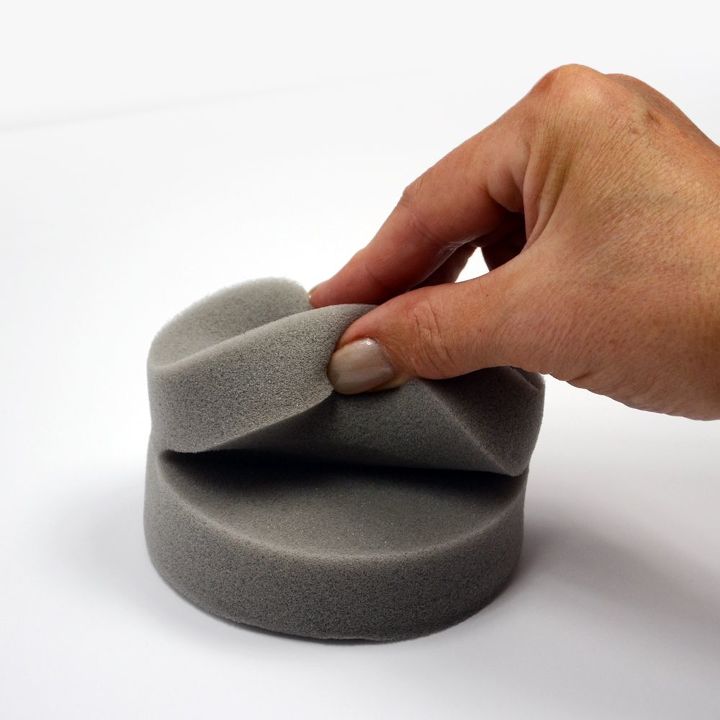
This is my handy dandy tool, The True Applicator. I use it for lots of things, base coating large flat surfaces, applying top coats, blending. They're $4 each and the best tool in my bag of tricks.
The True Applicator has a built in handle and the two discs are connected in the middle so you can pinch one side up to make a handle. Nifty, huh!
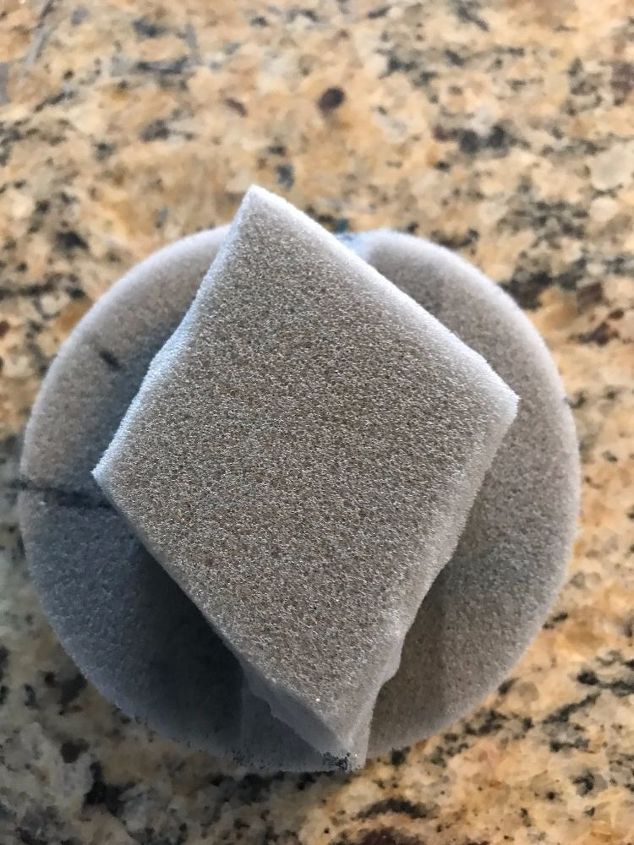
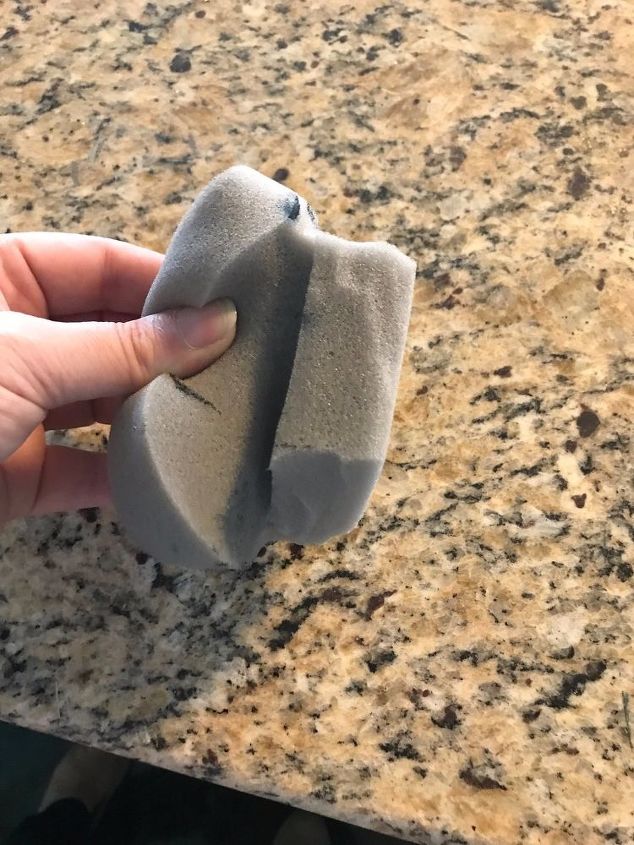
Don't laugh! Brace yourself. This is my first go at this and remember from the convo above that I am artistically challenged. I cut the first layer of my True Applicator into a diamond shape with scissors. Be careful not to cut into the middle where the two are connected. Do you see where we're going with this?!
NOTE: I've since refined this process a little more and will share that tip with you on the LIVE so be sure to join me.
This is a screen grab of a quickie video we did showing the stamping in process. We used the cut True Applicator like a stamp to make a repeat harlequin pattern. Video is in this blog. These color combos are a little crazy but I wanted to see the contrast and I was just playing at this point getting the process down.
{
"id": "4537613",
"alt": "",
"title": "",
"video_link": "https://www.youtube.com/embed/ENyXdf3gsv0",
"youtube_video_id": "ENyXdf3gsv0"
}
{
"width": 634,
"height": 357,
"showRelated": true
}
We made our True Applicator into a stamp! It works great. You need the handle on the 2nd layer to help you apply pressure. I poured out some All In One Paint onto a paper plate, dipped in my creation, wiped off the access and started creating my pattern. Can I get a round of applause for no tape!
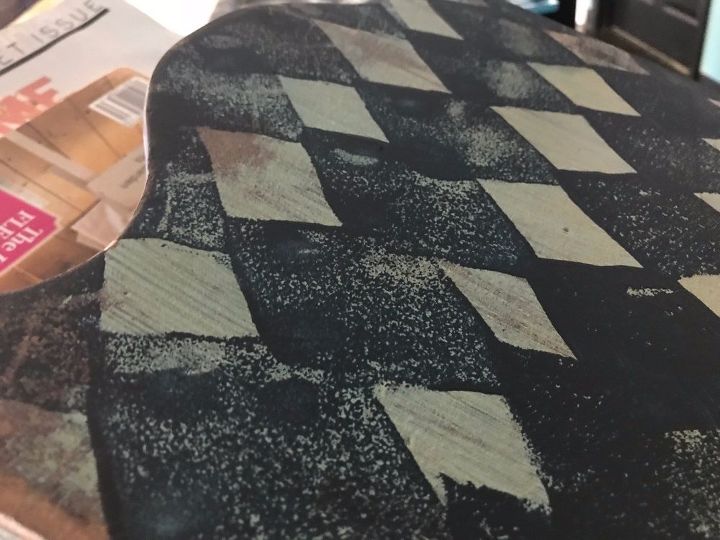
This was my first attempt and I wiped off quite a bit of excess on the side of the plate. I love how imperfect this is. I'm calling this pre-distressed harlequin. It took me a minute to get the placement down so you might want to practice on a sheet of cardboard or kraft paper before attempting it on your furniture or sign. This color is Polo by the way. Also in the All In One Paint line. Its a super dark navy. LOVE!
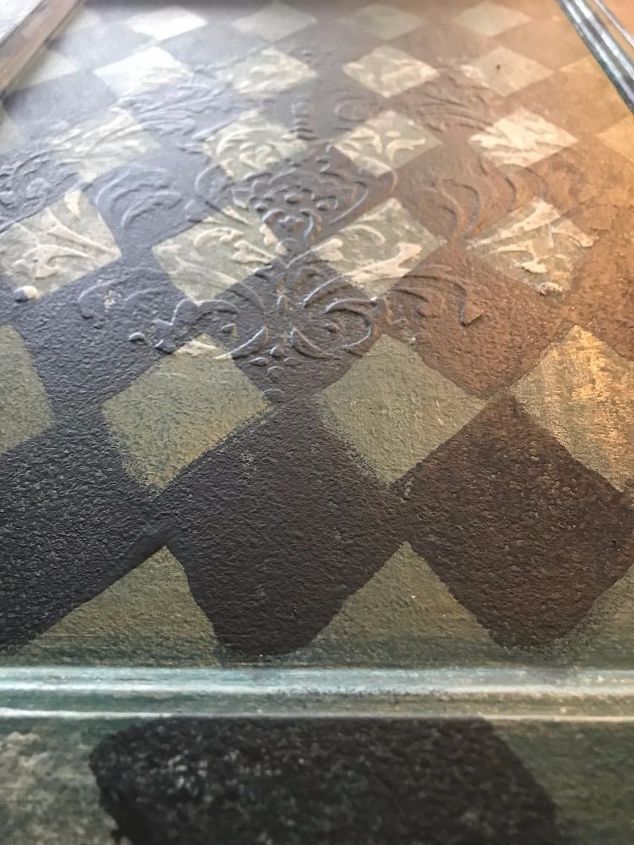
Here's another example with more coverage, i.e. more paint on my True Applicator. We were playing and using what we had handy so this is over another piece we created on a Hometalk live a while back using our Venetian Texture Medium to create a 3D stencil.
What other shapes do you think we can create and stamp? I'm thinking squares and a couple sizes of polka dots for sure. I hope you're loving this idea s much as I am. If you're needing to get some last minute gifts done for the holidays this is a great way to create something unique that looks like it took a lot of love, sweat and tears but it only took love and a little creativity. Order your True Applicator and any of our Heirloom Traditions Paints now and do this project with us live on 12/22/17.
We have 8 colors of All In One Paint on Amazon Prime with FREE 2 day shipping. You can also find our amazing Weathered Wood Antiquing Gel there as well as our Syntec Chalk Brushes.
Resources for this project:


Any price and availability information displayed on [relevant Amazon Site(s), as applicable] at the time of purchase will apply to the purchase of this product.
Hometalk may collect a small share of sales from the links on this page.More info


Frequently asked questions
Have a question about this project?