


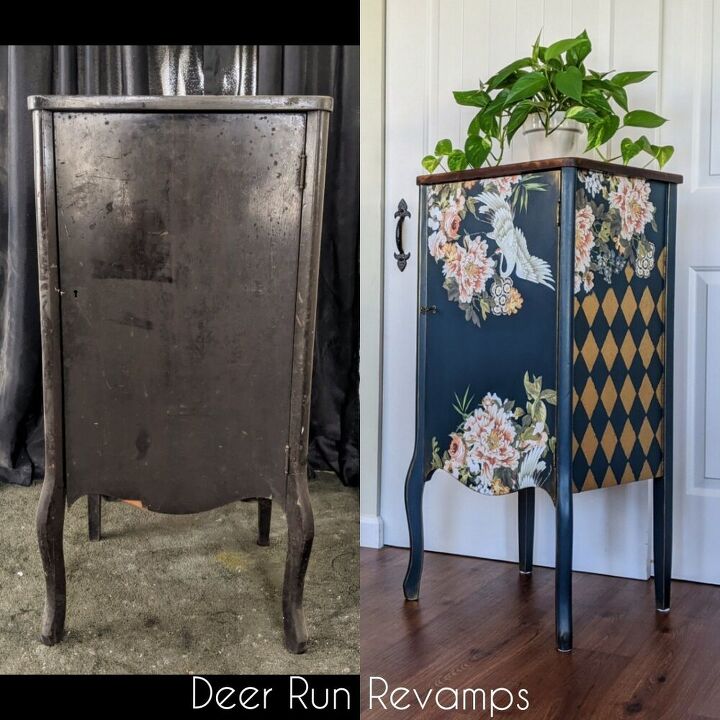
Transform A Cabinet W/ Paint, Floral Transfer & Gold Harlequin Pattern

I had been looking for an antique music cabinet for quite some time. They are a perfect size for any space and an extremely versatile piece of furniture. But....they are pricey 💲💲💲 And with my frugal ways, I was beginning to think I'd never get my hands on one. 🤷🏻♀️
Then, at some random estate sale, in the corner of a dingy garage, I saw something that piqued my interest. I only saw the top since there were Christmas decorations in front of it, but I had a great feeling! So I briskly walked over to that corner, moved the decorations, stepped back and just took in the sights! It was a music cabinet! The most perfect music cabinet and I knew she was the one! She may have been in rough condition and very dirty, but she was a blank canvas, my blank canvas, and I was so excited to give her new life ♥️♥️
*I based the pricing off of the amount of product used for a project of this size. ..you will have a lot leftover of each product, ready for additional projects 😁 And a lot of these items you may already have in your garage 😉
*Time does not include dry time, work time only
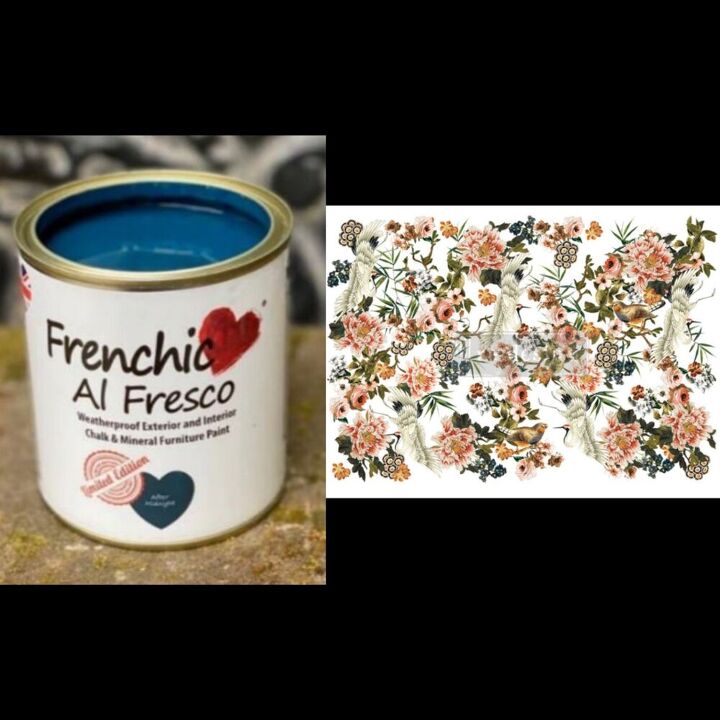
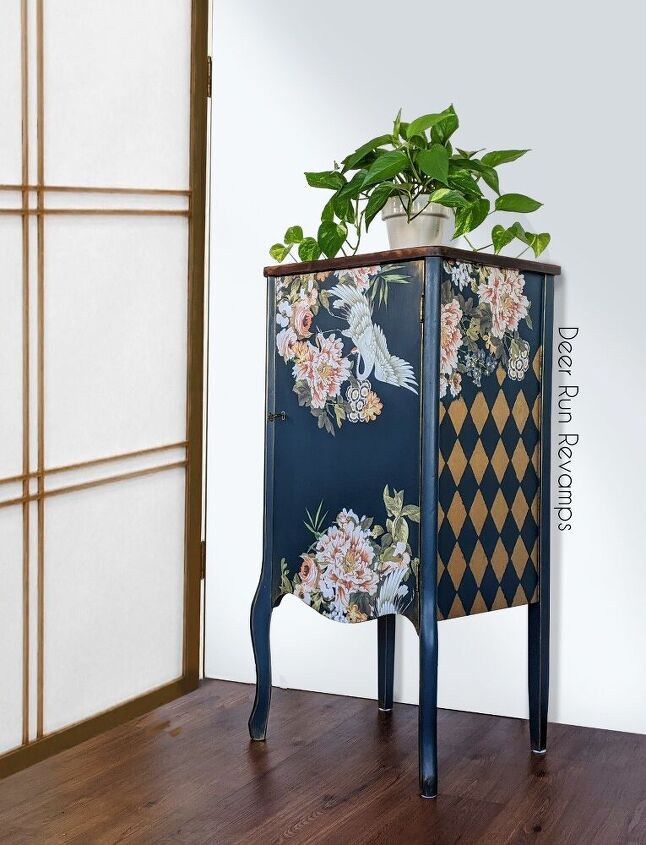
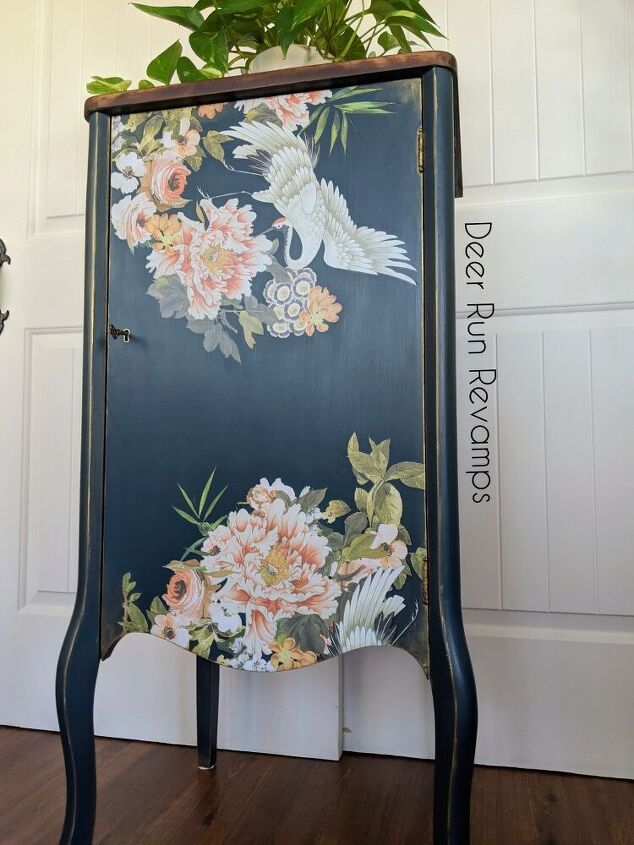
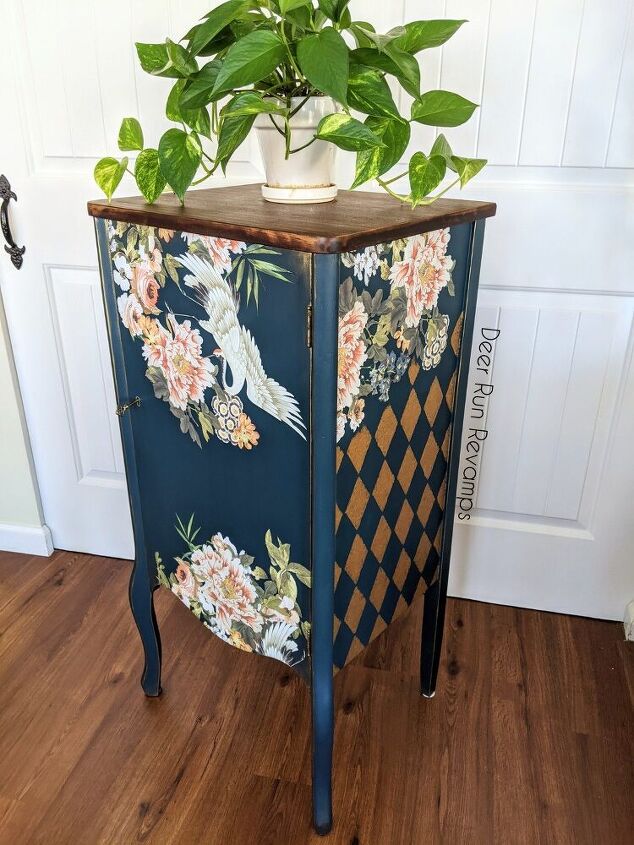
I decided to go with a slight Asain Influence. These two products were my main inspiration
Frenchic Furniture Paint's limited edition color in "After Midnight" is a stunning blue. It's a touch brighter than navy with a kiss of teal ♥️
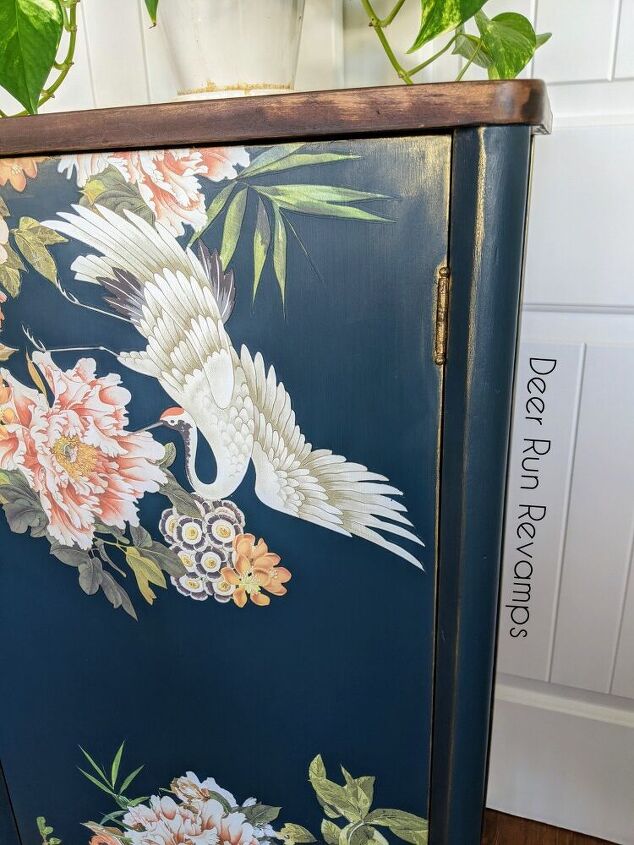
Redesign With Prima's "Elegance And Flowers" Decor Transfer is one of the extra large transfers! 48"x35" to be exact! And it comes in 6 sheets. You can get a few projects out of this single transfer
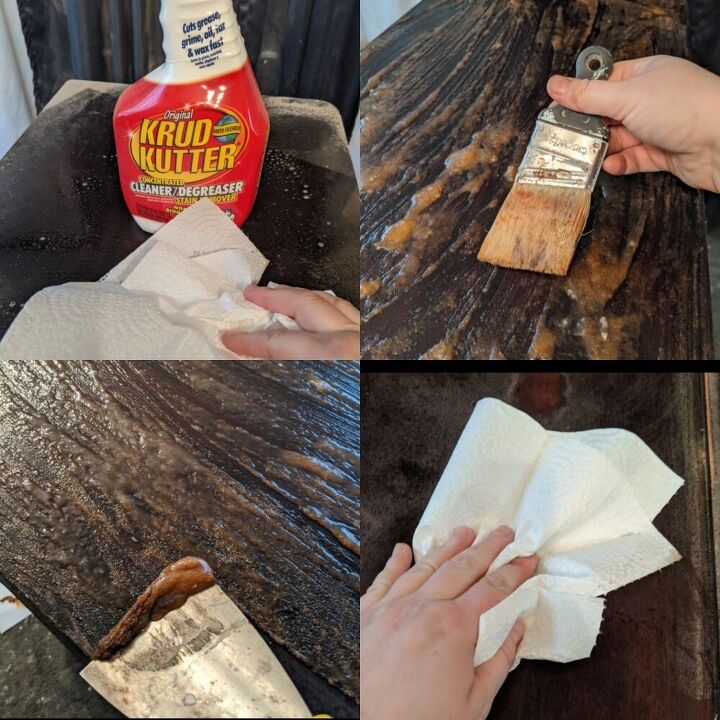
First step in any project is PREP
It doesn't matter what paint you use or what it says on the can, what "Karen" does, or what your neighbor told you. I promise you, prep is always necessary for a forever lasting, perfect finish.
Now, some paints may require more prep than others, but most chalk/mineral paints require the same prep.
Clean the piece really well with a degreaser. Totally Awesome from the dollar store is a decent cheaper option, Krud Kutter is a great choice, or, what I use (it's only the Krud Kutter bottle that I refilled), Frenchic's Sugar Soap. It's a non toxic cleaner that removes grease, dirt, grime, and even nicotine! It comes as a concentrate and you mix it with plain water (Link in the materials section)
After the piece has been thoroughly cleaned, strip any areas that you want to keep wood or if the previous finish isn't adhered properly. For this piece, I stripped the top and the door. The door had about 5 coats of a thick varnish, so I wanted to remove that before painting it.
I prefer Jasco brand stripper. It works extremely fast but expensive. I also use Klean Strip from Walmart, which works pretty well too, but cheaper. I'm not a fan of the "non toxic" strippers, they take forever and typically numerous coats. I'd rather put on gloves, go outside, and get the job done within 10 minutes.
It all comes down to preference
Make sure you're either outdoors or in a well ventilated area, put on a pair of thick gloves, and apply a thick coat of the stripper. Allow to sit for a few minutes (directions in can will tell you how long it requires) and then scrape it off.
Clean any remaining residue with mineral spirits
Scuff sand the entire piece (wherever your painting) using 180-220 grit sandpaper. This step is crucial because it will key the surface and give the paint something to really grip onto
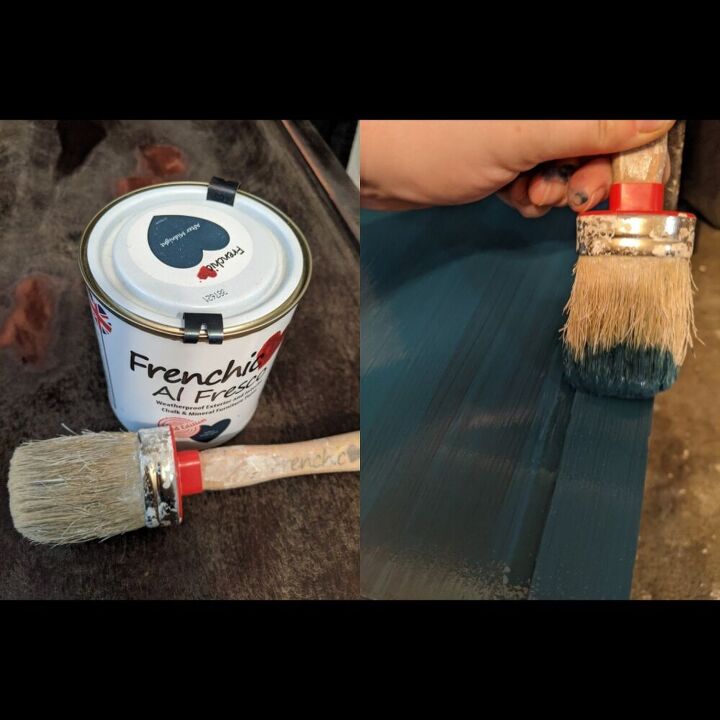
When using Frenchic's Lazy and Al Fresco ranges, you do not need a primer. I have painted a mahogany dresser white with no primer and no problems. This paint is amazing!
Apply the paint in thin coats, misting with water as you go if necessary. You want to make sure that the brush smoothly glides over the surface. This will ensure very little to no brush marks. 2 thin coats is all I needed for this piece.
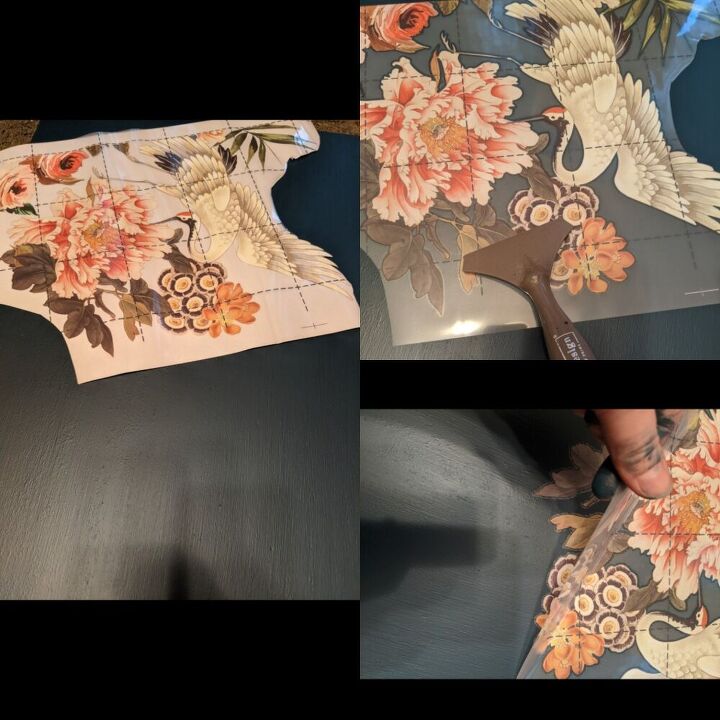
After allowing the paint to dry for 1-2 hours, I then applied the transfer.
Transfers are extremely sticky, they will stick to anything they touch. So keep the white backing on until you're ready to apply.
Cut the transfer to fit your space. You can cut out a single bird, or you can use the entire transfer, get creative and create a look that you love ♥️
Once you have the piece of transfer ready to go, remove the white backing. Carefully hover over the surface while you position the design exactly where you want it. Once you're sure on the placement, go ahead and press the Transfer onto the surface.
Using the wooden tool included with your transfer or the transfer tool (purchase separately), apply pressure and go over the entire transfer, especially over the edges.
Once you think it's adhered, start at a corner and slowly start to lift up the clear protective layer. If at any time, a piece of the transfer didn't adhere, just lay the clear film back down and go over it again with your tool. Continue this process until the entire clear film is lifted.
Take a dry clean rag and "Burnish" the transfer. Press down all over the transfer as if you're buffing wax
Continue this process for each piece of transfer you'd like to apply
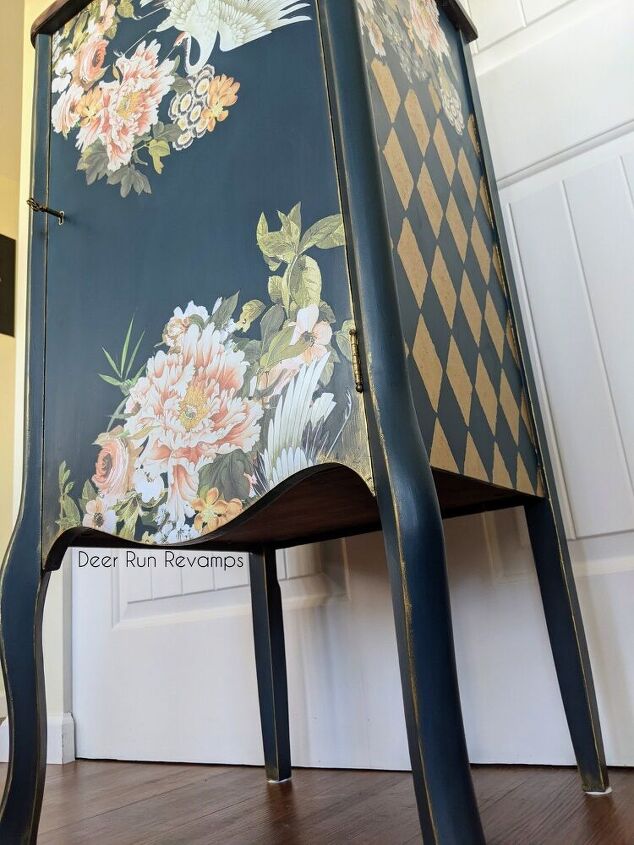
For the sides, I added a gold harlequin pattern using a Stencil I got from Amazon.
Frenchic makes a product called Frensheen. It's a metallic mineral powder that can be mixed with paint, wax or a waterbased topcoat (or just about any medium). For this project, I mixed it with Frenchic's Finishing Coat, a waterbased poly. It's about a 4to1 ratio Finishing Coat/Frensheen. But, it's all about preference and the project. I wanted the gold Frensheen "glaze" to be thicker for this pattern since I wanted texture, so I added less finishing coat. Just mix a little bit at a time until you're happy with the consistency. I also added in just a pinch of silver Frensheen to offset the brassiness in the gold. Again, just add in small amounts and mix until you're satisfied.
Tape off any areas you don't want to get the gold glaze, and then tape your stencil into place and grab a detail brush. A fluffy one is best. Dip it into the glaze (you want a good amount in your brush, this isn't typical stenciling and you will get bleed through, it's not meant to be perfect), and in an up and down pouncing motion, apply the glaze to the stenciled area. Don't worry about completely filling in the stencil, you want a bit of the base color coming though. The main goal is to get texture, lots of it.
As you get to the top of the design where the transfer is, apply glaze to go in line with the design, don't do a straight across line.
As the glaze begins to dry, go back and "pounce" over the design again, creating even more texture.
Allow the design to dry before moving on to the next section
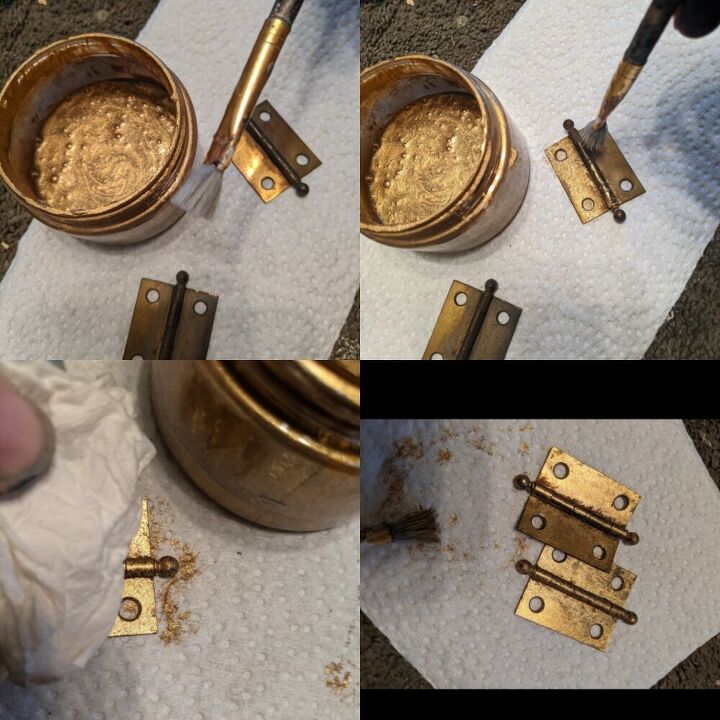
While we have our Frensheen out, move onto the hardware. I only needed to do hinges and the skeleton key.
Clean the pieces well using soapy water or a product like bar keepers friend. If the hardware is brass, you may like the look you get just from cleaning them. But if you don't or if the pieces aren't brass, they can be painted.
Grab your Frensheen and brush, and do your pouncing motion again, leaving some of the patina behind.
I'm a wax girl... rephrase..I'm a Frenchic Furniture Wax girl. This wax is unreal! It's so creamy, glides on smooth, durable, leaves a soft sheen, and does NOT have to be buffed! 😲
It's foolproof! So many times, the topcoat messes up our beautiful painted finish, but there's no worrying about that with this wax! Unfortunately, it isn't meant for every project. High traffic pieces such as dining tables need more than a layer of wax. But accent pieces that will get low-medium use, wax is the perfect option 😁
I get cloth sponge like pads meant for car wax from Amazon. They're cheap and they're washable, so you can reuse them a few times before they get thrown out.
Apply just a small amount of wax to the pad and in a circular motion, go over the entire piece, really focusing on the transfers. Especially if you see any of the "halo" (outline). You could even seal the transfer right after applying it. Skip the dry rag step and use the wax instead to burnish the transfer, but just the transfer, not the entire piece.
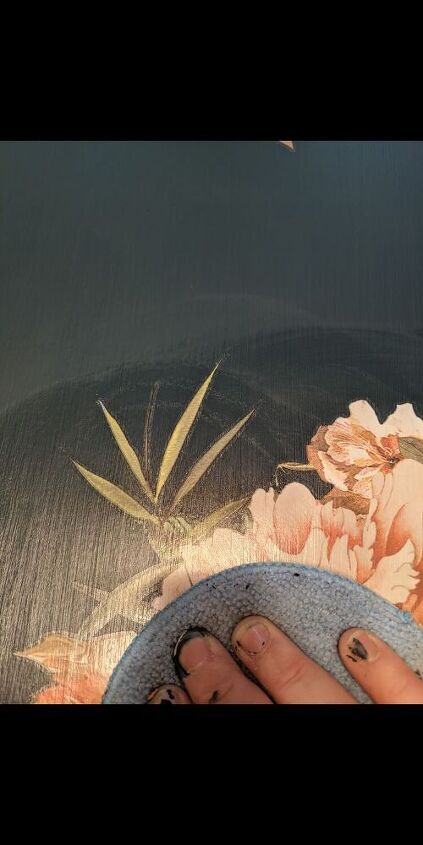
I LOVE a distressed look. But, with this elegant style, typical distressing would be completely out of place. So, I did a gold distressing instead.
I used the most gorgeous antique gold wax on the market, Redesign With Prima Decor Wax in Eternal.
Using your finger, apply just a small amount of wax and gently glide up the edges of the legs, corners, and edges of the sides and mouldings.
This is typically my first step since I try to do all of the sanding before anything else, but I wasn't sure how I was going to do the top so I decided to do the rest of the piece first.
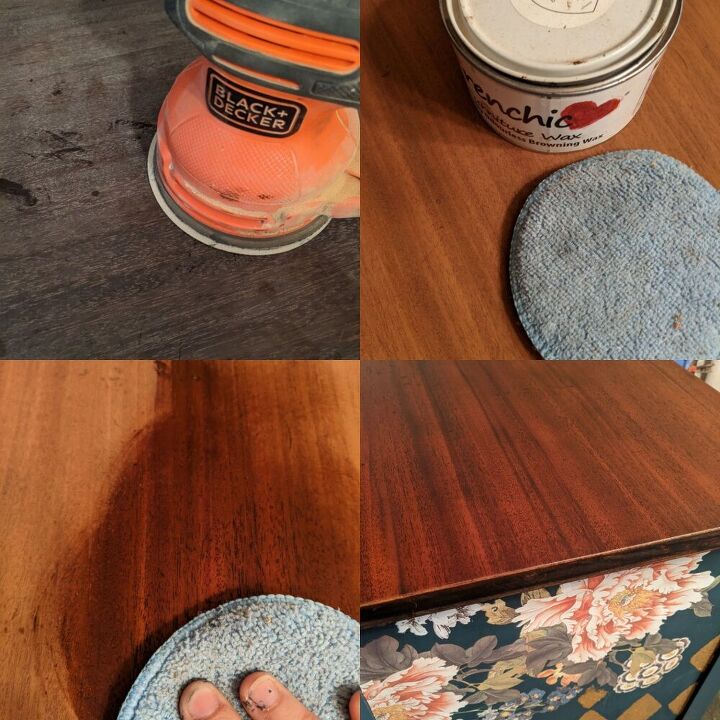
The area was already stripped so I just needed to sand it. It is a veneer, so I needed to be careful.
Starting with 150 grit sandpaper, I sanded off the remaining stain. Then I went up to 180 grit to smooth out any marks, and then 220 grit for a soft feel. If you're staining, this is where you stop. When you go above 220 grit, it closes the grain and won't take the stain properly.
I'm not staining the wood, so I finished it off with a 320 grit hand sanding to really smooth it all out and give it a silky feel.
I then sealed it with Frenchic's Browning wax. This also acts as a stain, it deepened the color while adding a subtle shine. If you want more shine, you could buff the wax, but it's not necessary.
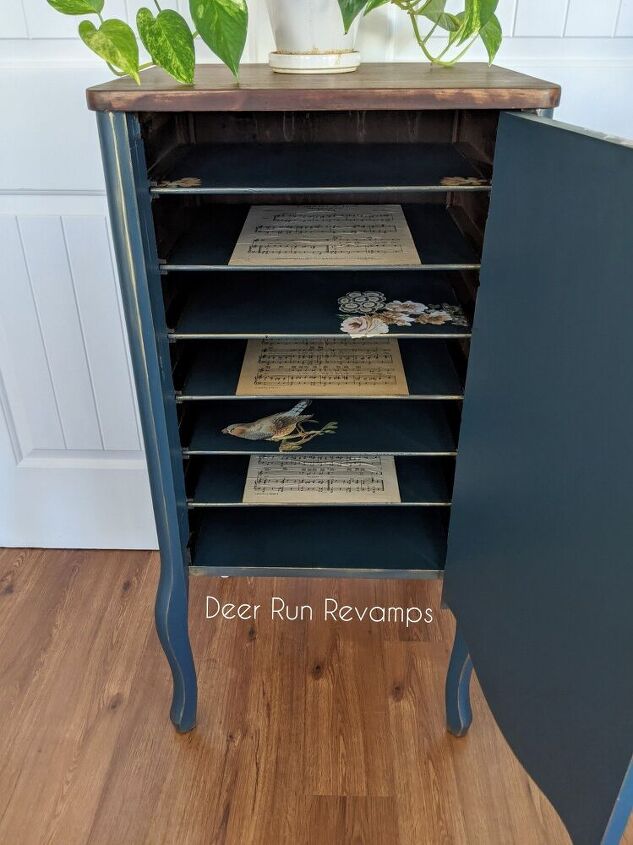
It's all in the details! Especially since this piece is going up for sale!
I painted the shelving and added vintage sheet music to a few shelves, the song "I Still Get A Thrill", which I specifically chose because I still get a thrill everytime I pick up a paintbrush 🖌️♥️
The other shelves have small pieces of the Elegance And Flowers transfer.
Now, step back and enjoy the view! All the hard work does pay off!
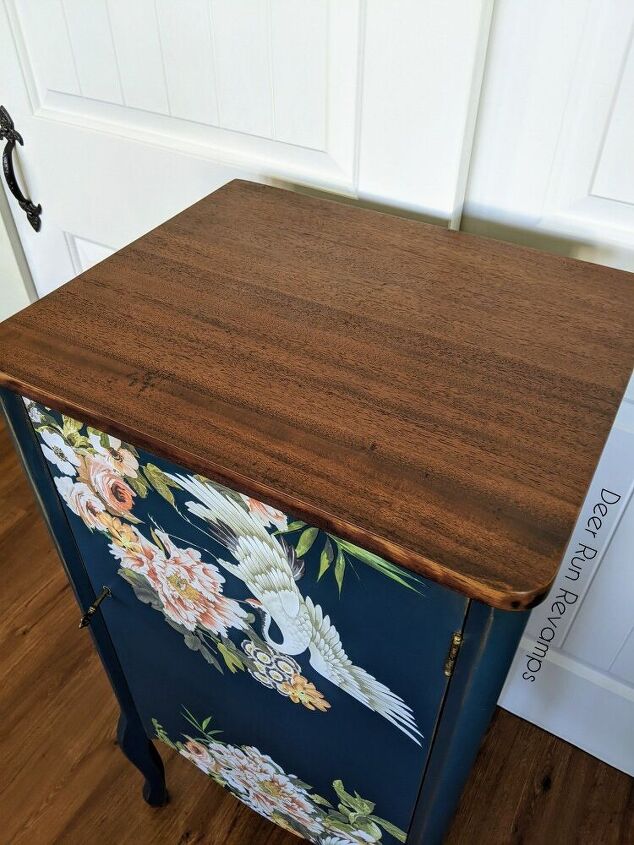
The mahogany veneer cleaned up so beautifully
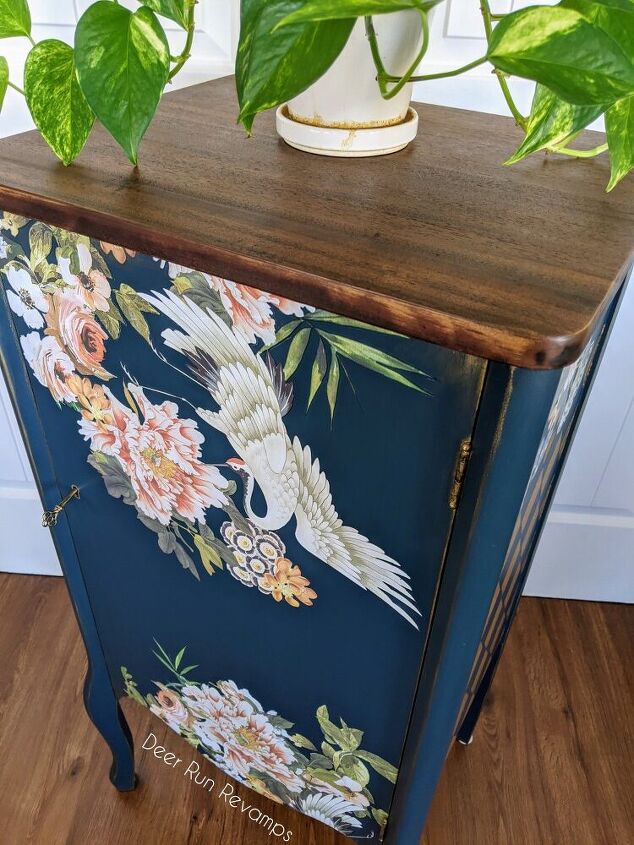
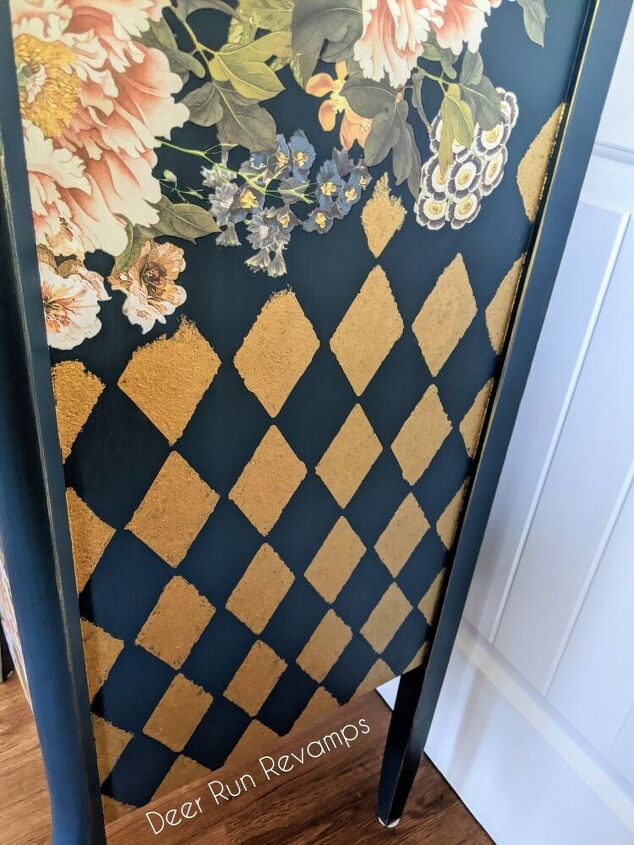
The texture is exactly what I wanted and I love how not perfect it is 😍
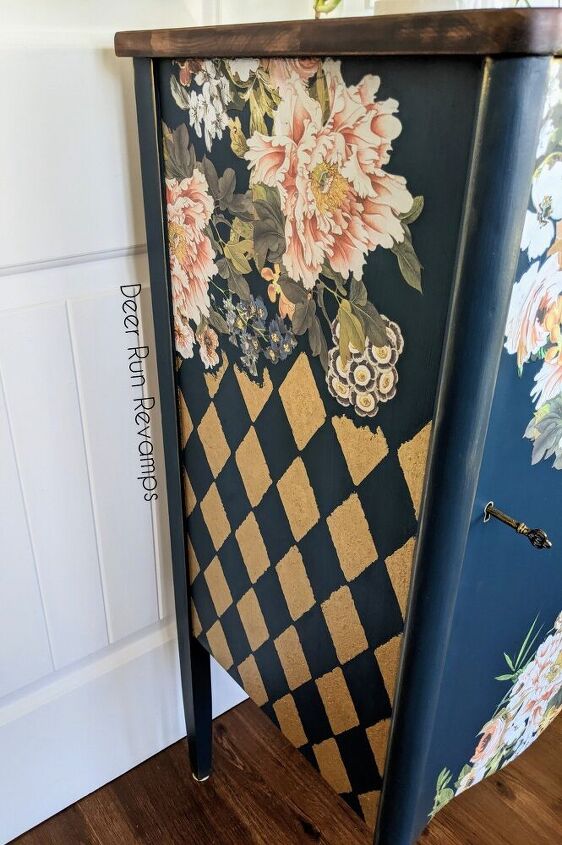
The gold "distressing" really adds another layer to the beautiful details
You can find all of the products used in this tutorial and so much more in my Etsy shop
This piece is currently available and can be shipped anywhere within the contiguous US
You can also follow us and see more of our creations as well as unique home decor on our Facebook page
Thanks for reading! ♥️♥️
I hope this tutorial has inspired you to jump in and create something beautiful 🥰
If you have any questions or comments, pleaee don't hesitate to reach out or comment below 😁
Resources for this project:
See all materials


Comments
Join the conversation
-
Simply beautiful!! Very elegant Thanks for sharing!


Frequently asked questions
Have a question about this project?