


How to Apply a Furniture Transfer

Like the look but not sure how to apply a furniture transfer? Rest assured, they are so easy to do and look amazing.
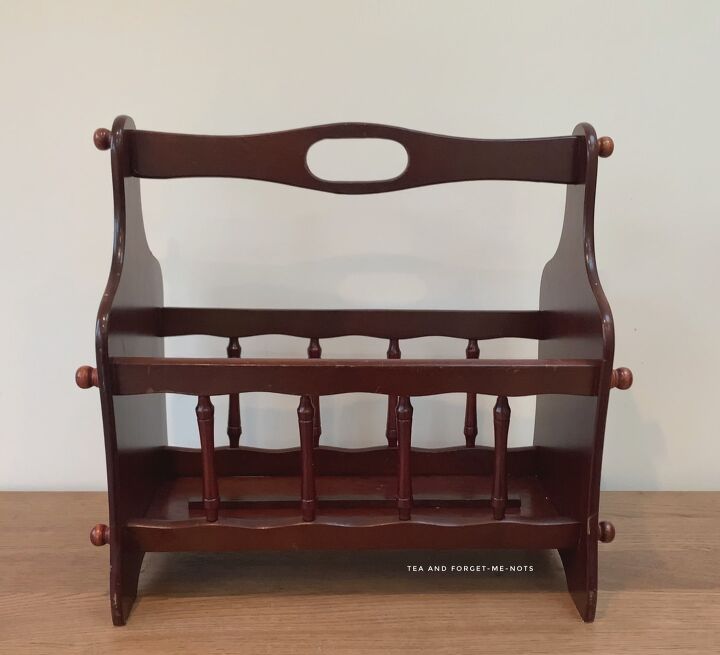
I’ve done quite a few pieces with furniture transfers. From chests of drawers to cabinets… and this one is the smallest yet.
But the thing they all have in common is that they look unique and interesting.
My beforehand photos of the products I planned to use was 100% right this time, that might be a first!
I knew I wanted to do something interesting, especially as this is a collaboration with other upcyclers. So I chose to add a transfer for extra character.
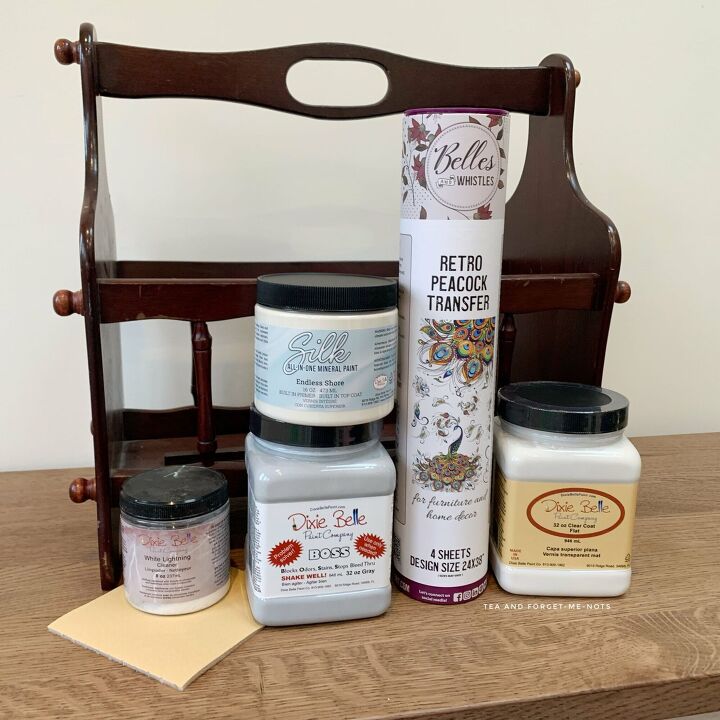
Prep for success
I started by cleaning the piece with White Lightning, diluted in warm water. I then sanded it with 180 grit sandpaper to take the shine off of the brown varnish finish.
It was quick to sand as I didn’t need to remove the colour, just give the piece enough texture for the paint to stick well to.
This is the dust that was left after sanding. So I needed to clean again with White Lightning for the paint to stick to the actual wood rather than the dust.
Cleaning and sanding done, on to the fun bits…
Prime time
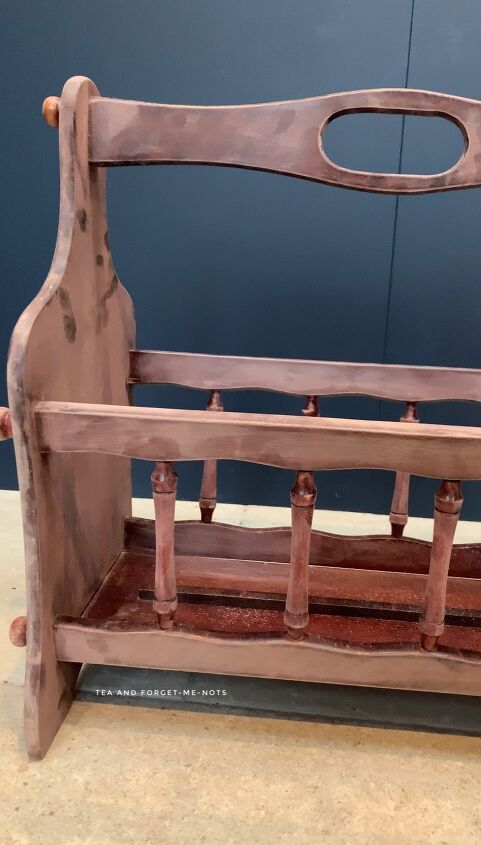
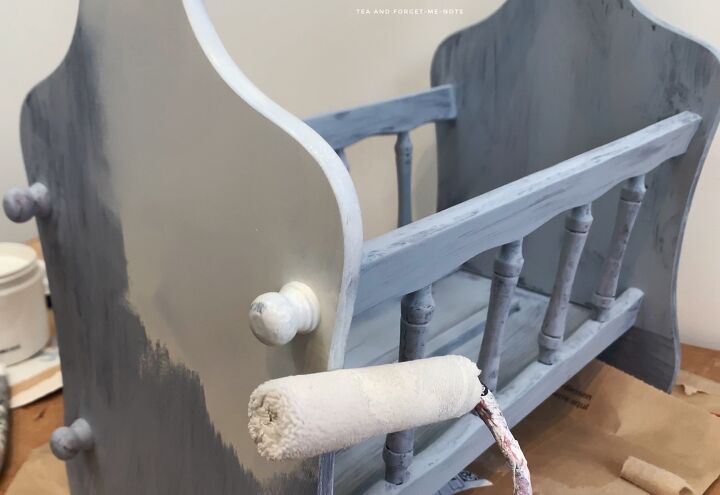
As I was changing the colour from dark to light, I used one coat of BOSS primer in gray, to help the transition.
If I didn’t use primer and went straight to painting, it’s likely that I would have needed more coats to cover the brown fully.
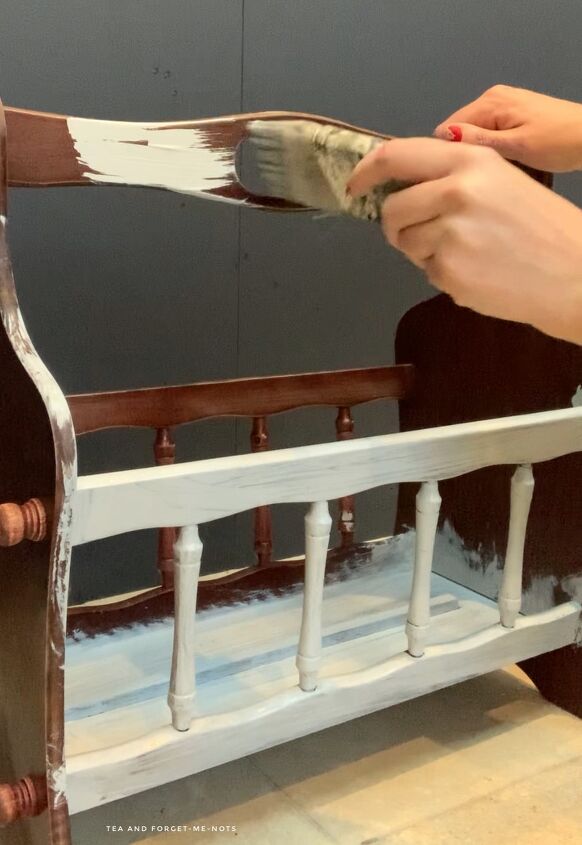
I chose the warm white paint colour, Endless Shore, and needed two coats. I’m always impressed by the coverage of Silk paint. The last time I created a piece in white, I needed more than twice as many coats. Phew.
I used both a brush and a roller. The brush to get into the details on the spindles and a roller on the flat surfaces.
The furniture transfer
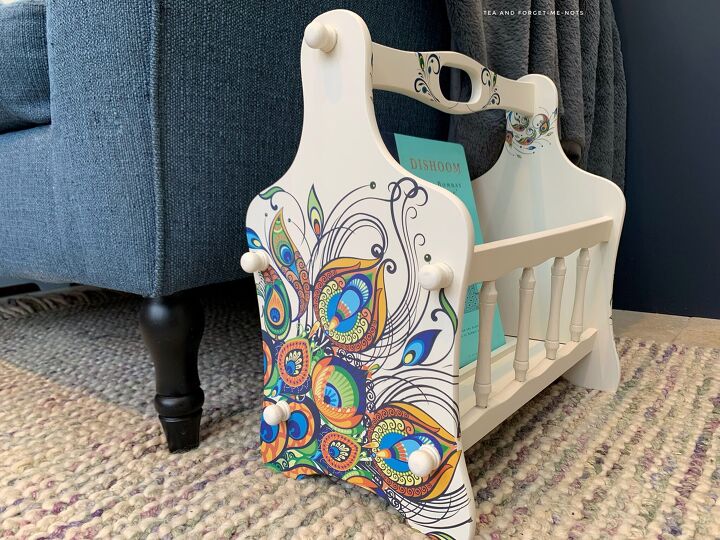
The Retro Peacock transfer comes on three or four separate pages so I took my time to decide which parts I wanted to place where.
I knew I wanted the larger, more dramatic pieces on the ends and there were several to choose from.
There was also lots of feathers and pretty smaller details to choose between, to decorate the middle section.
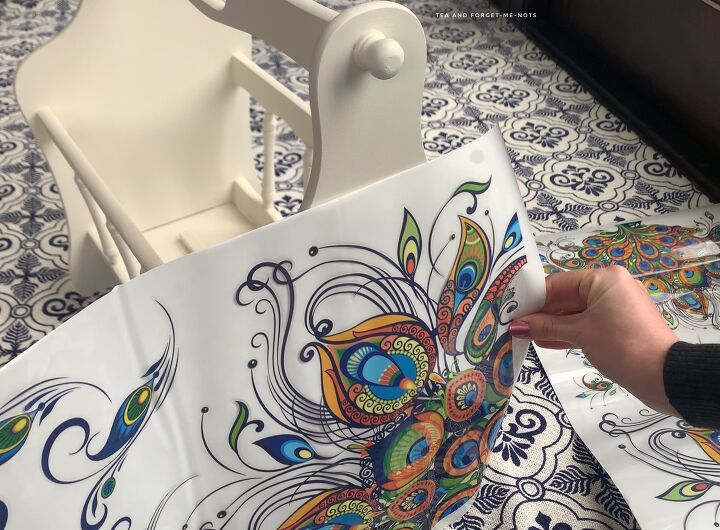
I wasn’t initially going to dismantle the magazine rack to apply the furniture transfer. But eventually decided that the time I would save not doing so, might cost me more effort trying to get the pieces to sit well under the knobs.
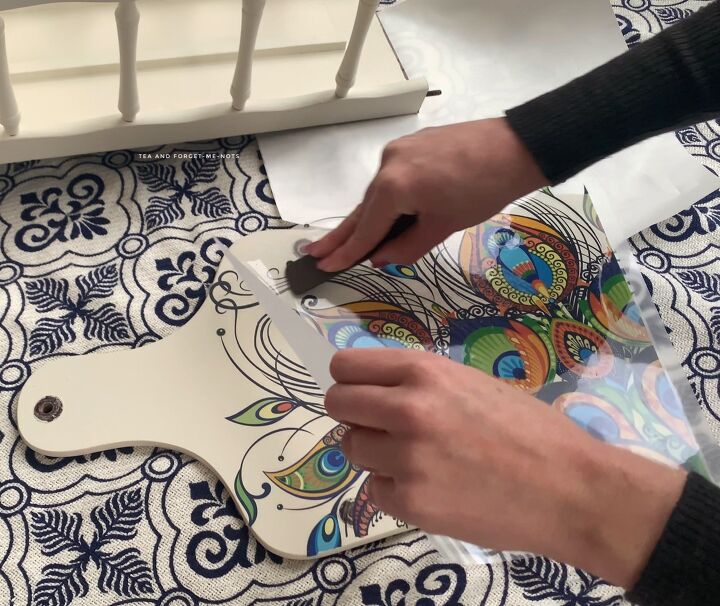
The process of applying the transfer is very easy. After cutting the piece to size, I removed the white backing and laid the piece where I wanted it.
At this stage, the transfer is sticky so it’s important to get it in the right place. The transfer comes with a wooden ruler to burnish, or rub, the transfer onto the piece.
This takes a bit of time but is very straightforward. Unlike this chest of drawers where the transfer took me 6 hours to apply, this one took about 15 minutes.
Any sections where it didn’t attach perfectly, I lay the plastic back down and rubbed over the section again.
I then reassembled the magazine rack before applying transfers to the middle so that I had a better sense of the overall design.
While Silk paint doesn’t need a sealer, the transfer does for extra protection. I used Dixie Belle’s Clear Coat in flat which is matte, so didn’t distract from the transfers at all.
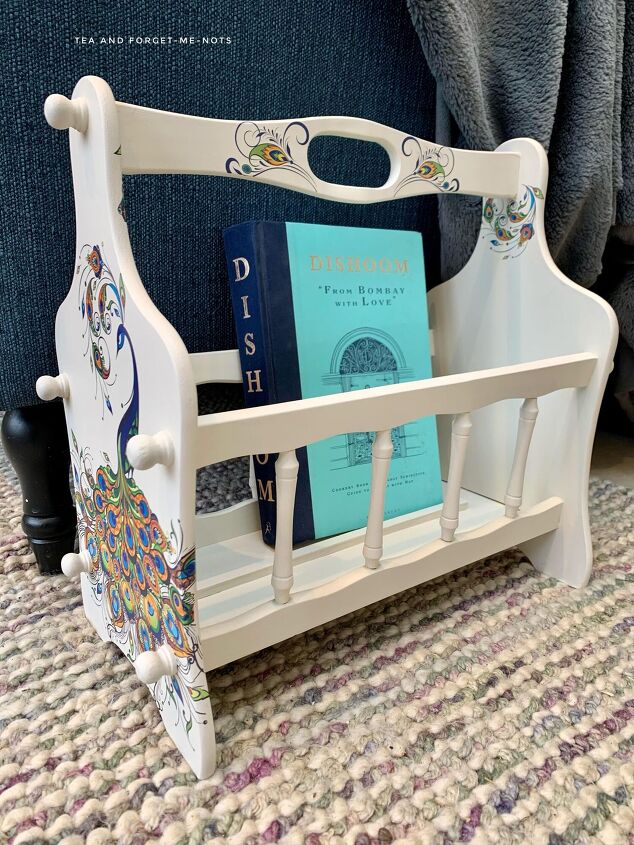
The finished piece
Quite the transformation, I think. Hopefully no longer a 75p magazine rack.
I was fortunate that the main peacock piece fits perfectly where I wanted it to go.
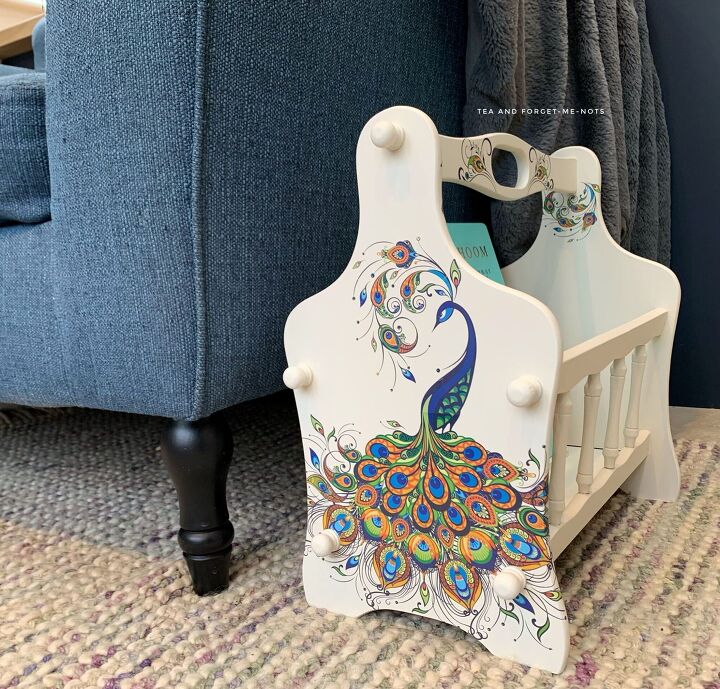
And there were enough symmetrical pieces that I was able to do mirror images across the middle and inner ends.
I also like that whichever angle you view the piece from, there’s some transfer visible. If it’s straight on from the side then it’s only the subtle, symmetrical pieces at the top.
I considered adding the transfer to the knobs but think it was the right choice to leave them plain to break up the colour.
The colours are so bold and fun, a definite wow factor.
What do you think? Did this explanation make you confident in how to apply a furniture transfer? I’d love to know if you try it.
Subscribe for weekly DIYs, tips and the 5 tools under £15 that will make your life easier.
Thanks to Dixie Belle for sponsoring this blog post. All opinions are my own.


Comments
Join the conversation
-
Yep and wonderful idea it was very well done I love it
-
I will try on a wine dis place when I make it


Frequently asked questions
Have a question about this project?
i love the retro peacock transfer and would love to try it. I need to know where to find the transfers so I can price them and ho from there
We’re can I get The transfers from please