


Quick and Easy Stair Makeover

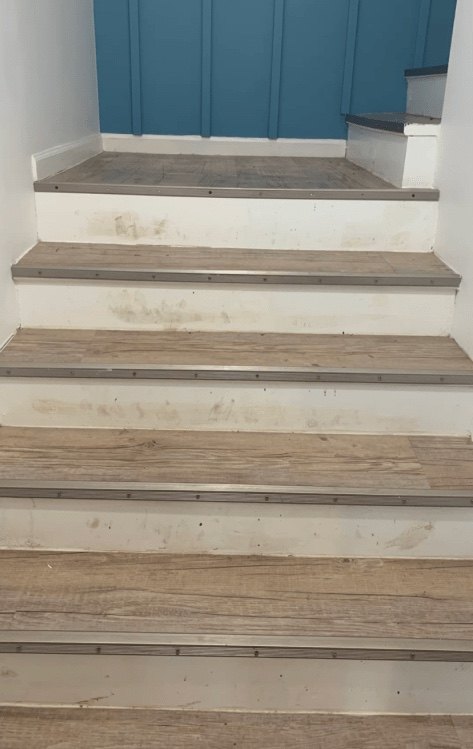
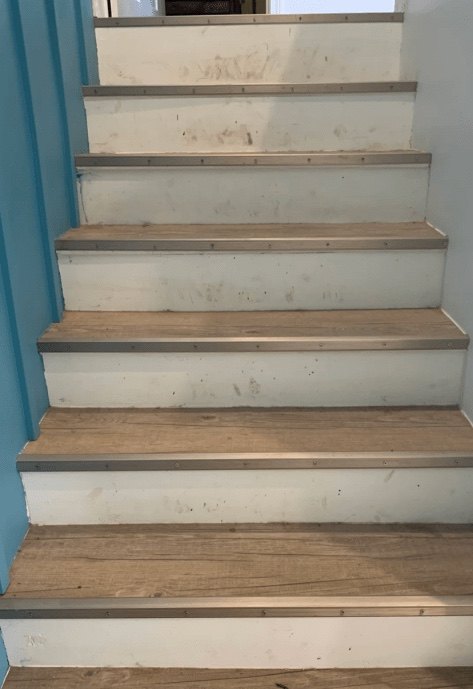
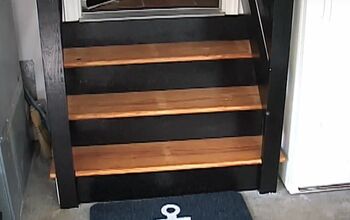
I hate my parents’ stairs to their basement. The house is only 3ish years old but these stairs have scuff marks everywhere, they were clearly constructed in a rush, and of course my parents opted for cheap leftover materials to cover the treads. No two stairs are exactly the same size. Plus, to hide the edges of said leftover materials, they opted for those terrible metal stair noses that are screwed down and catch socks all the time…she said with some personal experience.
Hometalk Recommends!
Several months ago, my mom and I discussed choosing a self-adhesive wallpaper to stick on the stair risers to cover the scuff marks and try to beautify the stairs a bit. Fast forward to the week before Mother’s Day, and my mom had picked a wallpaper and started the project herself.
She did one stair.
Then Mother’s Day weekend, she asked if I would finish the project as my gift to her. Isn’t that convenient?! lol
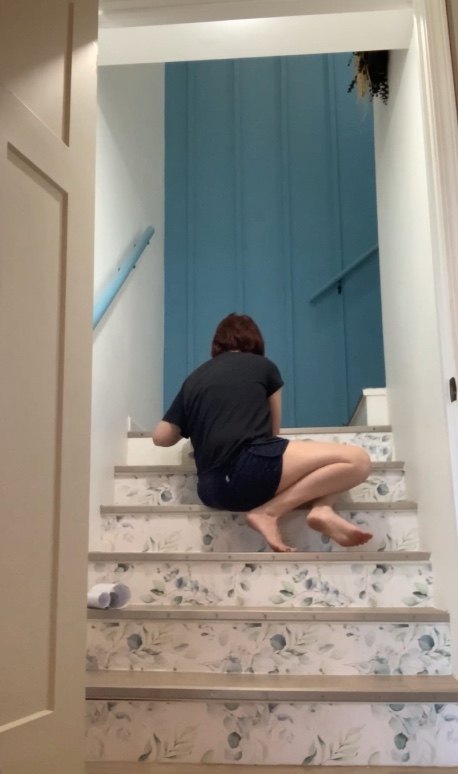
So, last Saturday I gathered the few tools required for this simple project, waited until my husband took our kids shopping, and got to work…in my pajamas. Yes, this project is easy enough to do on a holiday weekend in your pajamas. In total, I think it took me an hour to do the 13 stairs left to me. Doable, right?
Supplies:
(As an advertising affiliate and Amazon Associate, I earn a small commission from qualifying purchases. But it doesn’t cost you anything extra and helps me keep up my site!)
- Tape measure
- Razor/box cutter
- Scissors
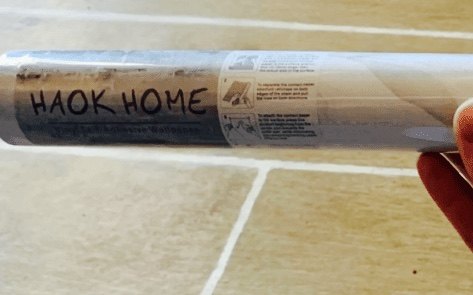
- Self-adhesive wallpaper (We needed 3 rolls)
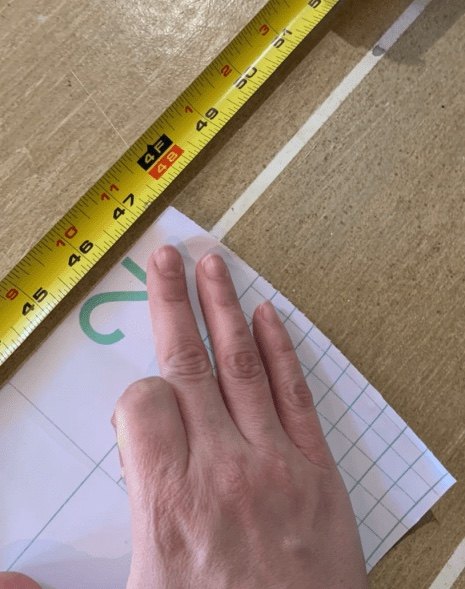
Step 1: Measure each stair. If you have the good fortune of having symmetrical stairs, good for you! Yours will be easier. Most of the stairs I had to deal with were around 6 inches high and around 48 inches long for the bottom section, then around 6 inches high and around 41 inches long for the top section, except for the very top stair which was almost 8 inches tall and one random stair which was 7 inches exactly. 😑
Anyway, once you know how much area you need to cover, you’ll know how much wallpaper to buy. (Each roll should say on it how much it covers.) It helps to have a little extra for each stair, so keep that in mind. We needed a little over 2 rolls, so that 3rd roll gave me plenty of wiggle room.
Step 2: Buy self-adhesive wallpaper. When picking a wallpaper, consider the symmetry of your stair risers. If, like the ones I was dealing with, they are not squared or even, try to avoid any design with lines or patterns/shapes that are going to give that away. Also try to get a color that is close to the color of your existing stair risers and/or the walls if you have weird nooks and crannies. (My mom lucked out in that she picked a floral/plant design that swirled and stretched with no particular angles to line up, plus the background was a light color like the stair risers. Whenever I couldn’t quite get the paper to compensate for the uneven stair dimensions, the light color blended into the uncovered gaps and wasn’t noticeable.)
The wallpaper we bought was from Haok Home on Amazon, and it’s beautiful up close. They also have many other options that are very cool, pretty, and colorful. Sometimes the adhesive can be too weak or too strong on self-adhesive wallpaper, but this stuff was perfect. 👍
Step 3: Clean the stairs. This might seem silly to point out, but it really does help if the stairs are clean. You don’t want any dirt or dog hair to screw up the adhesive or get stuck on the edges as you smooth the paper. I quickly swept the stairs with a broom and then wiped the stair risers with a damp cloth. That did the trick.
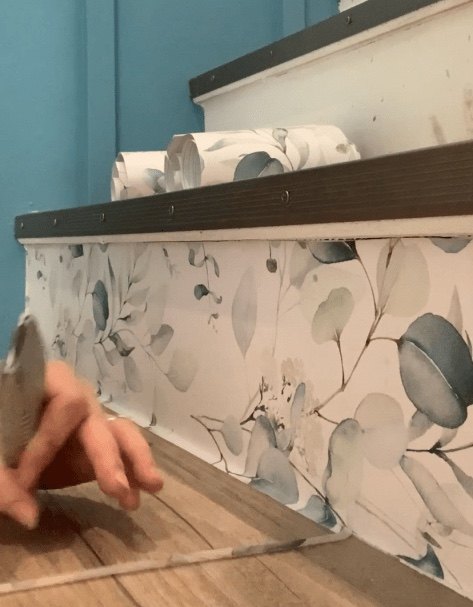
Step 4: Cut the wallpaper. I measured each stair as I went to be sure. if your stairs are all the same, again this part will be easier. With my 6×48 “ish” measurements, I rolled out and flattened the wallpaper, then used a tape measure to mark off my cuts. I gave myself about a half inch extra for each measurement to help me cover the wonky riser dimensions, but I’d recommend this even if your stairs are perfect because it helps you get nice tight lines against your stair treads and sides…more on that in a second.
Once you’ve got your marks, scissors cut the wallpaper really well. Most self-adhesive wallpaper that I’ve used has helpful lines on the back side, so those certainly help keep your cuts straight. The paper might roll back up a little, but I pinned the end under one of my dad’s nearby boots. 😂
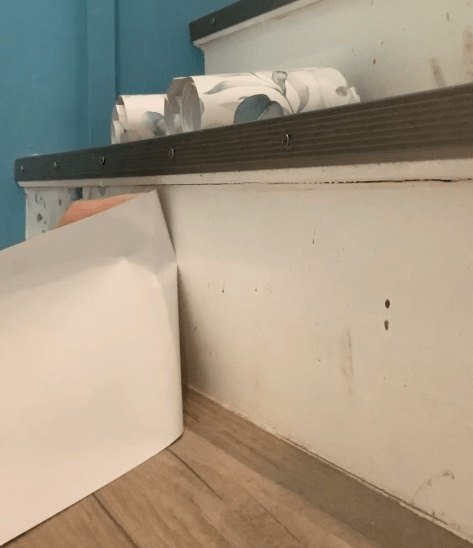
Step 5: Attach the paper! This is the fun part, as you get to see the stairs start to transform. After some trial and error, I found that attaching the top of the paper first worked best. I peeled off the backing of the wallpaper a little bit at a time, lined up its top edge to the top of the riser under the stair’s nose, and gently pressed the top to stick. Since I’d given myself some extra, I didn’t have to worry too much about lining up the sides perfectly when I did this.
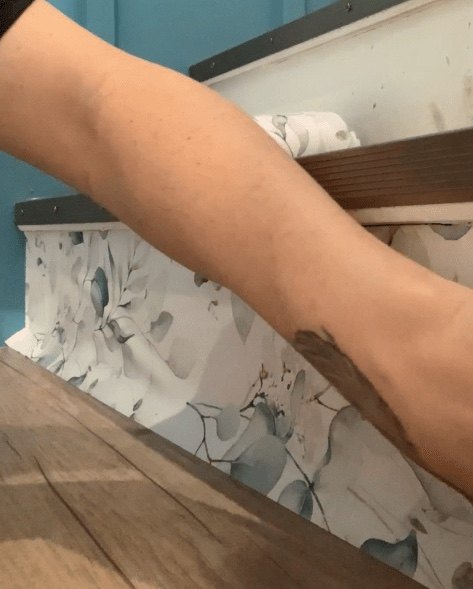
Once my top line was straight (I did have to reposition a few, but that’s why I only gently pressed the paper in place at first), I moved to the middle of the stair riser and pressed the paper in a downward motion, all the way to the bottom. From there, I smoothed the paper in a “down and outward” motion on either side to press the paper onto the riser. I found this worked best to quickly (and usually in 1 try) attach the paper and avoid any air pockets.
A few I had to gently peel back and reposition, but once they were in place without wrinkles or air pockets, I smoothed the paper more firmly all over to make sure it was stuck on really well.
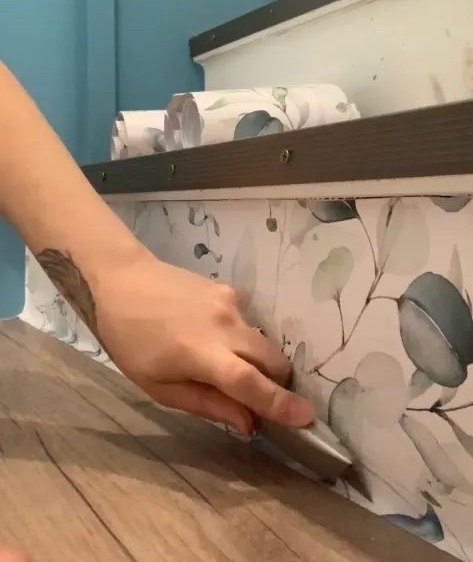
For the bottom and sides, I again had a little extra for wiggle room. When pressing these edges, I was very careful not to pull up or tear the paper. By fortunate happenstance I was wearing a bandaid on my pointer finger, and that worked great for smoothing the paper into these corners gently and without rubbing my finger raw! lol. So there’s a weird but useful tip.
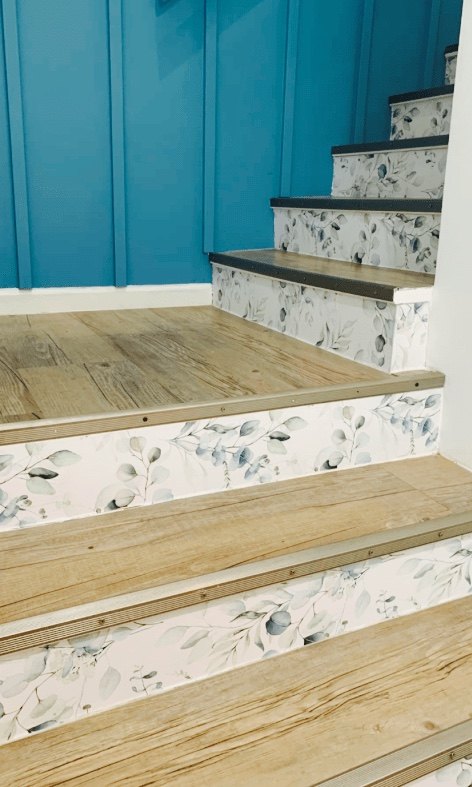
Step 6: Trim for perfect edges. Once the paper was attached, I used a box cutter and carefully ran it along the corners of the bottom and sides. This let me get a really tight line at those edges, and I could cut perfectly to match the weird angles of the stairs – measuring and cutting the paper to fit perfectly first would have taken FOREVER. I was pleasantly surprised by how easily and well the razor cut the wallpaper, and it peeled away for a great-looking finish.
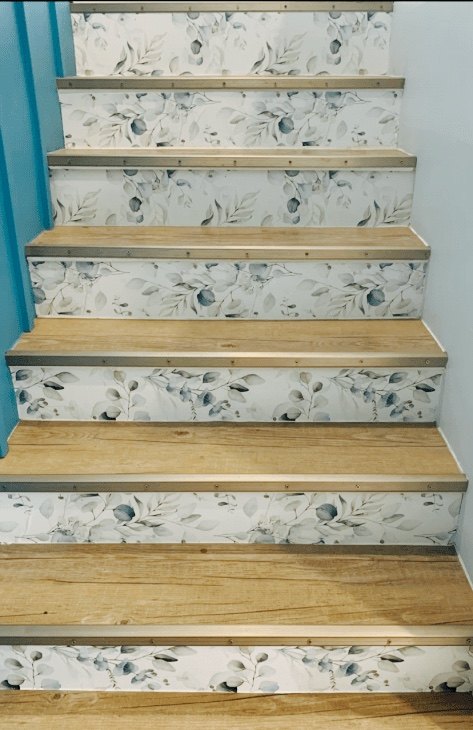
That was it! Now just repeat that process for each stair until you’ve got beautifully made-over stairs. This was a simple project that made a BIG difference in the stairs’ appearance. I can walk up them now without cringing. And, most importantly, my mom loves them too.
See some video of this project over on Instagram and TikTok!


Comments
Join the conversation
-
Very pretty & clever, but if your stairs got all scuffed up before, so will the wallpaper even more easily including possible tears as well. Beautiful choice of wallpaper, btw!!
-
It would make me smile every time I saw them 😊


Frequently asked questions
Have a question about this project?