


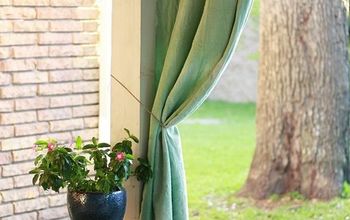
Anthropologie / Restoration Hardware Inspired Curtain Tie Backs

I love my ceiling to floor curtains, and had been looking for some unique tie backs when I came across these from Restoration Hardware:
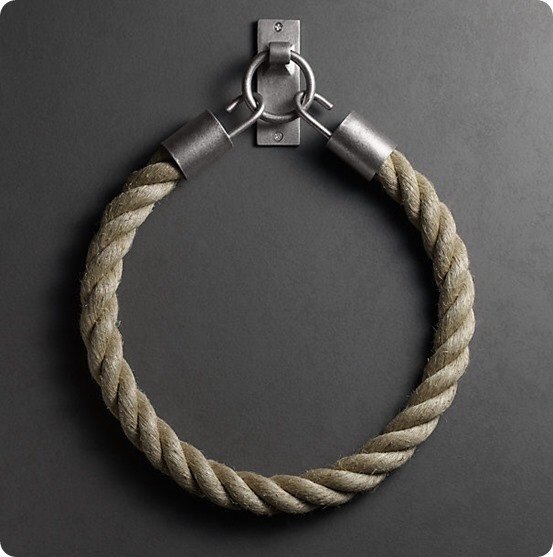
No way was I paying $75 for each tieback, but it gave me an idea for similar ones to make. Anthropology has similar tie backs, but again, way more than I want to spend.
For this project you will need:
-rope (each of my tie backs used 21” of rope, but you can adjust this depending on the thickness of your curtains and how tightly you want them held) - I used 5/8” white twisted nylon rope, but you can use Manila rope or something similar. It all depends on the look you are going for.
-PVC pipe caps (2/tie back) - I used 1/2”, but you need to get the size that fits your rope the best. (Ex: If you get 1” rope, you will probably need 1” caps)
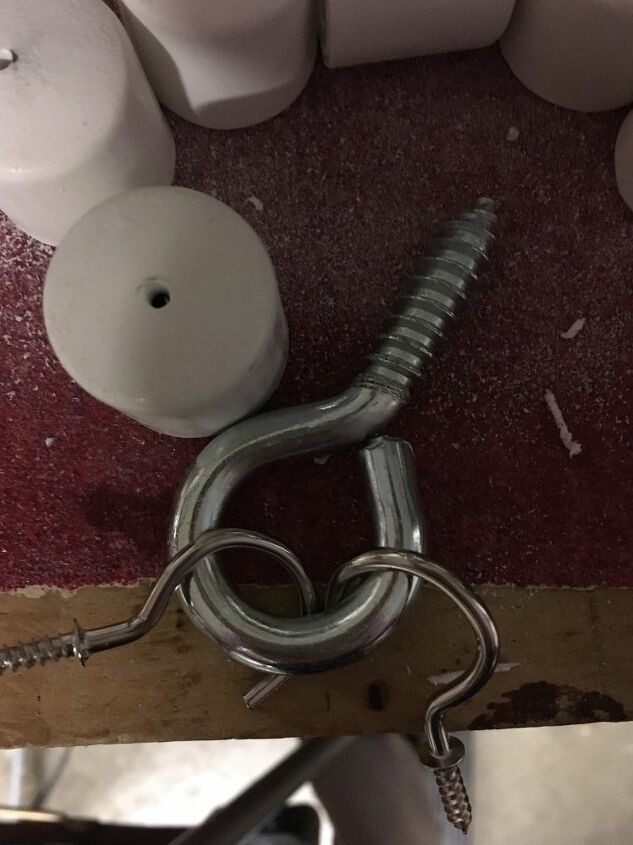
-cup hooks (2/tie back) - I found a box of 7/8” hooks that were around $3 for 40. This was surprisingly cheaper than buying a smaller box of similar hooks.
-eye screws or a hitch ring with plate (1/tieback) - I used large eye screws that I had leftover from another project (around 1.5” diameter), but again, the size depends on your preference. If you want it more similar to Restoration Hardware’s version, you can use a hitch ring with plate
-spray paint - I had an antique pewter spray paint on hand that I had used in other hardware throughout the house, so that is what I used on these, but an oil rubbed bronze would also look great with this project.
-sand paper - This is to sand the lettering off of the pipe caps and rough them up a little for the spray paint to really stick.
-hot glue - For the ends of the rope to keep it from fraying, and glueing the pipe caps onto the rope.
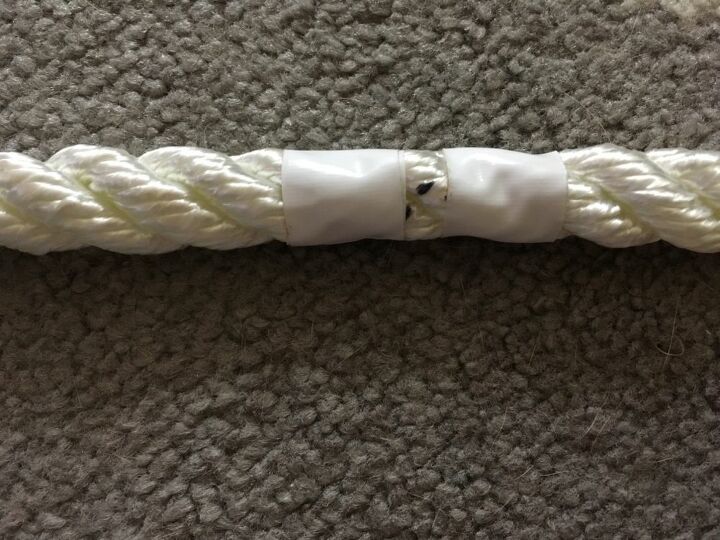
First step: mark and cut your rope. Twisted/braided rope will quickly unravel when it is cut, so use a thin tape on both sides of where you will cut. After you cut it, put some hot glue on the ends. If you use nylon rope, you can also melt the ends with a lighter.
***If you use thin tape (I used white electrical tape), you can leave it on as it will be covered by the pipe caps. Otherwise you can remove the tape once the ends have been secured.***
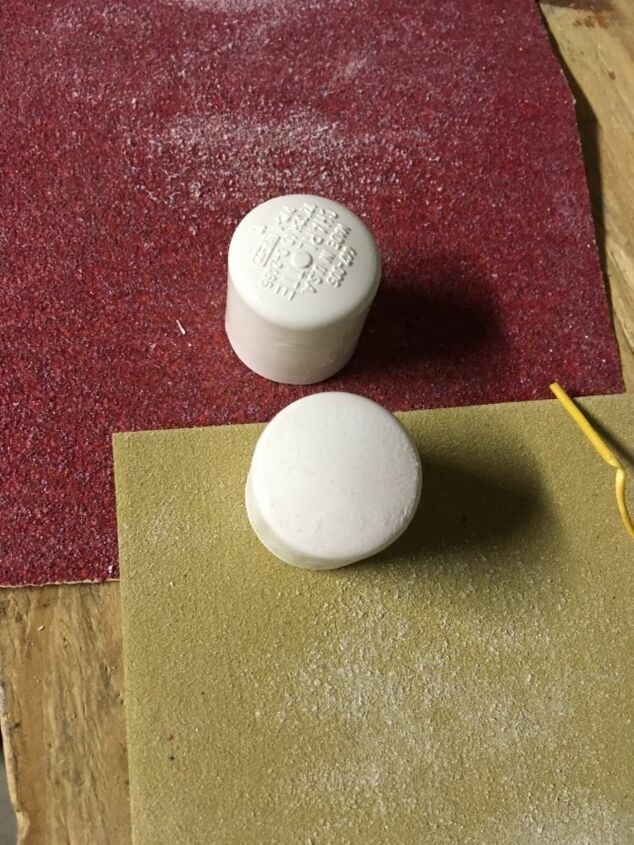
Next step is to sand the caps. I started with course (60 grit) to get the lettering off, and followed with fine (220 grit).
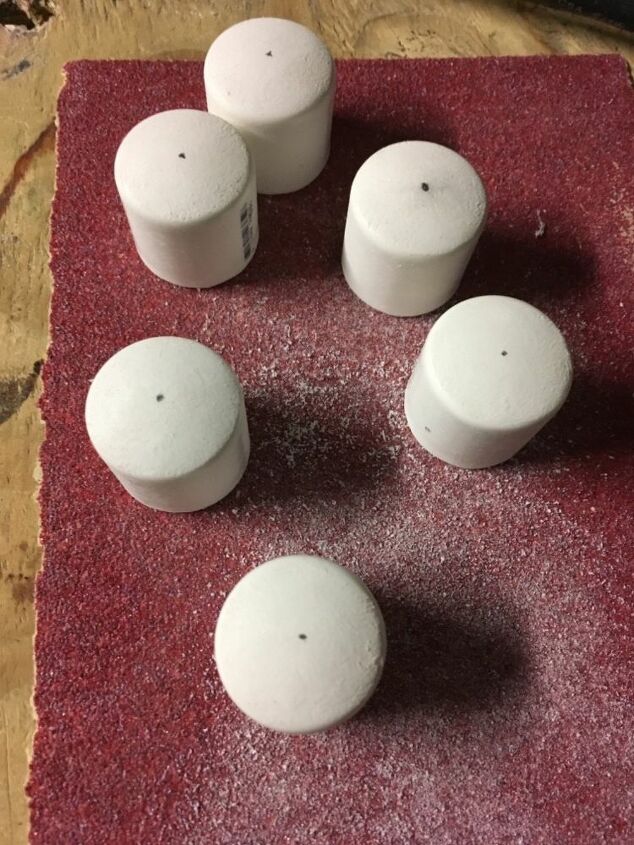
Mark and pilot hole the caps. I decided to place my hooks slightly off center due to their shape, but exact placement is up to you.
*I had to lightly sand the tops again after drilling to flatten it back out.*
This is what the pieces should look like before spray painting.
***I recommend painting the pieces before you attach your rope, but I wanted to test fit a piece before painting.***
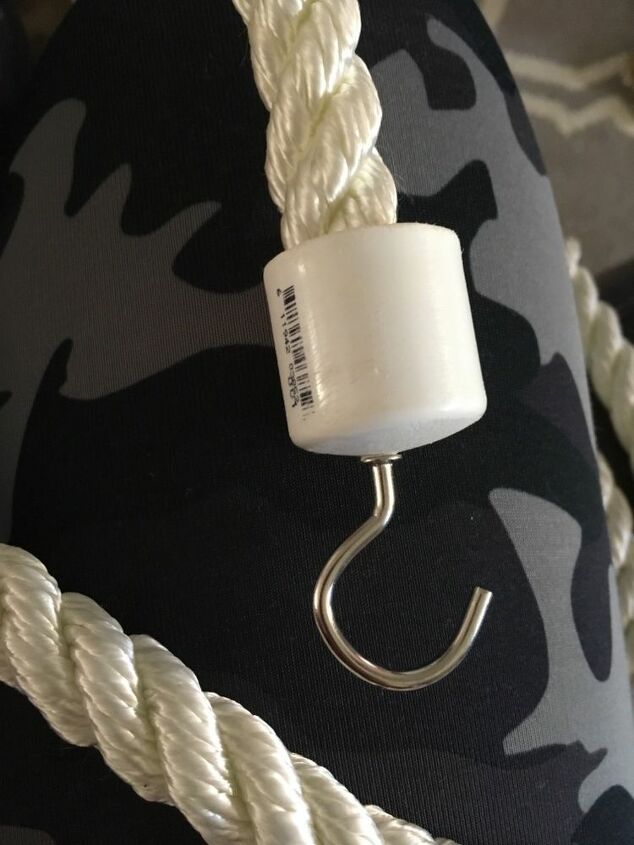
Spray paint everything (except the rope). Once dry, glue your rope inside the cap by putting hot glue along the inside bottom and sides of the cap and pressing the end of the rope in firmly and holding for at least 10 seconds.
Screw the cup hook into to cap while holding both the rope and cap so they do not twist and separate.
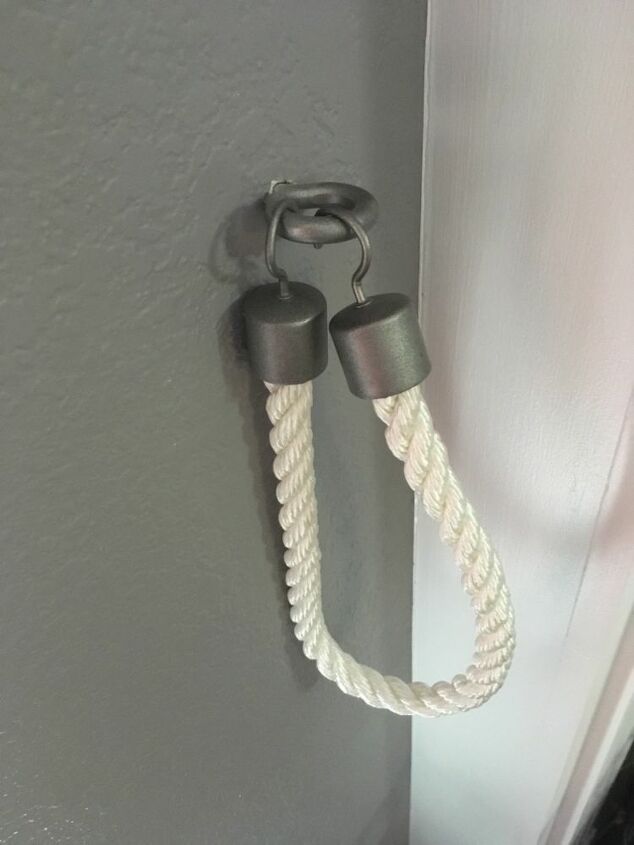
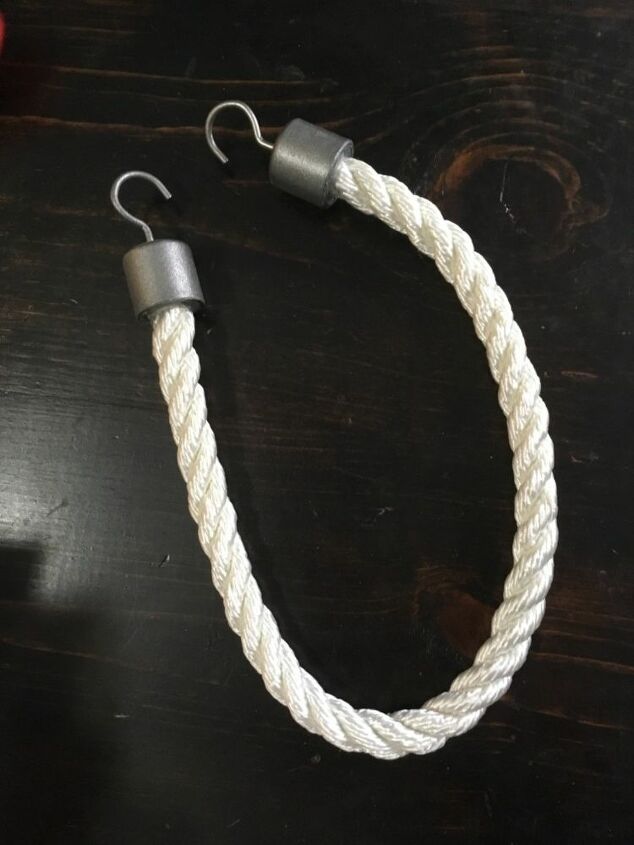
Figure out where to install your eye screws. This is what all of the pieces should look like together.
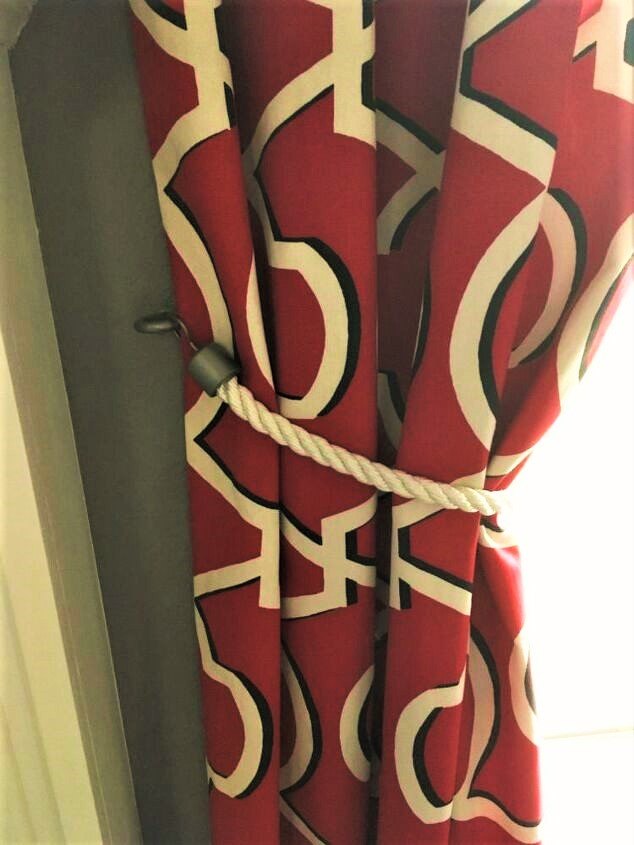
Tie back your curtains and enjoy!

The whole project cost me about $20 to make 4 tie-backs; less than 1/3 the cost for just 1 from RH!
Resources for this project:
See all materials


Comments
Join the conversation
-
Unlike many other projects, your directions were specific and complete, with the results looking very professional.
-
I also wanted rope tie backs but just couldn't come up with "how to" and now I see. Thank you!!


Frequently asked questions
Have a question about this project?
I am not clear how to secure the cup hook to the rope. Super idea and looks so high end.
Why does finished product mounting not resemble original first picture?
Awesome you did a get hack and I love it !