


How to Make an Easy DIY Tub Skirt | DOSE OF DIY

Super simple way to add a tub skirt to your bathtub! Upgrading your bathroom doesn’t have to be hard. Adding this tub skirt quickly elevated the look and feel of my bathroom. Learn how to do a DIY tub skirt in 8 easy steps!

Supplies
Check out my full blog post on my website for all of the links!
Materials
- Scrap board — for the back, I used a thin piece of MDF leftover from an IKEA kitchen corner base cabinet
- Wood planks
- Paint
- Caulk
- Wood filler
- Epoxy – I had leftover from the countertop kit I did on my bathroom vanity
- Wood glue
Tools
- Either hand miter saw or electric miter saw
- clamp
- caulk gun
STEPS
I started off with a basic bathtub (see image below).

I recommend checking out my video on YouTube since I am not the best at describing things. And be sure to subscribe to my YouTube channel!
I also created another version of the video where I talk slower in case that is preferred!
Here is a quick overview of the steps for making a tub skirt.
- Measure Wood Boards
- Cut the Boards
- Glue Boards Together
- Use Wood Filler
- Attach Back of Tub Skirt
- Add Caulk to the Seams
- Paint Tub Skirt
- Waterproof Your Tub Skirt
Since Steps 1 & 2 are pretty self-explanatory, I am going to jump to Step 3.
Step 3: Glue Boards Together
So normally, I like to use Kreg pocket hole jigs to attach pieces of wood together. HOWEVER, in this case, I would not recommend that.
During the googling phase of my project, I read that you are not supposed to use screws or anything that can rust since it’s going to be exposed to a lot of moisture. Therefore, I just used wood glue and I clamped it together until the glue dried.
Step 4: Use Wood Filler
Then, I used wood filler to fill where the wood boards met. This was to help make it less obvious that they were separate pieces of wood that were being connected (see image below).

Step 5: Attach Back of Tub Skirt
So I had an IKEA kitchen corner base cabinet that I was turning into a litter box enclosure. It had a thin piece of MDF that I wasn’t using, so I just had that in my room with spare pieces.
Since it was already smooth, I figured it would be perfect for this because I didn’t have to worry about a cheap piece of plywood showing the wood grain super strongly.

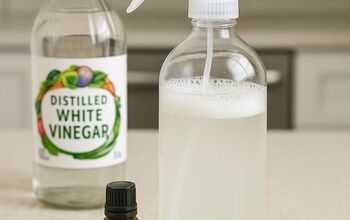
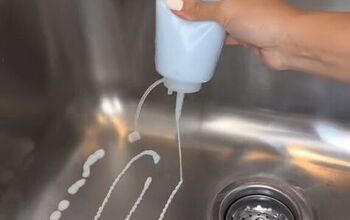
Step 6: Add Caulk to the Seams
Now, I used my FAVORITE caulk in the space where the wood boards met the back board. This is to fill the little crack, which helps give it a more professional look once it is painted.
Step 7: Paint Tub Skirt
When it came to painting the tub skirt, I had only used one kind of paint at this time…. chalk paint. If I were to do it now, I probably would do more of a real paint… But in the end, I don’t think it makes a difference since I covered it with the epoxy anyways.
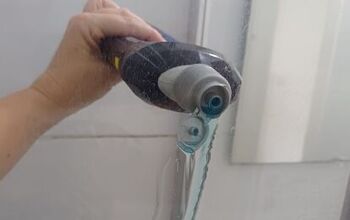
So after the paint dried, I placed the tub skirt against my tub and I filled the space between where the tub skirt met the actual tub with caulk.

Step 8: Waterproof Your Tub Skirt
There are multiple different methods for making tub skirts, but one thing that is universal is that you want to waterproof it somehow.
If you look at my Pinterest board below, there are some people that put a PVC board or stone slab over it to waterproof the top. However, I did not want to buy anymore materials and I already had leftover epoxy laying around.
Obviously, I wouldn’t expect you to buy a countertop kit with additional paints and stuff for this project.
However, I do not feel comfortable making a recommendation for a specific epoxy product if I haven’t tried it. I do plan on doing additional epoxy projects in the future, so I will update this once I feel comfortable making a recommendation.
In the mean time, I found this article that ranks the best epoxy kits and lists the kinds of things to look for when choosing epoxy to try to help!
When you are applying the epoxy, you should follow the directions for the specific product that you bought.
For the epoxy kit that I used, here is some information I learned the hard way:
- In order to make the epoxy, you have to mix the epoxy with the activator to get the actual epoxy coat
- While you are stirring, make sure to stir it for the full time (approximately 3-3.5 min). But, don’t stir much longer because it’s not kidding when it says you have like 20 min until it starts to get hard
- DO NOT use too little — that will make it bumpy and have air bubbles
- Like I said, make sure you use a good amount so that it easily spreads all over. It should sort of feel like you are using too much
- Afterwards, make sure to inspect immediately for air bubbles! If you see any air bubbles now, they won’t be going away by themselves.
- In order to get out all air, I had to use tweezers to poke out any air bubbles. Almost like the air bubbles are pimples and you are using the tweezers to pop them. I know, GROSS! But I couldn’t think of a better comparison.
- Another option is that you can try using a hair dryer to blow out the air bubbles. I saw that some people recommended that, but I tried…. And that didn’t work that well for me. So I popped those pimples!
BONUS TIP: You can make this a rental-friendly tub skirt by putting the epoxy on the tub skirt while it’s not next to the tub and not adding the caulk that would connect it.
And that’s it!

If this specific method doesn’t work for you, check out my Tub Skirt Pinterest board to see other methods/designs!


Comments
Join the conversation
-
You did an amazing job!!! It looks fantastic!!!!!!!! Im not even looking to do but watched it all just so I could comment. Killed it!
-
This is such a cool idea! I’m hoping to try this on my kids bathroom.


Frequently asked questions
Have a question about this project?
What size wood planks did you use?
Why would you want a “skirt” on a bathtub?