


Outdoor End Table / Ottoman

I am in the throws of re-vamping my deck décor. I had to replace the deck boards last fall and I am getting ready to stain them now that they have had time to dry out. I have decided on a rich brown for the floor and a dark gray for the railings. Now that that is settled, I have to decide on furniture. My old furniture had seen better days and was just a mish-mash of things I found along the way. I really want to make this an inviting space but I don't have a lot to spend. (desire - $$$ = DIY)
After carefully searching out free (and easy) woodworking plans online, I have found the perfect accent tables. They are perfect because they can serve the dual purpose of being tables or seating! Win-win!
Before I start, or rather before you start, go to this link for the plans: https://www.ana-white.com/woodworking-projects/ottoman-or-accent-table-simple-modern-outdoor-sectional. My tutorial will be a visual for you to see how a novice completes this project. It's not perfect, but it will work nicely for me.
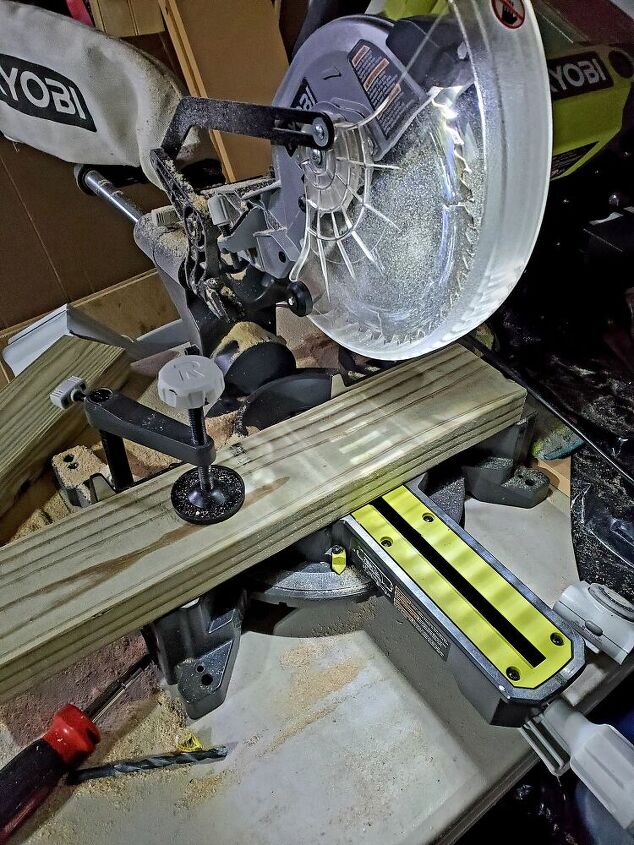
The plans provide not only a materials list, but also a cut list. I began cutting my 2x4s as directed on the cut list. I had some waste because I had to have my boards cut in half to fit in my car. If you can fit 8'L boards in your vehicle, it's best to do that so you don't have to purchase an extra one.
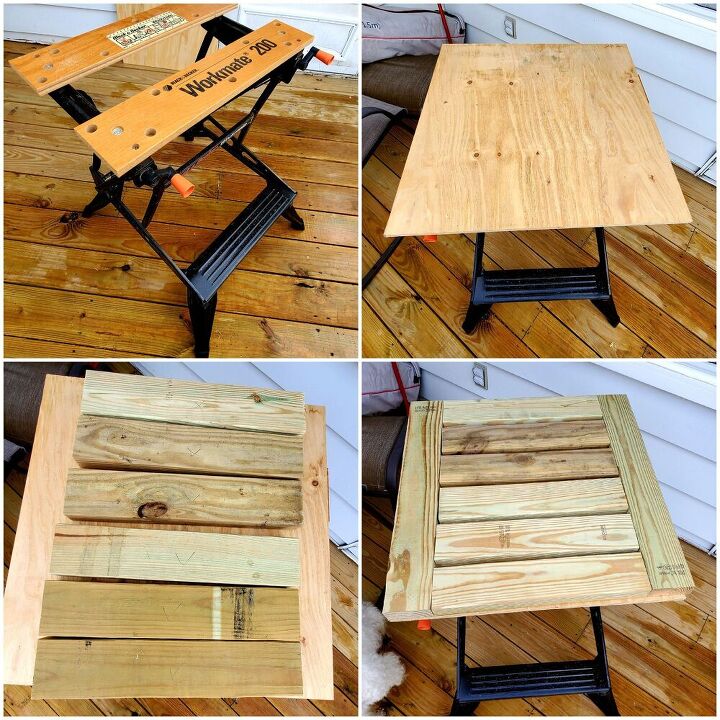
First, I just want to say that the portable workbench I picked up at a yard sale has been the best $20 I ever spent! I clamped a scrap piece of plywood 24"x24" to it to give me more area on top of the bench. I laid out the table top pieces on the board, wrong side facing up. Next, I marked the sides on my boards where I needed to make pocket holes. I also marked the other parts of the table for pocket hole locations. Lastly, I calculated the spacing of the boards and made marks so that I could line them up easily when I began to screw everything together.
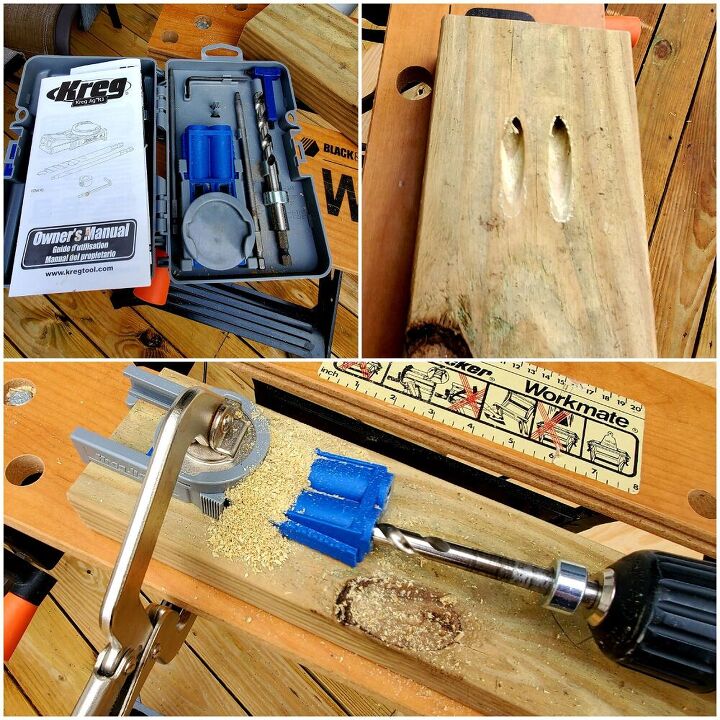
The plans don't call out for pocket holes, but whenever possible, I prefer to do this step. Making pocket holes is therapeutic for me. With a Kreg pocket hole jig set, it is simple, quick, and right every time. Pocket holes enable you to make solid, board-to-board attachments. You can then fill the pocket holes and give the illusion that everything is magically attached. Or you can position the hole on the back sides of the boards and no one will be the wiser. I usually opt for the latter.
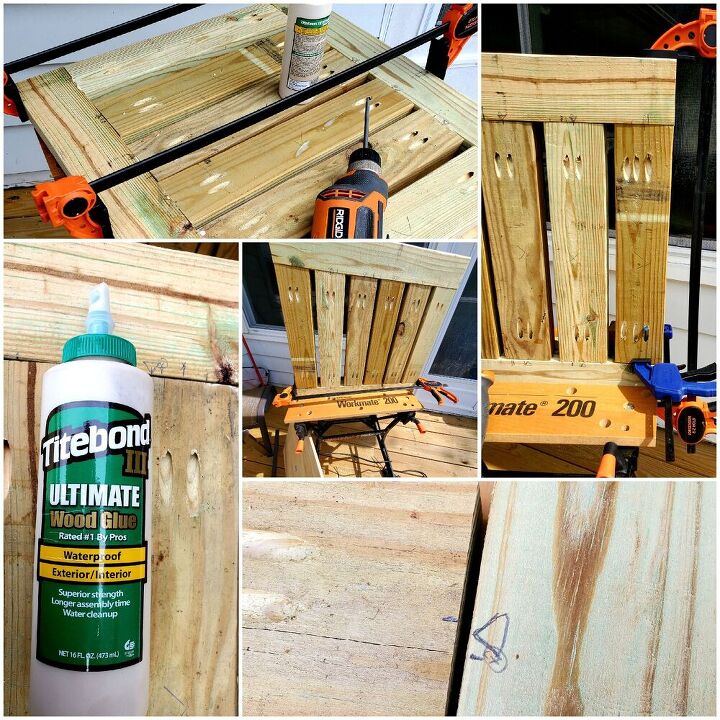
Time to assemble the table top. I like to use wood glue (for exterior purposes) and Kreg pocket hole screws (also exterior). This is the tricky part that the directions don't mention. 2x4s can be a bit wonky and you must be sure that the center planks are all cut evenly so they butt to the end pieces without gaps. I tried, but a few gaps happened anyway. Clamps are also a great tool to have handy for this purpose.
Be sure to leave the spaces between the center planks to allow water to go through. Otherwise, you will be dealing with mold build up and the table top will not last as long.
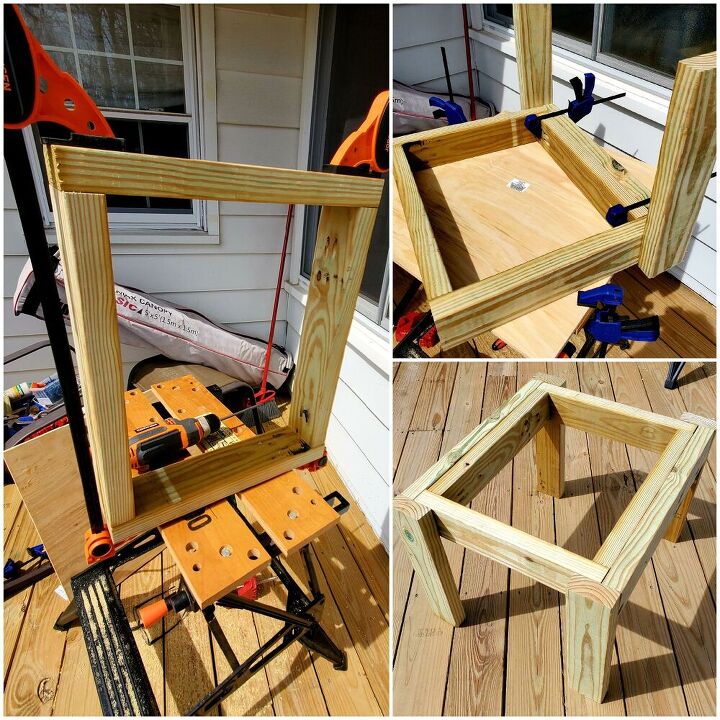
On to the table base. The legs are attached to the end pieces. ALERT!!! Be sure to follow directions carefully. You will notice that my legs are not positioned properly. I didn't realize this until I was too far along to correct it. I didn't really make a big difference, but I had to do some shoring up to make the table sturdy.
I built the inner box and then attached it to the leg pieces. Be sure to check that your inner box is square.
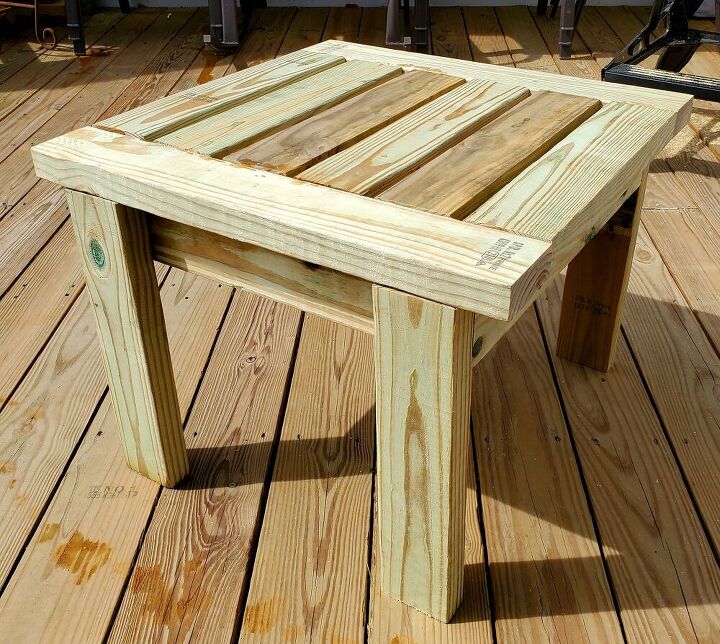
Here it is, pre-finished. The pressure treated lumber needs some time to dry out a bit. I am also waiting until I build the rest of the the furniture and stain the deck before I decide on the color I will use. It is very important to use a good, waterproofing stain on your table to keep it fresh looking longer. I wouldn't recommend paint, as you will be looking at a future of sanding and repainting to keep it nice. If you want the look of a solid color paint, you could opt for a solid color stain - just about any color can be created.
Resources for this project:
See all materials


Comments
Join the conversation
-
Nice looking table. Good job and good share.
-
Wow! It turned out beautifully!


Frequently asked questions
Have a question about this project?