


Dollar Tree Witch

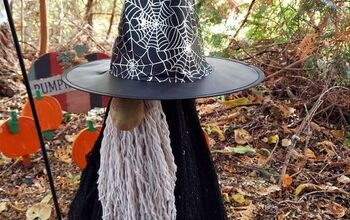
I absolutely love Halloween, and it's even more enjoyable when I can celebrate it on a budget. And what's a better budget-friendly option than the $1.25 Dollar store witch? However, to make her look scarier and less inexpensive, I needed to give her a makeover. I'm planning a party, and my daughter is having one too, so these decorations will definitely come in handy this year!

What you’ll need:
Dollar Tree witch
Black spray paint
Green paint
White paint
Fake hair
Hands
Plunger
Scrap piece of wood
Screw gun
Apple or globe ornament
Wired burlap ribbon
Hot glue gun

Let’s get started!
To begin, repaint the witch's face and hands. I used black spray paint and gave it a light coat all over the face and hands.

The Flat Black spray paint from Home Depot works great!

Then, you need to paint these Dollar Tree hands black.

Once the head and hands are dry, brush some of your the green paint over them. I always use a white stiff brush and take a piece of paper towel to dab off some of the paint.
You don't want to completely cover up the black paint.

Once the paint is dry, put the cape back on.

Next, take the fake hair and glue it on to your witch.
I had this lying around the house but any wig will work.

I stuck it on just above her ears.
If you want the teeth to stand out, paint them using some white paint.

Then, add the hands on with hot glue.

Next, make a witch's hat using some burlap wired ribbon. I made it by wrapping it around the witch's head to measure, then I folded up the edge on one side to make the flap. I then wrapped it in a spiral to form a cone shape. I used my hot glue gun to secure it in place.

Here it is all done. Since it has wire in it, you can bend it a bit to make it more like a witch's hat. Then, spray it with black spray paint and glue it onto your witch. Make sure the edge of the hair is tucked under the hat when you glue it on.

Next, take the pole off of your plunger. You will need this and your piece of scrap wood to make a stand for the witch.

Mark the center of the piece of wood and screw the pole in. I used a 2.5 inch screw to do this.

Now your stand is ready.

Now, pick up the witch's dress and make a hole in the bottom of her head. I used a knife and made some slices to do this.

Just like this. Then you can push the pole in firmly.

It's also a good idea to paint the pole black before attaching the witch to it.

Add your apple, globe or poison to her by bending the arm to hold it in place.

Have some fun with it! I made a few of these witches and then went back to buy the ghost, skeleton and pumpkin to make some more variations.

Comments
Join the conversation
-
Cool, I made something very similar.
Yours is much better. 🤩💯
Happy Halloween























Frequently asked questions
Have a question about this project?