


Dollar Tree Mini Bead Floral Spring Wreaths
Transform Dollar Tree's mini bead wreaths into beautiful spring floral bead wreaths with this easy DIY tutorial. Add a touch of spring to your home decor with this creative and budget-friendly project. I'm excited to share a quick and simple DIY project with you today.
Last year, I purchased two mini bead hanging decorations displayed with the fall decor. I decided to add them to my craft stash and use them in the springtime. In this tutorial, I will show you how to create mini bead floral wreaths and provide a full list of materials needed for each step.

Materials
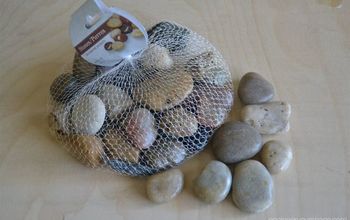
Round mini beaded hanging decorations
Artificial floral accents
One large craft/popsicle stick
Paintbrush
Acrylic paint
Floral cutters
Hot glue/Adhesive
Dollar Tree Mini Bead Floral Spring WreathsVideo tutorial
Be sure to check out the video tutorial for this quick and easy project. If you would like to support my YouTube channel I invite you to subscribe and follow me along my craft-making journey! Hiy the yellow bell 🔔 when you subscribe so that you can be notified of a new craft.

Step one: Applying paint
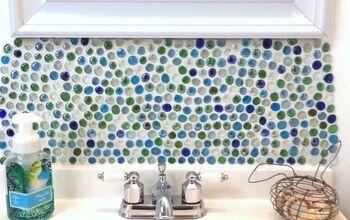
Before painting, remove any previous decorations such as the plaid autumn leaves that were attached to the wreaths I'm using. To start with, apply paint to your beaded wreath. You may choose to keep your beads as they are or paint them. I wanted to give my beads a more spring-like appearance, so I added a lighter shade of pink for my first wreath and a light green for the second one. Once you have applied the acrylic paint, set your mini wreaths aside and allow them to dry.


Step two: Adding the craft stick
Next, you are ready to add your craft stick. For my wreaths, I decided to use a larger craft stick. I marked the middle of my stick with floral cutters and pressed them down firmly to create a split in the middle. Then, I easily broke the stick in half. If the ends are a little jagged, use a sanding block to smooth them out. Attach the bead decoration to the craft stick using adhesive.

Afterward, use a smaller paintbrush to paint any wording you would like displayed on your sign. I painted the words "welcome" and "hello".
The last step is to add your floral accents to your beaded wreaths. I used hot glue to attach each of my flowers.


Pin Share Save


Frequently asked questions
Have a question about this project?