


'Chris Missy' Christmas Holiday Tree Tutorial
Easy
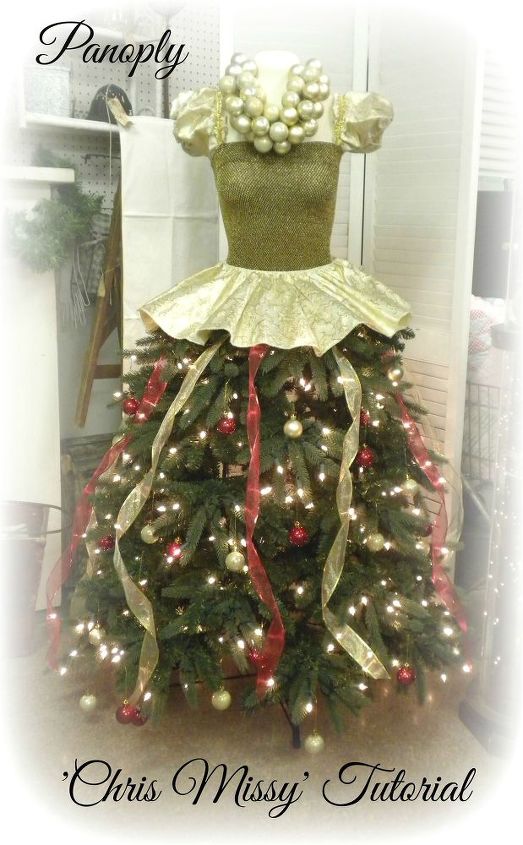
As part of Panoply's antique mall booth space holiday 2015 decor, my sister and I created 'Chris Missy' - a unique Christmas holiday tree, fashioned from various components, both vintage and new. This post is a tutorial on how the tree was created, a step-by-step instructional guide, designed for those of you interested in assembling one of your own.

Panoply's 'Chris Missy' Christmas Tree
While the concept of this tree is not a new one, I'm sharing how we created ours so you can see just how basic (or elaborate) you can develop the concept.
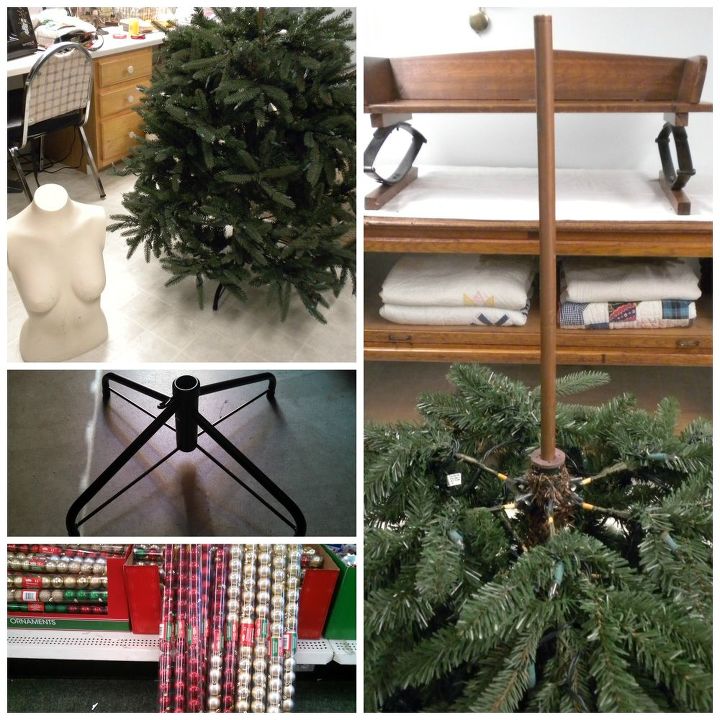
Components for 'Chris Missy'
The primary components for 'Chris Missy' include: 1) an artificial tree section and base (we used the middle section of an individually strung, pre-lit 7' slender tree, along with the original metal base stand it came with); 2) an upper body (torso) mannequin; 3) a slim pipe (to attach the mannequin to the tree base); and 4) 10 packages (15 count each) of Dollar Tree ornament bulbs for trim. We also used wired ribbon (Sam's Club has great choices), and vintage clothing.
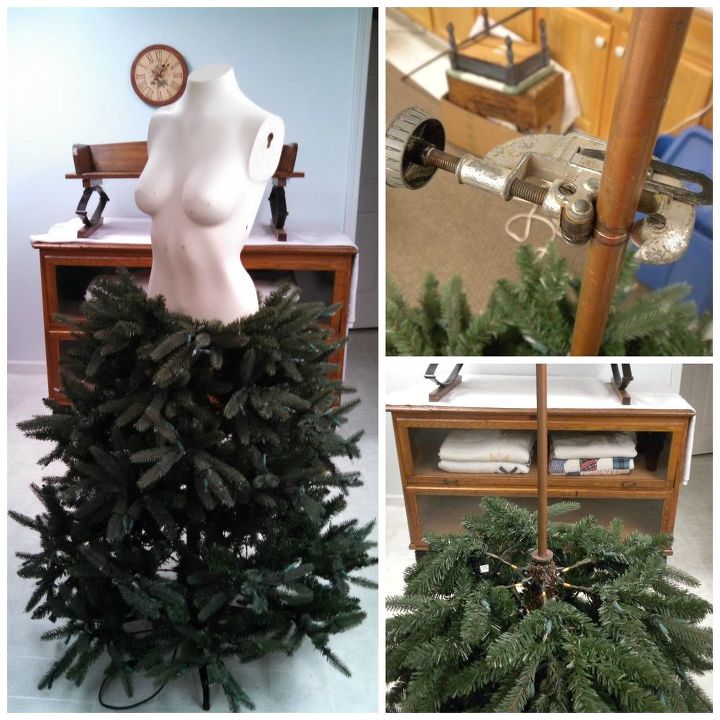
Initial Assembly for 'Chris Missy'
Once we gathered our supplies, we found a pipe to fit the base of the tree, but need to cut it to size (approximately 2'). With the right tools, any job can be easy. We used a plumber's pipe cutter, and the pipe was like slicing butter - so easy. We tamped down the pipe into the tree base with a mallet to secure it, and then inserted the mannequin torso over the pipe (the mannequin had a hole pre-drilled in the center of its base).
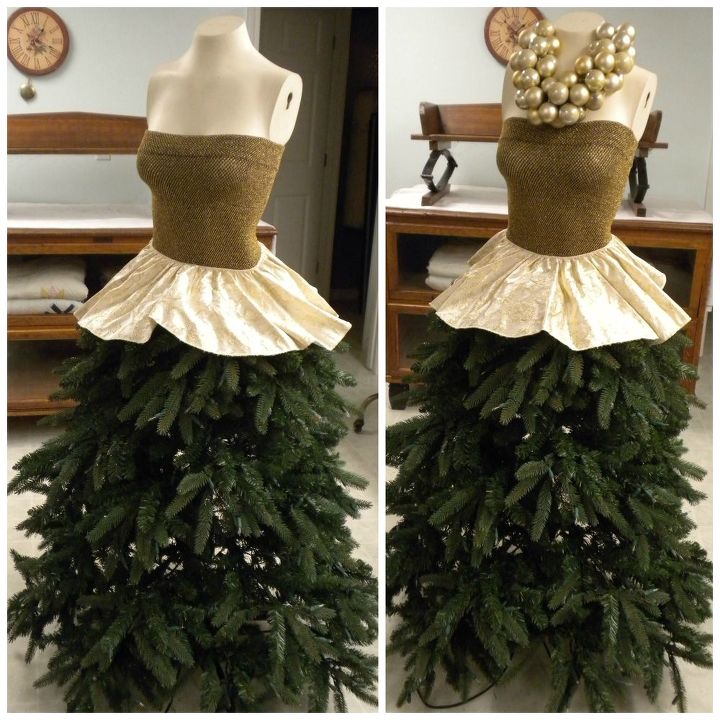
Initial Dressing of 'Chris Missy'
We then dressed the mannequin, first slipping a 1970s glitter tube top over it. The peplum was from a stored ballet costume, and its elastic waist fit easily over the waist of the mannequin, creating a nice transition into the tree base.
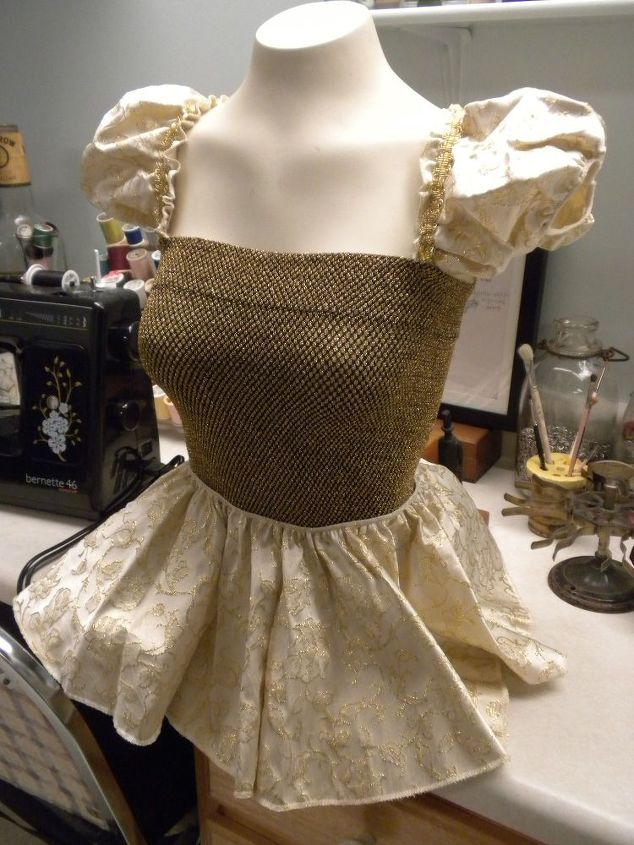
Additional Vintage Clothing Flourishes
The ballet costume from which we took the peplum also had pouf sleeves, so we added those to the tube top with a tack stitch on both front and back for each sleeve.
Decorating 'Chris Missy'
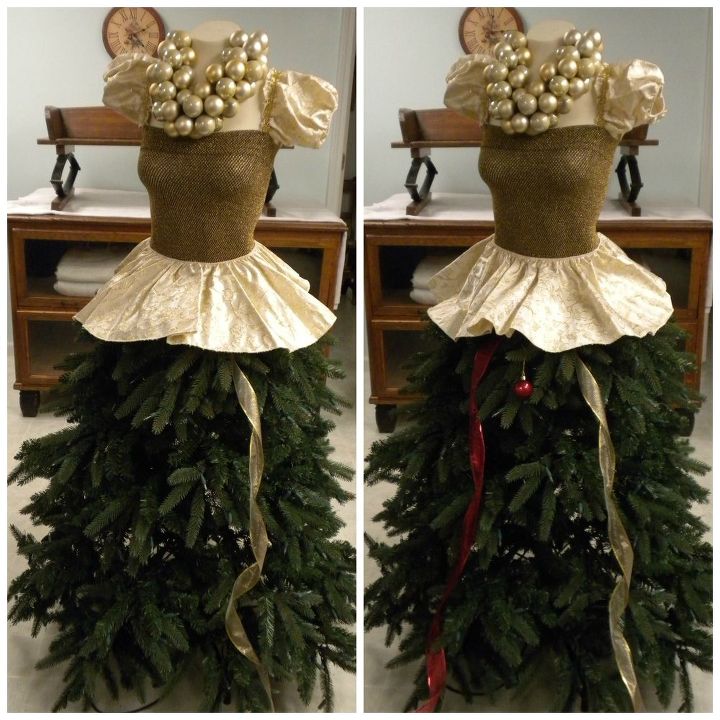
We next focused on the tree base, and decided we would alternate the wired ribbon trim around the "skirt". We simply tied each strand at the top of the tree's base (under the peplum), and then loosely twisted each strand for a ribbon candy effect, and cut each strand.
Panoply's 'Chris Missy', Displayed
Pleased with the concept realized, we decided to finish trimming once we took the tree into our local antique mall, where we rent space and sell our vintage and antique items. Once transported to the antique mall, we assembled the main components swiftly, and then spent an hour or so stringing the ribbons and hanging the remainder of the bulbs.

Want more details about this and other DIY projects? Check out my blog post!
Comments
Join the conversation
2 of 96 comments
-
Love this hope t o do this next year just too cute
-
cute idea. Last year I wanted vertical ribbon streamers on my tree. I made a circle of 2" wide red ribbon using the girth of the tree at the top as a pattern! I taped the ends together. On the back side of the band I taped streamers of red and green (you can choose any color combination or just one color to go on your tree. I cut mine in varying lengths but of course you can go with one length for all of the streamers. I liked the effect, hope you'll try it and enjoy it. NOW you have a 2" band to decorate. Lol I put fir around mine! Have fun, Christmas is only 7 months away! lol


Frequently asked questions
Have a question about this project?