


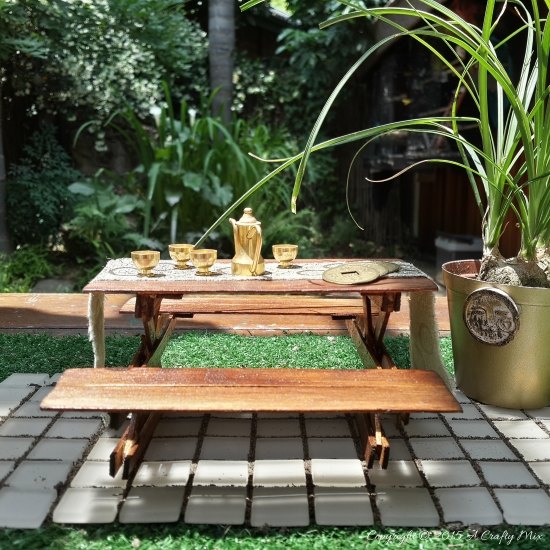
Fairy Picnic Table
$10
2 Hours
Medium
Make this tiny little garden bench and invite the fairy folk for a picnic.
Fairy picnic table
All you need is some ice cream sticks, glue gun, scissors and some varnish. I used 8 fat ice cream sticks (15 cm x 2 cm), 16 normal ice cream sticks (11 cm x 1 cm) and 4 thin ice cream sticks (14 cm x .5 cm)
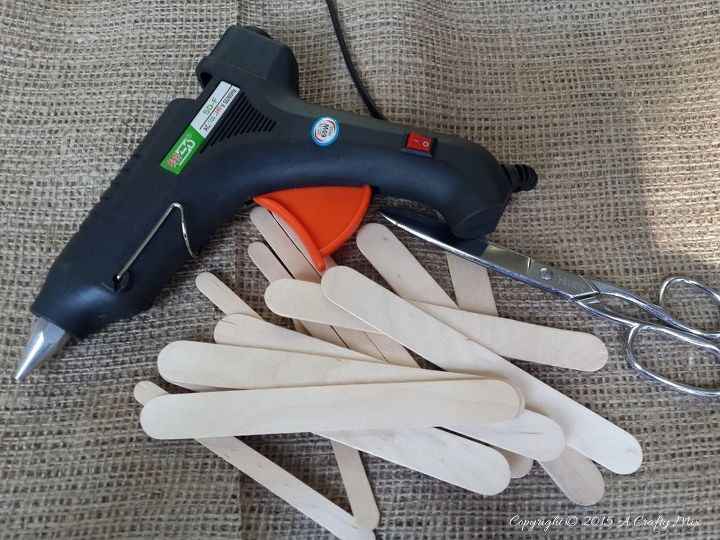
What you need
To make the table top use four fat ice cream sticks and cut their round edges off. Take two normal ice cream sticks and cut them so they are about 8 cm long. For each of the seats you need two fat ice cream sticks, with their edges cut off and one normal ice cream stick that has been cut into four 3.5 cm pieces. Using a glue gun or normal wood glue attach the pieces as shown below.

Making the table top and seats
Now for the table legs. You need twelve normal ice cream sticks. Cut four of these ice cream sticks so they measure 6 cm long (this will be the table support). Cut the other eight so they are 8 cm long. Mark the center point on four of your 8 cm pieces and cross over at 90 degrees matching up the marks. This will form the cross bar for the table legs. Glue these pieces together to form a cross as shown in the middle image below. To add the seat support take the thin ice cream sticks, mark the middle point and glue them in the center of the cross. Eye ball them to see if they are parallel to the bottom and the top supports.
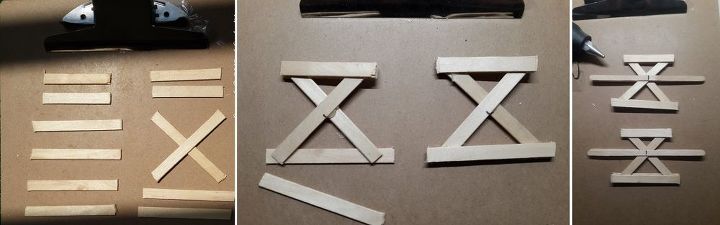
Making the legs
Attach the seats and table top to the legs using your glue gun and give the fairy picnic table a few coats of varnish.
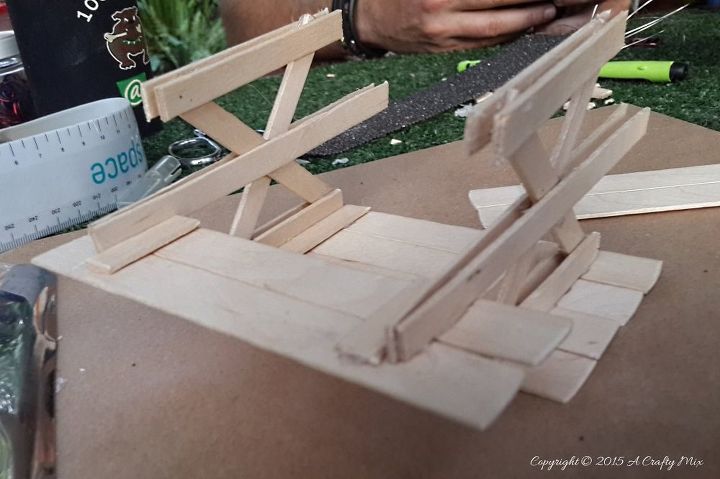
Glue the legs to the table top and seats
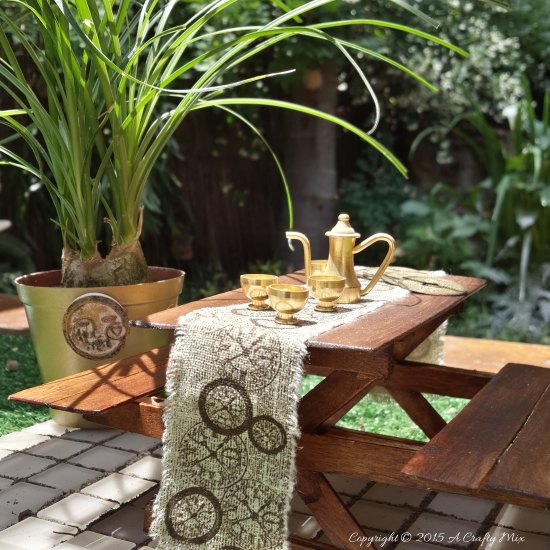
Anyone for a picnic?

Want more details about this and other DIY projects? Check out my blog post!
Comments
Join the conversation
2 of 45 comments
-
That's so cool! I'm going to try this. Thanks for sharing.
-
Very cool !


Frequently asked questions
Have a question about this project?