


How to Make a Simple Burlap Wreath

by
Studio Paint
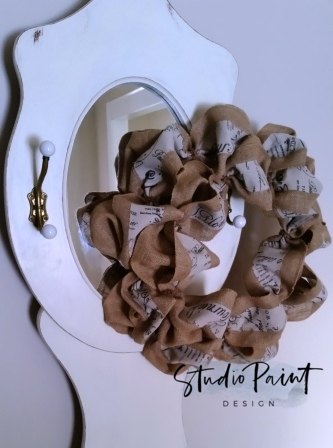
I thought I’d show you today how inexpensive and easy it is to make a wreath like this. I primarily made it to put on my front door for Easter and can easily take me into the spring season by swapping up a bow made of different ribbon colours or adding some addition embellishments.
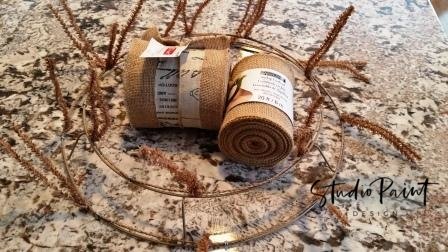
I started by purchasing this wire cage with pipe cleaners attached from Michael’s in this burlap (beige) colour and a couple of different rolls of burlap ribbon. One is plain burlap and the other has a centre strip of fabric in stamped letter print. Each roll is about 20 feet or 6 metres. This gave me enough to go around the metal wreath cage twice.
I started by purchasing this wire cage with pipe cleaners attached from Michael’s in this burlap (beige) colour and a couple of different rolls of burlap ribbon. One is plain burlap and the other has a centre strip of fabric in stamped letter print. Each roll is about 20 feet or 6 metres. This gave me enough to go around the metal wreath cage twice.

I doubled up on the ribbon and started on the outside circumference of the cage. I secured the the ends of the burlap to the back of the cage by bringing both pieces through the wires and pinching the wires together somewhat. From the front I secured both layers of burlap by folding them like an accordion and placing them atop of the pipe cleaner and tying the pipe cleaner tightly around the fabric (about 2-3 times will do). I then moved to the next pipe cleaner fastener and did the same thing allowing the ribbon some slack in between to be fluffed up later.
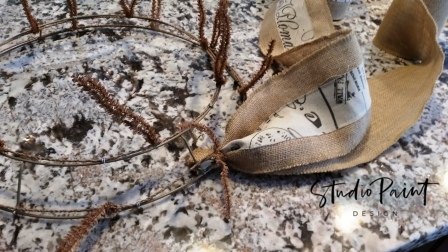
I continued in this way all the way around the outside circumference of the metal wreath until I arrives back at the beginning of my circle. Here I untied the first pipe cleaner and laid my next “accordianed” fabric atop of the other and refastened the pipe cleaners tightly around the fabric.


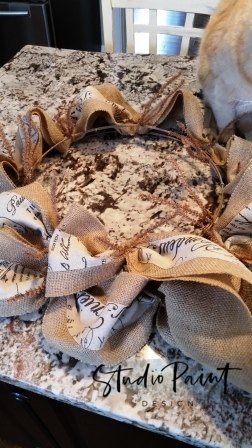
Next, beginning on the inside of the metal cage I worked my way around until I completed the circle and tied off tightly the last pipe cleaner where I began the second row.

I cut the fabric off and tucked all the exposed pipe cleaner in behind the wreath. Now to the fun part. In order to make it look full, I began by pulling the two layers of ribbon apart (easy as you go!) You want to fluff not destroy, adjusting as you go.

Check out my website for more information on this piece and other cool crafts I've completed.


Frequently asked questions
Have a question about this project?