


Rustic Table Centerpiece
This beautiful centerpiece can be jazzed up with different colored ornaments for Christmas, or given a Thanksgiving theme with nuts and small berries!

Take a trip to your park or into a beautiful forest. While enjoying your surroundings, pick up a bagful of pine cones, acorns, eucalyptus buttons and juniper balls! Even black oak shells are beautiful!
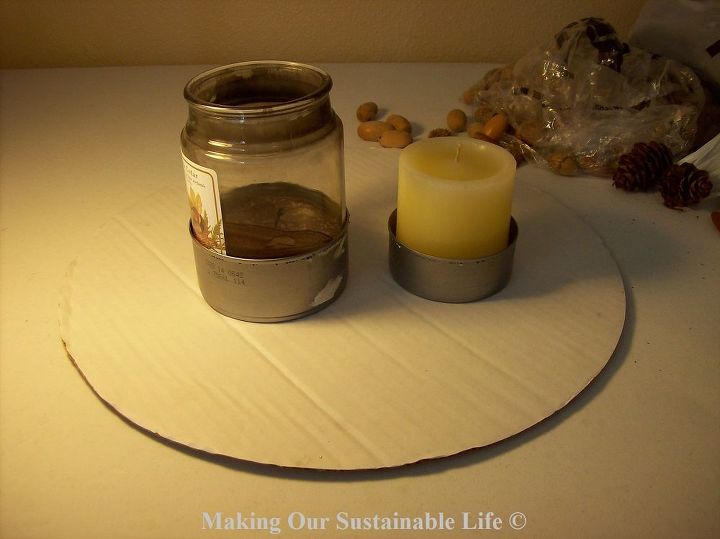
Find a short tin can. As you can see, the larger one fits a large glass candle and a tuna can fits a 3" pillar. The base can be either cardboard or wood.
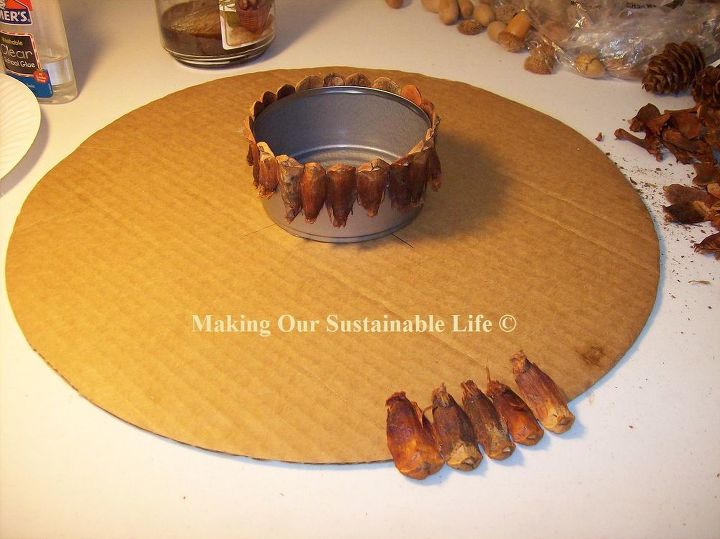
Start by hot gluing a rim of pine cone bracts (just cut the pine cone apart with heavy shears, or if you are lucky you will find a tree stump where a squirrel has done the job for you as he tore the cone apart for the seeds) around the can and the base. Once this is done, glue the can onto the base.
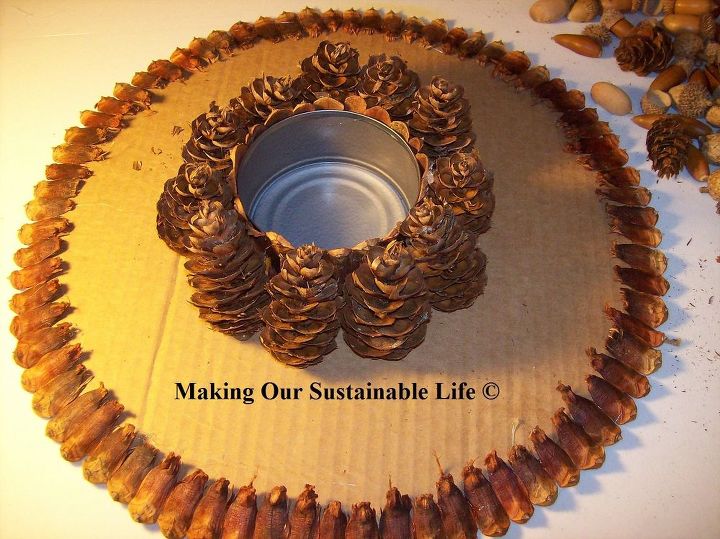
Now glue a ring of pine cones around the can. Don't worry if you can see through the holes, we will fill them in later.
Glue pinecones around the edge of the base. These pinecones are from a Douglas Fir.
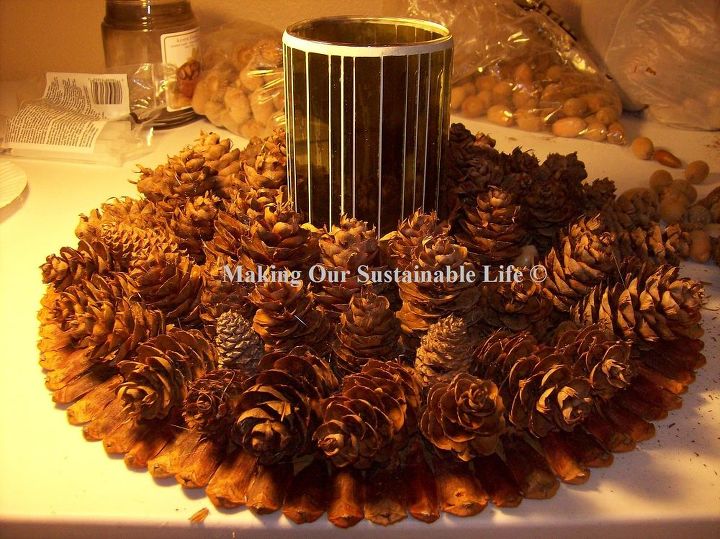
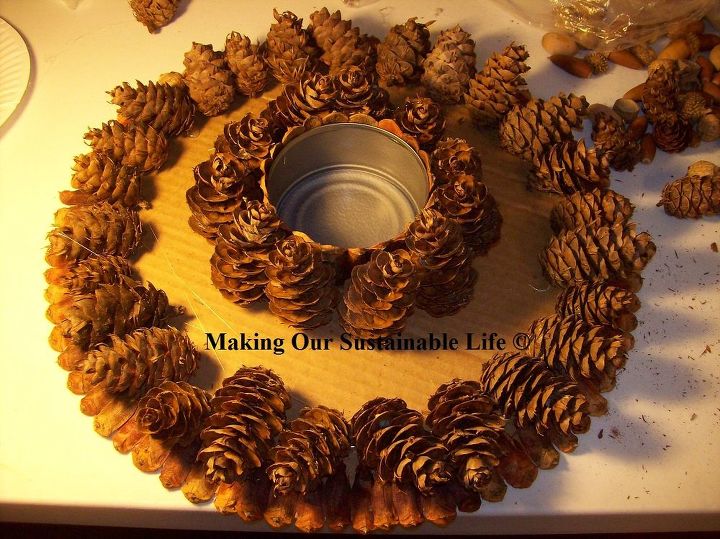
Fill in the void with more pine cones. Now, take your acorns, eucalyptus buttons, and juniper balls and fill in the larger holes. You can also use nuts, seeds, cinnamon sticks, or even small pretty pebbles to fill in the holes.
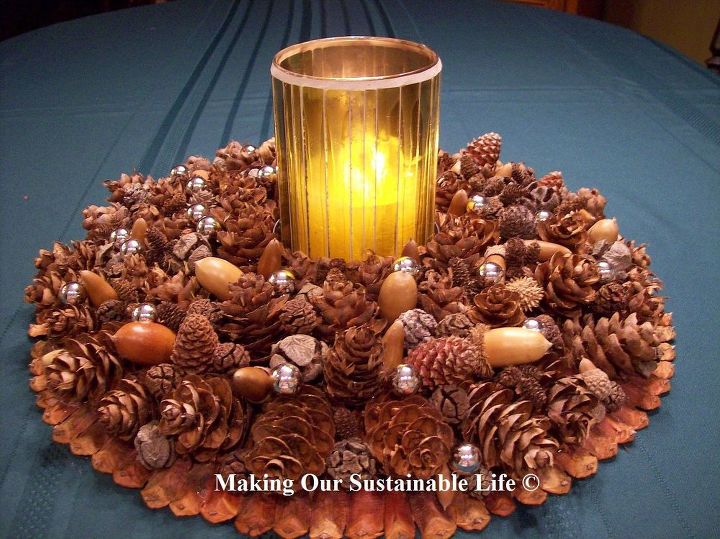
Add small glass ornaments for a sparkly Christmas look. Don't glue them in because they can be removed and replaced with sprays of berries or small dried pomegranates for a Thanksgiving table. If you would like a fresh look, swap out the candle for flowers!
More Thanksgiving DIY Projects
Comments
Join the conversation
-
Thanks! What's so great is that it doesn't cost much at all to make, and you can customize it by painting the acorns or adding in little ornaments, etc, to fit your own decor!
-
This is beautiful! My grandmother used to make these when I was little. It brings back great memories.


Frequently asked questions
Have a question about this project?