


How to Remove Embarrassing Bathroom Odors, With an "MG"

9 Materials
Here's a overview of how to install Manderley Gates SR/1 "MG" Toilet Odor Venting System
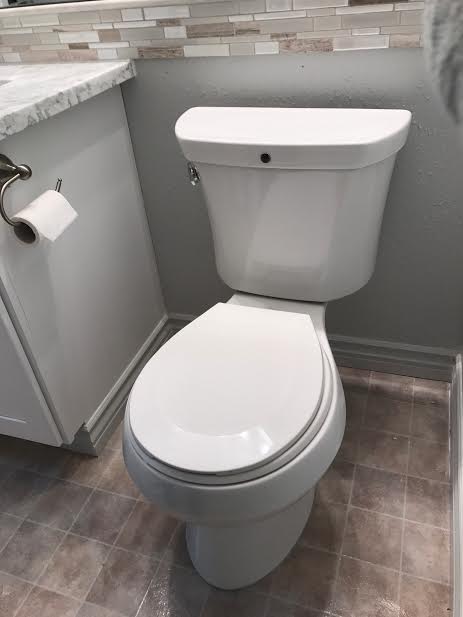
Can you see the toilet odor venting system?
Well the correct answer to the above questions is Yes and No. This toilet is equipped with our SR/1 "MG" and while you can't see it since its installed within the toilets water tank all "MG"s use the water outlet openings in the toilet bowls rim to draw the embarrassing odors away, making the toilet itself part of the venting system. So yes, you can see it!
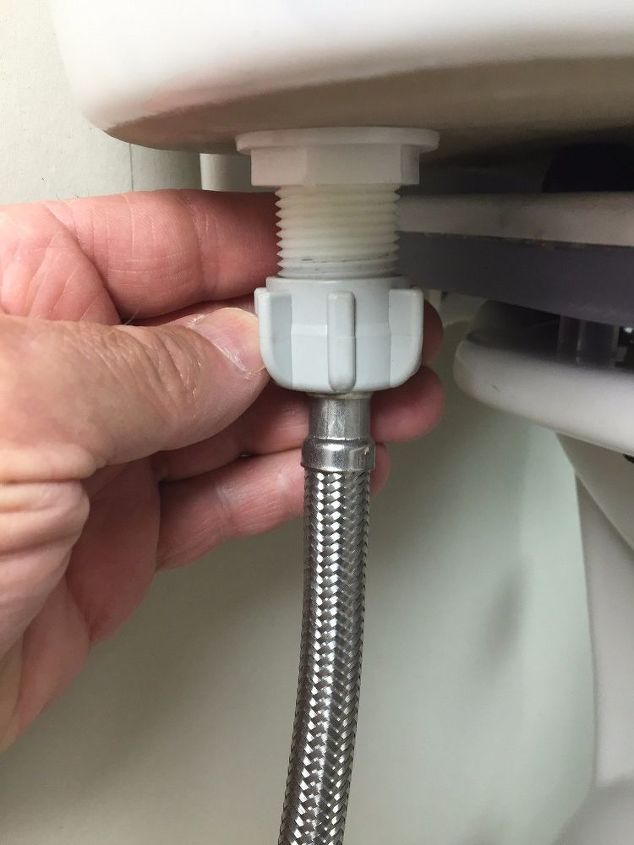
Disconnect the water supply from toilet
First turn off the water supply to the toilet, flush the toilet to remove water from water tank and then, using a sponge, mop up any excess water still in the tank. Now disconnect the water supply hose from the water tank.
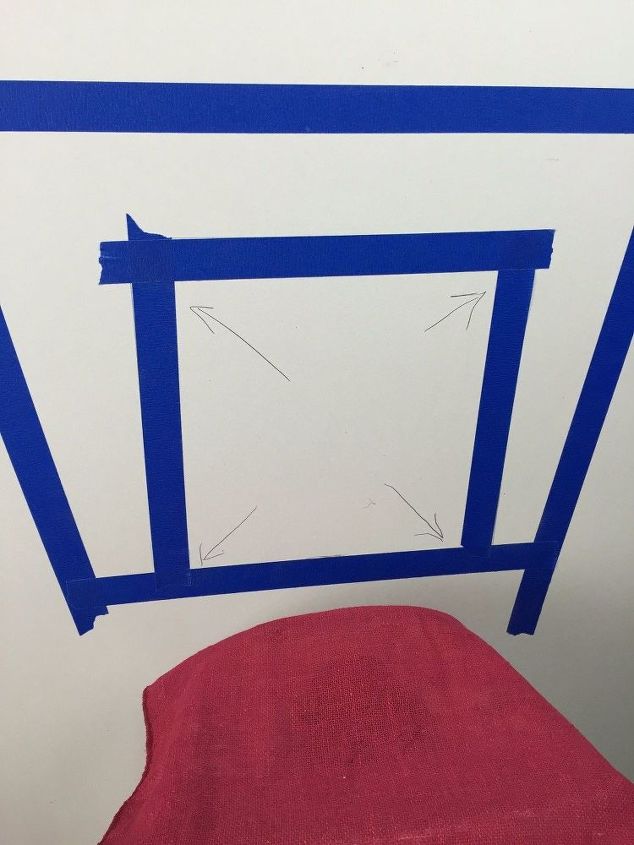
Outline the water tank with painters tape
Using painters tape, outline the water tank on to the wall. Now remove the water tank. Place the supplied 8" x 8" access panel as you see in the above photo and outline it with a pencil. Then place painters tape on the INSIDE of the access panel outline.
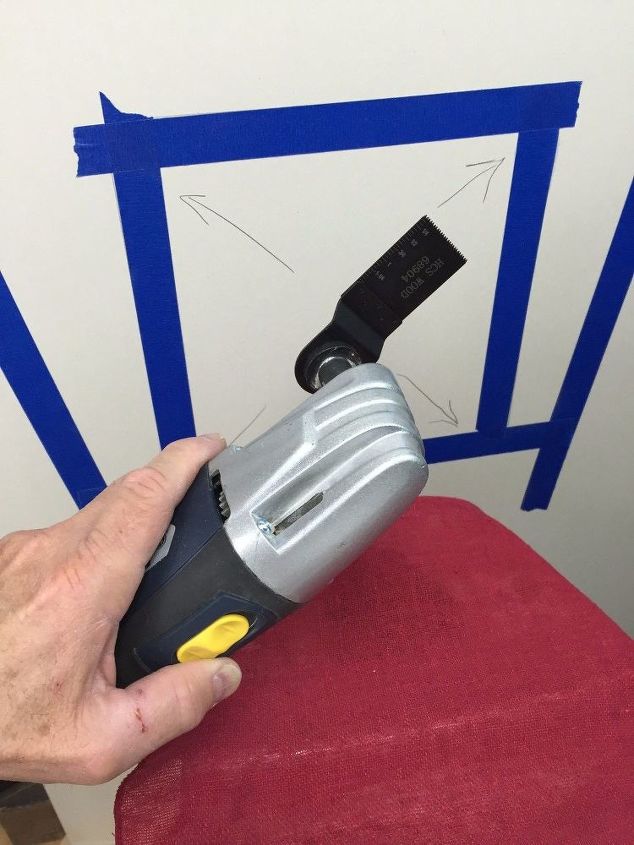
Cutting the opening in wall behind the toilet
Before cutting the opening behind the toilet for the access panel make sure there is nothing that could be damaged such as water pipes and or electrical wires. Carefully drill a 2.5" opening in the center of the taped access panel area so you can see inside the wall. Proceed only once you're sure nothing is in the way and is safe to do so.
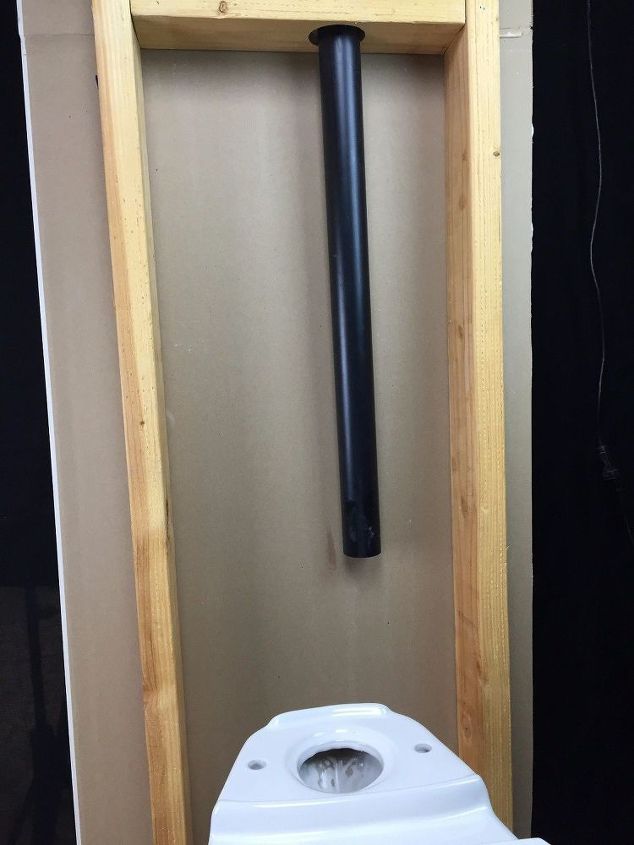
1.5" ABS vent pipe behind toilet up to attic
Using a 2.5" Forstner wood drill bit, drill through the header up in the attic directly behind the toilet and drop down the 1.5" ABS vent pipe to the access panel opening.
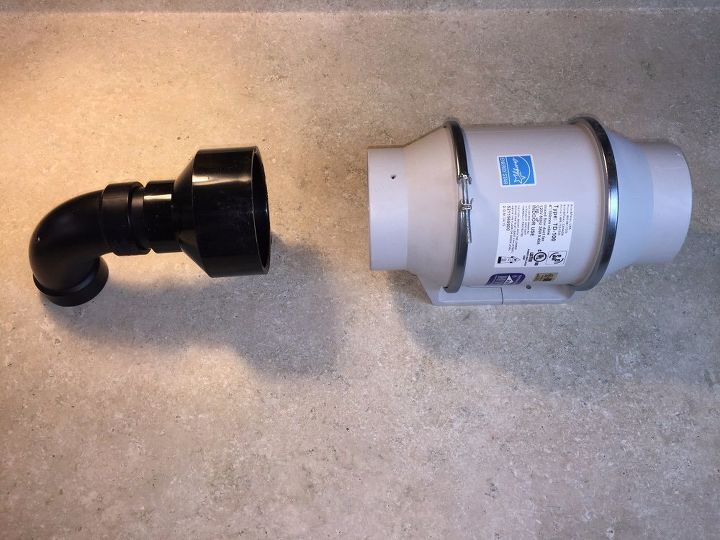
Elbow to the flare to flex ducting to motor
At the top the 1.5" ABS pipe in the wall behind the toilet you will connect the provided sweeping 90 degree elbow. Then connect the elbow to the provided flare so you can connect 4" flex ducting (not provided with system) to the inline fan unit. Inline fan unit is usually screwed to a roof truss.

4" flex ducting heading to outlet in roof
Once you've decided where to mount your inline fan unit and have connected all ducting, it should look something like the above photo. Strapping the flex ducting up to the trusses will make it easier to move around the attic in the future if needed. Important! Never fasten anything to the roof underlayment itself, doing so could cause a leak! The inline fan unit receives power from the main light switch in the bathroom, this way it will come on when the main light is activated. Note: Most people go #2 with the light on.
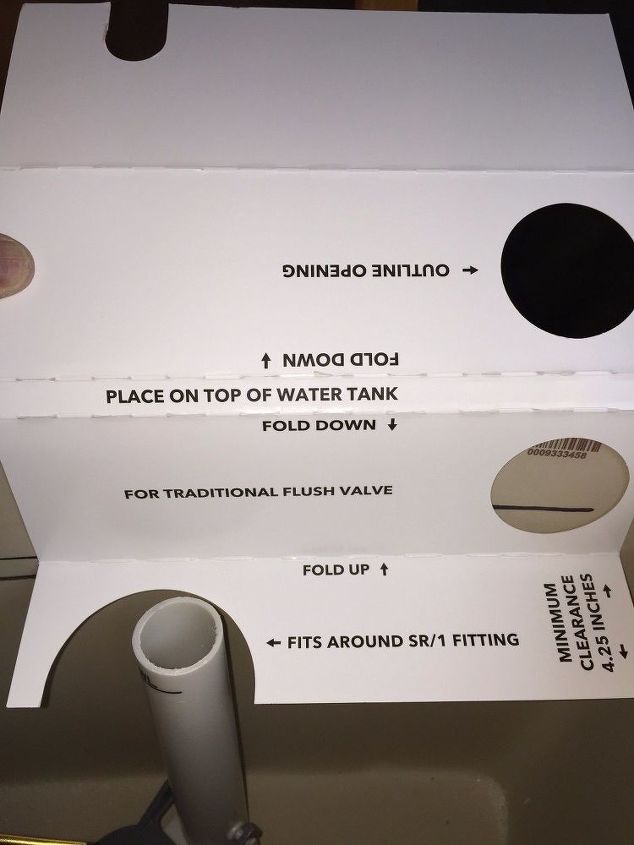
Easy to use SR/1 "MG" template
OK, you're done up in the attic now you're ready to mount the SR/1 fitting in the toilets water tank. Place the provide template as you see in the above photo and following the installation instructions, mark the opening on the back of the toilets water tank through the template. You may need to loosen the large nut on the flush valve (flapper unit) and rotate flush valve so its within the large opening where the SR/1 fitting with go once installed. Make sure to re-tighten the large flush valve nut once done.
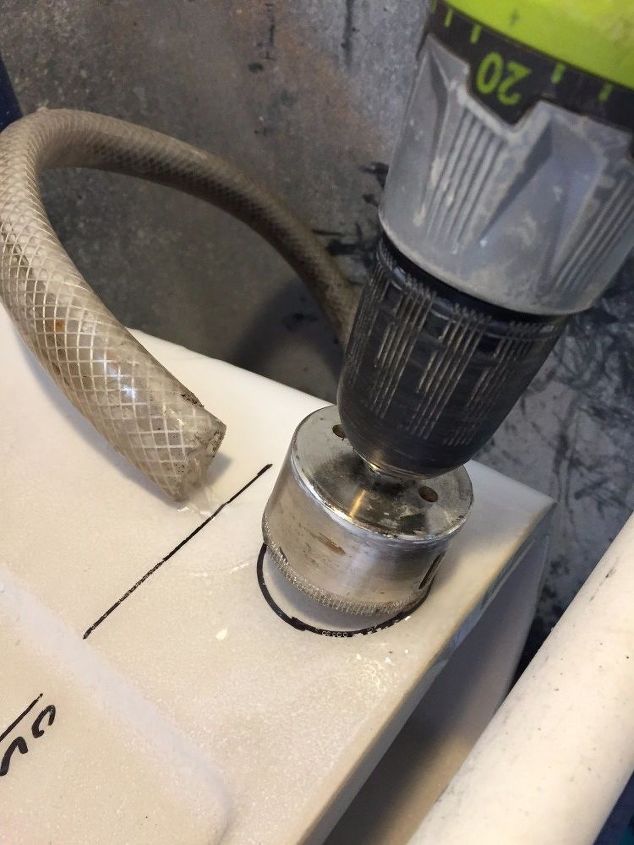
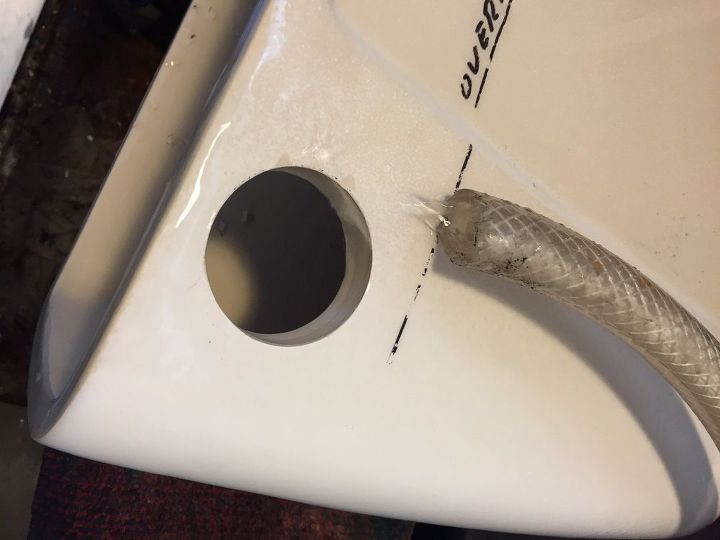
This is easier than you think
Using the provided diamond encrusted drill bit, cut out the opening for the vent pipe in the back of the toilets water tank. Place the tank on a soft clean towel so as not to scratch the finish and using water to keep the bit and toilet cool, cut the open. Start by drilling at a slow speed and on a slight angle like you see in the above photo. slowly square the drill to the water tank as you cut.
See, I told you so
In about 5 minutes or less, it will look like this! Just take your time and let the drill and drill bit do the work. No need to press hard on to the tank. Now you are ready to install the SR/1 fitting.
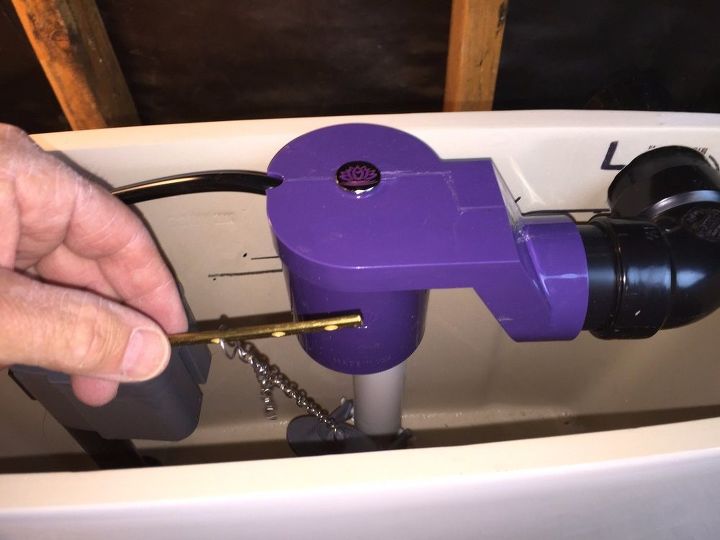
Making sure to follow the installation instructions your toilet will be "MG" equipped in no time. Make sure the nothing rubs or catches on anything, remount the water tank to the bowl, connect the water supply hose and check for leaks.
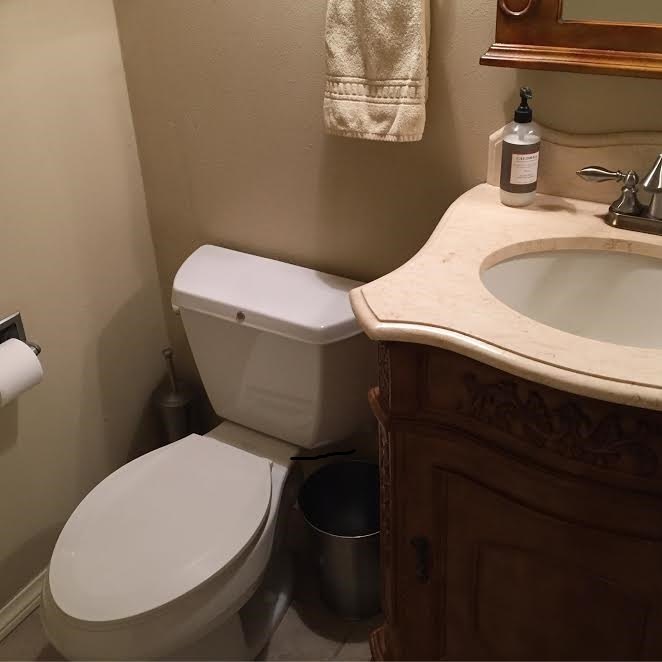
Here it is, all done and ready to go.
While installation can be a bit of a job, once done, its done! You will never need to buy messy aerosol sprays or drops ever again and you and your guests will experience true luxury and peace of mind that only an "MG" equipped toilet can provide.
{
"id": "3745321",
"alt": "",
"title": "",
"video_link": "https://www.youtube.com/embed/QnnPyFdgZUg",
"youtube_video_id": "QnnPyFdgZUg"
}
{
"width": 634,
"height": 357,
"showRelated": true
}
And here it is in action!
Comments
Join the conversation
4 of 10 comments
-
Poo pouri works for $15....spray the water...and go. DOne
-
Wow!


Frequently asked questions
Have a question about this project?