


$3 Shelves: How to Create DIY Hanging Shelves With Dollar Tree Items

Hanging rope shelves are an effortlessly stylish way to make a statement and bring your living room to life. I have seen countless hanging rope shelves in magazines and TV shows and have wanted to make my own for a while, but without having to spend hundreds of dollars on bespoke furniture. Luckily, all it took was a trip to the local Dollar Tree to get all of the tools and materials needed for my own DIY hanging rope shelves, with the total cost of everything coming to a mere $3! Rope shelves such as these are great because you can fill them with items that reflect your personal taste, allowing for a truly personal touch in your home decor. If you want to see how it's done, read on to find out how I made my own DIY hanging shelves using only Dollar Tree items.
Tools & Materials
As I mentioned earlier, you really do not need much to create your own easy DIY hanging shelves. Everything needed for the shelves I made was bought in a single trip to the Dollar Tree near my house, with the total cost of the items amounting to $3.
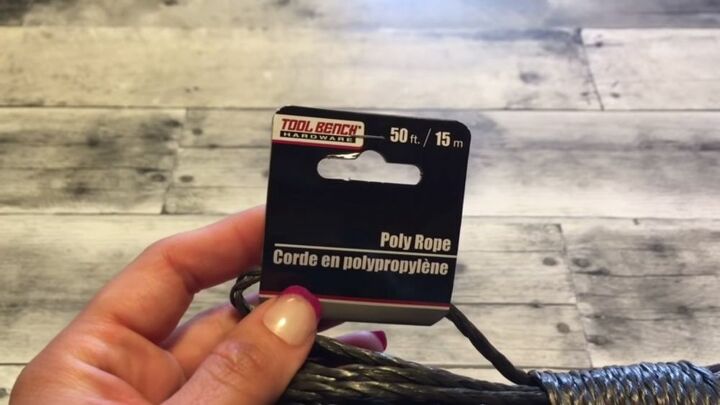
- A length of poly rope: I chose a 50-foot length of black rope from the Tools section, but there are several colors to choose from. Remember, poly rope is stronger than normal rope and will be able to hold up your shelves with ease.
- A roll of shelf liner: I opted for the Quick Cover shelf liner in the grey and white style, as you can see above. Though, there are several colors and patterns to choose from, so you can pick one that best suits your taste.
- A thick poster board: Make sure to buy more than you think you will need, in case your measurements end up being inaccurate
- A hot glue gun
- A few nails
- Hammer
- Scissors
- Box cutter knife
Step 1: Gather Your Materials
The first thing you'll need to do to create DIY hanging rope shelves is to gather all of your materials in one place. I found this project to be much less messy than some of my previous DIY ventures, so you probably won't need to lay anything down on the surface to protect it. Make sure you have a wide, flat surface area to work with, as prepping the poster boards requires plenty of wiggle room. Also, have a spot picked out on your wall before you get started. Once you've found the perfect place, simply hammer a sturdy nail into it and then you can get started with building your shelves.
Step 2: Measure and Cut Your Shelves
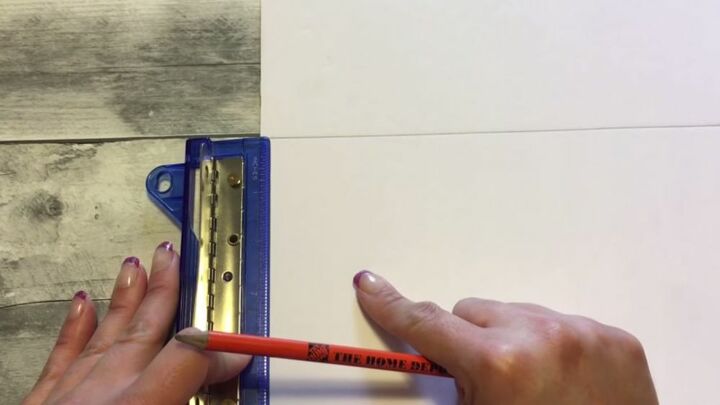
Next up, I had to measure my poster board so that I could create the actual shelving unit for my DIY hanging rope shelves. I chose to have shelves that were five-and-a-half inches in width, whilst keeping the length the same as the actual poster board. I didn't need to use any fancy DIY tools for this part, just a standard ruler, and a pencil to draw my lines across the board so I knew exactly where to cut. I made a total of four markings to create two shelves, as each shelf consisted of two boards. This is because I learned that 'doubling' up your shelf will make it much stronger and longer-lasting. Once you have made all of your markings, do as I did and run the box cutter knife along the lines to neatly carve out your initial shape.
Step 3: Cover the Posterboard with Shelf Liners
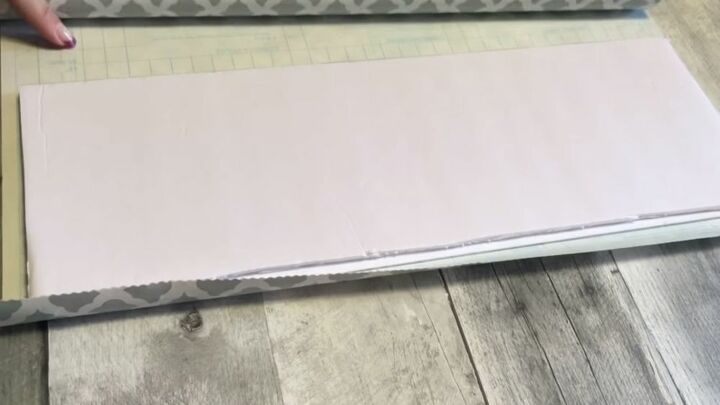
Once I had my four boards, I placed two on top of each other to make the shelves thicker. Then I rolled out the shelf liner and placed the shelves on top of them before cutting so that I knew how much I'd need. I then quickly ran a pencil around the outline so that I knew the exact amount of liner I would need to cover the shelves completely. After this, I simply cut the amount I needed and peeled it apart. The liner is coated with sticky adhesive on the inside, meaning that all I needed to do was place it on the shelf and stick it down - make sure to flatten it out with your hands so that there are no creases or air bubbles. If you have used too much liner, you can use the box cutter to trim off the extra paper. You can also hot glue the edges down if you find that they stick out.
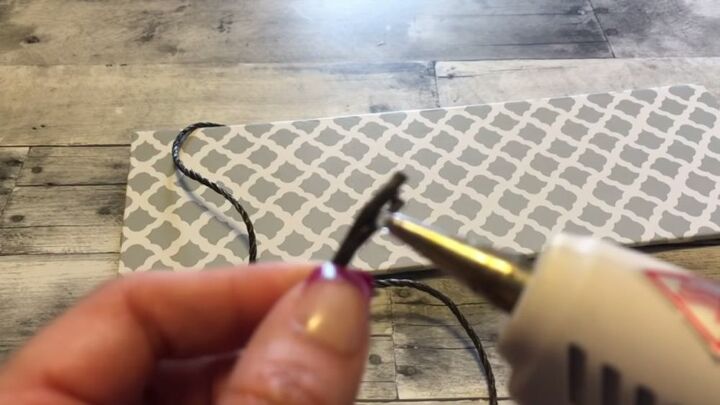
Step 4: Cut Rope to Length and Glue Ends Together
Now it's time to create the hanging rope. I made sure to create two lengths of poly rope that were exactly the same size. Make sure to consult where you have hammered your nail into the wall, as this will help you determine how long each length of rope should be. Once I did this, I looped the rope underneath the shelf at each side. The ends of the poly rope will likely be frayed from where you have cut it, so just do what I did and use some hot glue to bring the ends together. Remember not to use too much glue, as this will make the next step a little more tricky.
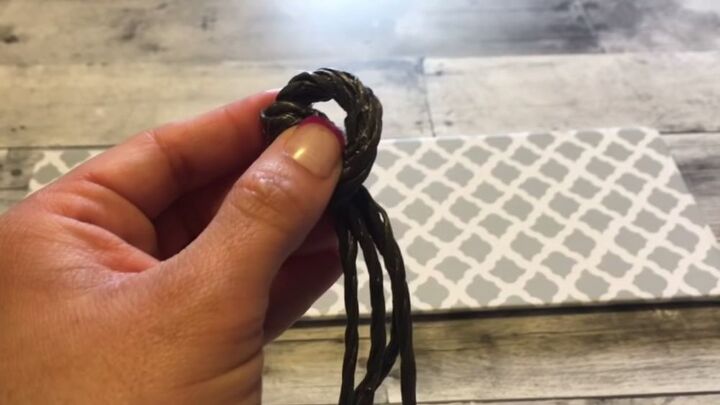
Step 5: Tie a Knot at the Top of the Rope
Next, I wanted to bring the two lengths of rope together at the top by creating a knot with a loop formation that I could hang onto the nail. This isn't too difficult. You just need to tie a standard knot with the ends of the rope, while making sure not to pull the knot too tightly. I made sure to leave a very loose loop at the center of the knot so that there was plenty of space to hang it over the nail. Once you have created your knot, use the hot glue gun to secure it by gluing the areas where the ropes overlap. You might also find that there are more stray fibers at the end of the knot, so don't forget to glue these together too!
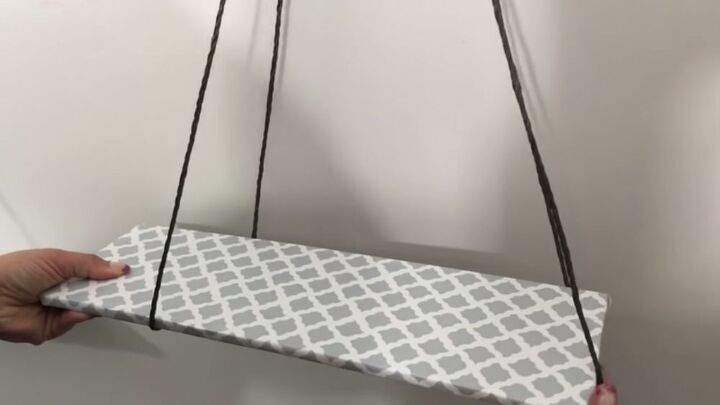
Step 6: Place the Shelf onto the Rope
Once all the glue has dried, you're ready to assemble your shelves! Once you have placed the knot over the nail, you should have two loops of rope hanging down. All you need to do now is place each loop on either side of the shelf so that they are holding the board up equally. The rope should be holding the shelf up at each end, but not too close to the edge as this will make the structure less secure. I found it helpful to press down on the shelf with your hands to test how sturdy it is.
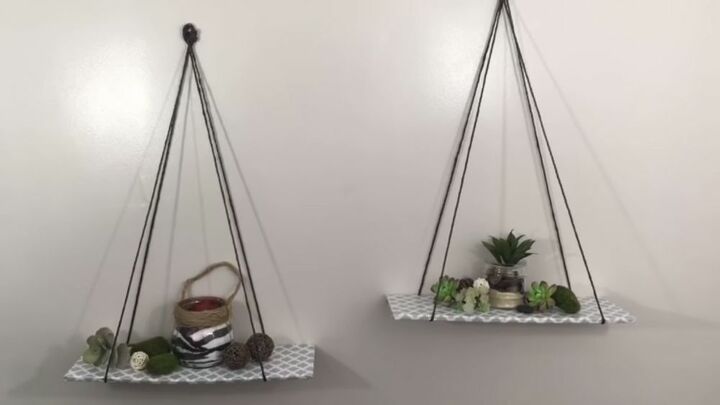
Decorate and Admire Your Work!
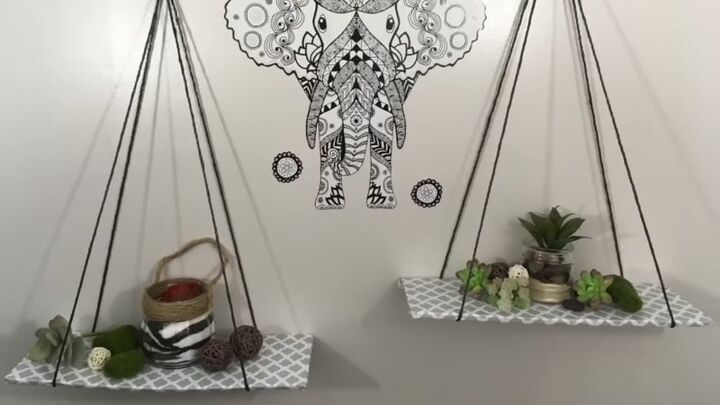
And that's how I created my own DIY hanging rope shelves! As you can see, these don't look like a cheap DIY job at all, which just goes to show how you can create professional-style home decor with just a few bucks and a glue gun. I chose a number of decorative items from the Dollar Tree to place on top; such as succulent plants and a ceramic pot. Of course, you can choose whatever items suit your tastes. If you liked this cheap and easy DIY hanging shelves project, make sure to share it with your friends so that they can create this look for themselves. And don't forget to let me know how you did below!
Comments
Join the conversation
-
That is to cool. Love this. Thanks for sharing and great tutorial as well. :)


Frequently asked questions
Have a question about this project?