


Wooden Turkey DIY

by
Amber Foster
17 Materials
$20
1 Hour
Medium
I LOVE turkeys! AND I love to decorate with turkeys for Thanksgiving! I mean aren't they just the cutest!? Here's how to make this little adorable guy for your Thanksgiving decor.
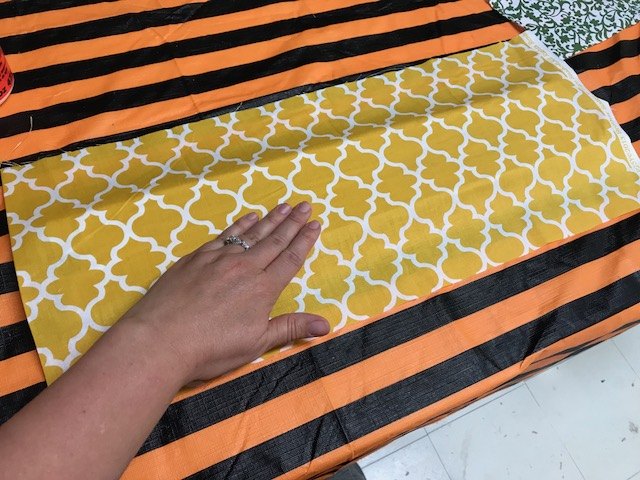
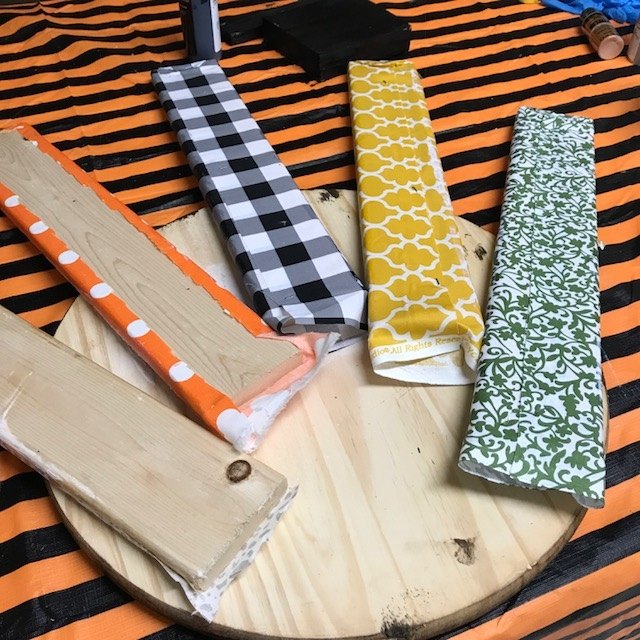
Start by Mod Podging the fabric to the 1x4 feathers.
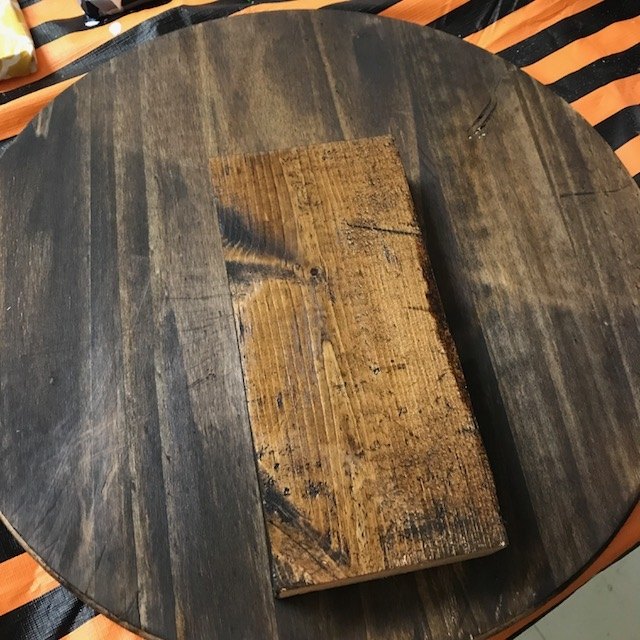
Next, stain the wooden circle and rectangle for the head and body.
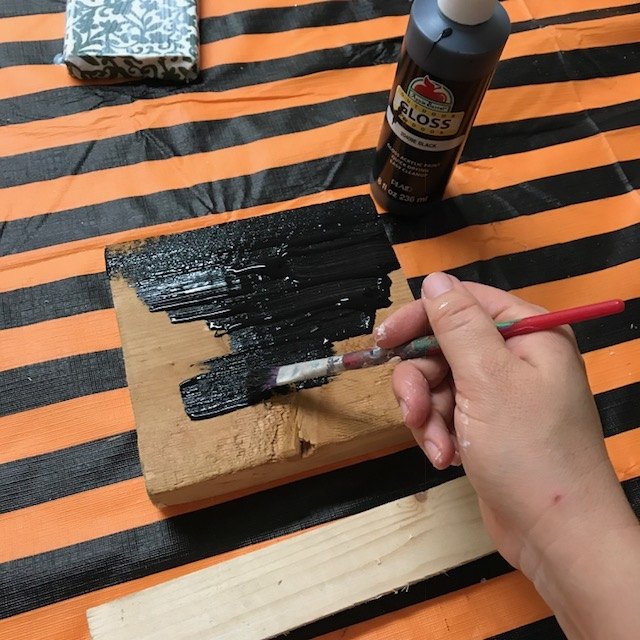
Paint one of the squares black. Leave the other one blank.
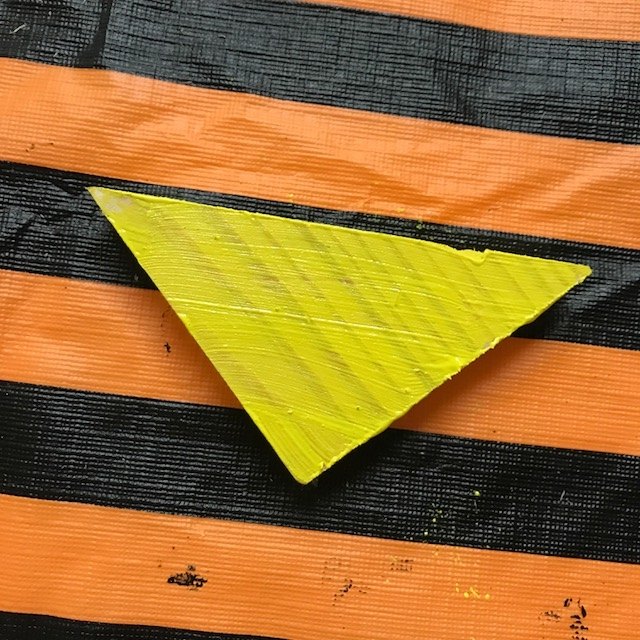
Paint the triangle yellow.
Flip the circle over to the back and arrange and attach the feathers by nailing them to the back of the circle.
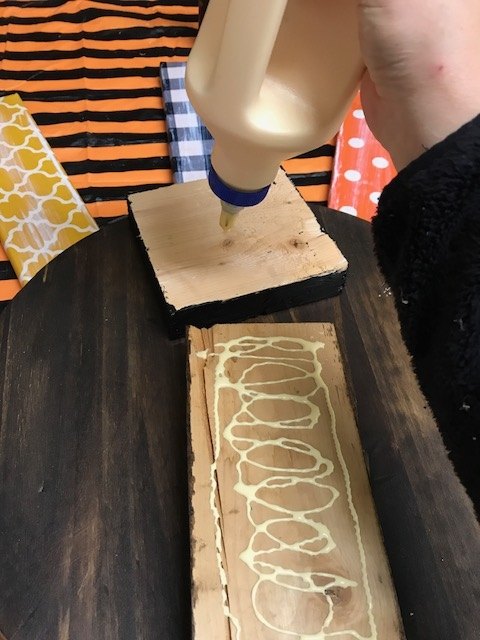
Glue the head and the hat onto the front using the wood glue. Then glue his button eyes, beak, and gobble on his head.
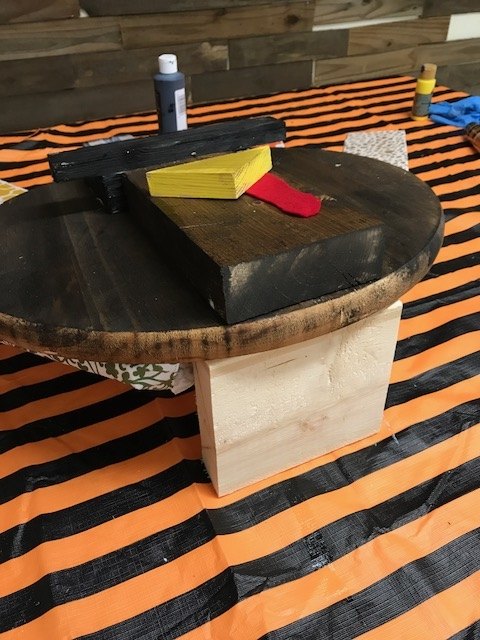
Glue the kick stand to the back.
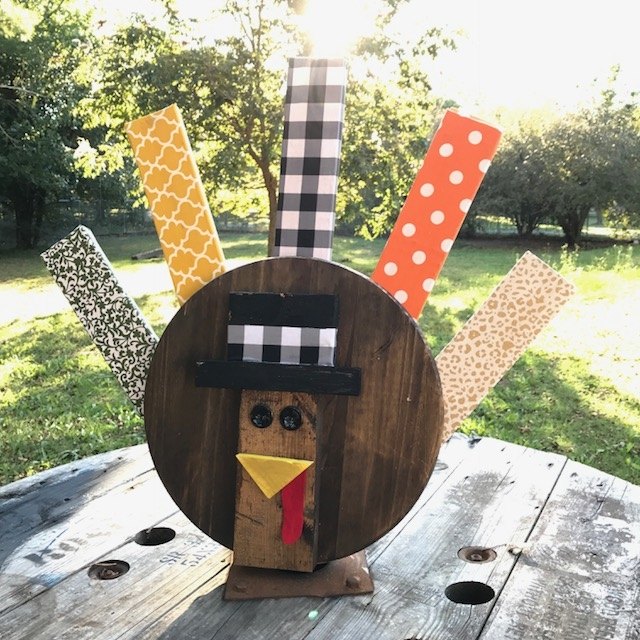
Wait until he's all dry and stand him up! Gobble Gobble!
Want more details about this and other DIY projects? Check out my blog post!
Comments
Join the conversation
1 comment
-
i'd love to try this turkey


Frequently asked questions
Have a question about this project?