


Snowy Winter Door Swag
5 Materials
$80
1 Hour
Medium
Christmas and New Year's Eve are behind us and we are looking at the long cold winter ahead. For me that means it is time to switch out my holiday decor for something that can hold its own through the winter. I spent the last few days up in Northeast Ohio and got a few days of bitter cold and snow to put me in the mood!

I ordered this assortment of brown and white ornaments and picks from Hollar. It is an online store that has all kinds of craft items. The white is actually a garland that I cut apart.
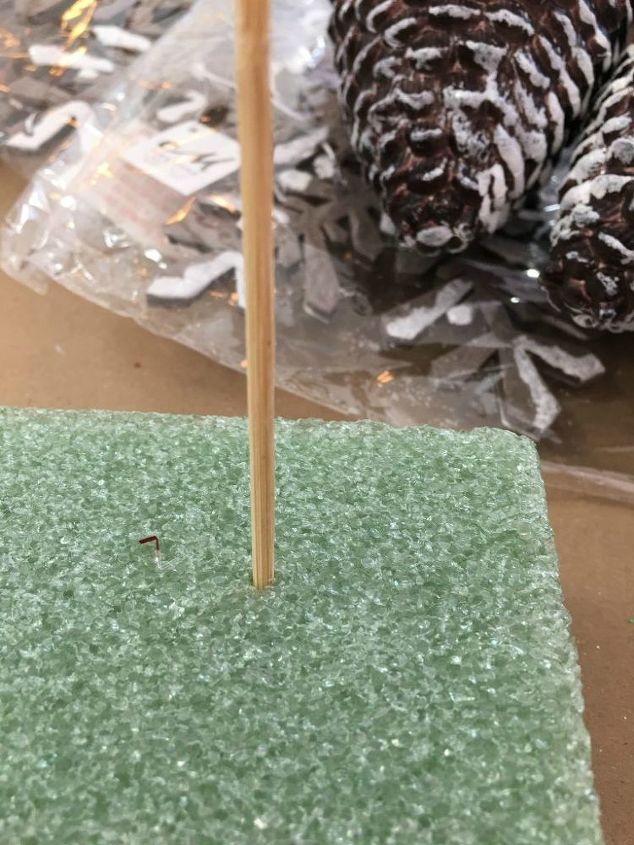
I decided to try a new way to make my hanger for my swags and used a kitchen skewer to poke two holes all the way through a block of styrofoam that was 12" x 4" x 2" . Then I used a pipe cleaner to feed through the holes.
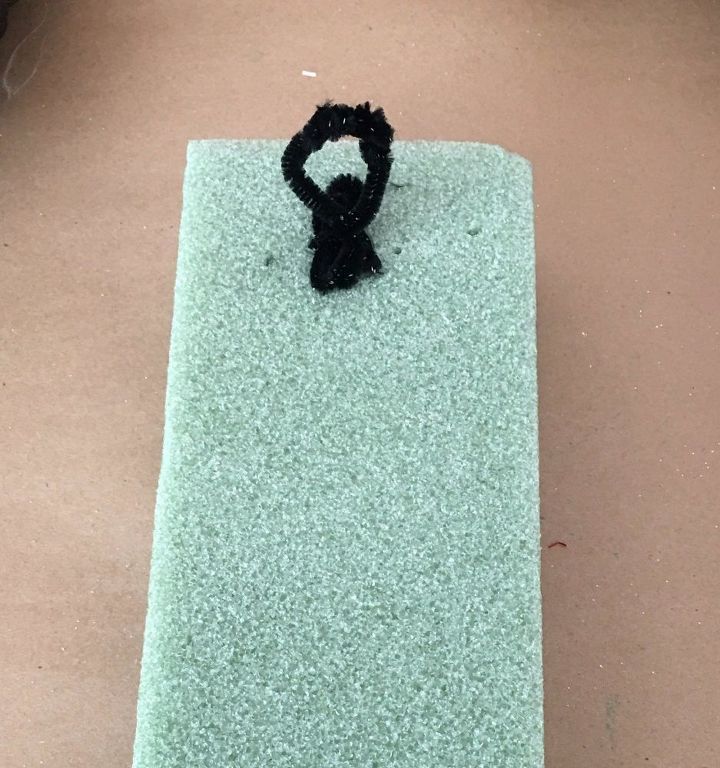
I folded up half of a pipe cleaner, put it against my foam block and then twisted the ends of the pipe cleaner together over the folded one. That would keep the pipe cleaner from cutting through the foam.
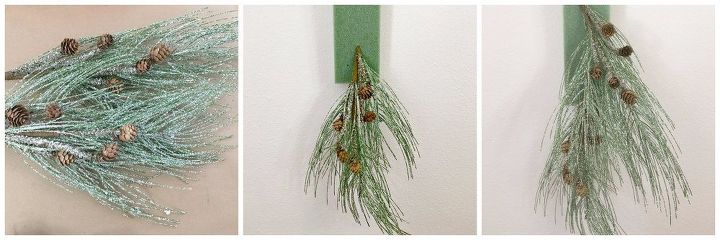
I had ordered these two large snowy white pine boughs. I cut each one off, and added them to my block of foam which I now had hanging on the wall.
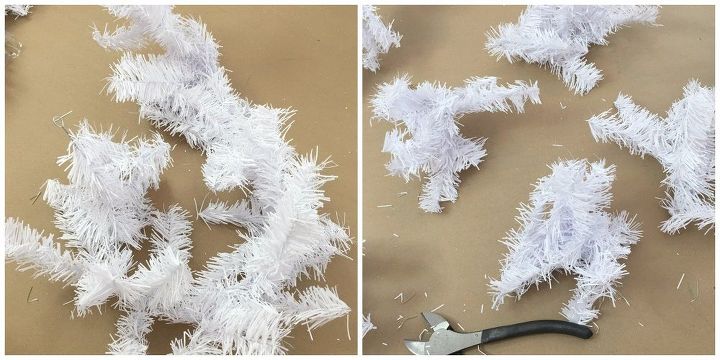
I took my white garland and cut it into short pieces between four and six inches long. I used a steel pick machine to add picks to each piece and started to build up the edges of my swag.
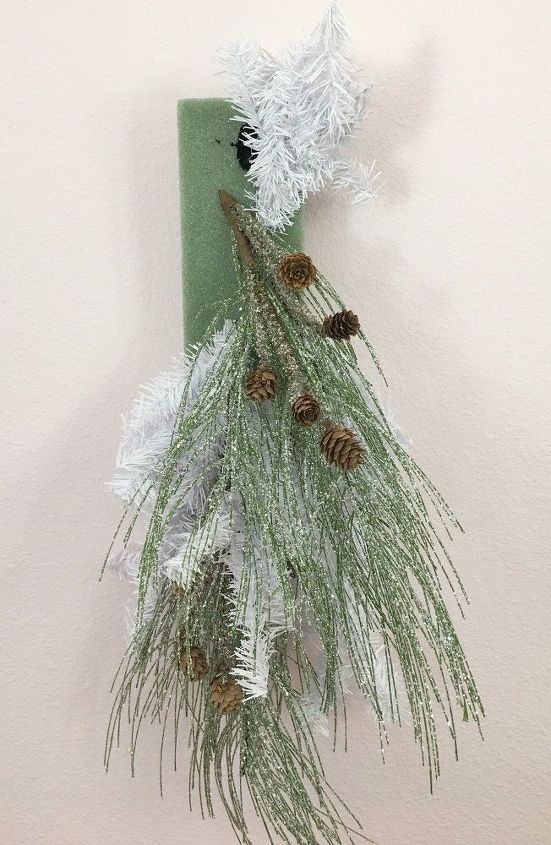
Here you can see how I began adding my white picks to my swag. You will add them all around the edge of your foam.
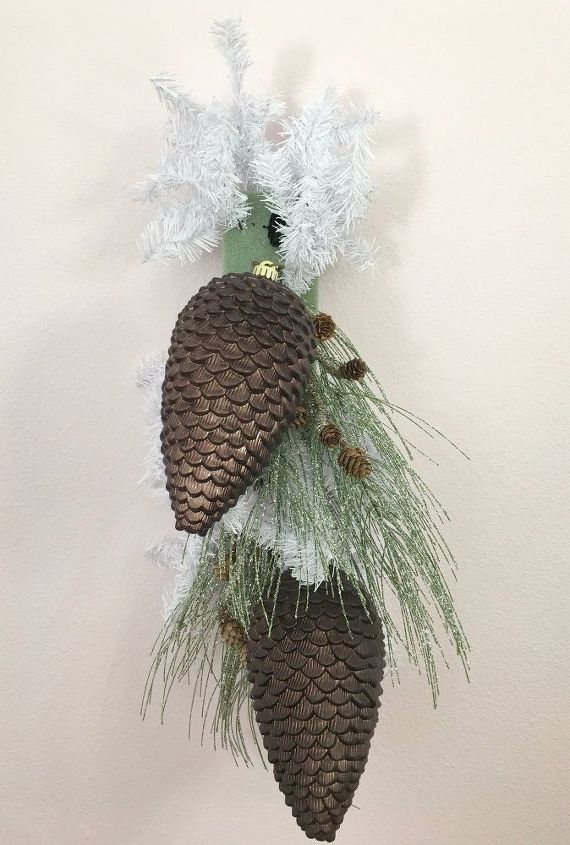
Next I added my large cone ornaments. I used a brown pipe cleaner threaded through the holder on the top of each cone and folded the pipe cleaner over to just about three inches long, added a steel pick (you can also add a wood wired stick) and secured them into the foam block.
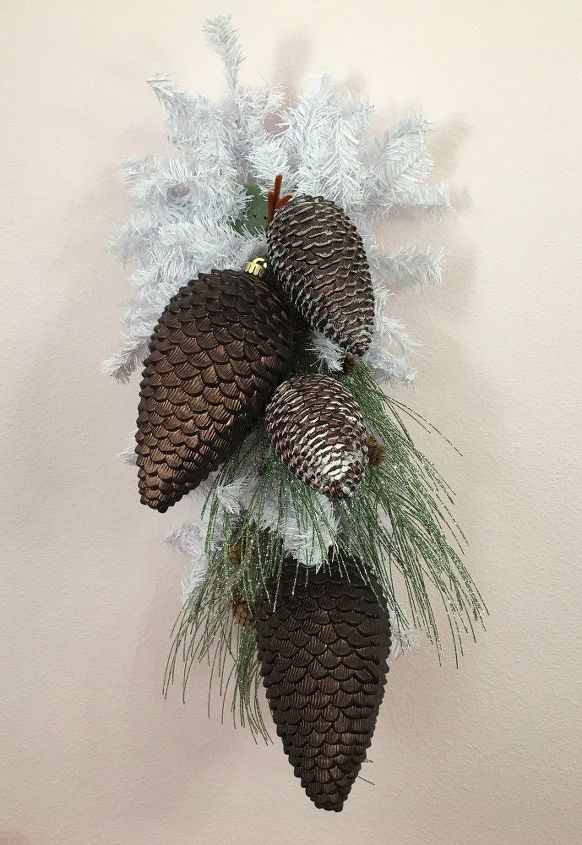
I repeated the same process with the two smaller pinecones and continued to fill in with the pieces of white garland.
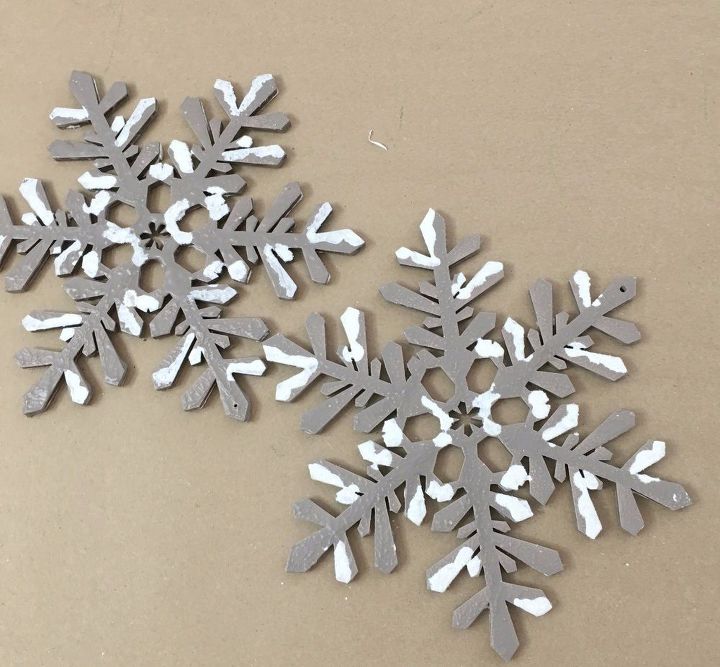
These beautiful snowflake ornaments will be just the right size to stand out on my swag. I used the same technique with the pipe cleaners to attach these into my swag.
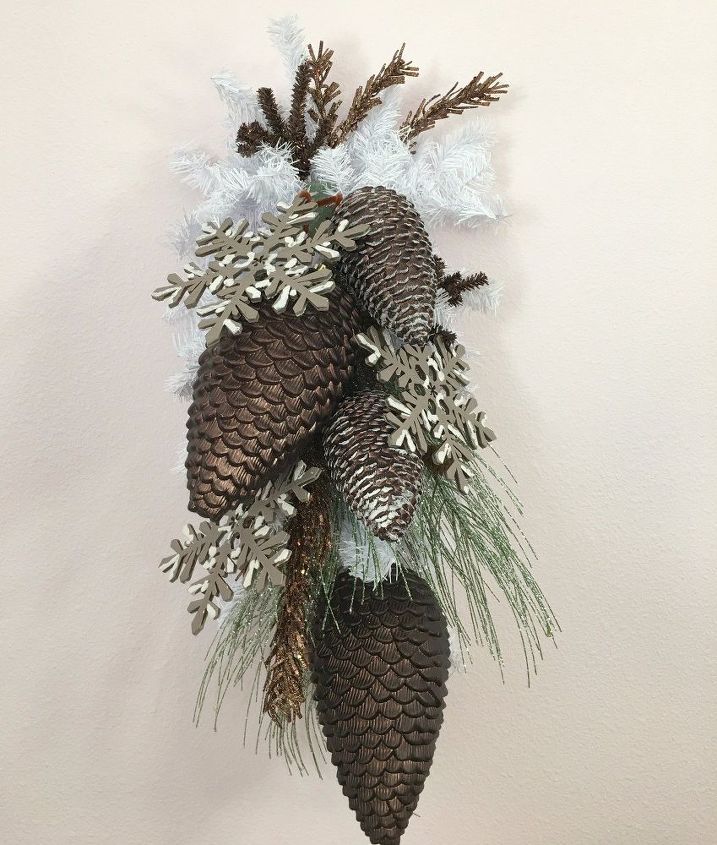
The swag is really coming together with the addition of the snowflake ornaments and a few brown picks.
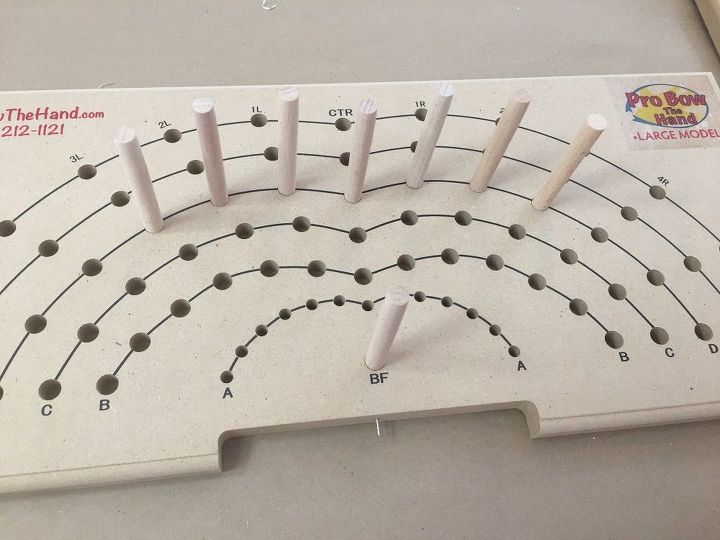
I usually hand tie my bows but bought myself one of these Pro Bow The Hand bases for tying bows, this would be my first experience with it!
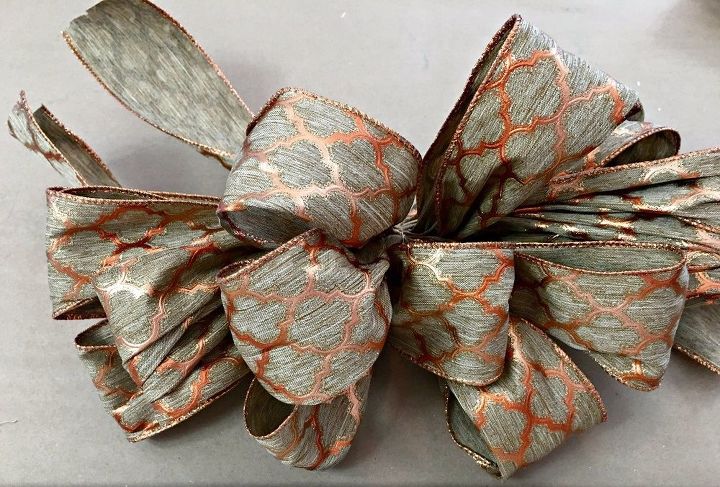
I was really pleased with how my bow came out! The loops are much more even than when I tie a bow by hand...and my hand doesn't hurt nearly so much! Here is my bow only half-fluffed.
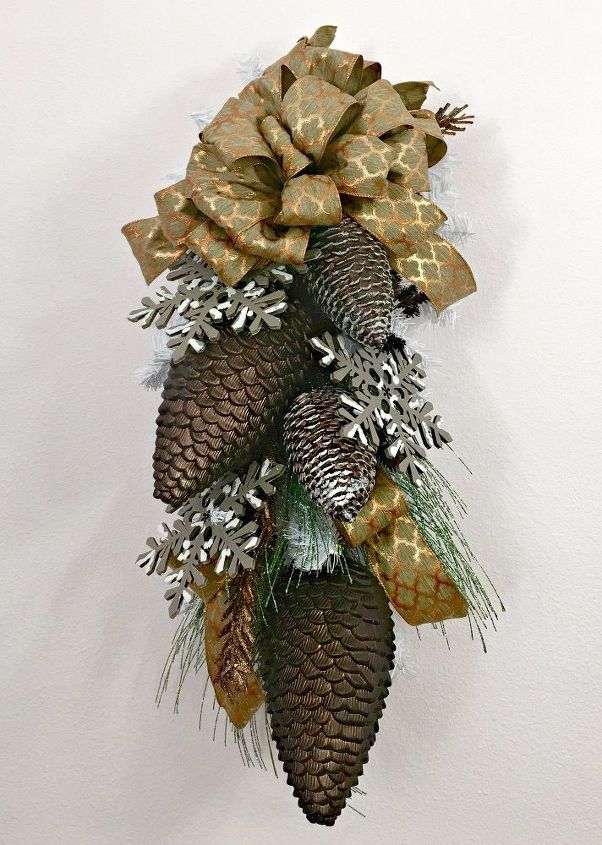
What a difference a bow makes! It is like the crown on the top of this pretty swag. I added a couple of other loops and tails toward the bottom of my swag.
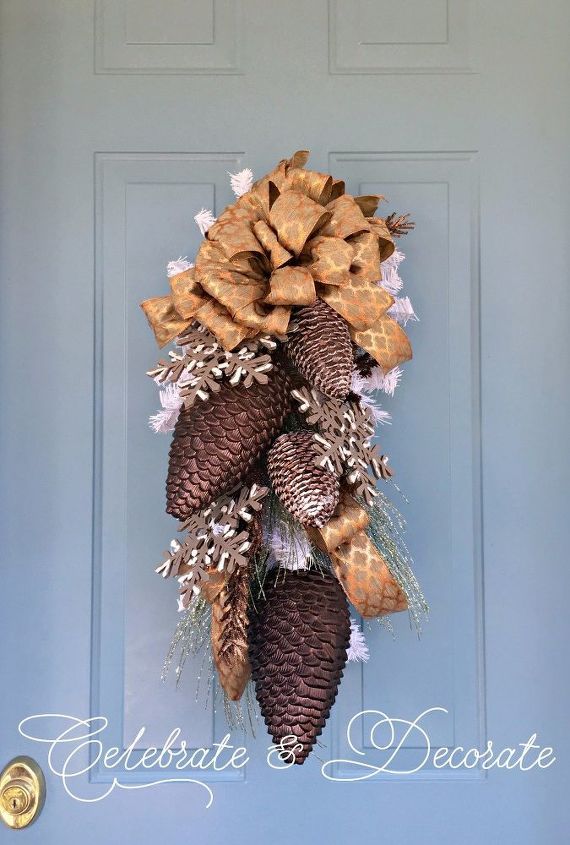
If the bow made a difference, getting the swag onto my blue front door made it pop even more! This snowy winter swag will be a pretty winter statement piece on my front door! For more details, check out my post: Snowy Winter Swag
Resources for this project:
See all materials


Any price and availability information displayed on [relevant Amazon Site(s), as applicable] at the time of purchase will apply to the purchase of this product.
Hometalk may collect a small share of sales from the links on this page.More info

Want more details about this and other DIY projects? Check out my blog post!


Frequently asked questions
Have a question about this project?