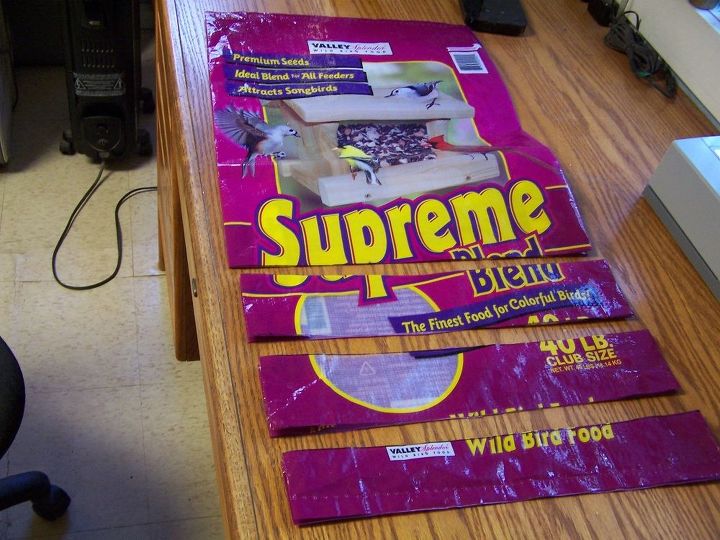
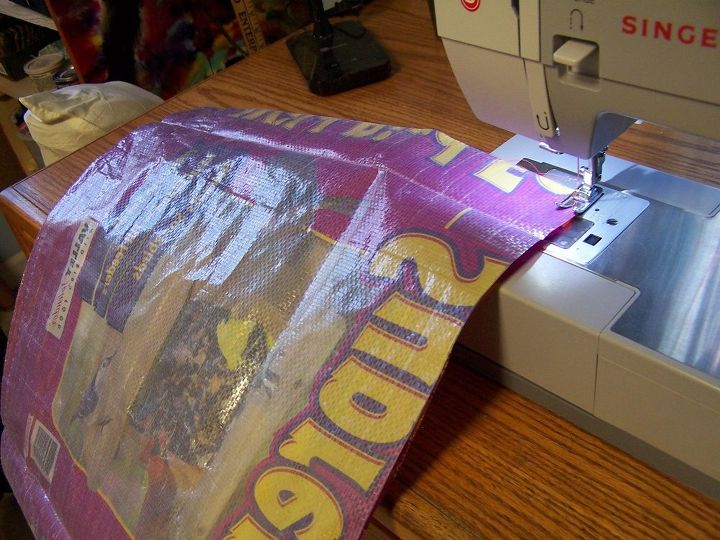
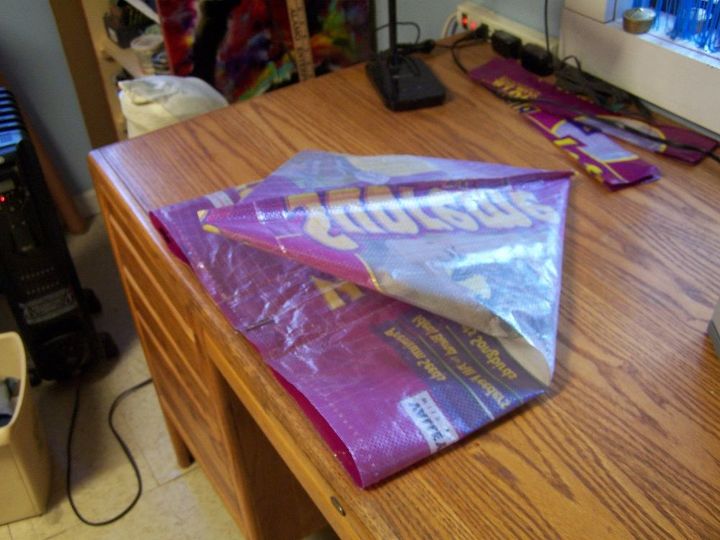
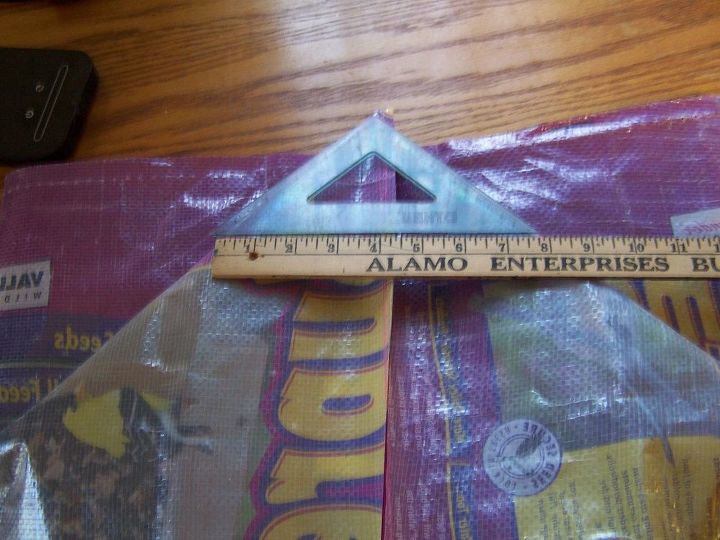
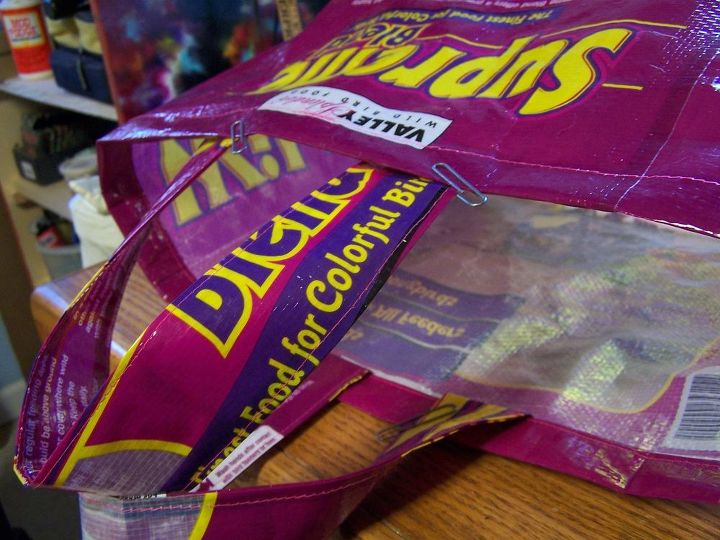
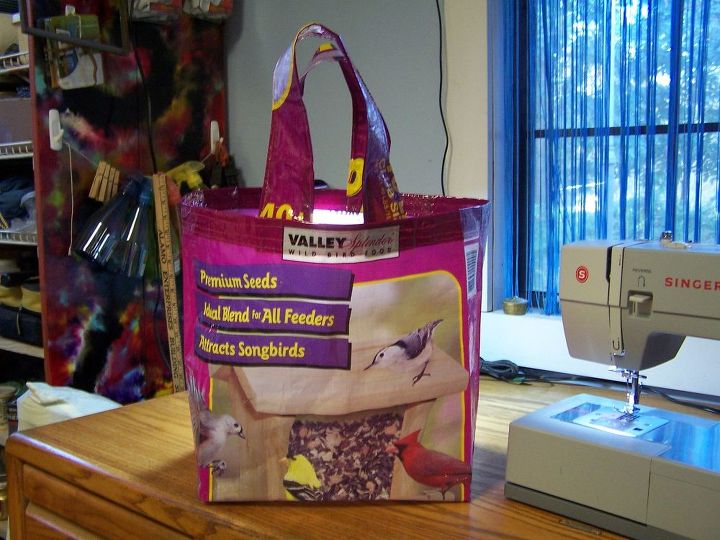
Feed Sack Totes

Patty Anderson
by Patty Anderson
3 Materials
1 Hour
Easy
I can't sew. I despair over a thread and needle, buttons fall off with my bad attempt at sewing them on, my bell bottom jeans were fringed, since hemming them was out of the question. My mom could sew; she could make plaid match up in her patterns. Either that gene skipped me, or I was adopted. Then one day I was at a friends house and she showed me some feed sack bags that she had bought from another DIy'er. At $15.00 each. My first thought was- really? Then my second was-oh! These are grand! I did some research. I now make feed sack totes. With a sewing machine. And if I can do this, you can too. Let's do this!
I had taken the bottom stitching off the bag so that I could clean the insides by wiping or rinsing with a hose. 50 pound feed sacks are generally a bit over 30 inches. Some are shorter, some are longer. It's all good. So let's remember about 3 inches for the rolled top, at least 17 inches for the height of the bag, (it can be higher if you want!) and two 3 inch handles. While I was making this post, I took 24 photos, and worried how I was going to keep the photos within limits. I'll try not to confuse you! This pic here shows a birdseed bag cut with a top of 20 inches (remember, 3 inches will be for the rolled top) and two "handle" strips of 3 inches each. The last strip is throw away.
Turn your sack inside out and run two seams along the bottom edge. I like two seams because it makes me think it's stronger. The weakest part to these bags is the thread; a poly bag will hold 50 pounds of feed, so I just double stitch everything! Oh, let's see, technical stuff....I put my tension on number 7, my needle position on middle, and my stitch length as long as possible! I also use a number 12-14 needle. I learned this all the hard way, spending HOURS making bird nests out of the thread in the bobbin area and on the bag! icon
A picture is worth a thousand words. You can see the bottom seam. So, now, fold your bag like this. It's like pinching the middle front and back of the sack and slowly creasing it to make this diamond shape. This will all make sense soon enough..... icon
Okay! Now that you have your diamond, here is where we add depth to the width of your bag. I have a protractor, and I use it. It makes an eight inch depth. You can use 9 inches, if you'd rather. Take a pen or sharpie and draw a line across. Do this to both ends, then double stitch where you drew your lines. It ain't rocket science; you can have 1/4 inch between your two seams! icon
Now turn your bag right side out and fuss with the corners until you have a nice looking bottom to your bag. Keep pushing your fingers into the corners until the bottom is square. You'll know what I mean as you wrestle with your bag! icon
Now for the top! You can either fold over about 3 inches and crease that all along the edge, (the bag will take a crease well!) then turn half of that in on its self and crease, OR crease about 1 1/2 inches of top in, then roll it over one more time and crease. I've tried it both ways, either works. Have some large paper clips handy! (You don't want to use pins on the bag...) Just keep pressing the bag edge against the table top as you go along, going around and around, creasing, until the top edge is just the way you like it. Use your paper clips to keep the top creased along your fold lines.
There! Well done! Now let's work on the handles.
Remember those two strips about 3 inches wide? These are your handles. Let me add that with a poly bag, there is an overlap that's melted together making the side seamless, but thick. You don't want to sew that part of your handle along the top edge of your bag, so seek that thicker part out, and cut your two strips apart evenly with that thicker part in the middle of your handle. With the two pieces turned pretty sides together, run one seam down one side of each of your handles.
Now that you have run one seam down one side of your handle, fold it pretty side out and crease it along your seam, making a pretty edge. Use your paperclips to hold your creased edge in place. On the length of the raw edge, turn both sides in about 1/4 to 1/2 inch, and crease, using the paperclips to hold your turned in creases in place. You don't have to mess with or crease the ends!
Now, sew along the edge, all four sides of your handle.
As I've been making these bags, I have learned to fold and crease them, because somewhere down the road, when not in use, that's exactly what you are gonna want to do with them, so might as well start now! Plus, remember that thick part of the bag we mentioned in the handles? You will want to look at your folded bag, and find out where that thick part is, so that you can avoid it when placing your handles! Seriously, we are already sewing through five layers of poly (three on the rolled top and two on the handle!) ....that thick part is a killer!
I've noted where the thick part is, (it runs down the "S" in the upper right part of the bag...) and have adjusted my handles where I won't be sewing them over that area. I slip the handle edge under the rolled top of the bag.I use paperclips to hold my handles in place.
Now we sew a seam around the lower part of the top, taking the paperclips out just before we get to them. Make sure your handles are square and flush with the under edge of the rolled top. Sometimes I accidentally move the bag a bit, and the handle is sewn in slightly not square. Ah well, live and learn!
Now, fold your handles out, and make another seam around the top of the top! In fact, I make an extra seam, because I know I'll be putting some stress on these handles at times! icon
And there you have it! Your own tote bag, good for groceries, (fill er up, she'll take it!) beach items, deer lease items, you name it! Taking the dog? Throw a blanket, two bowls and a gallon ziplock of kibble in with a few toys and the pup is set! The possibilities are endless! icon
Resources for this project:
Empty poly feed sacks
Any price and availability information displayed on [relevant Amazon Site(s), as applicable] at the time of purchase will apply to the purchase of this product.
Hometalk may collect a small share of sales from the links on this page.More info
Frequently asked questions
Have a question about this project?
  2 questions
  • Mary Ann Burch Mary Ann Burch on Jan 28, 2018

    I go through at least 2 40 pound bags of dog food a month. How would I clean the insides.

    Thanks for such clear directions.

  • Mi Mi on Nov 10, 2021

    Thank you for your tutorial!


    I've made these before, and I have always had trouble with the tension - I've even jammed my machine several times! I appreciate your giving the tension and stitch settings! One question - What type of thread do you use?


    Thanks!


    Michelle

Comments
Join the conversation
2 of 12 comments
  • Terri Terri on Feb 06, 2018

    I am so glad to see this tutorial! You have made it very simple (looking) and understandable! The last tutorial I read I just said "forget it!" I really want to make bags to go home with my foster dogs to carry all the stuff I send along!

    On the other hand...maybe I need one of those fancy machines to embroider the name of the rescue! LOL--thanks again!

  • Patty Anderson Patty Anderson on Feb 06, 2018

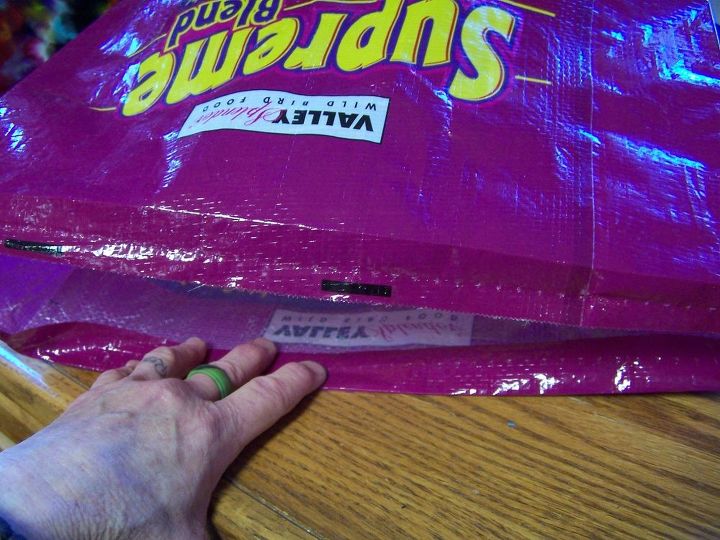
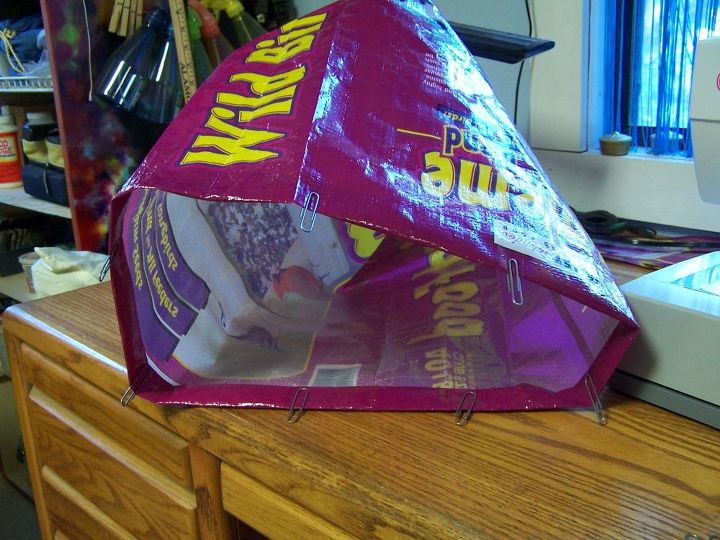
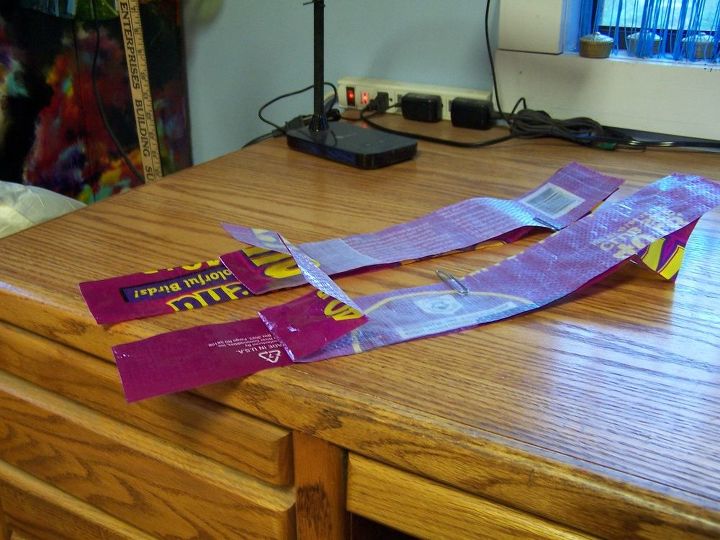
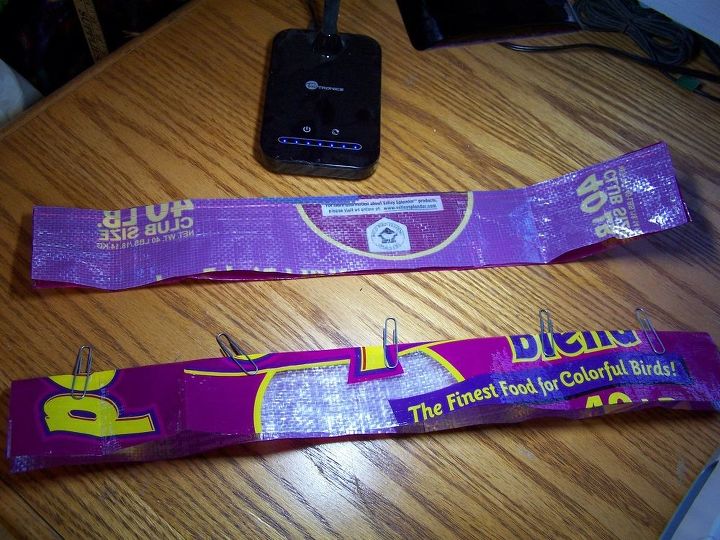
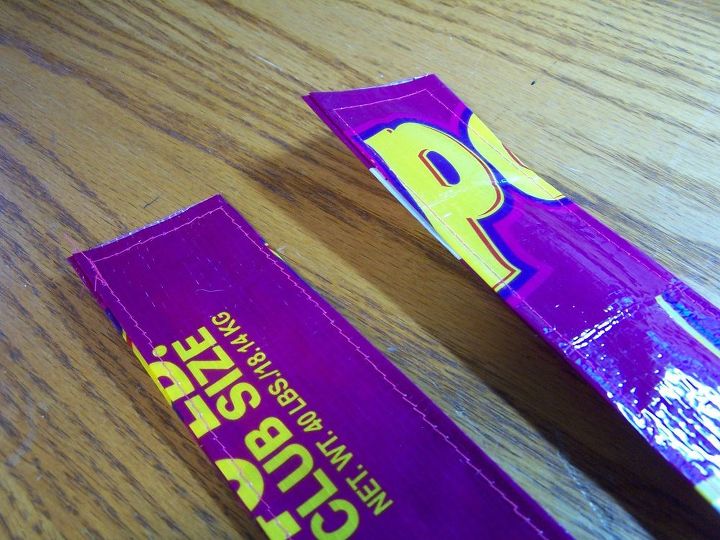
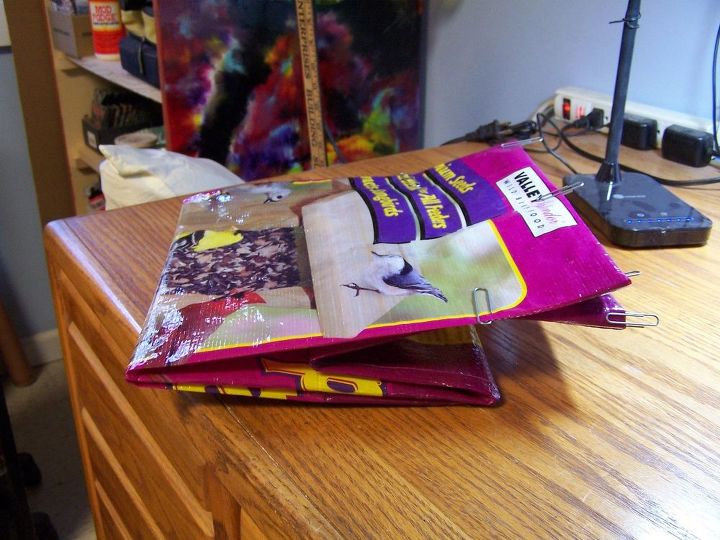
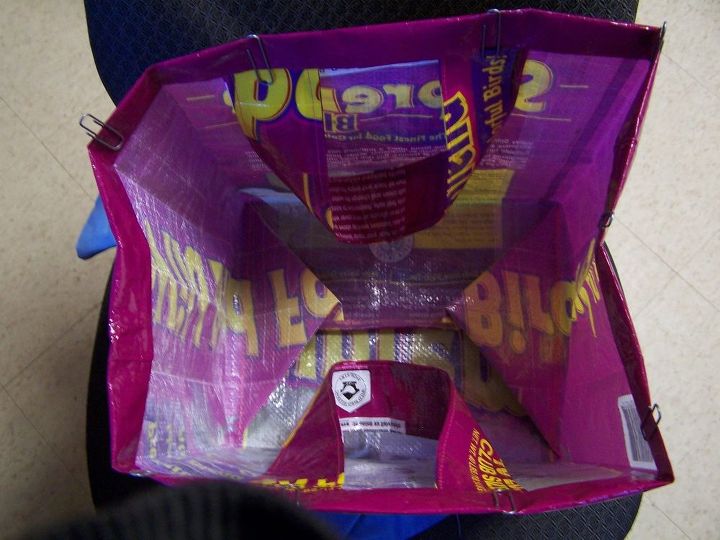
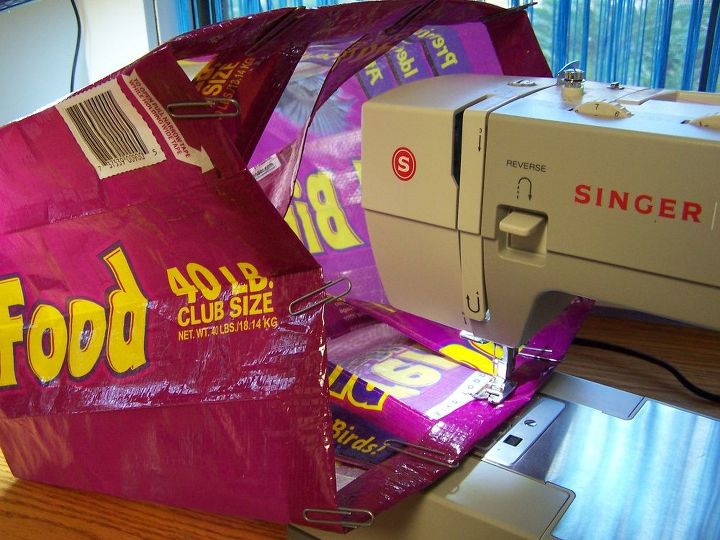
    Thank you, Terri! It really is pretty simple, once you figure 3 inches for the roll under top, 17 inches, or as deep as you want your bag to be, and 2 three inch handles. Done! But I worried....because long ago, when I read a tutorial on making these, I just couldn't wrap my head around those handles! Also I figured that photo of making the diamond shape to create the width of your bag might help more than anything I could say! So give it a go! Oh...and a heart felt thank you, for your foster work. Why we can't seem to pass a mantatory spay/neuter law is beyond me. I'm a foster failure, that's why we currently have 7 fur-babies.....all rescues......

Next