


Giving a Dated End Table New Life

by
Kaye
4 Materials
$30
10 Hours
Medium
Hello, I am always on the look out for Good Junk. When I found this end table for $13.00 on Facebook Marketplace - it was mine.
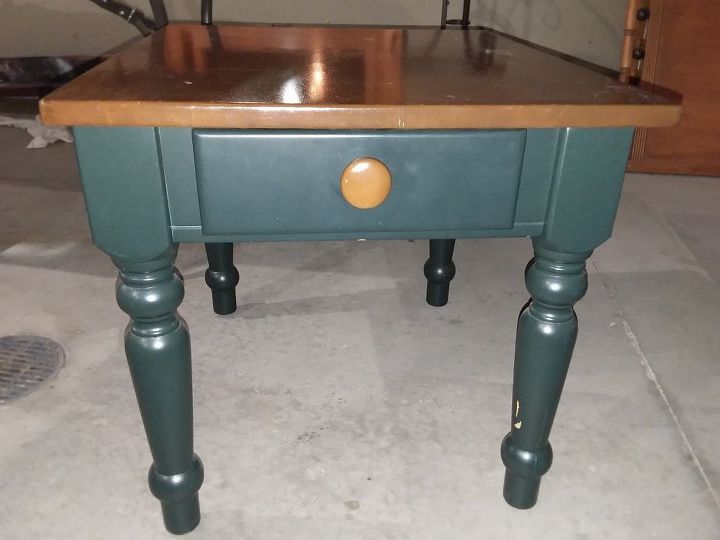
The piece was quite sturdy - BONUS. Normally, reconstruction of parts and pieces is usually expected. There were a few nicks and dings and the paint color needed to be updated as well as the hardware replaced/repainted.
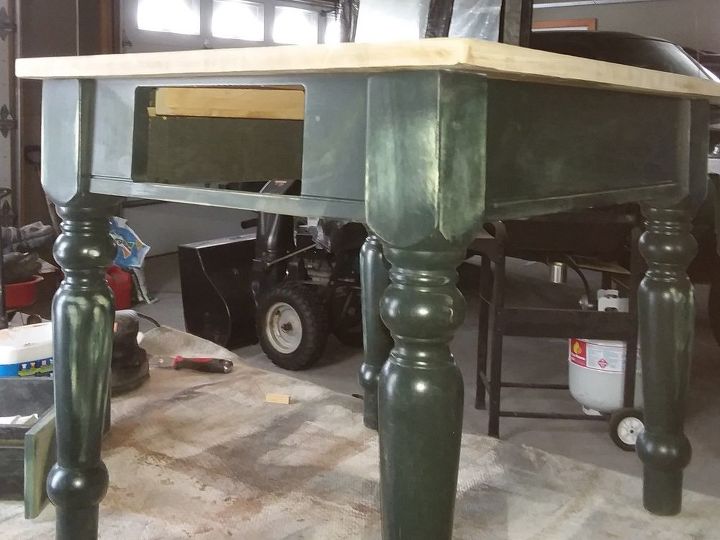
I refer to the sanding and taking apart stage as the "Discovery" phase. You never really know what you have until you start removing paint and finish.
Step one was to give it a good sanding. As I was suspicious that the top was not completely wood but a wood laminate, my goal was to get the polyurethane off and gently sand whatever I found underneath.
I was envisioning re-staining the entire piece until I discovered that just the drawer front was press board and would never match the rest of the wood. OK back to the painting idea.
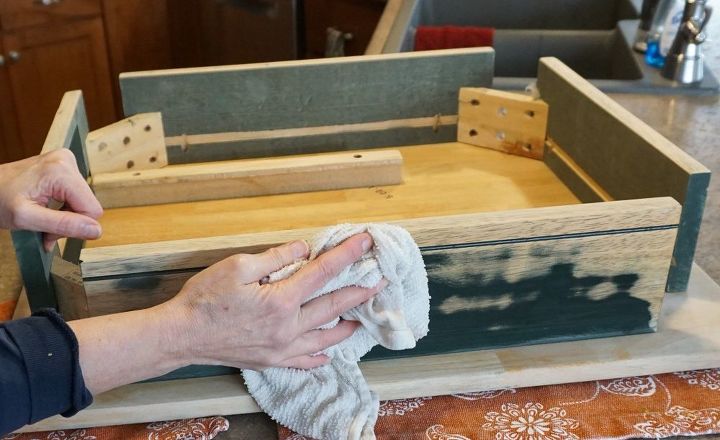
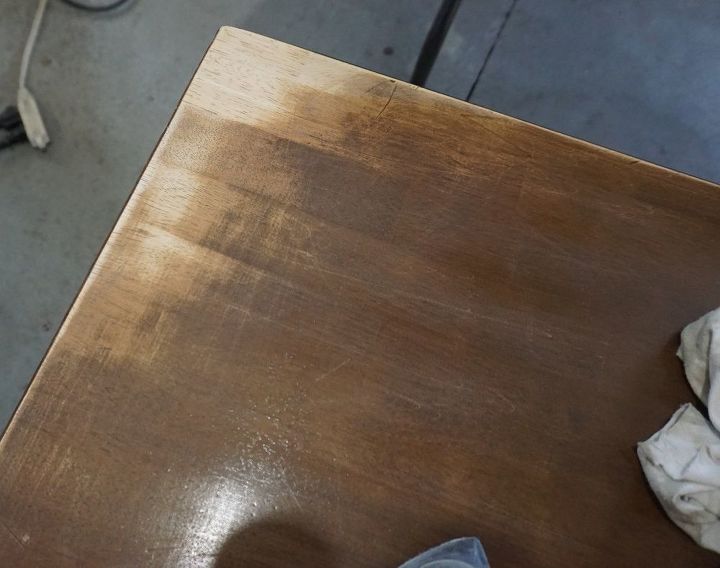
After sanding was complete, I wiped it down several times with a nubby cloth (think gym towel) rag. Let the piece completely dry between wiping. It amazes me to see how much sawdust sticks even after the second wipe down.
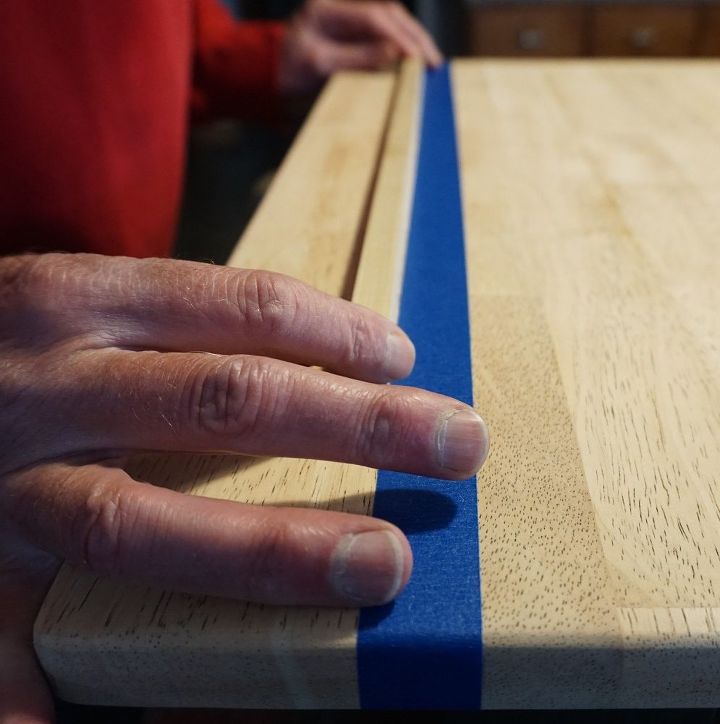
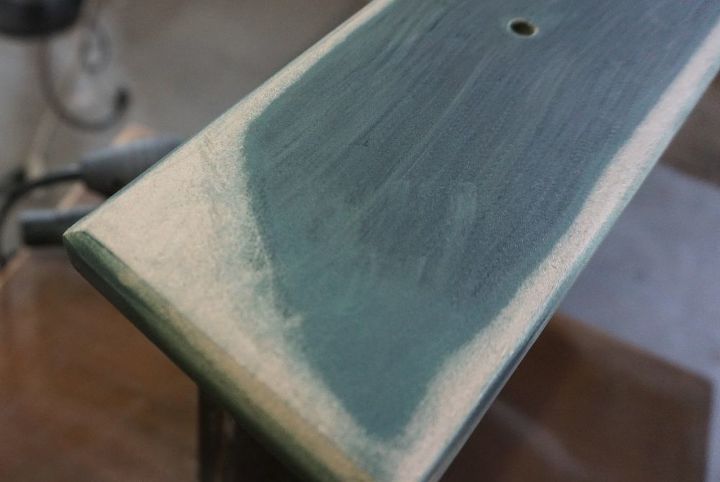
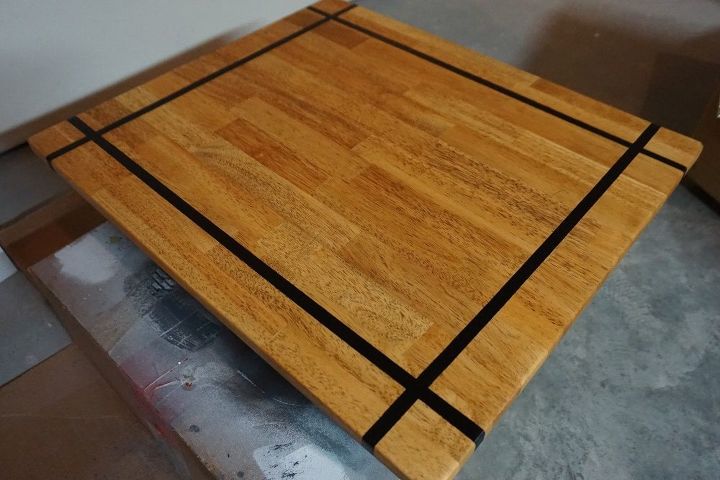
To pull the piece together, I wanted to extend the paint color to the top without entirely covering the wood. I decided to mark off lines with tape to make a window type crosshatch on the top.
Note! putting this tape down is definitely a two person project. Joe, my tape measure friendly hubby, marked off the lines equal distance from each edge. We put the first line of tape down and used a square dowel to help keep the tape line straight for the second piece of tape.
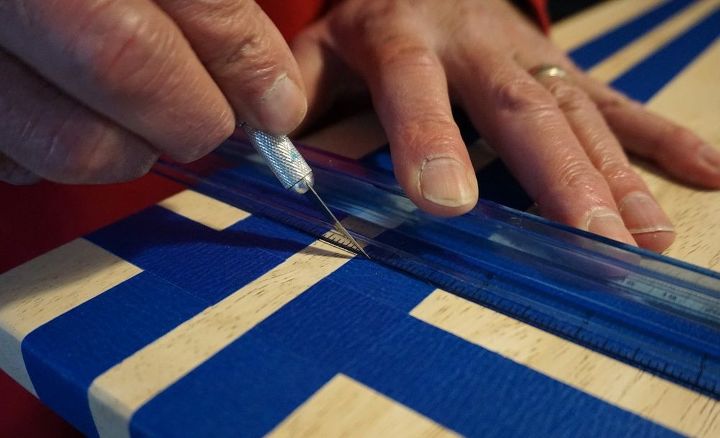
After taping, we used an X-acto knife to gently cut the inside where the tape crossed over.
After taping, I used black chalk paint to stencil the area in between the tape line. The edge of the black line is not completely crisp but will work as it will be covered by stain and polyurethane.
The next step was to paint the legs, drawer and frame. I chose a satin black as I wanted the luster of the paint to match the shine the top.
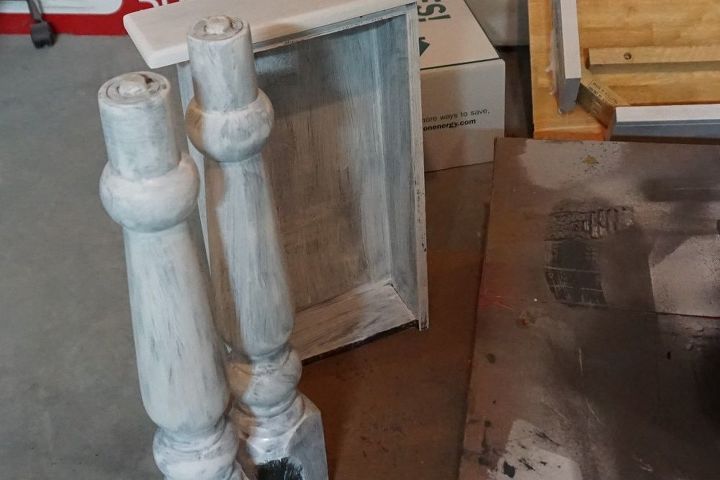
Primer paint (must do) was followed by two coats of satin finish black paint. Painting satin finish paint over primer is different that flat paint. Two coats are a must with the first coat for brushing a smooth base as possible. The 2nd coat will fill in the brush marks and put on the luster.
The next step was to stain and polyurethane the top. After staining the top with a Honey Oak and letting it dry thoroughly, I used a triple thick polyurethane as I had it on the shelf. MISTAKE.
Triple thick is great if the temperature is well above what it states on the can. As I was in our cool winter Wisconsin basement, triple thick left ridges that did not smooth out as it dried.
After a good light sanding, I applied a single coat of regular polyurethane and WHEW! it spread out beautifully.
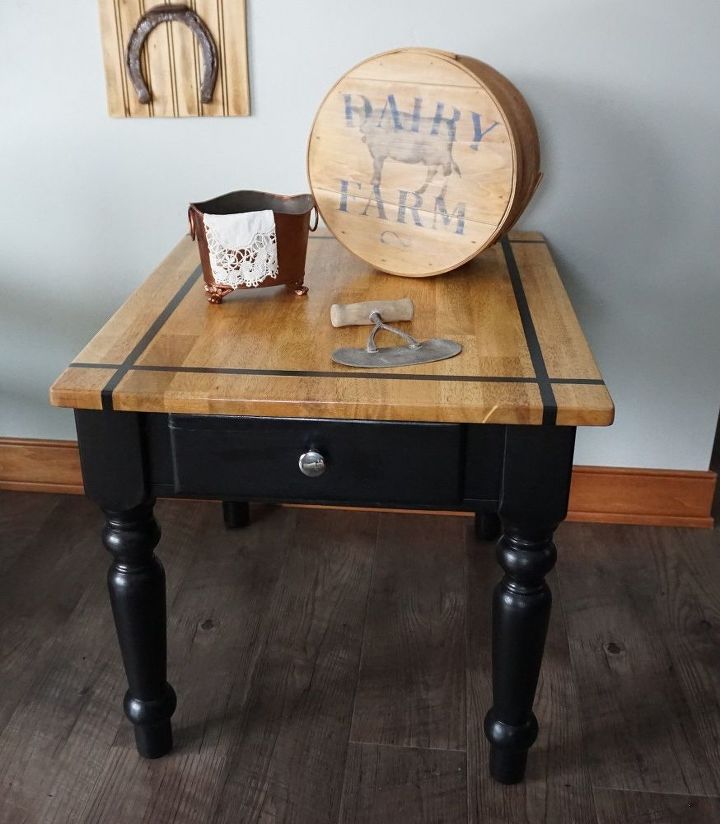
I replaced the wood knob with a simple silver one and gave it a good go over with lemon oil.
Hope you like it.
Resources for this project:
See all materials


Any price and availability information displayed on [relevant Amazon Site(s), as applicable] at the time of purchase will apply to the purchase of this product.
Hometalk may collect a small share of sales from the links on this page.More info
Comments
Join the conversation
4 of 35 comments
-
so pretty!!
-
No questions, just admirazation! Beautiful!!!
 you
you


Frequently asked questions
Have a question about this project?
I love the look of the Rustoleum. Is there a particular brush you recommend? Have you ever used water based poly?
What colors are best for a small apartment