


Refurbished Vintage Singer Sewing Machine

6 Materials
$100
1 Week
Medium
Received a vintage Singer sewing machine as a birthday gift from a contractor who was preparing to remodel a client's basement. It had been sitting for years and was going to be thrown out as trash. Thankfully he saved it for me and I fell in love with it immediately.
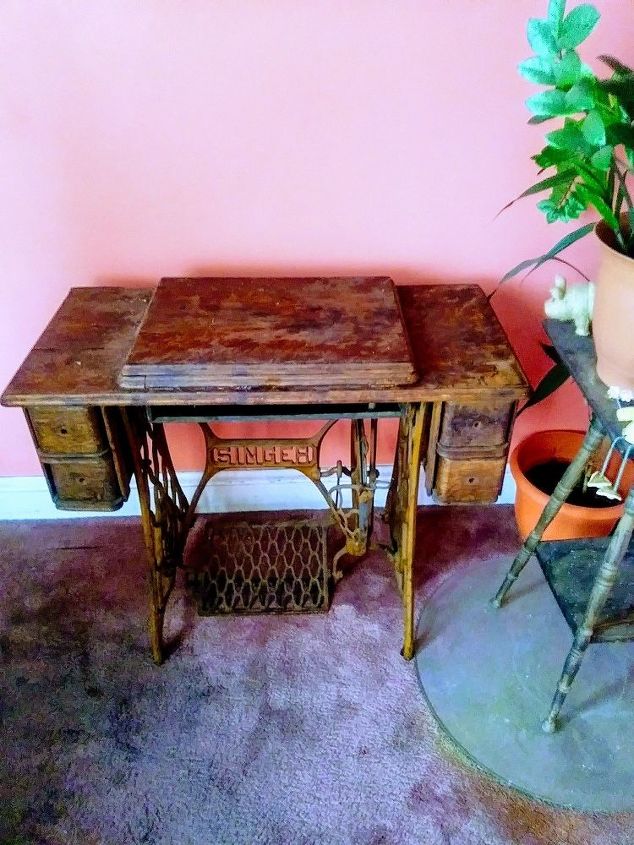
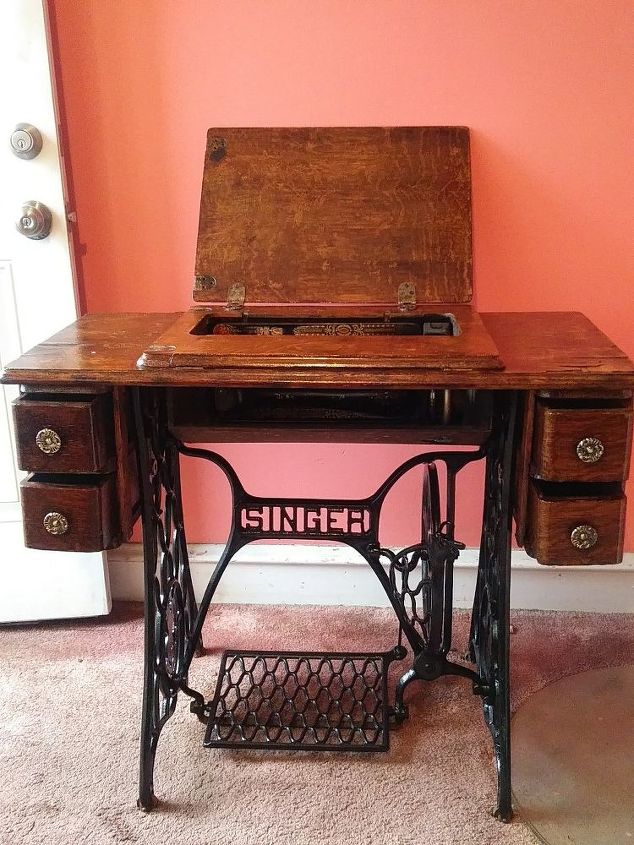
This is my little beauty. She was badly rusted, and a little water damaged, but was otherwise in pretty good shape.
Here I have cleaned it up with Murphy's oil soap, and Old English furniture polish. I don't want to take away from the normal wear and tear of the cabinet, so I I'm not going to take any heroic measures to get rid of the ragged edges and discoloration, which I believe gives it character. Looking good already.
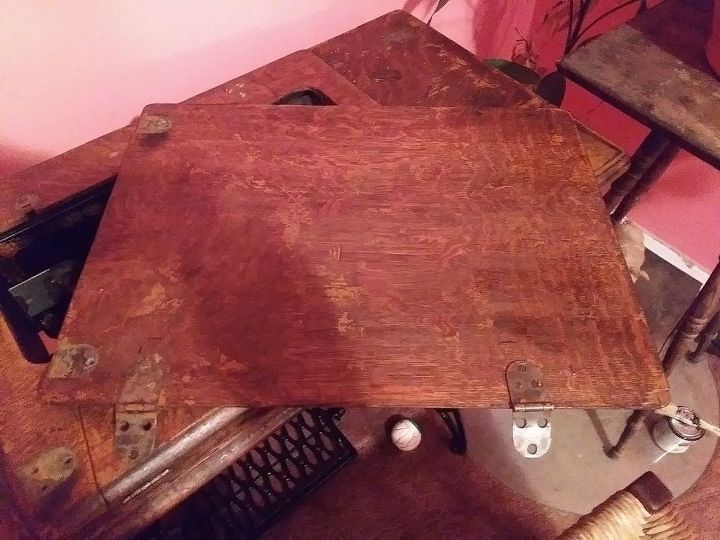
The ultimate goal was to convert the sewing machine into a vanity for my bedroom, so I removed the top and will re-position this to open from the back to the front.
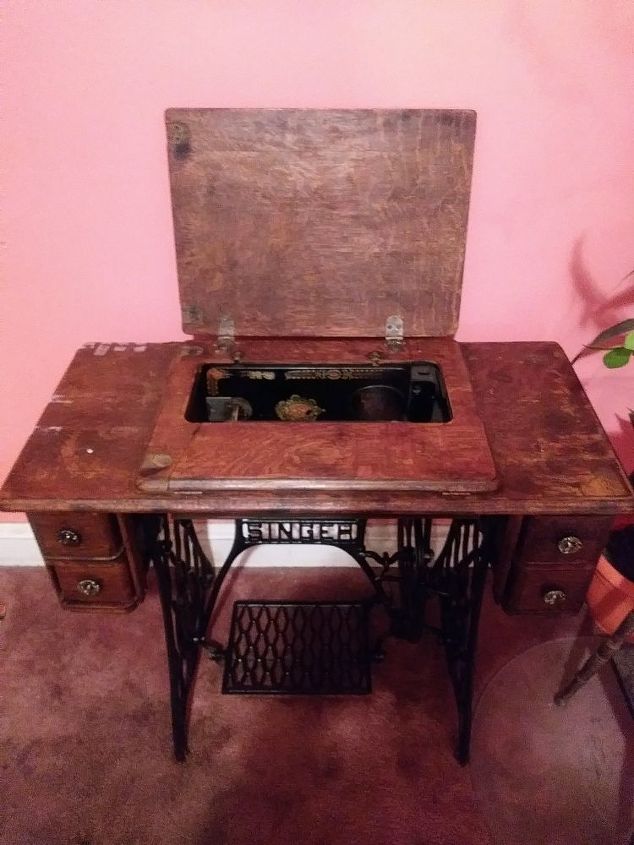
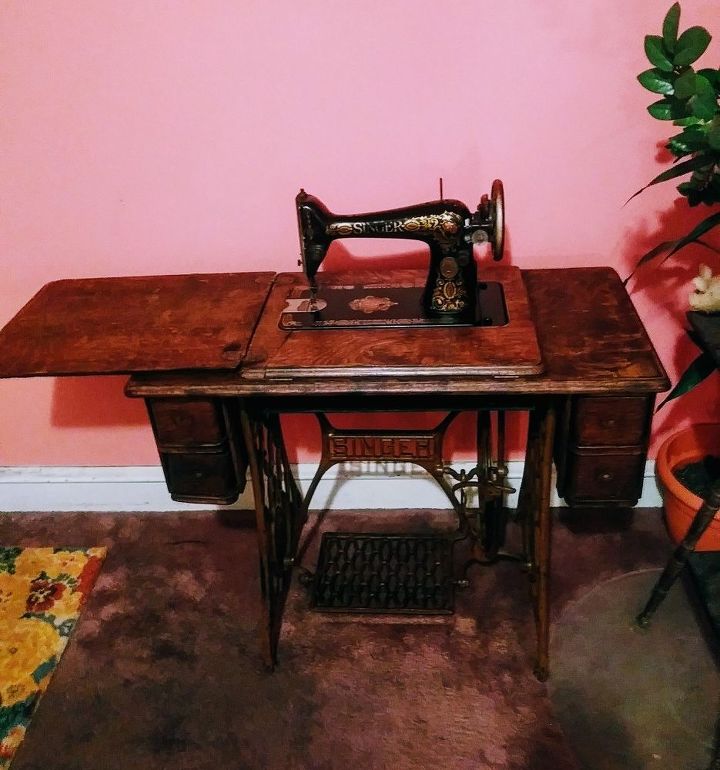
At this point, I have painted the base with a semi-gloss black paint to show the beautiful details, and the Singer name. The corners which were lifting due to water damage, were glued down with wood glue and held in place with tape. As I said before, one of the corners could not be repaired, so I will leave this as is and will seal it later with a top coat. The top has now been re-positioned and ready for a mirror once it gets upstairs.
The drawers were not made to hold a screw for a drawer pull, and whatever was there before was missing, so I drilled holes in the drawers and bought these beautiful drawer pulls that look like that they were made for this beauty.
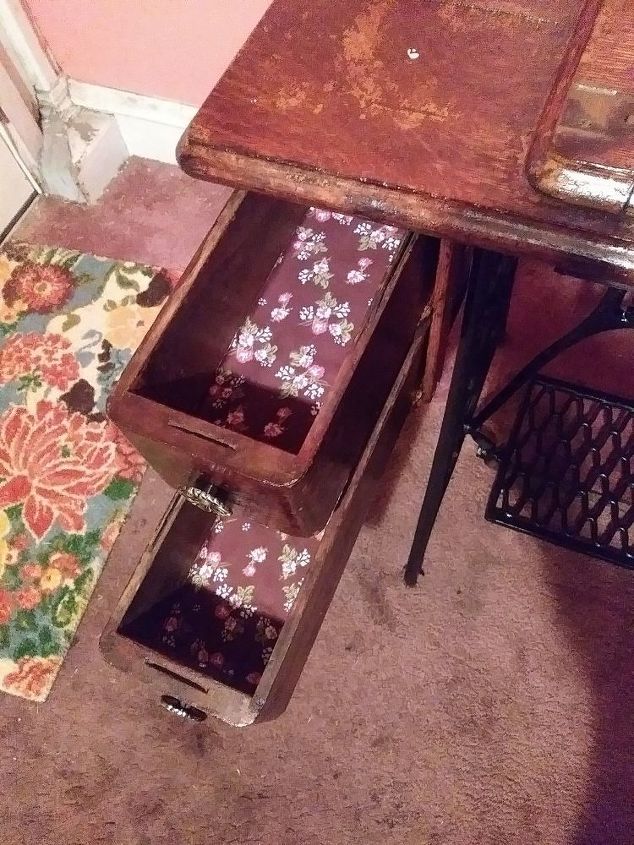
This is the inside of the drawers where I used some old sewing scraps to make a liner. The material looked "vintage" and just adds another personal touch.
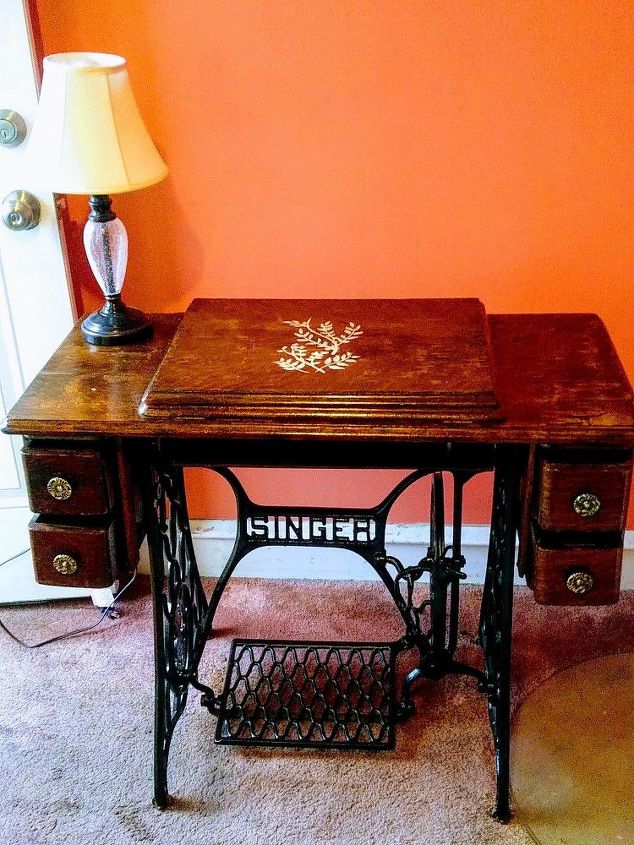
Another personal touch I added was a stencil design to the lid of the cabinet. This way, whether it is open or closed, it will be beautiful to look at. After the stencil had dried, I applied shellac to the entire cabinet to bring up the beautiful color of the wood and to also seal some of the edges that could not be glued down. This worked beautifully. Now she's ready to be taken upstairs to the bedroom.
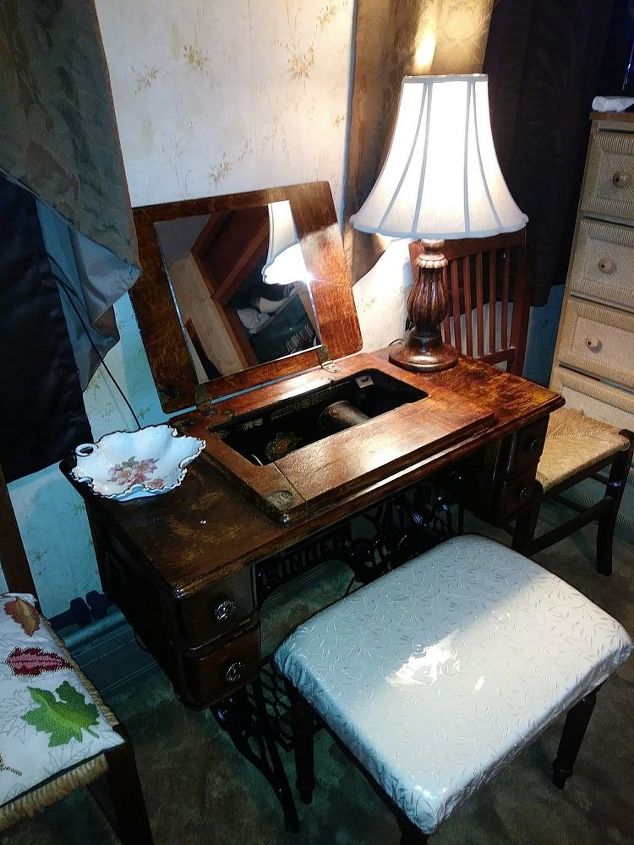
Finished product! I have now attached the mirror, and it is ready to be used as my vintage vanity. The wooden based lamp and vintage dish were both purchased at my local Goodwill store to compliment the sewing machine. Because I loved the actual sewing machine so much, I decided to keep it and display it whenever the vanity is not in use.
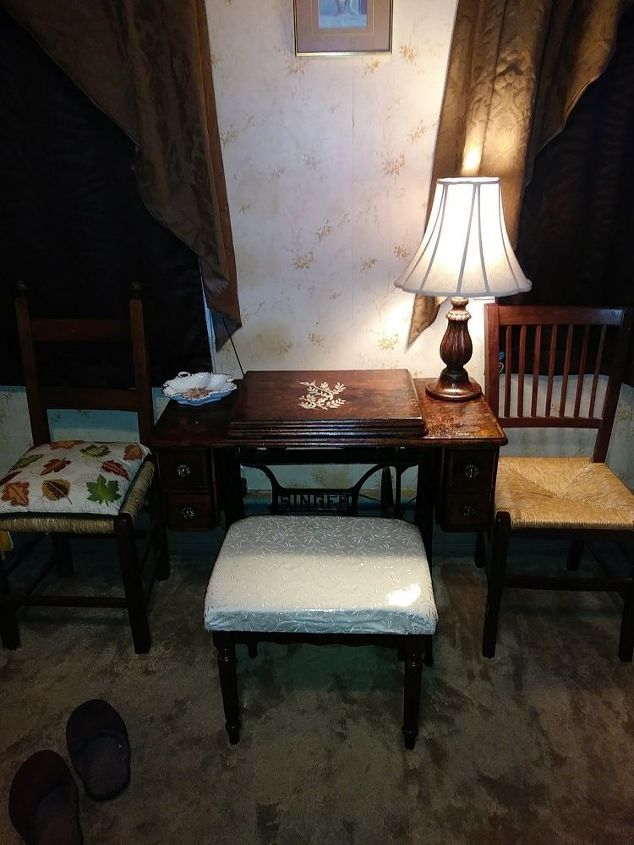
Another view with the top down. *See the little seat? That was also a project from months ago. I wasn't sure what I was going to do with it and it kind of sat around the house without any real purpose. Little did I know it was just waiting for a "vintage sewing machine"!
Resources for this project:
See all materials


Any price and availability information displayed on [relevant Amazon Site(s), as applicable] at the time of purchase will apply to the purchase of this product.
Hometalk may collect a small share of sales from the links on this page.More info
Comments
Join the conversation
3 of 41 comments
-
This was amazing. It took me back in time by about 65 years. My mom had a Singer sewing machine. I learned how to sew on it, with out electric. That was so cool. I would of loved to taken it to my first home & when I had children ,I could have taughy them to sew. I did but on her other Grandmothers machine. I am sorry for taking up do much of your time but the story ment so much to me. By the way, my dresser looked like your machine turn ed d out to be. Thank you for sharing. CC. ❤❤
-
Thank you for not slapping chalk paint on this gem! It is beautifully done and a very clever idea!!


Frequently asked questions
Have a question about this project?
i have a vener machine in dreadful condition and would like to paint is this possible