


No Sew Dust Ruffle
I was determined to make a no sew dust ruffle. If there is a way to make something without having to get out my sewing machine or a needle and thread, I will find a way. I was putting together this room for my granddaughters and needed a little more punch of gold. I couldn’t find gold dust ruffles that I liked at a price I liked so I decided to tackle them myself. You can see more of my crafts and creations here.
I purchased enough gold lamé fabric double the length of I needed for my dust ruffles. The twin beds are both tucked into corners of the room, so I only made the dust ruffles for down one long side of the bed and across the bottom. I did add another foot onto the length so I could tuck it around the corners.
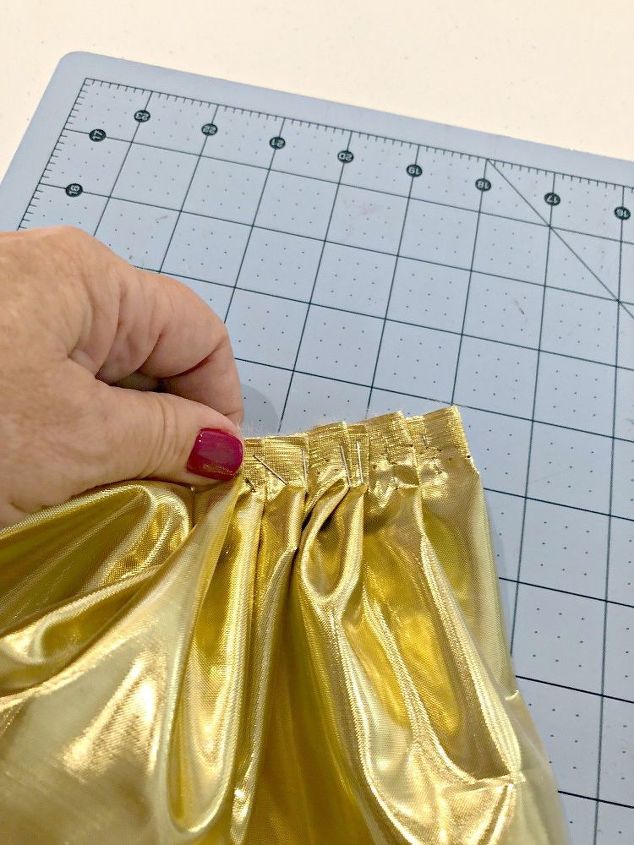
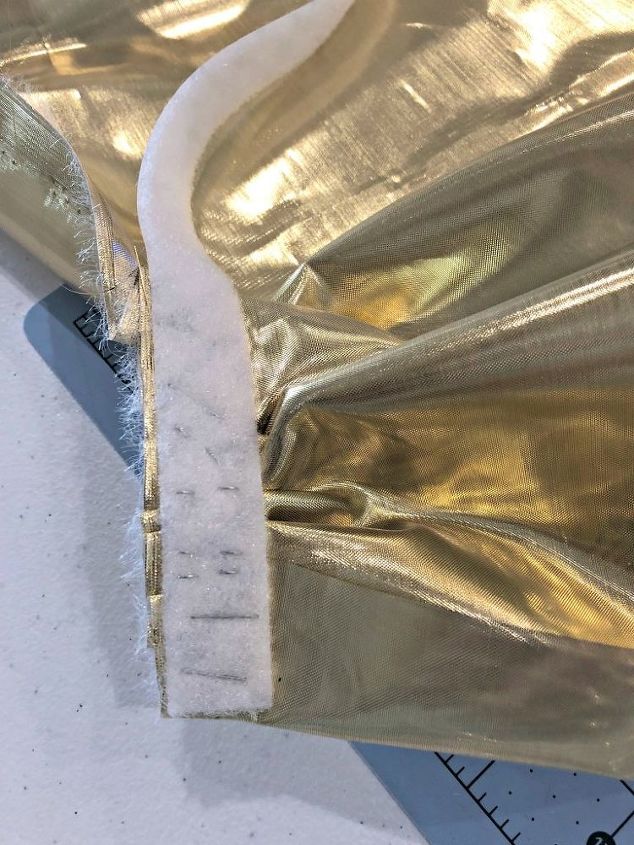
The gold fabric I bought was 60″ wide. I unfolded it and cut it in half right down the fold. I didn’t want to deal with hemming the fabric and I wanted a little bit of a pouf on the bottom, so I then took my 30 inch width of fabric and folded it in half. I used sticky-backed velcro and then went to work stapling the fabric to the velcro, gathering it as I went. Twice the length of what I needed was enough for me to gather it as shown above. I stapled to the loop piece of the velcro.
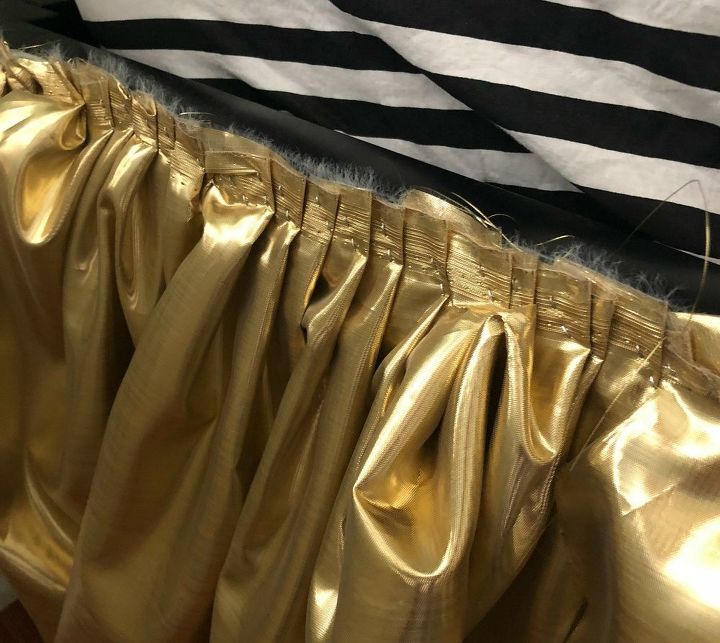
When I had completed the length I needed, I attached the hook strip of velcro to the loop piece on the back of my fabric. Then all I needed to do was to peel the paper off of the sticky backing and stick it right to the metal bed frame. I didn’t feel any need to finish off the top edge any more than I did, but if you wanted to, you could easily stitch some hem tape over it for a more finished look.
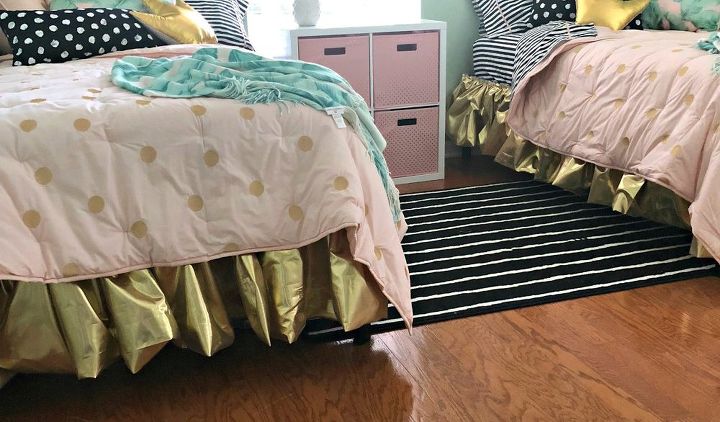
The gold was perfect for helping the gold dots on the bedspreads “pop”.
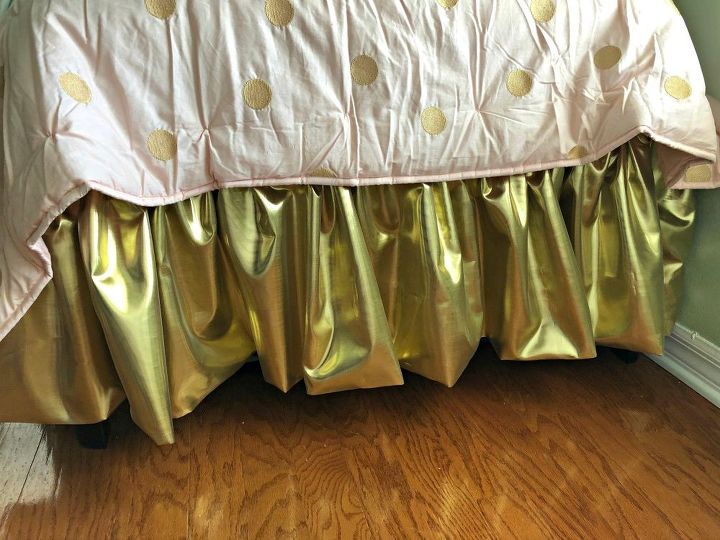
The length ended up being exactly what I wanted for the girls’ room, about two inches above the floor so they can pull the bins of toys out from under their beds and push them back easily without catching the dust ruffle and pulling on it. I couldn’t be happier with how these turned out! I wouldn’t hesitate to make one for the queen sized bed in my guest room! I would love to have you stop by my blog, Celebrate & Decorate for the full tutorial as well as sign up for my latest creations, posts, recipes, exclusives, and more...


Comments
Join the conversation
-
Beautiful job, getting you are their favorite grandmom! No insult to other.
-
loved this, was going to buy a dust ruffle, now I am going to make one. THANK YOU, THANK YOU, THANK YOU.


Frequently asked questions
Have a question about this project?