


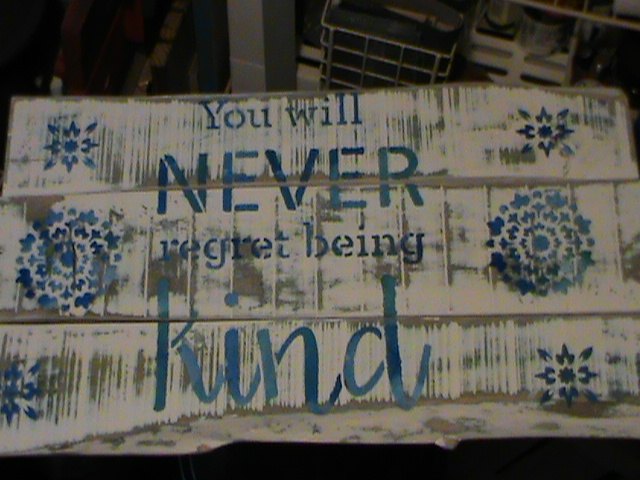
Acts of Kindness Was My Inspiration for This Pallet Sign!

by
Jennifer
10 Materials
4 Hours
Easy
I have seen so many videos of people doing acts of kindness lately that last week before this challenge was announced I had made a new wall sign to hang by the front door! Some of the videos I had seen like the police officer who helped shave a homeless man's face so he could apply for a job, the young boy who helped an elderly woman with a walker up a flight of stairs, the woman who carried a hurt, lost dog out of the wilderness for miles or the young man who pushed a disabled person home for about a mile when her electric wheelchair ran out of juice!!! Just so kind and asked for nothing in return! I hope everyone does something kind everyday, our world needs it!!
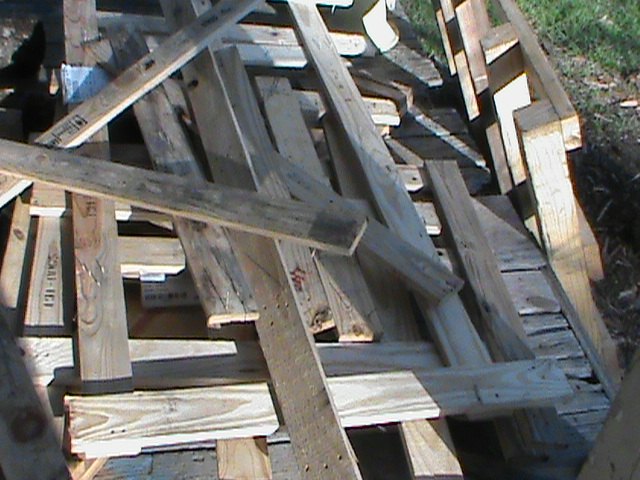
I go through a pile of pallet wood, like this one here, in no time at all! This sign is the last of that pile!
I didn't take a lot of pictures because I wasn't planning on posting this sign until I saw what the challenge was and I thought "Wow I just made a sign of inspiration!"  Perfect timing!!
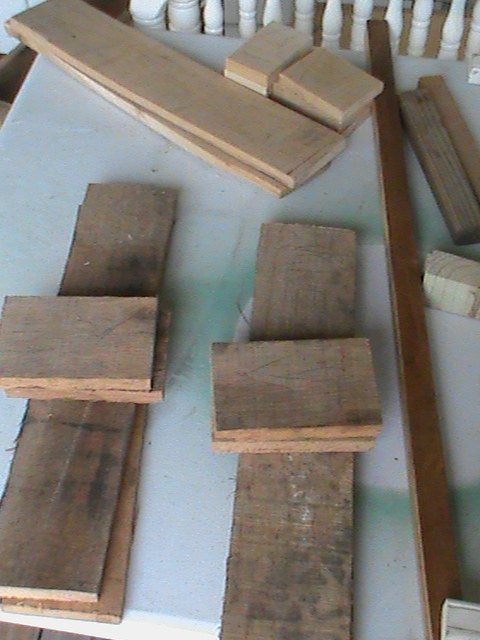
Perfect timing!! Three pieces of wood will be good for this one!
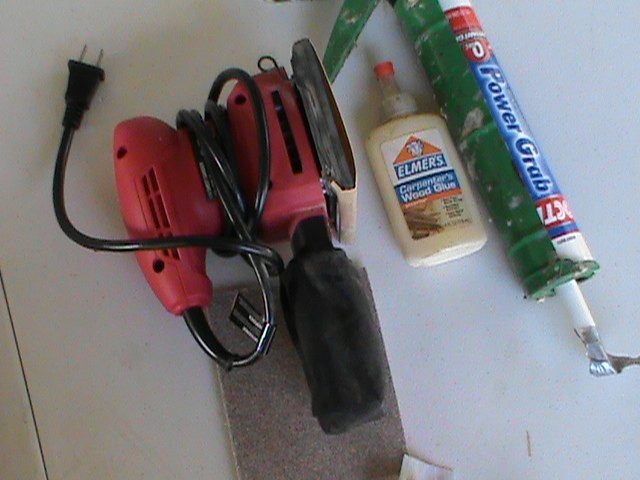
Make sure you sand it down! I use a palm sander and sometimes adhesive too, along with nails or screws. It really depends on the wood and weight.
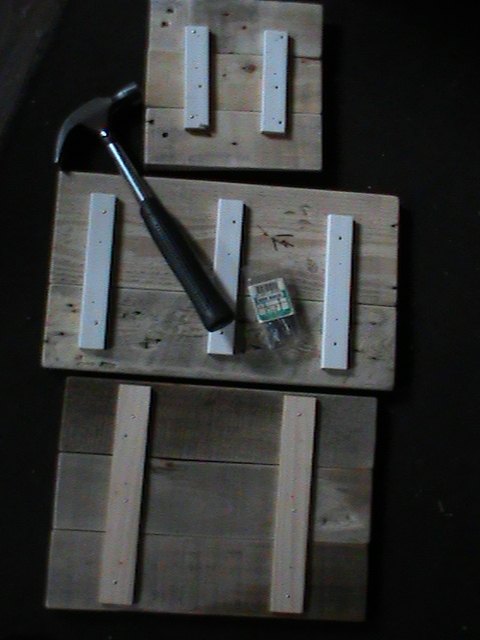
The sign can be as long or wide as you want it to be! Sometimes I will nail the braces on the back or screw them in. It really depends on how heavy the wall art/sign will be. The signs above were nailed because they were small in size and light in weight.
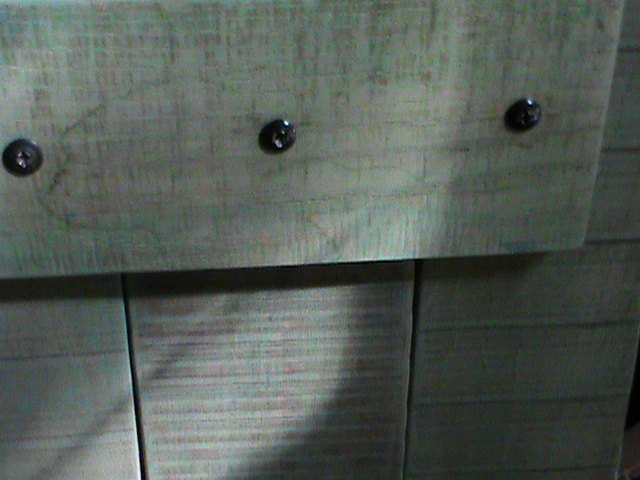
I screwed in the braces on this one, it is a bit heavy. I also predrill holes for the screws so the wood won't split!
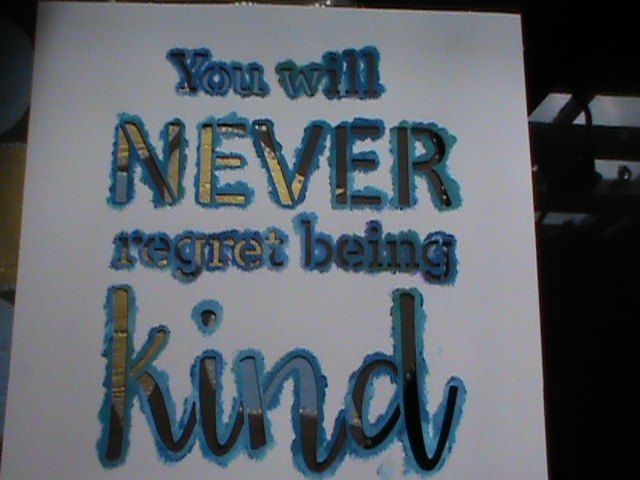
I was looking for something positive and I knew I had a stencil that would be perfect for what I wanted! I have used more stencils lately than ever before! I think they are so easy to use!
Before I stenciled I painted the sign green and blue, let dry then added some white, let dry again. I then sanded down some parts here and there.
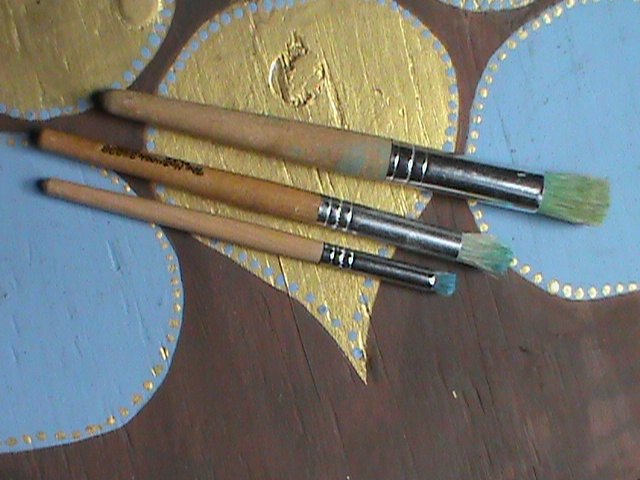
I used stencil brushes, the stencil and mod podge first before I applied the paint to the stencil. Made sure I made a few marks so I could line up the stencil right for painting. I mod podged the stencil first, lift, let it dry then lined up the stencil back over my marks. Less paint on the brush when stenciling is always better even with the mod podge it could bleed, so I dab the brush several times before I apply the paint.
Then I stenciled the words with some of the colors I had already used , let dry again because I didn't want to smear the words. Last step are the little stenciled medallions! It seems like a lot of steps but I did it all in one morning! Oh and I added two "D" rings on the back to hang and sealed with a clear gloss spray paint!
Oh and I added two "D" rings on the back to hang and sealed with a clear gloss spray paint! I will put this by the front door just to remind myself and others that "You will never regret being kind", whether it is to a person, animal, the earth or yourself!
Thanks for looking at my inspirational message/sign! Any comments or questions are always welcomed!!
Resources for this project:
See all materials


Any price and availability information displayed on [relevant Amazon Site(s), as applicable] at the time of purchase will apply to the purchase of this product.
Hometalk may collect a small share of sales from the links on this page.More info
Comments
Join the conversation
4 of 22 comments
-
This is beautiful and so thought provoking. Thanks, Pat
-
Love it!
 Thank you Patricia!


Frequently asked questions
Have a question about this project?
How do you make your stencils? Beautiful. Great idea.
How do you use the mod podge on the stencil? I want to learn this. Thanks.