


$7.50 Hutch Top Flipped Upside Down Trash to Treasure!
5 Materials
$25
2 Hours
Medium
Hello! I wanted to share my latest flip with you! I was browsing at my local thrift store a couple a weeks ago. I came across a hutch top and an entertainment center that was not all wood. They were both priced at $14.99 each. I decided to give it a week or two because I knew they would reduce the price. Glad I waited it out. The reduced price was $7.50, and of course, I could not pass it up!
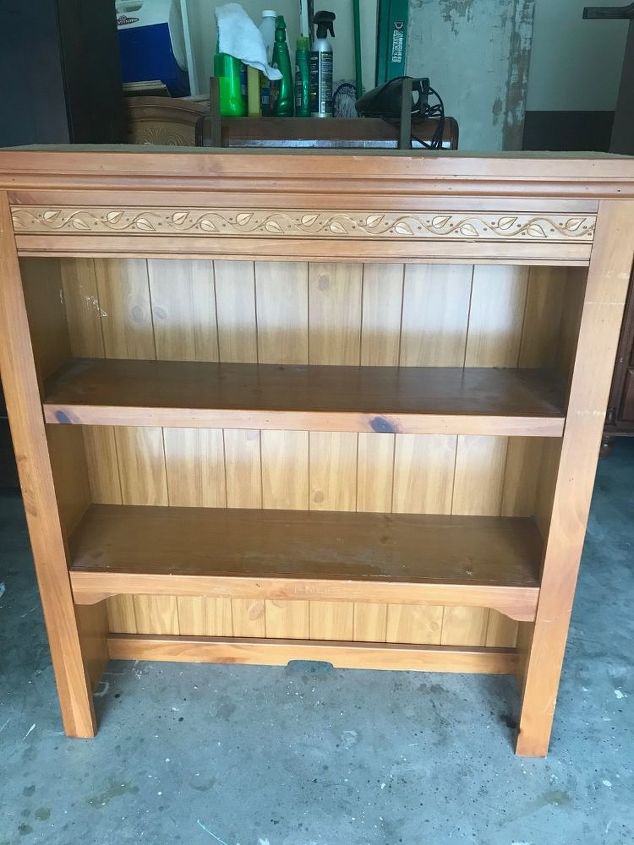
Hutch Top
I already had an idea brewing in my head as we drove home with it in the back of the truck. I wanted to make a farmhouse cabinet. The top was in awesome shape. I did realize from the very beginning that the leaf decor on the top had to to go! It wasn't giving off that farmhouse vibe! So I used my wood filler, and filled it in, let it dry and sanded it.

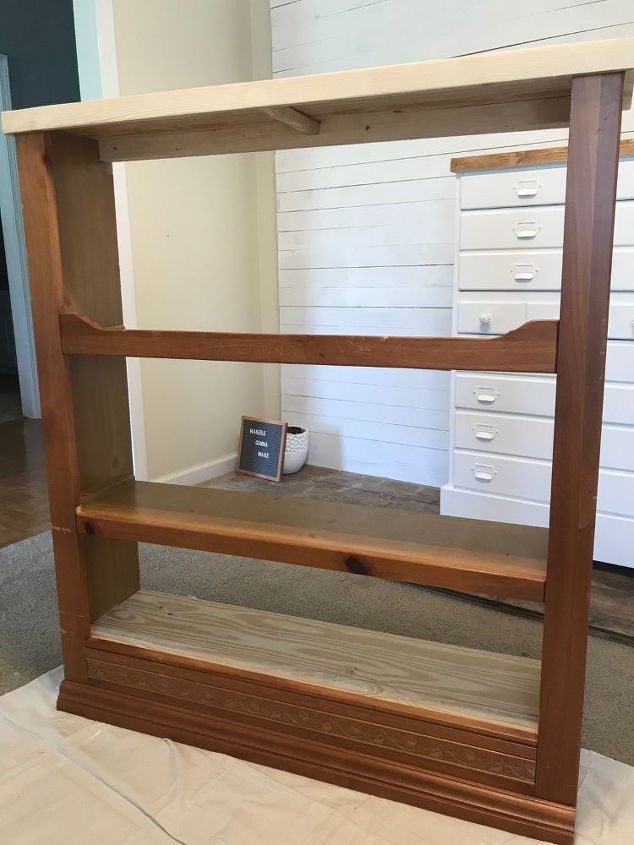
After I flipped it upside down, the molding would be on the bottom. This helped the overall flow of the top. I also decided that I would not add legs to this piece.
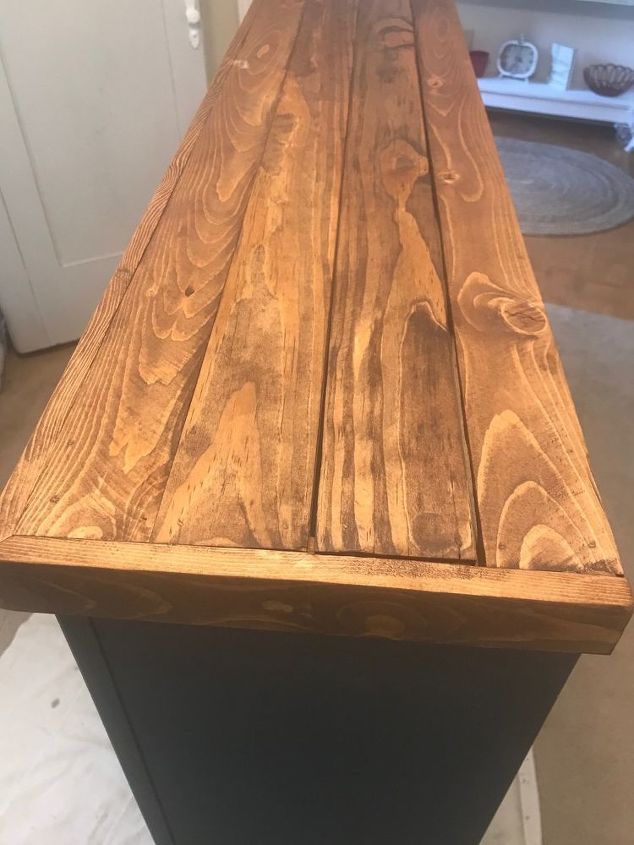
The Hubs got busy building me a new wood top and bottom shelf. The bottom was some sort of cardboard (which was the original top, so it did not serve a purpose) so I knew it needed a sturdy wood shelf. He made the top from 2x4's cut down and trimmed it out with smaller pieces. I then stained it with Rust-Oleum's Light Walnut.
He constructed the bottom shelf out of the same wood. Here is the cabinet turned upside down, with the new bottom shelf added. See how it flows better flipped upside down?
I gave everything a light sanding, and then cleaned with TSP cleaner. I chose to use Rust-Oleum Chalked Paint in Charcoal. I knew the red tint of the wood would pop if painted black and distressed. I gave the cabinet two coats, allowing a 24 hour drying period in between coats. Here is the cabinet with two coats of Charcoal inside and out.
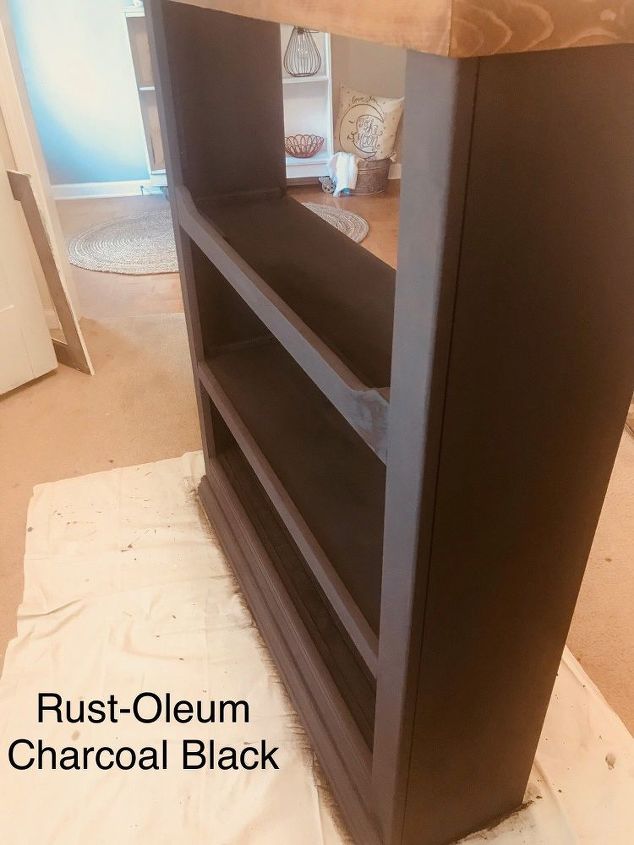
The back of the hutch top was in excellent condition! I liked the "beadboard" look it had! I painted it with two coats of Charcoal as well, and heavily distressed it. I then heavily distressed the entire cabinet.
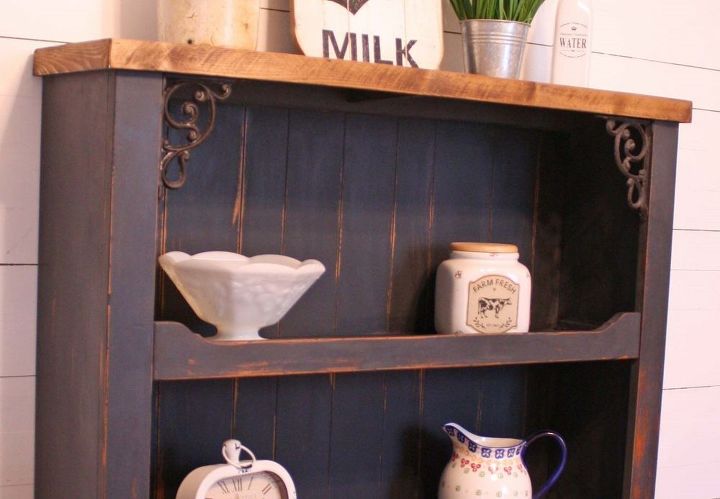
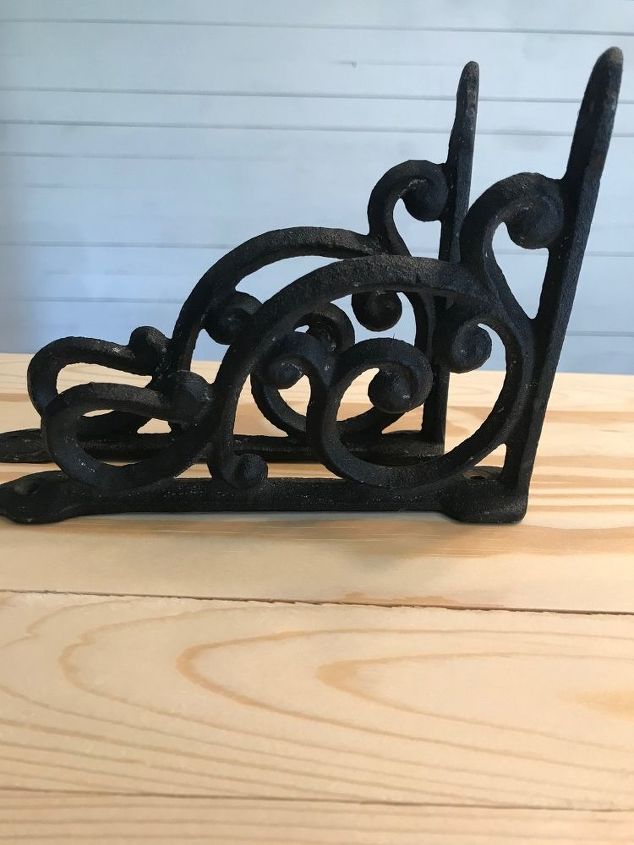
We added two corner shelf brackets to the top to give it a more fancy feel.
I then sealed the cabinet with Rust-Oleum Clear Matte Topcoat. From a $7.50 hutch top to a rustic, farmhouse cabinet ready for all your treasures to be displayed!

Resources for this project:
See all materials


Any price and availability information displayed on [relevant Amazon Site(s), as applicable] at the time of purchase will apply to the purchase of this product.
Hometalk may collect a small share of sales from the links on this page.More info

Want more details about this and other DIY projects? Check out my blog post!
Comments
Join the conversation
3 of 47 comments
-
Absolutely great job. I never would’ve thought of flipping it upside down and into a bookcase. You did a beautiful job. Kudos to you
-
Oh my goodness! I wouldn't have recognized it as the same piece! It looks absolutely charming. You did a fantastic job on it and should be proud of th job you and your husband did.


Frequently asked questions
Have a question about this project?
I love this!!! 😍😍👏🏻👏🏻👏🏻👏🏻
What brand is your wood filler? I can't seem to find one that won't shrink! Love the distressing and your idea.
Love it! Great job!!