


Custom Storage for Outdoor Tools
Many tool companies are now offering outdoor tools systems that have multiple attachments. These systems offer a lot of value as the individual attachments are usually less than buying an entire tool.
We recently tried out the Ryobi Expand-It system. We liked them, but storage was a problem. Steph came up with a storage rack that keeps the handle and attachments off the floor and also offers a way to connect the pieces right on the rack.
The attachments have a push button that locks the pieces to the handle. Steph used this button to keep the parts attached to the holder.
Want to see our latest projects? Sign-up for our weekly newsletter here!
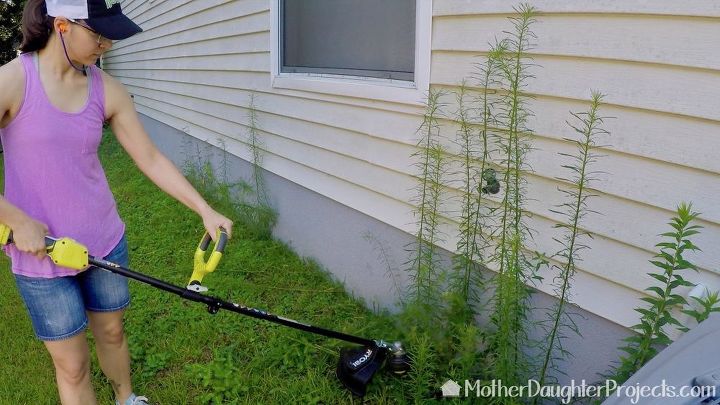
The tools are handy, but after the work is finished, where and how do you store them?
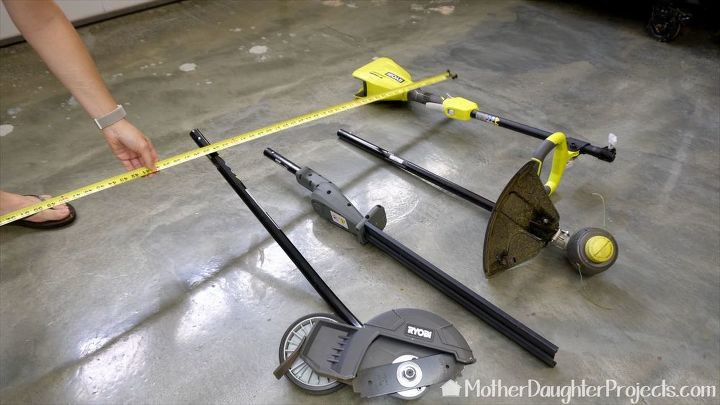
Steph started by laying the handle and attachments on the floor to determine the length of the holder.

The holder is made with a 2x6 board. (Note: if you've never purchased wood before, you need to know that a 2x6 is not actually the finished board measurements. This holds true for other sizes of lumber as well.) Steph marked the placement of the attachments on the wood and she cut to the length she needed. Most home improvement stores will cut lumber to the size for you.
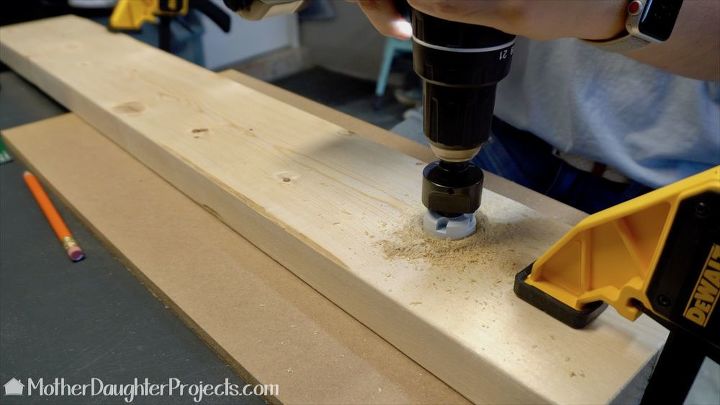
Next, using a hole saw on a drill, Steph cut holes into the board that she marked in the last step.
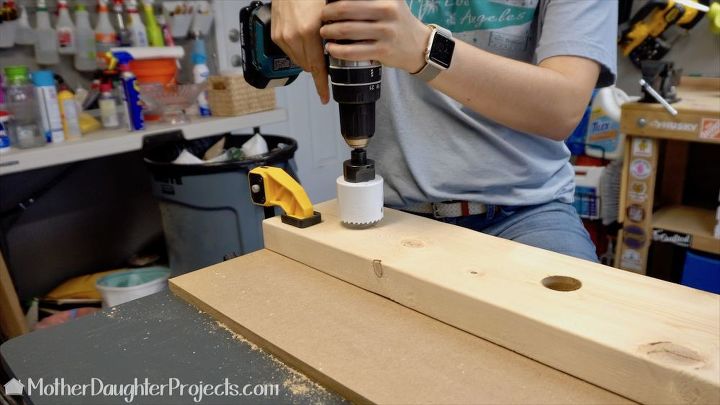
The hole where the handle is going to hang was made a little larger than the ones for the attachments.

Steph needed to cut out the hole so that the handle could be slid onto the holder. She used a portable band saw, but any type of saw- including a hand saw would work to do this.
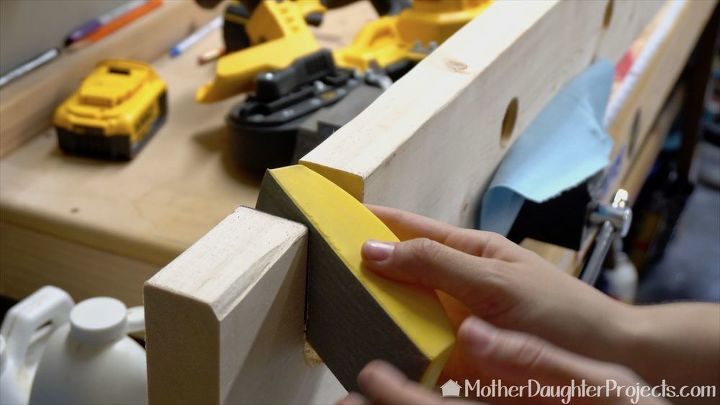
She did a little light sanding with a sanding block. You could just use a piece of sandpaper without a block for this step.
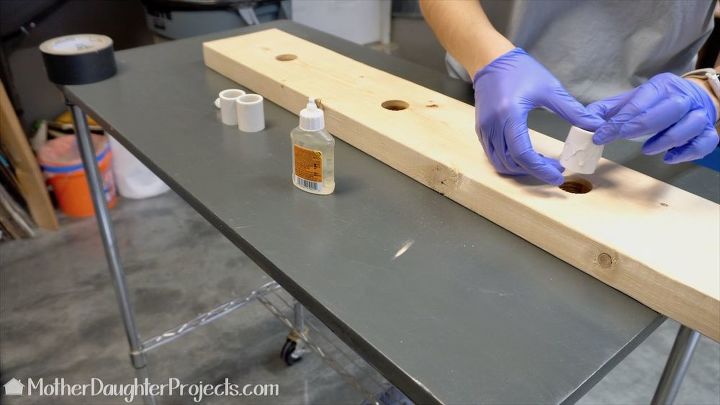
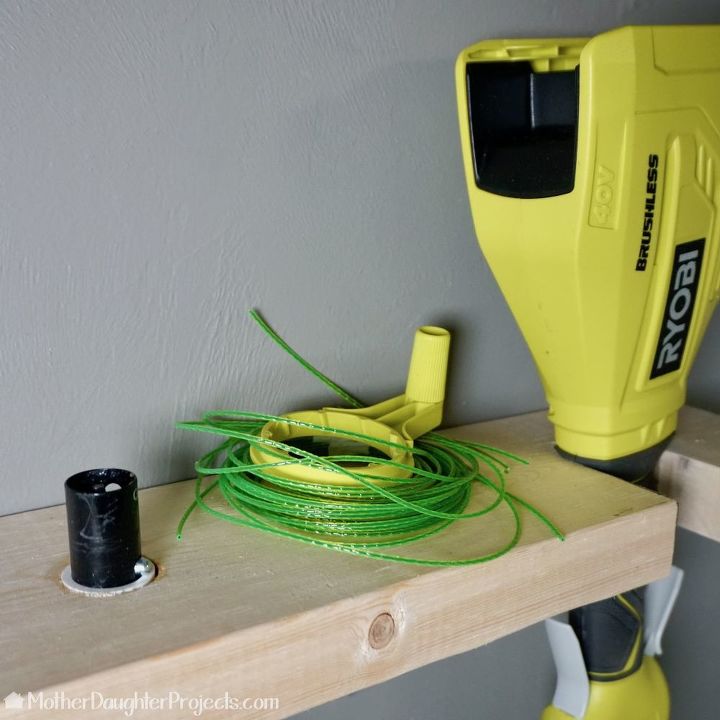
Steph cut three pieces of 1" PVC pipe to fit into the holes. She glued them into place and allowed them to dry. This is an optional step but she did it to help prevent the wood holes from getting damaged as the tools are put in and out of the holder.
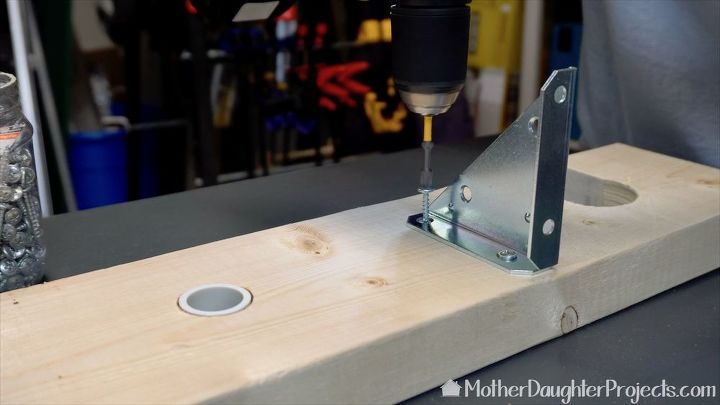
Corner braces are attached to the bottom side of the holder and then it is screwed into the wall.
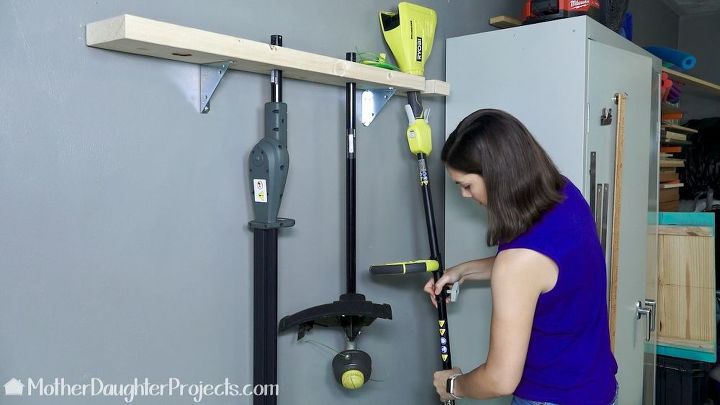
You'll note that the holder is mounted fairly high on the wall. The reason for this is so the handle can stay in place while the attachment are connected to the handle. It was a little awkward to connect the parts while they were flat. This holder solves that problem too!
In this picture, on the left, you can see the little silver "button" on the top of the black attachment. That's the button that holds the attachment to the handle which you see on the right.
To release the attachment from the holder, you simply push in the button and pull the attachment down and out of the holder. The top of the holder works to store additional string for the string trimmer. Other brands of tools that have a similar button connection could be adapted to a holder like this.
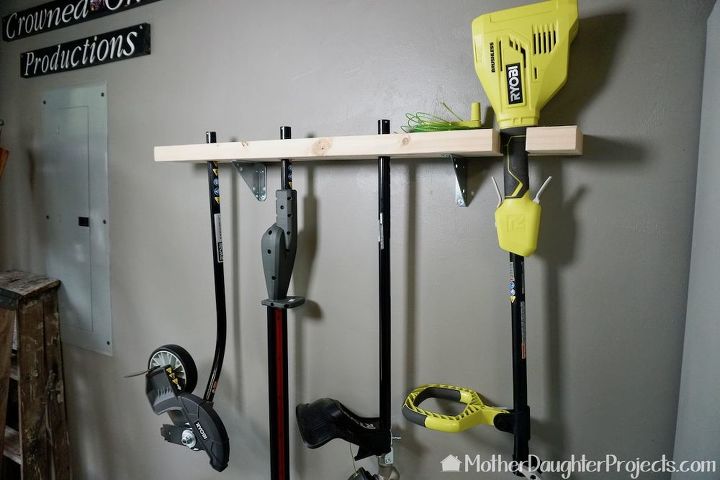
All finished. Everything is held securely in place and is out of the way.
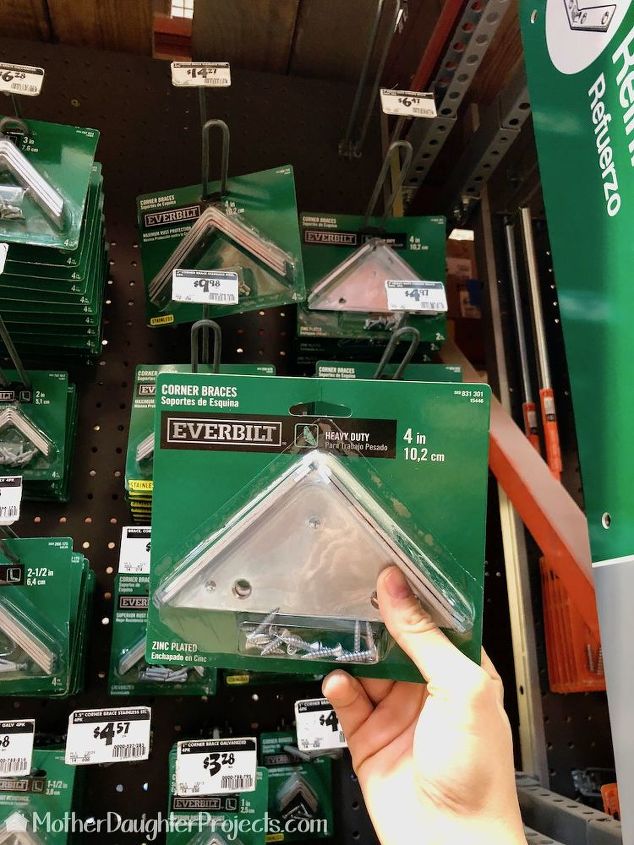
These are the corner braces we used to hold up the shelf.


Frequently asked questions
Have a question about this project?