


Making a Cat Proof Christmas Tree
I don't know what it is about cats but they just love a Christmas tree. I swear ours spend the whole year plotting how they'll take it down. Well this year they're in for a surprise, since we'll be putting up this lovely little tree. It's purr baby proof  , doesn't cost a lot and takes less than an hour to make.

All you need is:
- A pom pom maker or you can do it the old fashioned way
- Empty paper towel roll
- Long strips of fabric
- String lights
- Scissors
- Glue gun
- A piece of wood for the base
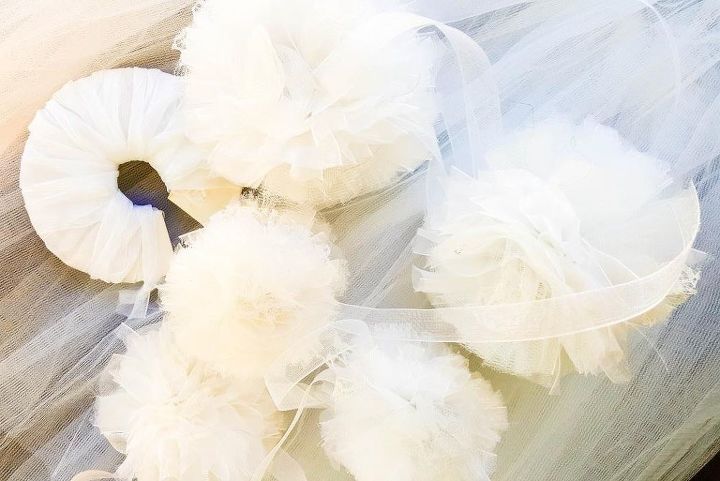
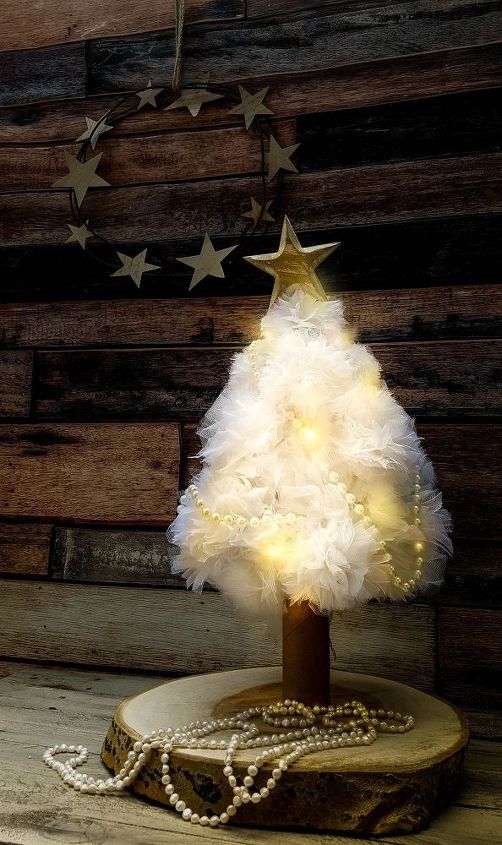
First things first. We need to make a whole bunch of pom poms. I find it strangely relaxing and do it the old fashioned way by wrapping strips of tulle, ribbons and lace around cardboard circles.
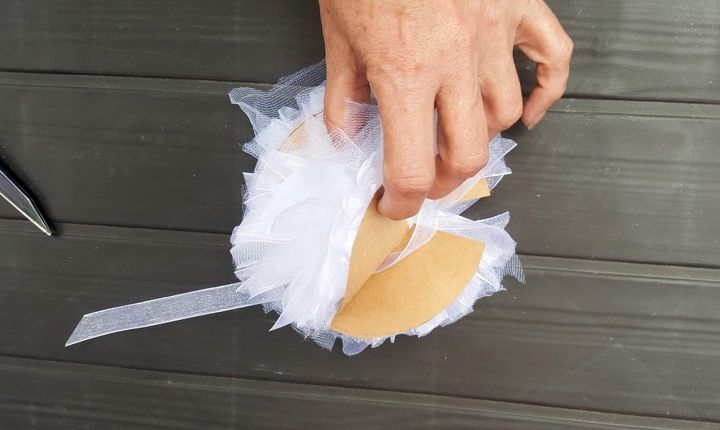
Feel free to use a pom pom maker if you prefer. You'll need ten pom poms for the cat proof Christmas tree: four small (8 cm or 3 1/4″ diameter), three medium (11 cm or 4 1/4″ diameter) and three large ones (13 cm or 5″ diameter).
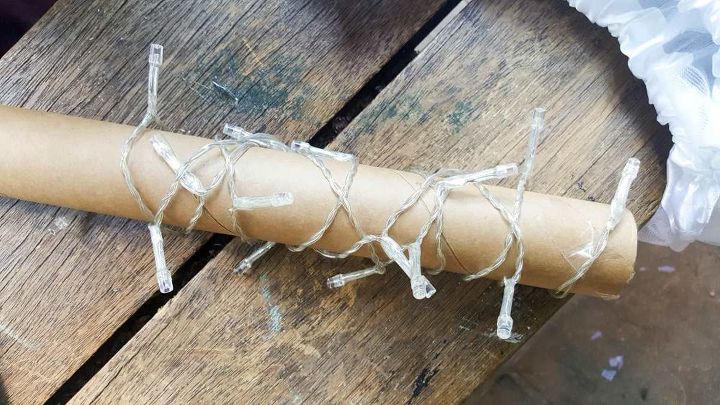
To assemble the Christmas tree, grab some string lights and wrap them around the the empty paper towel holder. About 2/3 of the way down.
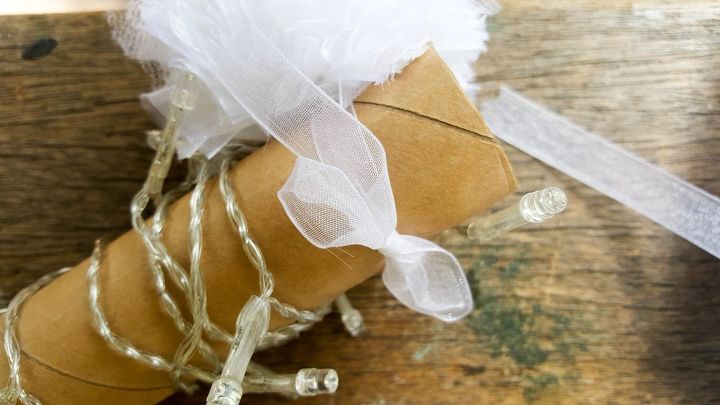
Tie the pom poms onto the roll, starting at the top with the three smallest ones, then the three medium ones and finally the three big ones at the bottom.
To finish off put the remaining small pom pom into the top of the paper roll and glue the bottom of the pom pom tree to a slice of wood. Decorate the tree with a string of faux pearls and a wooden star and you're done. I love the way it looks at night when it's all lit up.
But more importantly what do you think?
Don't forget to check out some of our other cat proof Christmas trees. Like these geometric ones that can styled two ways or this succulent version.
Until next time, happy crafting


Frequently asked questions
Have a question about this project?