


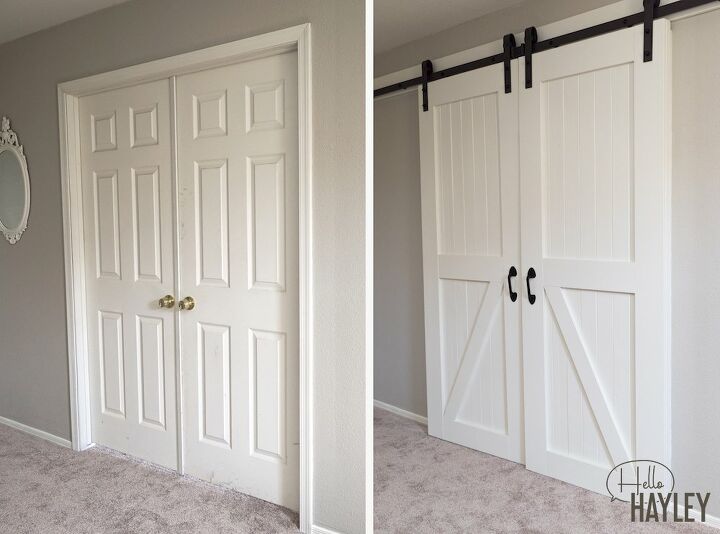
How to Build Barn Doors

Hiya, friends! Today I’m excited to share Part 2 of our latest project with you – how to build barn doors! We’ve been in full DIY mode and it is SERIOUSLY paying off. Can I let you in on a little secret? This project has only cost about $250 TOTAL – compare that to about $400 per barn door at home improvement stores! *angels singing*
Last time I talked about how to prep your doorway for barn doors, which is a crucial step in making the finished project look professional. If you’re taking on this project, don’t miss that step!
It took a bit of planning to decide on the best way to build these doors. We took many factors into consideration, including how sturdy they would feel, if they would hang straight (without warping), their ability to block out noise, and making them look professional-grade. With every project, we think, “Will this help increase the value of our house?” We don’t want to put in a ton of work on a project for little return.
Disclaimer!
Before I continue, I want to let you know that we had some issues with the wood warping and not laying as flat as it should be. That’s one of the downfalls of pine: it’s inexpensive, but it tends to warp. We took quite a few extra measures to keep the doors flat and we had to fudge some of the measurements to make sure everything fit together properly. If you’re taking on this project, make sure you MEASURE CAREFULLY and tweak along the way as needed. Carefully pick through ALL the boards at the store to make sure you’re buying the straightest and flattest ones they have.
If we had to rate the difficulty of this project on a scale of 1-5, it would probably be a 4.5 or 5. Make sure you have an experienced DIY-er (or handyman!) by your side to help.
Materials
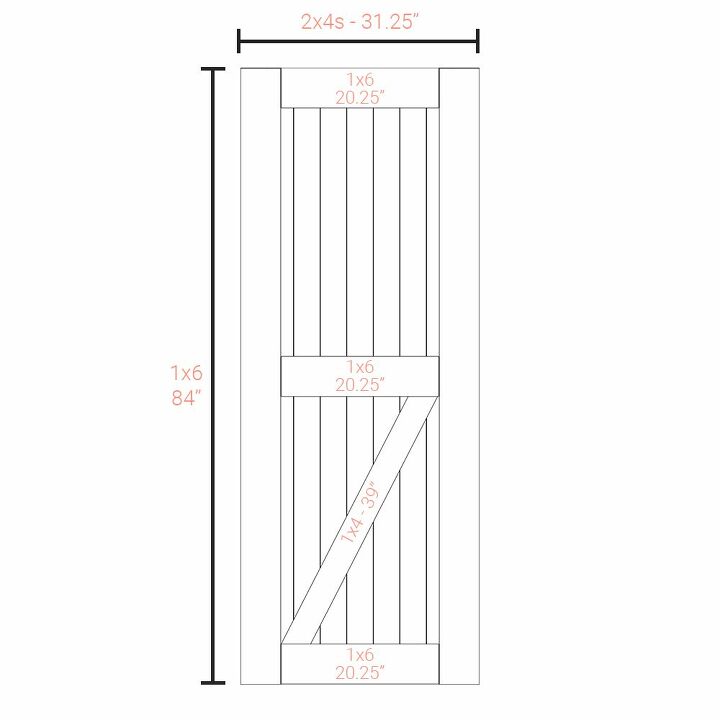
We decided to use 2×4″ boards for the backing of the whole barn door, then 1×6″ and 1×4″ boards for the design on the front. That means our doors were about 2.5″ thick! This is good for us, though, because we want these doors to help block sound from the TV. If the door didn’t need to be so heavy-duty (for example, for a closet or pantry), it would be better to use shiplap instead of 2×4″ boards.
Our doorway is 61″ wide by 82.5″ tall (with the trim), so we needed to make sure the doors covered the opening as well as the trim on all sides.
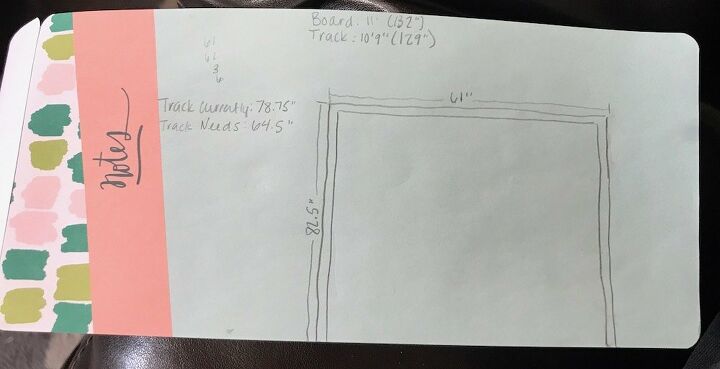
With that in mind, here are the plans we came up with for the door. The first number is the size of the board and the second number is the length it was cut to (Except on the very top; we used 9 – 2x4s that were cut to 84″ each. The width of the whole door is 31.25″).
These are the materials for JUST the doors! In Part 3 of this series, I’ll discuss in-depth the hardware and materials needed to hang the doors.
- 18 – 2×4″ – 8 ft boards, cut to 84″ (make sure they’re the straightest ones available!)
- 1 – 1×4″ – 8 ft board, cut into 2 diagonal pieces 39″ long
- 3 – 1×6″ – 14 ft boards
- 2 of these cut in half (84″)1 cut into 6 boards, 20.25″ long (you’ll have some leftover)
- Liquid Nails
- Wood filler
- #6 x 1-5/8″ inch screws (1lb box is enough)
- Paintable caulk
- 80 grit sandpaper
- Primer
- Eggshell-finish paint
Assembling the Door
We used 9 – 2x4s (84″ long) for the width of the whole door, so we laid them down side-by-side and used the lines on our tile floor to get them straight. Since the boards tend to warp a bit, we switched them around until we got them each as close together as possible.
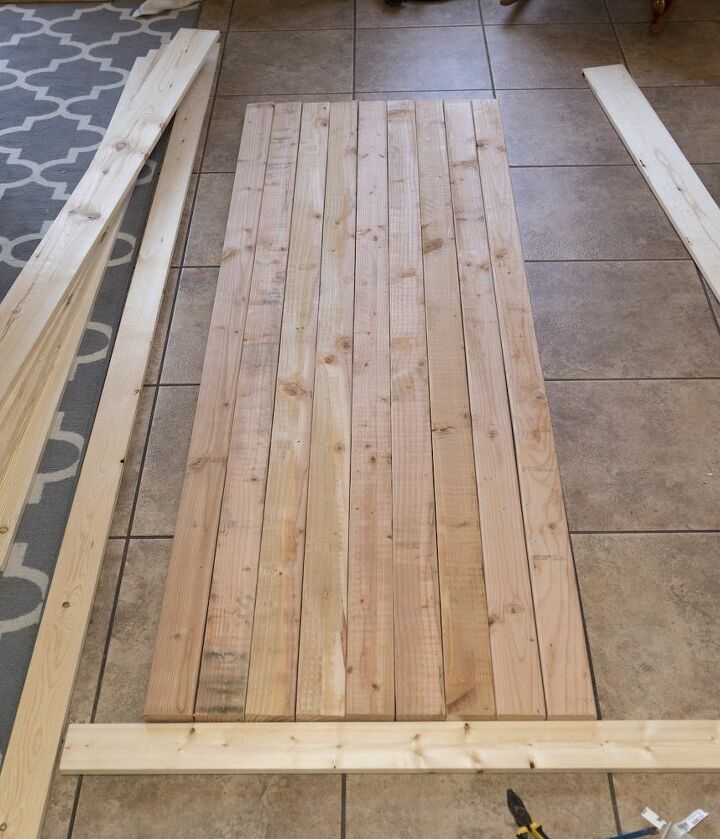
Next, we used Liquid Nails to glue on the two vertical 1×6 boards that were each 84″ long.
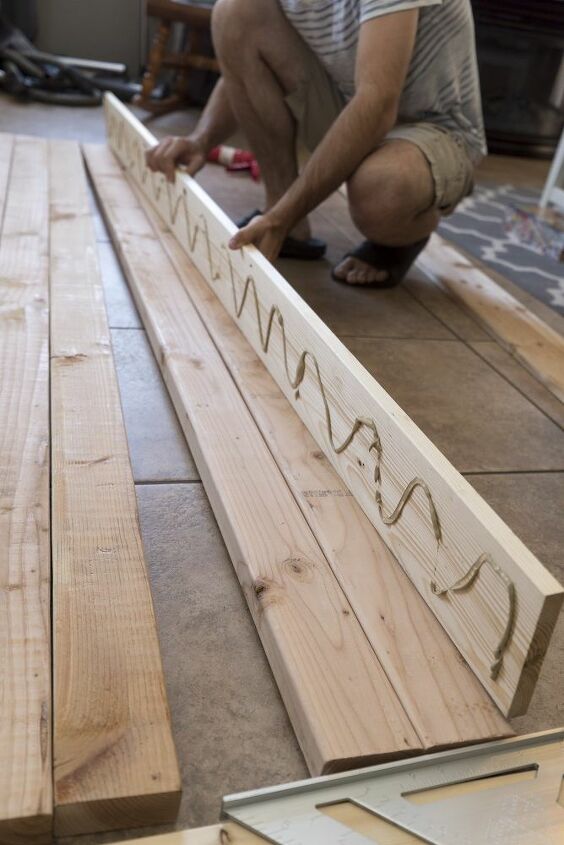
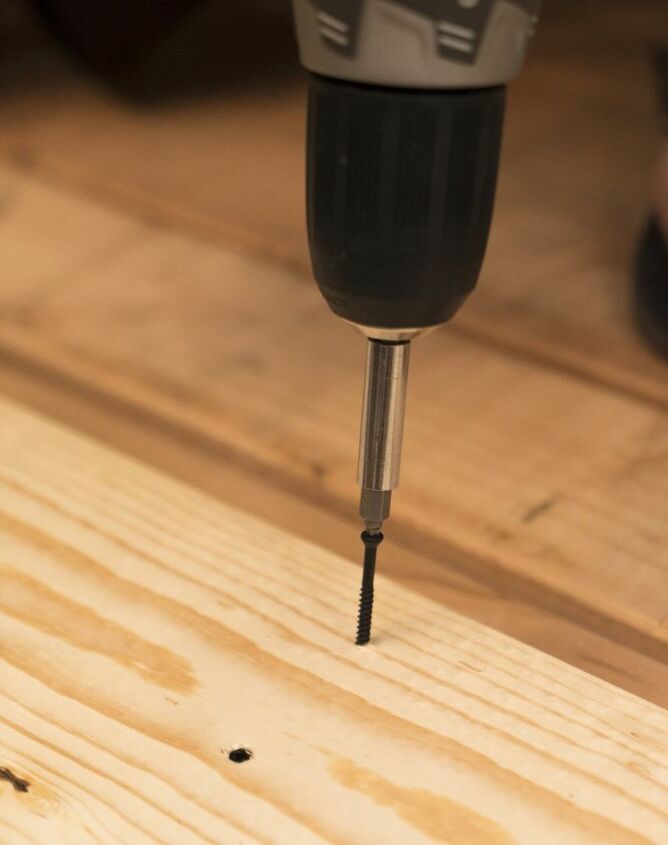
As soon as that board was in place, we screwed the 1×6 boards into the 2x4s to keep them extra sturdy. We used 3 screws each at the top, middle, and bottom of the board. Make sure that the screws sink down into the wood a little bit so you can cover them up with wood filler later on.
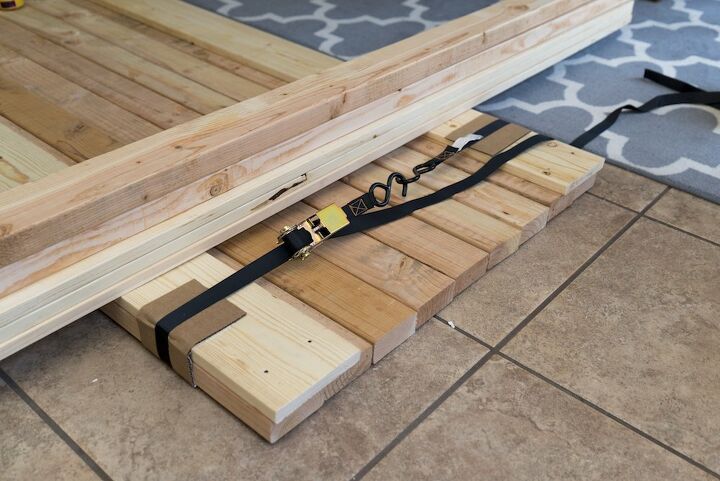
At this point, we were worried about the wood warping (you can see on the ends how they’re not totally flat), so Andrew jerry-rigged this contraption to get the boards as flat and close together as possible while we installed the three horizontal 1×6 boards. He used ratchet straps to keep the boards together, extra wood to weigh it down flat, and some cardboard to protect the wood.
With this jerry-rig in place, we glued and screwed the horizontal 1×6 boards in place – at the top, middle, and bottom.
Last was the diagonal 1×4 board on the bottom half of the door. We took the entire board and laid it on top of the door, then marked where the cuts would be. Since it was at an angle, it was a bit awkward to measure. It ended up being at just about 39″ long. Once it was cut, we glued and screwed it into place.
Filling in the Screw Holes
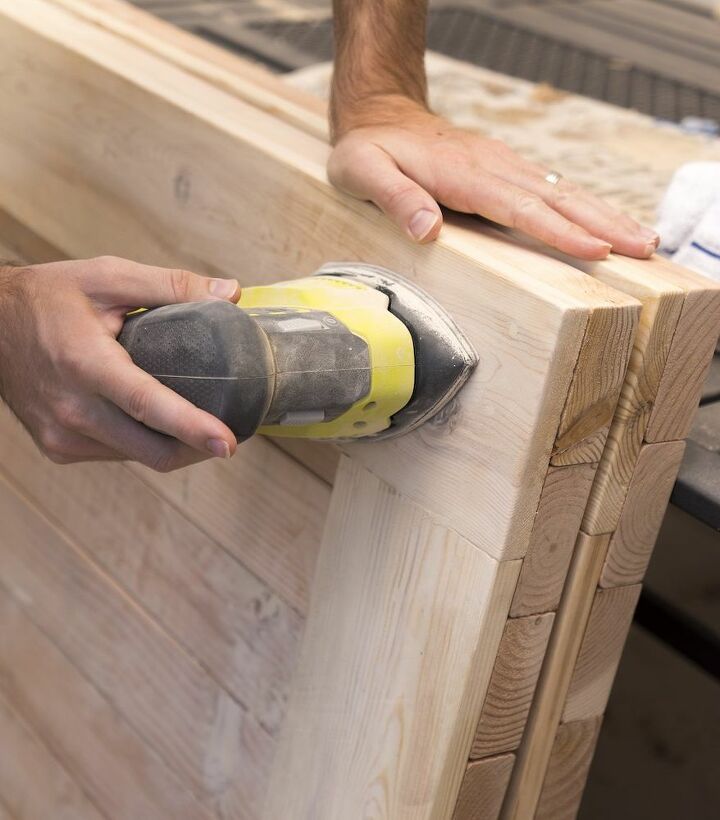
Now that the doors were completely assembled, it was time to start making them pretty! There were screw holes all over the place, so we used some plastic wood and filled them all in. We also filled in a few of the really big knots in the wood that we didn’t want showing.
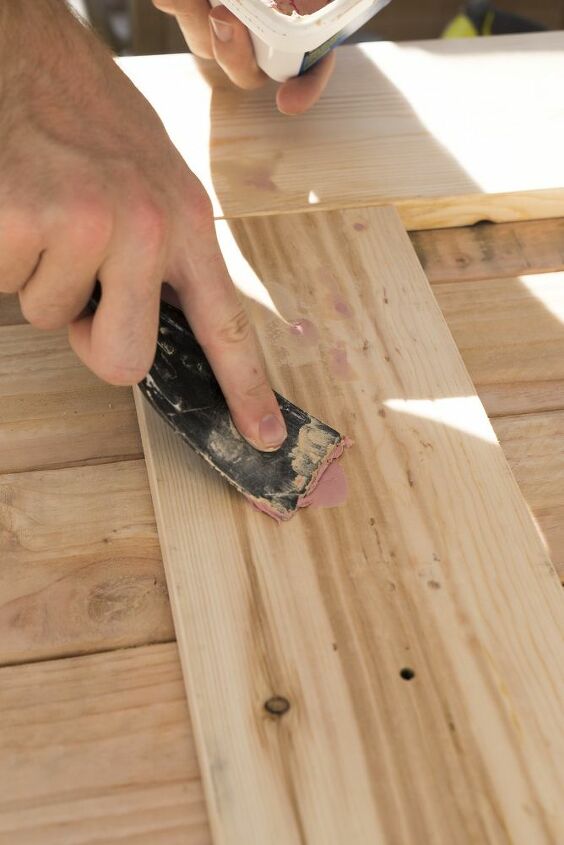
After that was dry, we went over the entire door with 80 grit sandpaper. Since we weren’t too worried about the doors being incredibly smooth, we didn’t use a finer grit. The doors feel totally fine after only using the 80 grit.
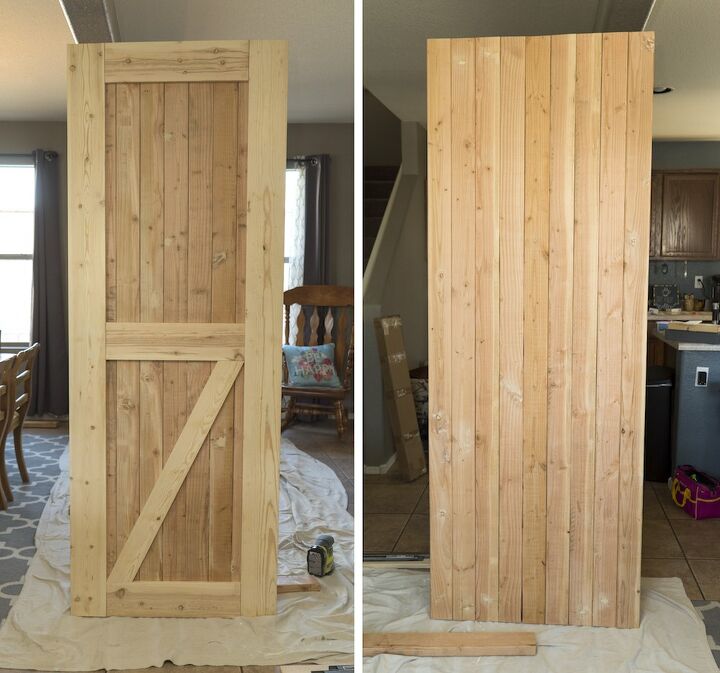
And now, the doors were COMPLETELY assembled!! Woohoo!! Here are the front and the back.
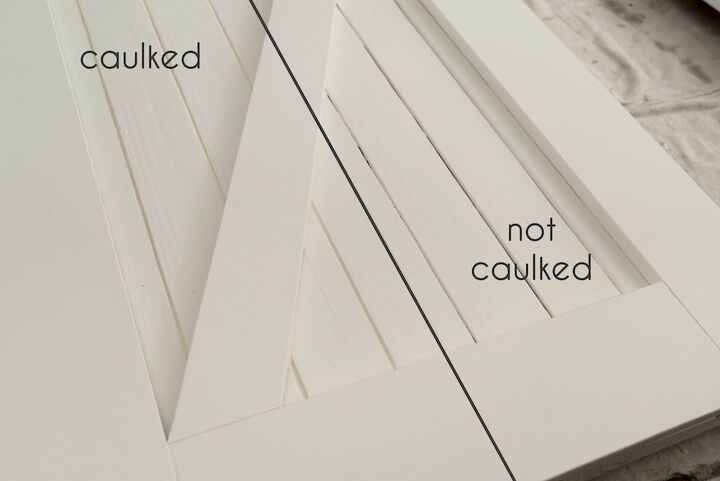
Caulking the Crevices
As we were holding up the door to take the picture, we realized that from certain angles, you could actually see between some of the boards. This might not be a big deal depending on where the doors were going, but we didn’t want that for our loft. SO, we caulked between every piece of wood on the door. We made sure to get the caulk really deep down in the cracks because we didn’t want to lose the “paneling” effect on the door. On this step, we actually had a coat of primer already on the door (these steps are reversible).
Priming & Painting
Because these doors were bare wood, we decided to do a coat of primer over the whole door before painting. Primer is less expensive than paint, so because we primed first we were able to get away with just one coat of paint. Score!
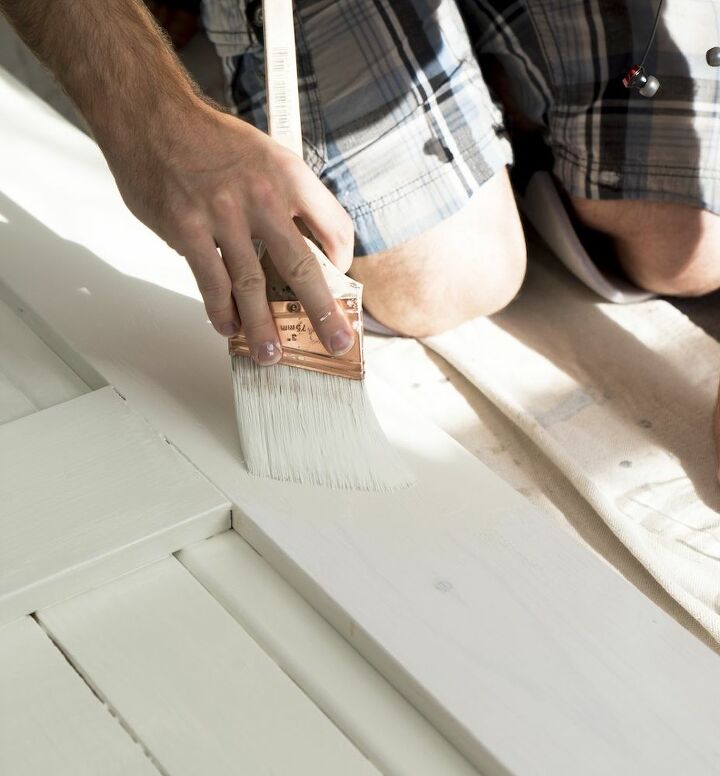
When it comes to paint color, we used a custom color match to our trim. Since the doors would be next to the trim and they were both white, we didn’t want two different shades right next to each other. That being said, we did use an eggshell finish instead of semi-gloss because we didn’t want the doors to be shiny.
After you’re all painted, your doors are ready to be hung! ALL of which I’m talking about in Part 3: How to Hang Barn Doors! Here’s a sneak peek at our finished product! Eeeeek!

Comments
Join the conversation
-
They look beautiful.
-
JOANNA GAINES would APPROVE 100 %!!!!! So would Martha Stewart. IT was a "job" but you knew what you wanted ... and GOT IT!!!!! BRAVO!!!! They look spectacular.


Frequently asked questions
Have a question about this project?
I love it but isn't it really heavy ???
Could you use the 1x6's instead of the 2x4's ???
Can/t beat the barn door look!! Love them! Has anyone tried building some of the original barn doors with the slice of wood that swings over and into a slat? Or the one piece of square that you pound into the wall and turn to close and holds the door closed.
We're did you get the tracking from?