


I Make A Honey Bee From Wood and Resin

"I just felt inspired and that sort of pushed me over the finish line"
I wanted to create a Honey Bee out of wood. This is such an involved project but like I said, I felt that it was one that I was compelled to do. It happens that way sometimes. The Honey Bee is small enough to sit on the palm of my hand. Let me tell you about the steps I took to make it. Also check out the video for inspiration and ideas of your own.
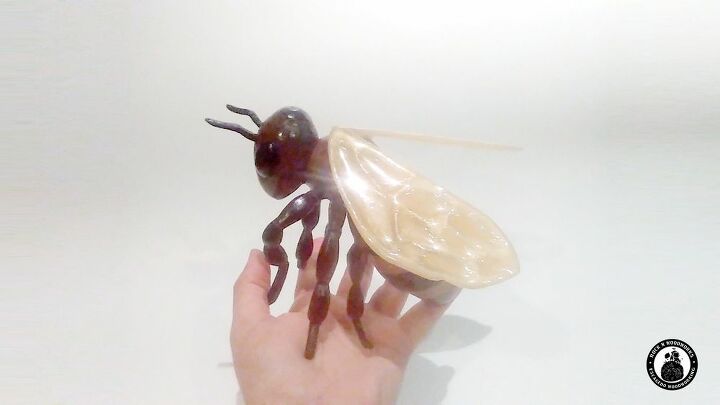
My Bee sculpture is made from Walnut, Poplar and resin. I used a variety of tools to reach the finished piece. I used a table saw, wood lathe, scroll saw and Dremel. I also used epoxy to connect body parts together such as the antennas, legs and wings.
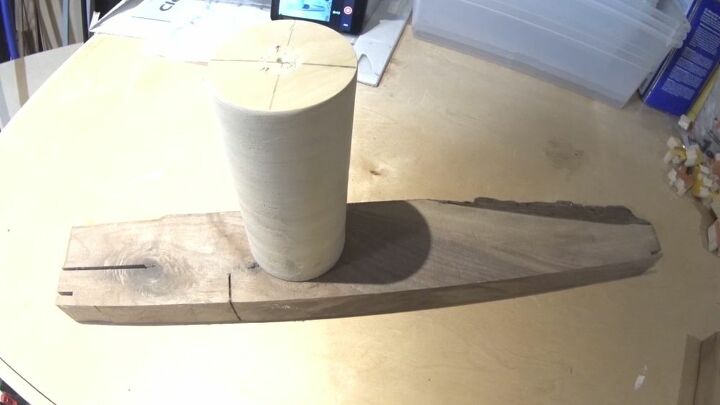
I started with the abdomen. I cut walnut and poplar wood into slices with the table saw.

I glued up the wood and clamped them together. I set that aside for a few hours before going to the next step.
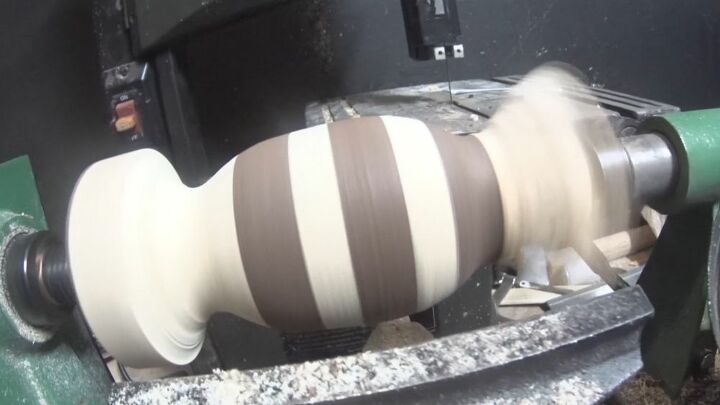
I shaped the bee abdomen on the wood lathe. You can see it taking shape.
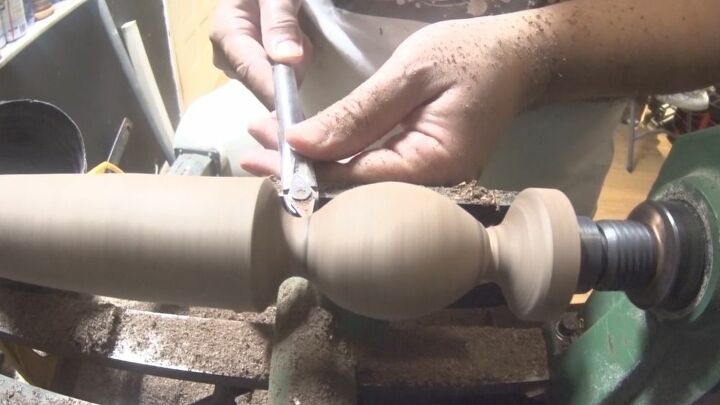
I also needed to create the thorax and head of the bee. So I did that on a solid piece of walnut and used the lathe to shaped the parts.
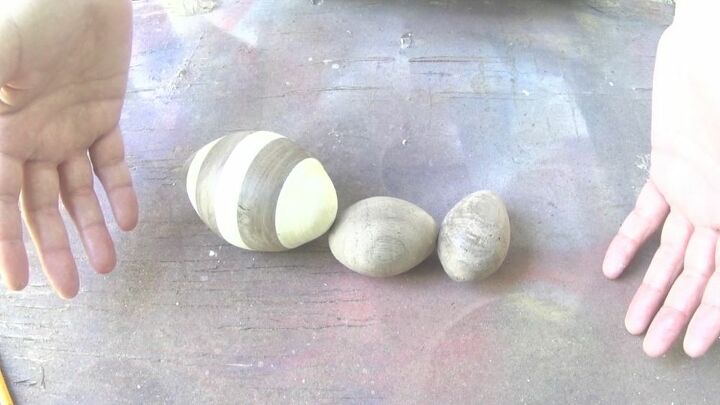
I ended up with 3 oval shapes. I used a Forster bit to open a cavity for the 3 pieces to fit inside one another. Then I glued them together with 5 min epoxy and set it aside to work the next step.
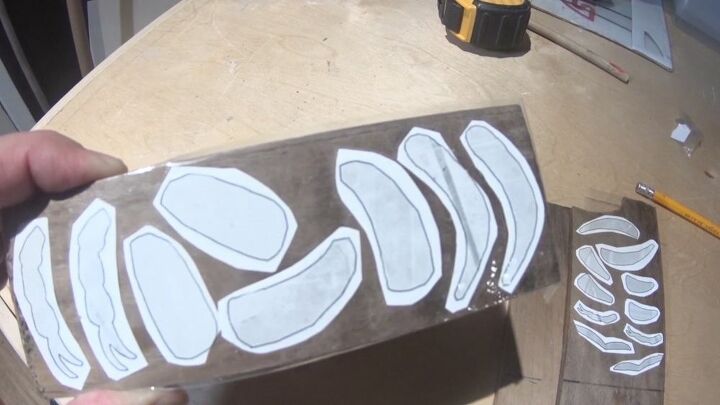
I printed out a bunch of leg parts for the bee and attached the templates to a walnut board.
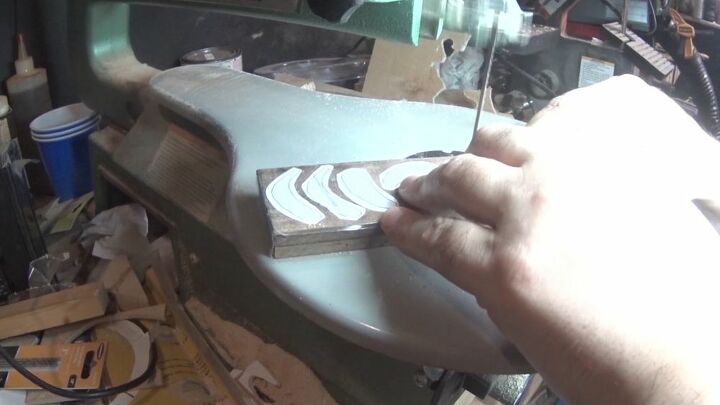
I then cut the leg parts out on the scroll saw and later used the Dremel tool and various sanders to shape them. I attached each leg piece together with 5 min epoxy.
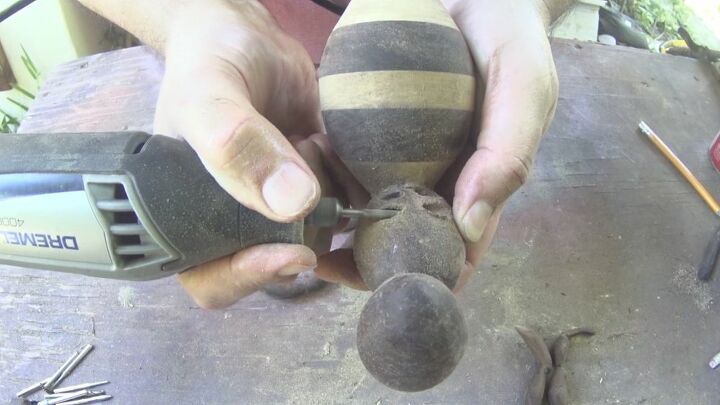
I also used the Dremel to carve out below the thorax of the Bee. Here I will attach the legs and use epoxy to bond the parts.
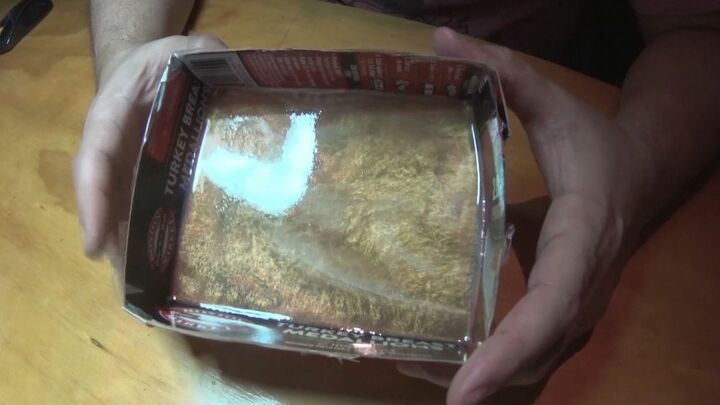
I mixed resin with gold mica powders and poured the mixure into a makeshift tray. Once the resin cured I pulled it from the tray and used sanders to clean up the cardboard that had bonded to the resin. This is what I made the wings out of.
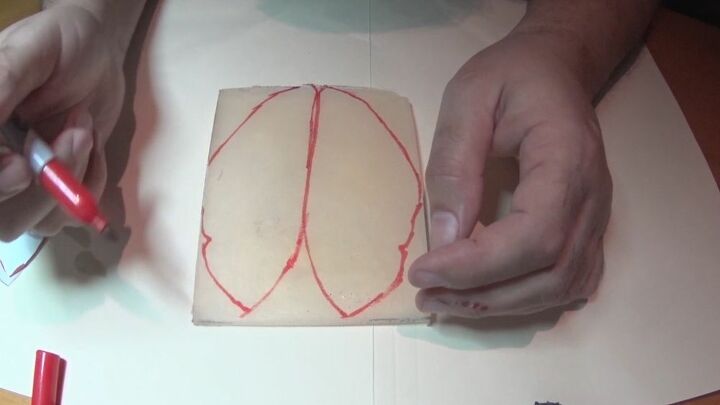
I drew the shape of the wings onto the resin sheet and the cut the parts out on the scroll saw.
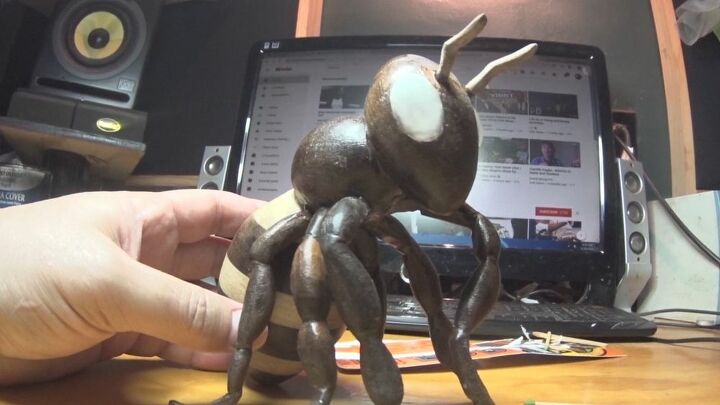
I used more resin to make the eyes. I shaped them with my Dremel tool. I took my time so both eyes would match in shape and size. I also attached them along with the antennas using more of the 5 min epoxy.
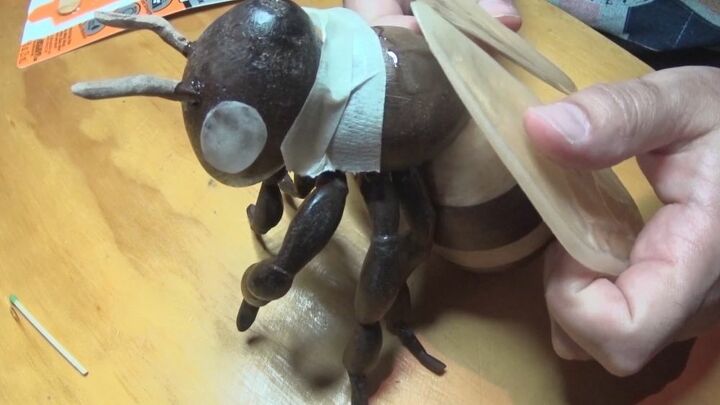
I attached the resin wings to the top of the thorax using more of that useful 5 min epoxy and held them in place til they bonded. This did take a bit of a steady hand and patience.
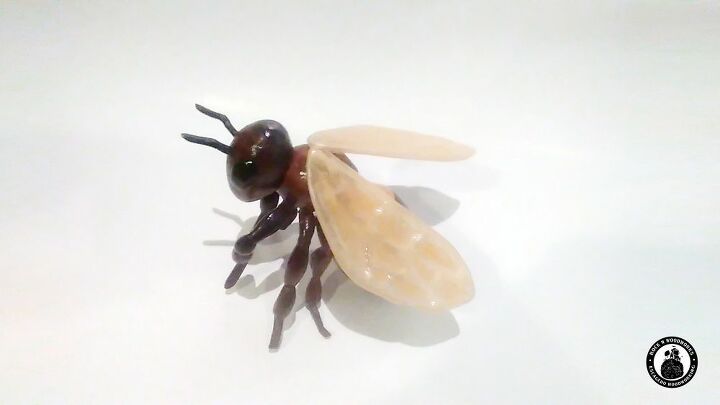
Here is a birds eye view of the Honey Bee completed. I'm pretty happy with the results. It was an adventure. I have been amazed at all the comments on social media and the love folks have for Bees. I hope you enjoyed my project. Check out the video if you have not doe so. You may come up with a few ideas and projects of your own.


Frequently asked questions
Have a question about this project?