


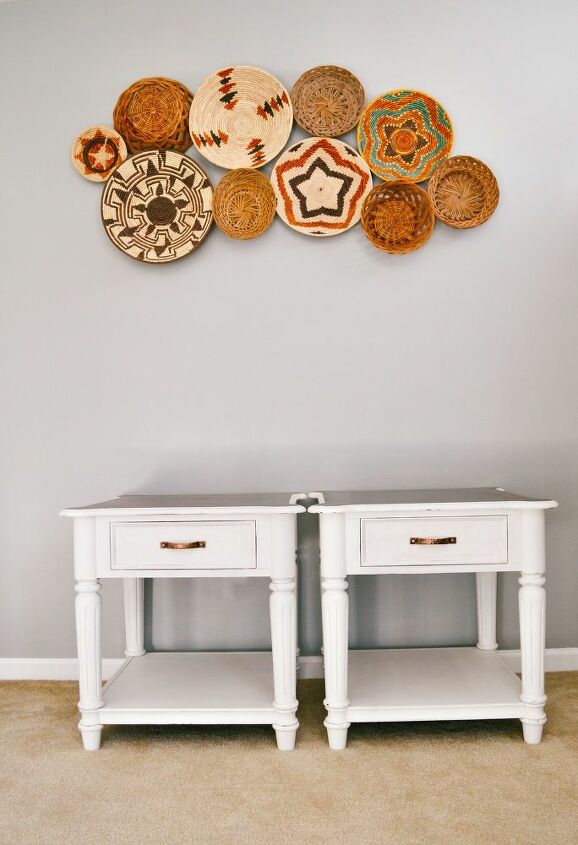
Side Tables Brought Back To Life!

-Ever see some beat up tables and think, "those have good bones, but man they're in rough shape"?? Well, grab them and with a little bit of paint and elbow grease you'll have beautiful, new tables in no time! -
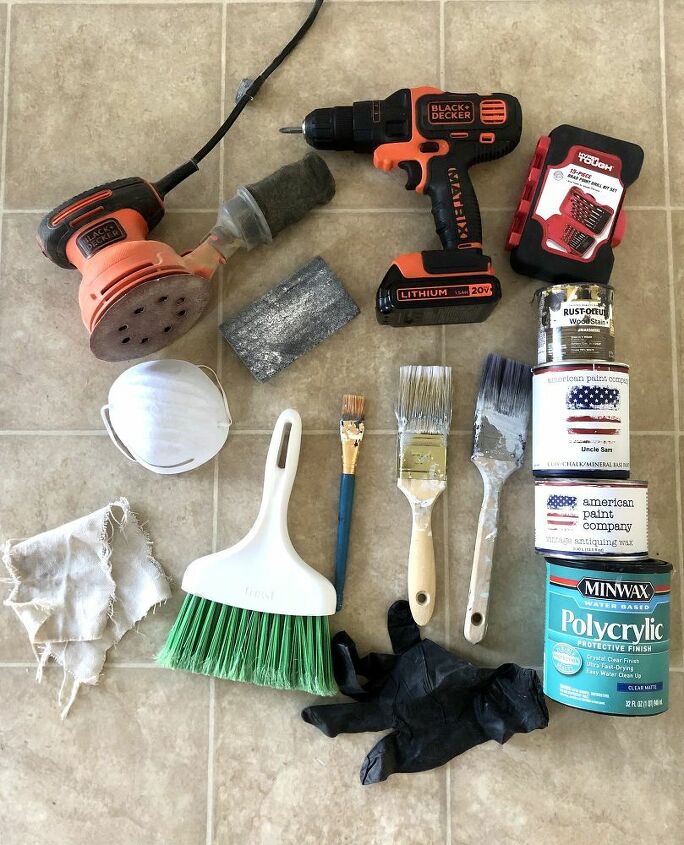
*not pictured - drawer Liner & exacto knife*
I partnered with American Paint Company for this project, and they provided the paint!
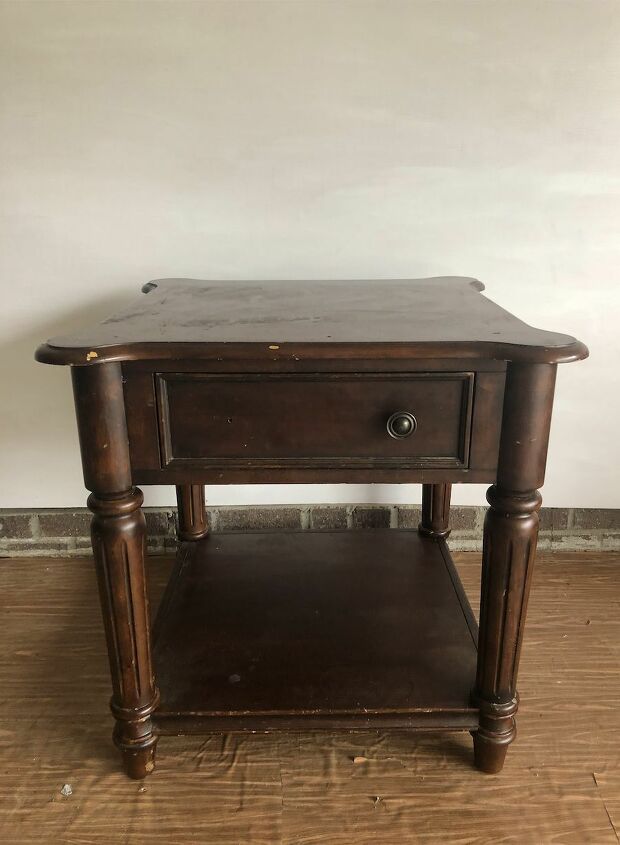
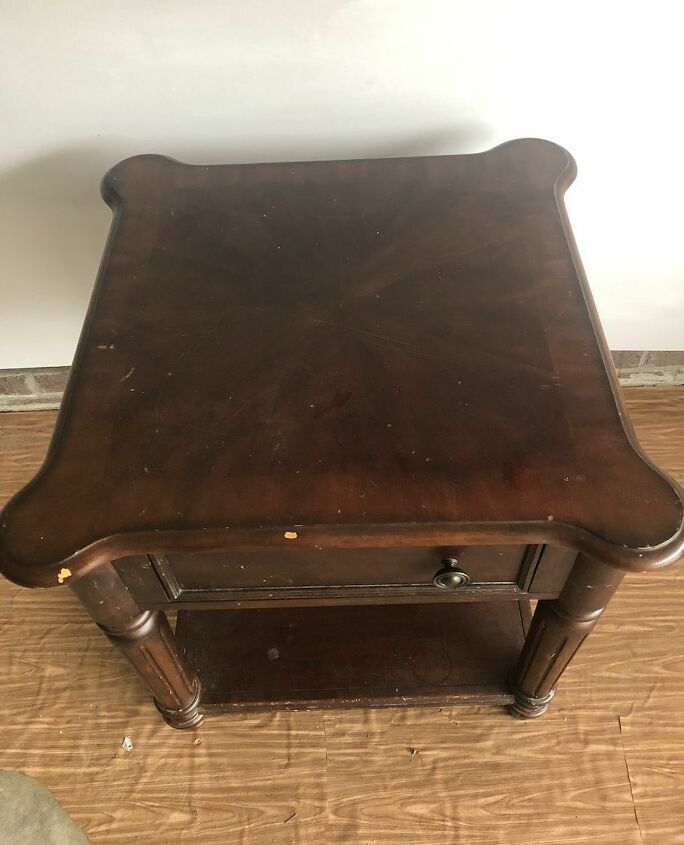
not in the best shape, but there's potential!
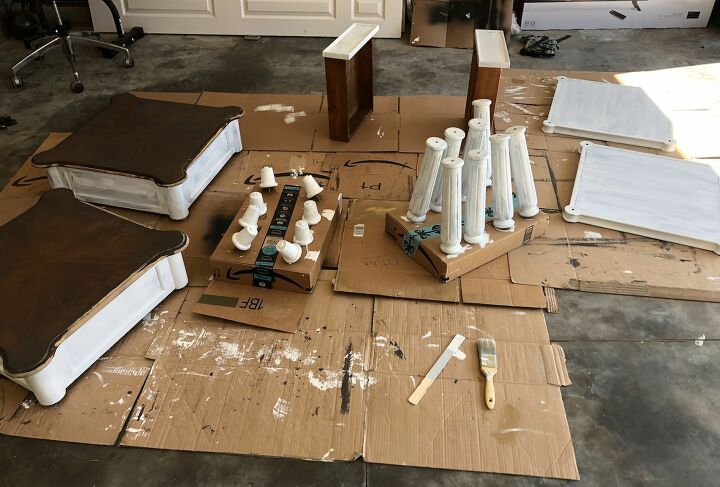
Step one - Prep your furniture
Clean off any grime and dust with a clean rag or cleaning wipe and remove all hardware.
*Optional Step* - Fill Holes
For these pieces I knew I was going to put new hardware on them. There was missing hardware when I got it, so I knew I needed to buy new anyways. I decided to do a pull instead of knobs so I needed to fill the original holes with wood filler and drill new ones. I drilled the new holes after I painted and sealed.
This step is completely optional! You can use existing hardware or just buy new ones you know you won't need to drill new holes for.
Step Two - Sand
When sanding start off with a medium to fine medium grit sandpaper (100 - 150). You never know exactly what material you’re sanding down to, it’s always better to start off safe with a higher grit than with a coarse grit like 60 and sand down too far.
If painting the furniture piece you don’t have to sand down completely to the wood. You just want to sand down enough so the paint will stick. If sanding down to stain (piece must be wood), you’ll need to completely sand down to the original wood removing all paint or stain previously on the piece.
Once you do your initial sanding with whatever grit you use, you’ll want to finish it with a finer grit such as 220. This is extremely important when staining.
Step Three - Dust
Once done sanding all the dust needs to be removed. I use a little handheld duster and a rag, but you can also use an air hose, damp cloth or “oil free” tack cloth.
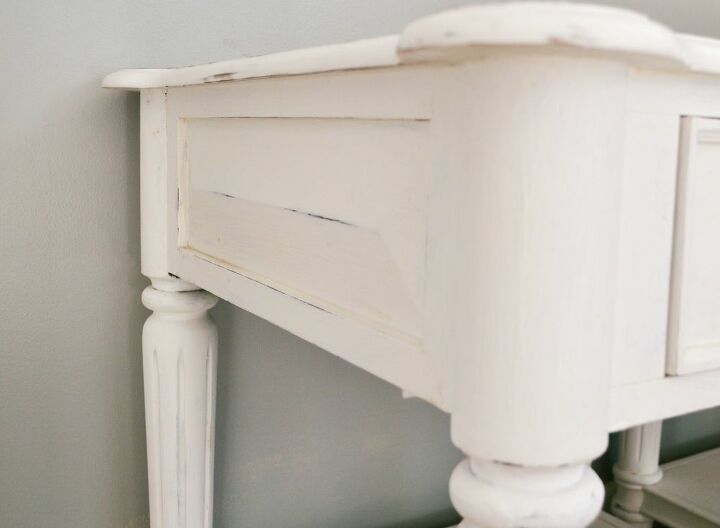
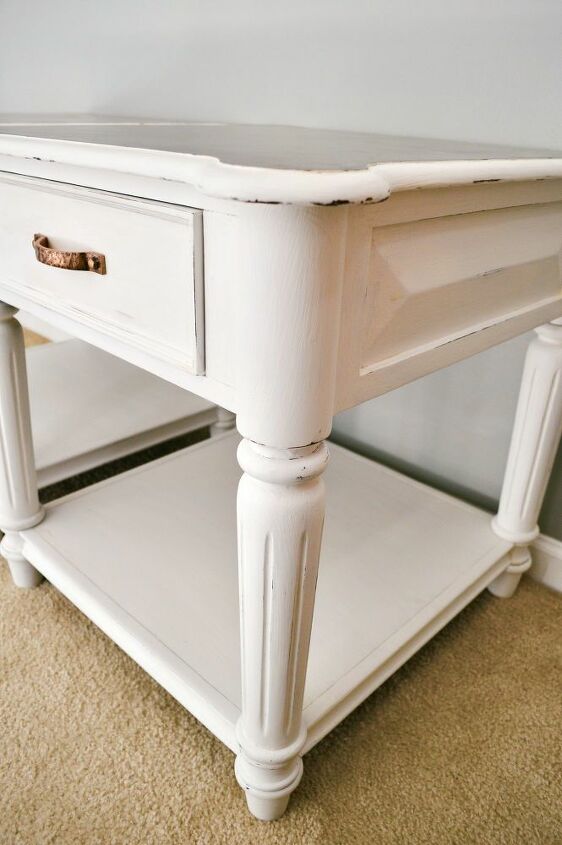
PROGRESS!!
Step Four - Paint and/or Stain
Use your color of choice and paint away. Most pieces usually take 3 coats, 2 if you’re lucky. Make sure you’re painting with an even coat throughout the whole piece. Allow drying time between each coat (this is why it can take a couple days to complete)
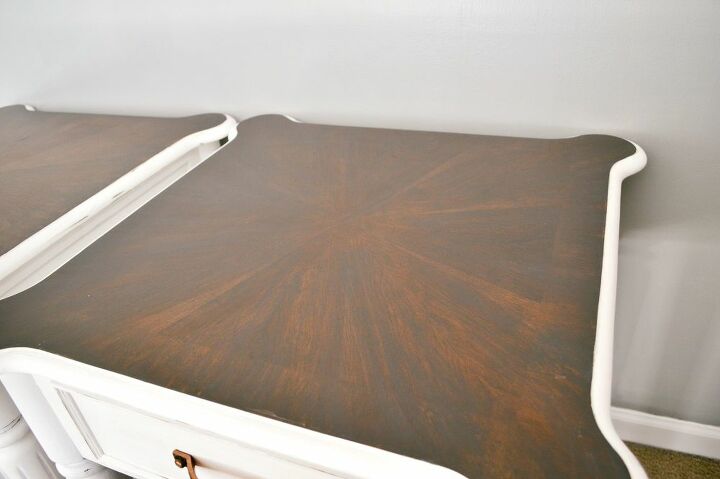
For this piece I stained just the top, so I did my painting and staining all at once. Very carefully and precisely I used my rag (piece of drop cloth) and stained the top making sure not to get any onto the part I was going to paint. Make sure to wear a glove, stain can be a pain in the butt to get off your hands and finger nails.
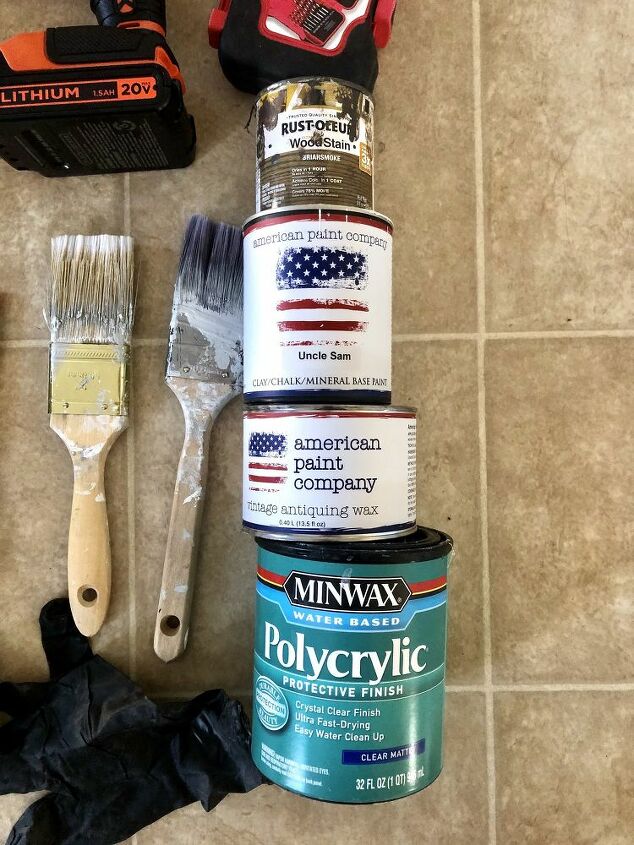
- Paint - American Paint Company
- Stain - Briarsmoke by Rustoleum
Step Five - Seal
Depending on what kind of paint you use you’ll seal with poly or a wax. For this piece I used chalk paint so I used a wax to seal it.
To apply wax on chalk paint I use a piece of drop cloth and rub on in small sections. With a clean piece of drop cloth you want to go over removing any excess. I just follow the directions on the container.
To seal the stain I always, always use Polycrylic Matte finish. I usually do two - three coats of this and sand with 220 grit in between coats, making sure I remove all dust particles with a cloth.
- Seal - Polycrylic Clear Matte by Minwax (on stain)
- Wax - Clear by American Paint Company (on chalk paint)
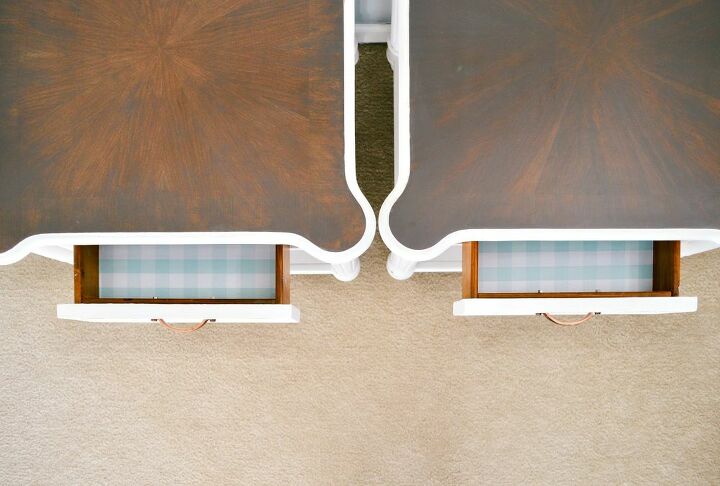
Step Six - Line the Drawers
Measure the drawer and cut the appropriate size of paper of choice. Remove backing and stick down on drawer. Use exact knife to remove excess from sides.
- Drawer Liner from Walmart
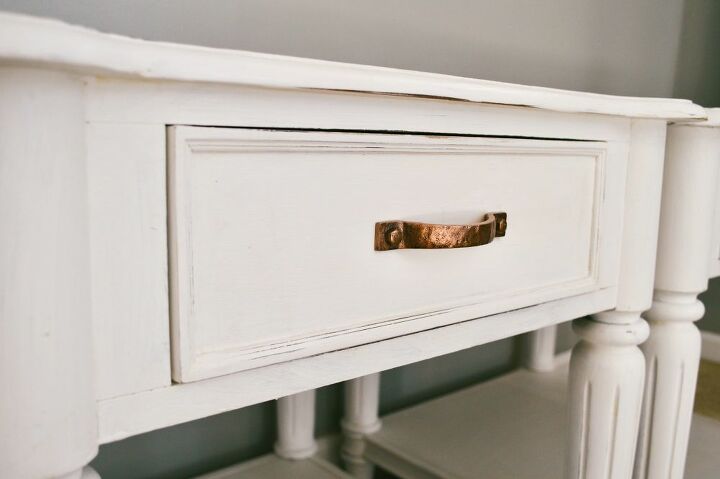
Step Seven - Add Hardware
Put your hardware back on. This piece has new hardware from Hobby Lobby.
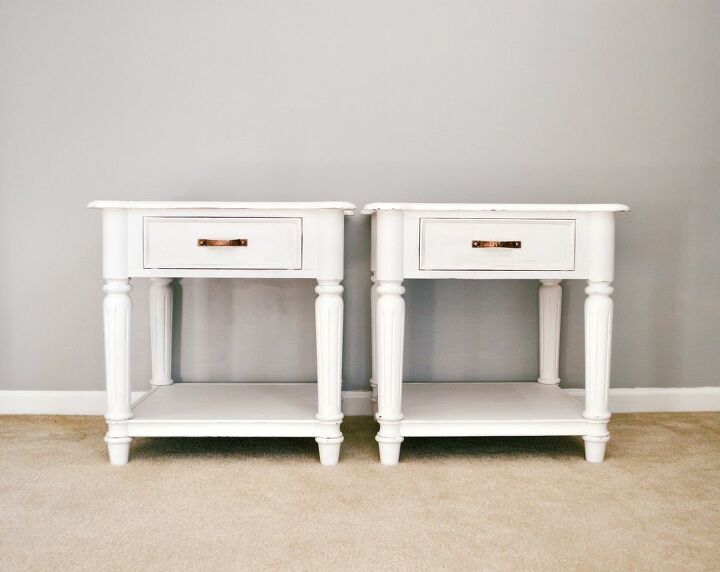
Step Eight - Find your finished piece a home!
Now that you have a beautiful new piece of furniture, the fun part starts - finding it’s new home in your house and decorating!
*Also the price of this project will differ based on what you already. $100 is on the higher end if you needed to buy everything listed in the materials used*

Check out more of what I do on my Instagram- @sommer.stains


Comments
Join the conversation
-
Even at the high end, that's a bargain for the results!
-
I love the wood with paint look! Beautiful job!


Frequently asked questions
Have a question about this project?
Love the grain on the top! That pattern must be veneer, is it? Love your makeover! Stunning.