


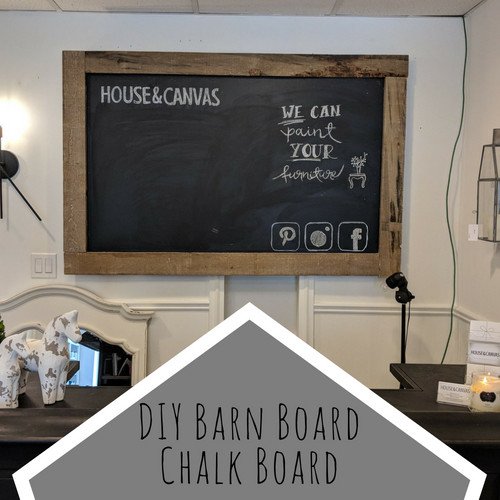
DIY Huge Wall Chalk Board With Barn Board Frame

by
Cait Geddes
3 Materials
$50
2 Days
Easy
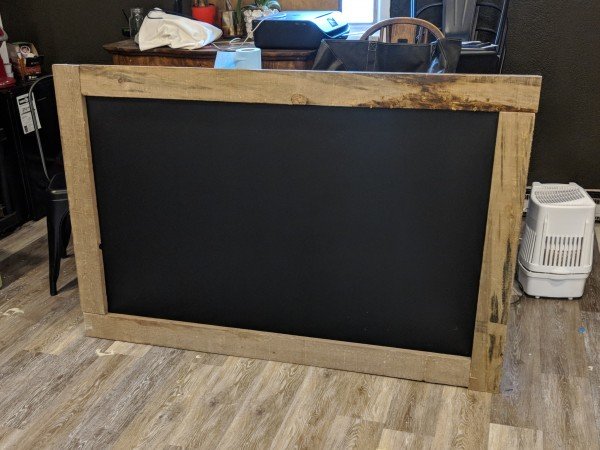
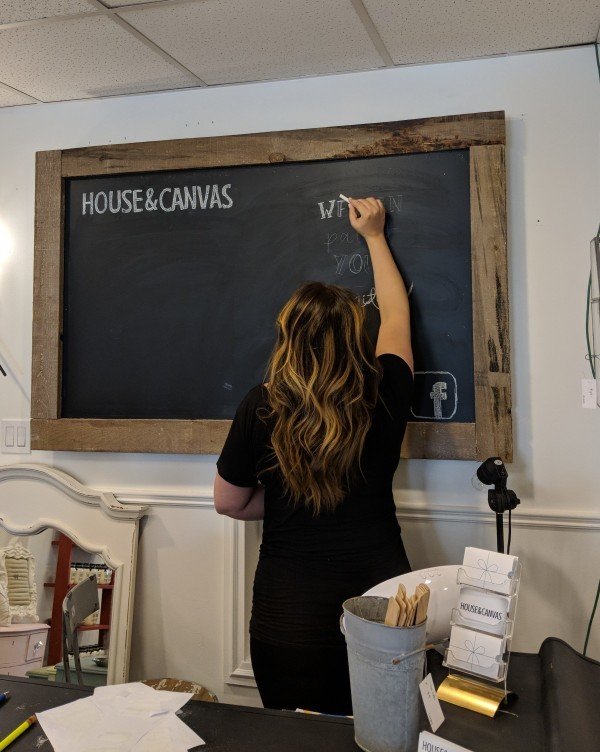
I used to have a store Downtown Burlington, Ontario where I sold my upcycled furniture and did lots of custom work and classes! It was a super cute location with lots of charm. It was an old house that had been converted to a retail space, and luckily the owners kept a lot of the original details like arch ways and millwork. I had this massive wall behind the cash desk that needed something substantial to fill the space. I have always loved huge chalkboards… not just for the neat look of them, but because they are functional and practical. I started shopping online for one big enough for the space and realized they cost a fortune -especially to have one custom made!! I was not interested in spending hundreds of dollars, so I called up my handy Dad and announced we had a new project!!What we built exceeded my expectations!! I am so thrilled with out it turned out. Here’s the step by step instructions to build your own Barn Board Chalk Board!
- House&Canvas Furniture Paint in SHADOW (You use this as your chalk board paint)
- Foam roller & paint tray
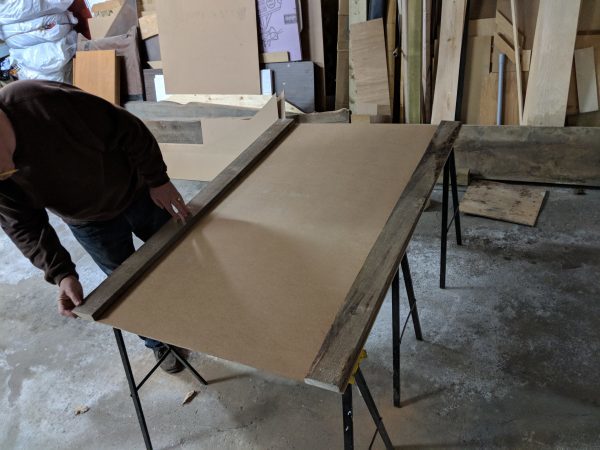
- 1′ x 4′ x 8′ Barn Board Wood for Frame (Home Depot has "faux barn board now - such a great, inexpensive option! I needed 2)
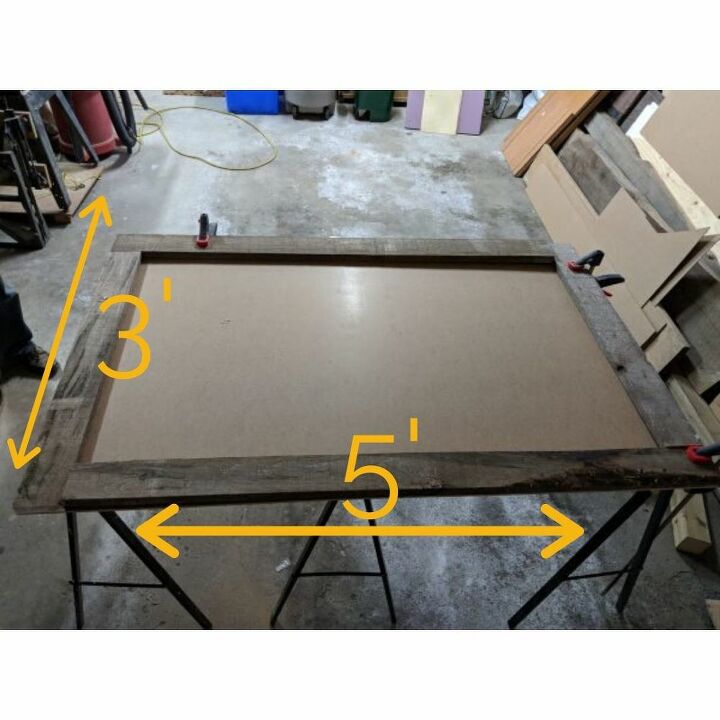
- Sheet of masonite cut to size (mine was 5′ x 3′ and my Dad had a spare so it was FREE!!)
- 10 x 3/4 Wood Screws
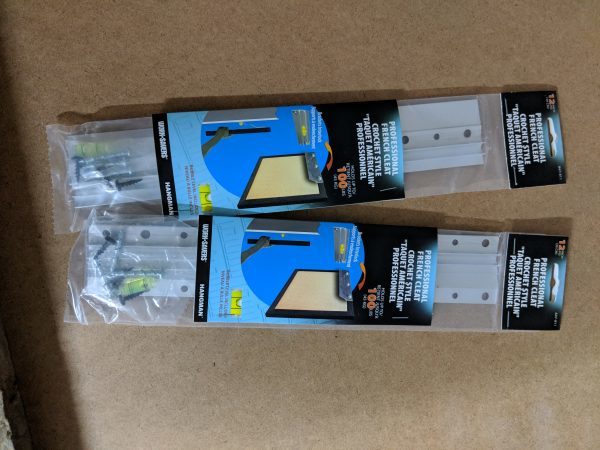
- French Cleat Mounting Bracket ( I needed 2 because of the size and weight of the board)
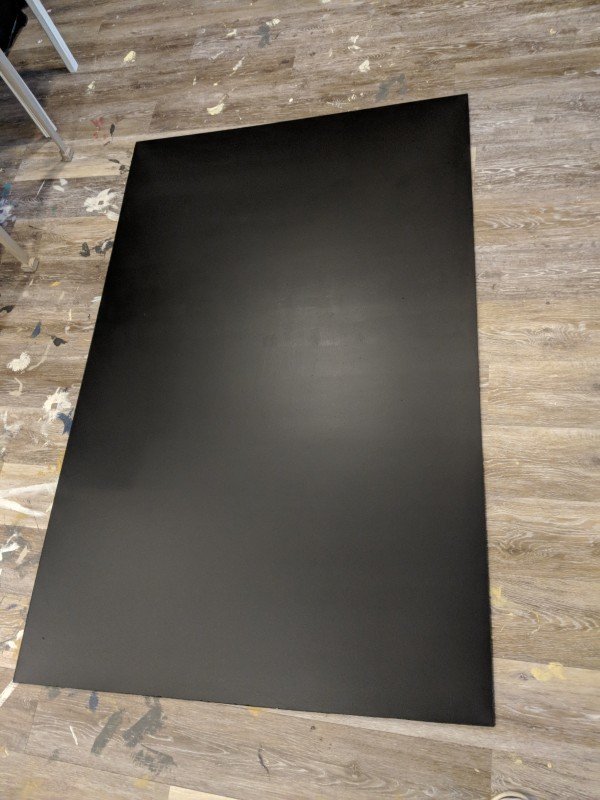

- Before using your chalkboard for the first time, be sure to prime with chalk. Simply lay your piece of chalk on it side and rub it all over the surface. Be sure your whole surface is covered in chalk, then erase it
- When your chalk board is looking a little worn, you can add a quick coat of paint to freshen it up. I gave mine a fresh coat every 6 months or so (but, I used it a lot!)
- You can easily erase your chalk with a dry, lint free cloth or eraser.
- For a better clean, use a slightly damp cloth. Don't forget that the paint is water based so excessive water will activate and wipe off the paint. Be sure your cloth is just damp.
- Always wait for the board to be completely dry before writing on it again.
Resources for this project:


Any price and availability information displayed on [relevant Amazon Site(s), as applicable] at the time of purchase will apply to the purchase of this product.
Hometalk may collect a small share of sales from the links on this page.More info
Comments
Join the conversation
2 of 6 comments
-
Just love it! Good tips to get the best results. Thx!
-
Great idea. Size lends itself to so much more than message board. I see kids keeping score when playing games or group hangman or whatever game. Littles can draw on when winter takes over. And I just can’t stop thinking of uses! Thanks for sharing


Frequently asked questions
Have a question about this project?