


How to Use a Colander for Acrylic Pour Painting

Love abstract art? Acrylic pour painting is my absolute favorite way to create it easily. Everyone loved to fingerpaint when they were a kid because you were allowed to mix your colors all together in an abstract pattern without worrying that it didn’t look like something. Acrylic pour painting lets you do the same without getting the paint all over your hands!
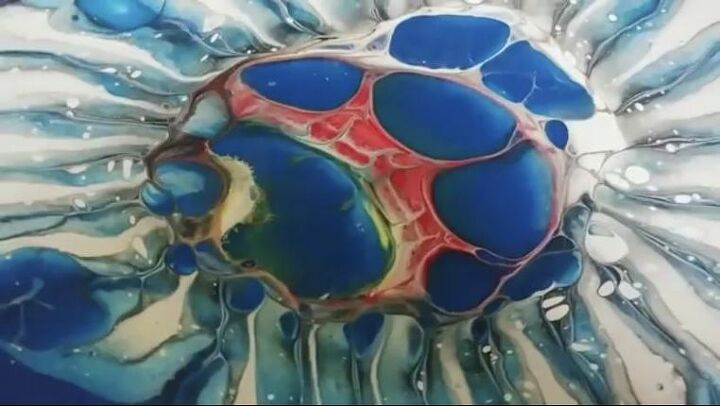
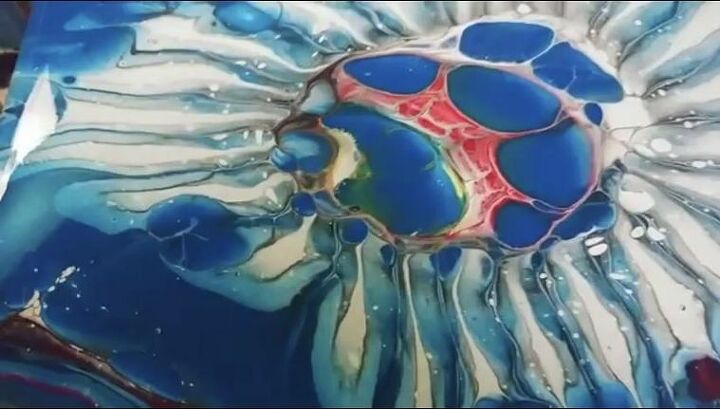
I used the acrylic pour technique to paint furniture and other pieces for my home many times but just to add even more abstract patterns, I set out to design a painted canvas using a colander to see the flow paint pattern it created. I used an acrylic pour medium and water to thin and add movement to my paint and shine to the dried artwork. Don’t be afraid to give this easy project a try- combine your favorite colors and see what you can create yourself!
You Will Need:
- Artist Canvas (Can Use Two)
- Primer or Sealer (Gesso) for Preparing Surface
- Dropcloth or plastic sheeting
- Floetrol or other Acrylic Pour Medium
- Artists’ Loft Flow Acrylics Paint
- Water
- Colander
- Spray sealant for Acrylic Paint
Step 1: Prepare Your Surface
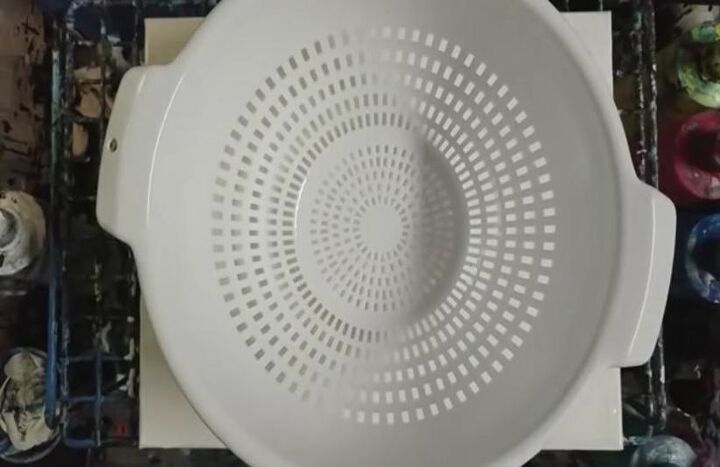
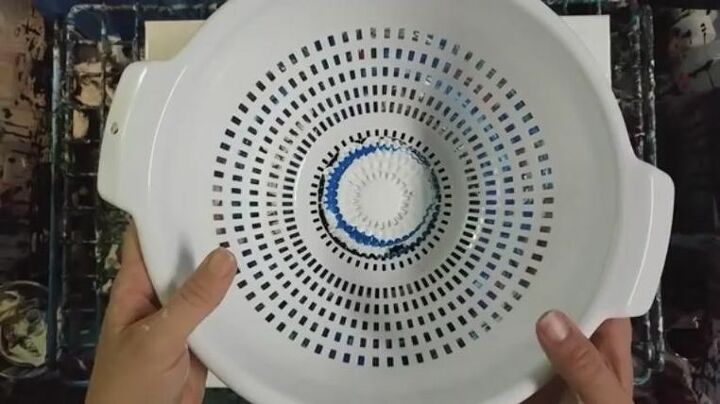
Before adding paint, I prepared my canvas with gesso and primer. Both of these materials help my paint adhere to the canvas better and increase the durability and longevity of the artwork. You can find a pre-primed canvas that is ready for paint if you want to save the time of this step, but it will typically be a little more expensive. If you are painting on a canvas, you can prevent paint waste by placing a second canvas underneath it to catch runoff and actually produce two paintings. When the canvas dried, I placed a colander in the center.
Step 2: Protect the Painting Area
I was painting in a workshop but to prevent a huge mess from the pouring paints, place a drop cloth or plastic sheeting underneath the painting area to catch the paint that will fall. This is another reason why the second canvas is a great idea but the dropcloth may eventually turn into a painting you want to display!
Step 3: Mix Paint for Pour
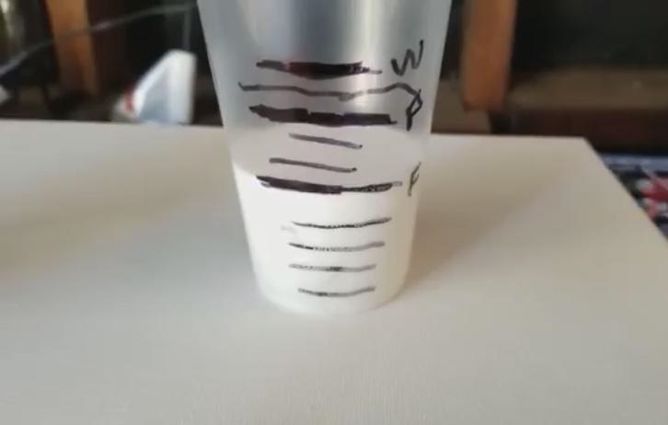
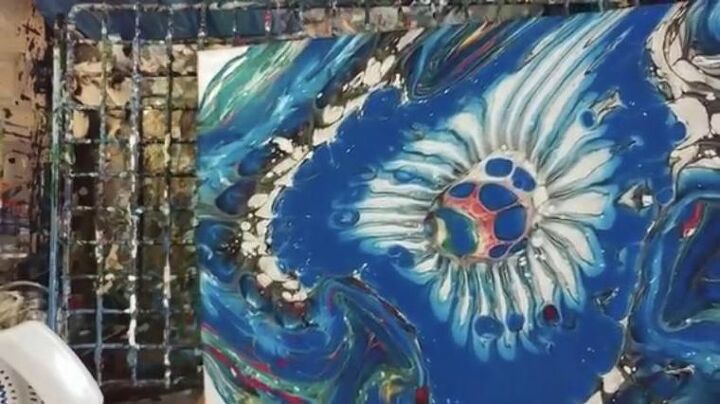
I combined a pouring medium (floetrol) acrylic paints, and water in several separate bottles for my project. I mixed 5 parts floetrol, 3 parts paint, and 2 parts water in each container. The floetrol or pouring medium you choose should thin and give movement to the acrylic paint. It also helps the paint dry with a brilliant shine and is responsible for creating what looks like cells on the surface of the poured paint. After completing the project, I recommend that you use a ratio with slightly more floetrol and water to create thinner paint because it has to seep through the colander and would benefit from less thickness.

Step 4: Start Acrylic Pour
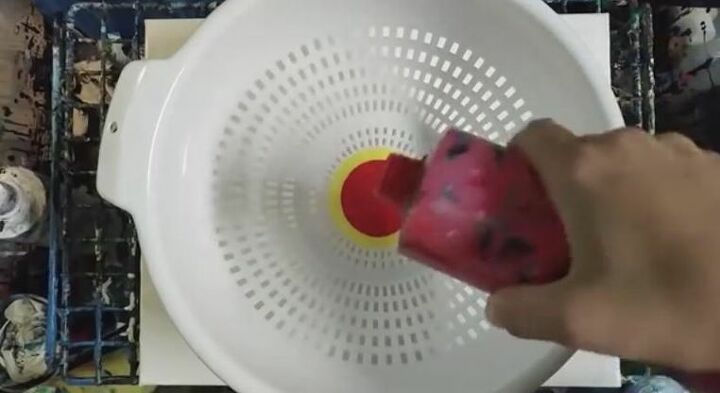
I slowly poured paint, one paint color at a time into the center of the colander. Pour only enough for the center to be covered and give it a chance to start dripping through the colander before pouring the next color on top of it. I poured the colors in this order: Yellow, red, blue, yellow, blue, white, black, turquoise, white, red, yellow, royal blue, white, black, white, royal blue, and a final drop of white. Choose several of your favorite colors and don’t worry about how they look side by side because there is no way to predict how they will combine in the artwork and that is the beauty of the process.
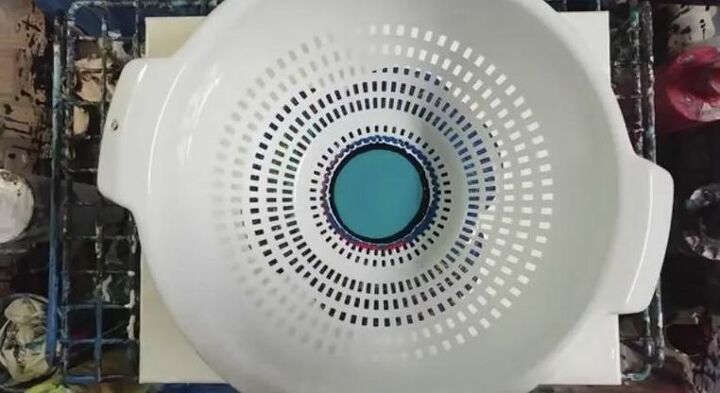
Step 5: Lift Colander
When I was sure that the majority of the paint was through the colander, I carefully lifted the colander straight up and away from my flowing paint surface to reveal an incredible paint pattern below. You can’t wait too long to do this because the paint is flowing on the canvas below.
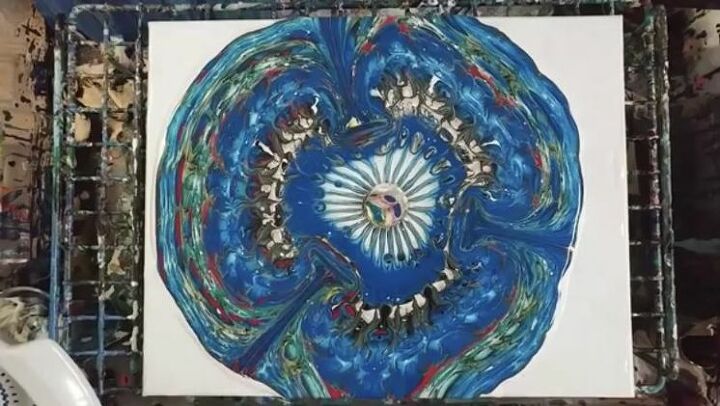
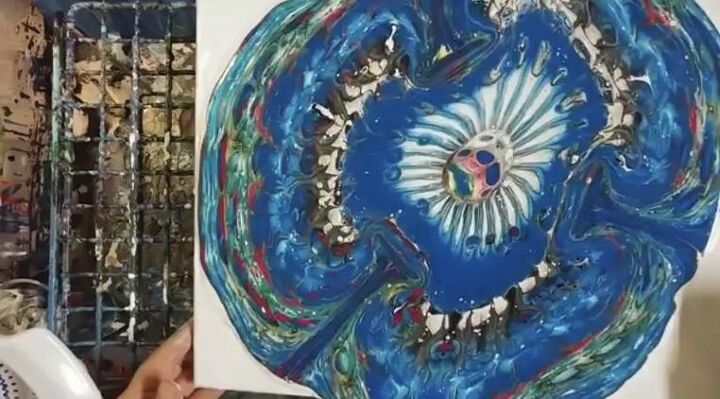
Step 6: Move Painted Surface
I lifted my canvas and gently tilted it side to side as the paint flowed from the center outward. I always prefer to maintain the very strong center pattern as much as possible and I moved my canvas around keeping that in the center several times. When the paint is about to touch your hands, turn the surface in the opposite direction. The paint will be dripping off the canvas and so having a second canvas to catch the runoff is a great idea. Move and tilt until your surface is covered with the amount of pattern and paint that you want.
Step 7: Dry
The canvas was covered with a ton of paint in a very thick layer and I allowed for ample drying time before sealing it. Be careful when handling the canvas because if the paint is too thick it may crack.
Step 8: Seal and Protect
I used a gloss finish acrylic spray sealant and covered the dried paint to preserve the colors and protect the artwork from fading, discoloration, or chips. Spray the sealant evenly over your canvas and let it dry thoroughly. The finished product will have a diamond-like shine both from the pouring medium and the spray sealant.
My canvas came out better than I imagined using a colander for my acrylic pour painting project. I love dreaming up color combinations and watching how they interact on the surface in mesmerizing, flowing, patterns and shapes and this one did not disappoint! This is a no-fail, simple project that anyone can give a try and instantly love their results. Trust me, once you try acrylic pour painting you will want to do it again. Use two canvases and give this project a try; you’ll have one to keep, and one to give away as a gift.
Have you tried the acrylic pour painting technique and loved the unique and beautiful result? Share your works of art and find inspiration for easy DIY projects for your home at Hometalk!


Comments
Join the conversation
-
I’m definitely going to try this. I love the way it came out.☺️
-
Nice…..good instructional video!


Frequently asked questions
Have a question about this project?
In real time...how long to dry if it's done on a small table..and be ready to use
I consider this a new TRY.....a new painting look.........it is one of those pour threw window screen, anything that has an opening........what would ya call it? ,, ,modern art......my son could probably help ya out here.
I have never attempted a "pour" project- it seems like there is a tremendous amount of paint used and wasted on the run off? Do you salvage that runoff paint ? Does it just turn into mud colored if you can save it? Is the end result "gloppy" or do you get a consistent smooth surface- I'm thinking in relation to doing on a furniture piece?