


Industrial Farmhouse Propagation Station DIY

Rustic styles are hot right now and I love the look. So when I saw this industrial farmhouse propagation station, I knew I wanted one right away. It was super easy to do and for much less than the cost of purchasing one, I had a brand new accessory for my apartment. All I needed was an old block of wood, some test tubes and a little stain. If you don’t have a wood block around the house, you can grab one at a home improvement store or lumber yard and they’ll even cut it for you. It doesn’t get any easier than that. Come see exactly how easy!
Supplies:
- Wood Block
- Test Tubes
- Drill
- Spade Blade
- Sandpaper
- Measuring Tape
- Pencil
- Rags
- Stain
- Polyurethane (optional)
- Drop Cloth
- Mask
- Goggles
- Gloves
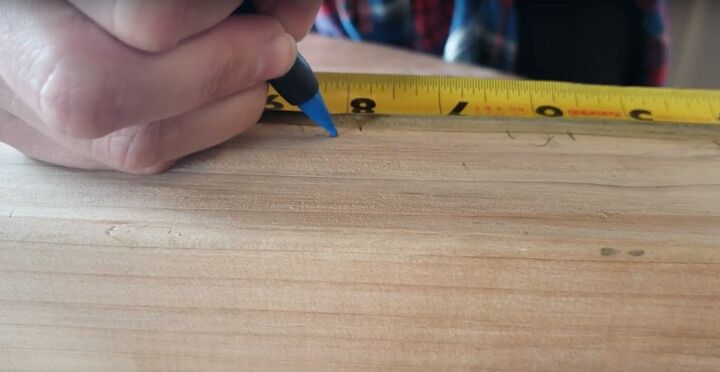
Step 1: Measure
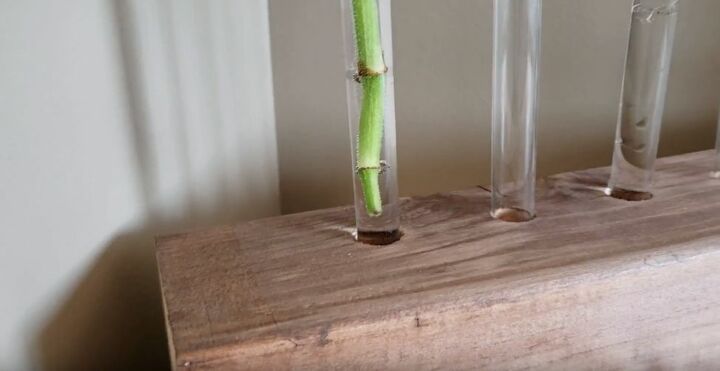
I started by measuring out where I wanted to place my 6 test tubes on my block of wood. I laid out my design with my measuring tape, decided on spacing and then marked it with a pencil. I made an “X” where the center of the test tube would be placed and then marked the area I would need to drill out to accommodate each tube. I left 1 ½ inches between each tube, but your spacing will depend on your specific supplies. Generally though, you’ll want them centered on the block.
Step 2: Drill Out Your Holes
I put down my drop cloth, since I was working inside, put on my safety equipment and grabbed my drill. Since my test tubes were ⅝ of an inch in diameter, I used a ⅝” spade drill bit. I drilled my holes a little bit at a time, dumping out some of the sawdust every now and then, for easier drilling.
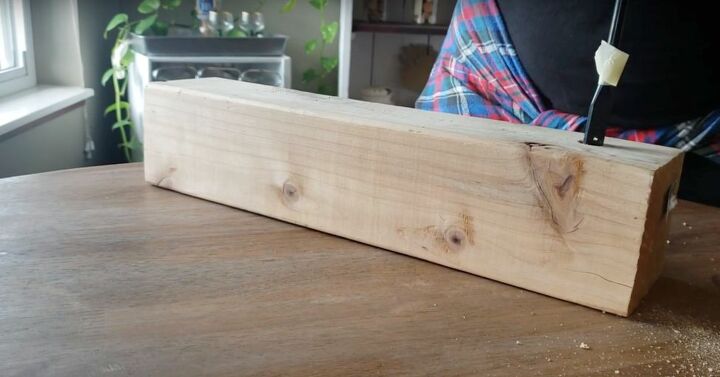
Step 3: Test the Depth
When I thought my holes were deep enough, I took a test tube and tested it. I placed it in the hole to determine if it was deep enough to hold the glass securely in place. I also wanted to make sure it looked good. When I was satisfied, I moved on to the next hole, making sure that they were all the same depth, testing as I went along, so I’d have a uniform height across the wood block.

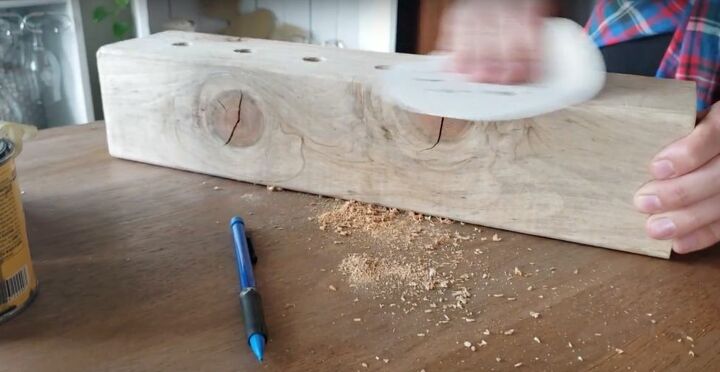
Step 4: Sand
When I was finished drilling, I was ready to sand. I didn’t need a power sander, this was a tiny job. I just used a piece of sandpaper and went over the entire wood block. I concentrated on the top, where I had just drilled, to make sure there weren’t any jagged edges or rough spots. I wiped the excess dust and debris away with a damp rag and set it aside to dry for a bit.
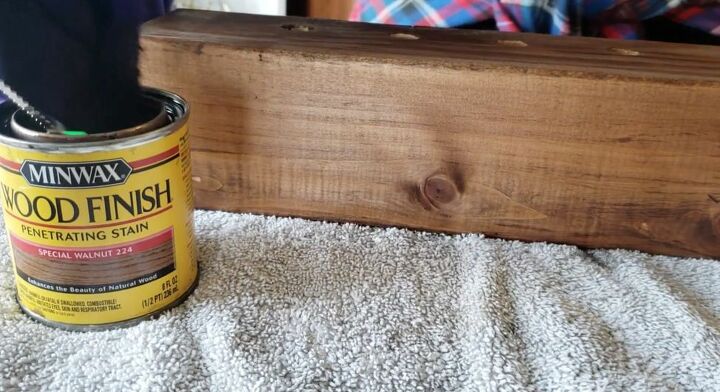
Step 5: Stain
I wanted the block to have a rustic farmhouse appearance, so I only gave it one quick coat of stain. I dipped a rag into the stain and then rubbed it in long even strokes across the wood, in the same direction as the grain. Then I used a separate rag to wipe off any extra stain, so the wood would have a more even finish. You could add a coat of polyurethane over the stain, or use a stain plus sealer product, but it’s not necessary. Oh, and remember to always work in a well-ventilated area with these products.
Step 6: Place the Test Tubes in The Holes
At this point, I was basically done. I popped the test tubes into the holes, then filled them up with water and placed a cutting inside. That was it. The test tubes worked out really well, since their shape supported a variety of cuttings and looked good even if a few were empty.
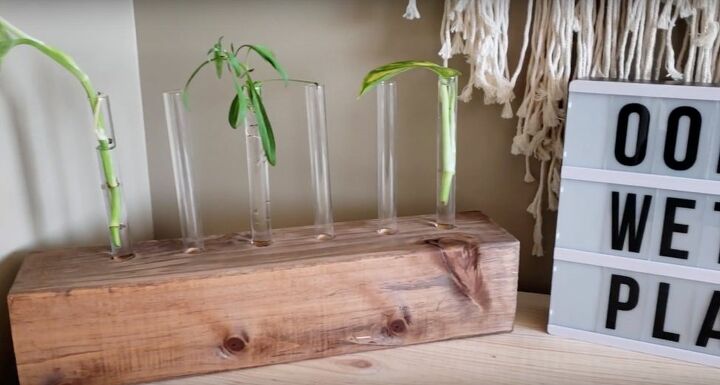
It was seriously one of the quickest and least expensive DIYs I’ve ever done. Plus, it’s a great DIY project for a beginner woodworker. If you can drill holes, you can have your own industrial farmhouse styled propagation station in no time. So why not get trendy and give it a try?
Do you think you might make one of your own? Let me know in the comments!


Comments
Join the conversation
-
This is really sweet - and easy - and inexpensive - win-win!
-
Really like this project,frugal gardener that I am. Would suggest for future project shares that you show photo of finished item first. Helps visualize the "unknown".


Frequently asked questions
Have a question about this project?