


DIY Mailbox Makeover

Back in the Fall season we finally had to replace our mailbox and post, the entire setup, after the old post finally just rotted through. Since then I have been waiting until warmer days and sunshine to finally give my new mailbox and post a DIY makeover.
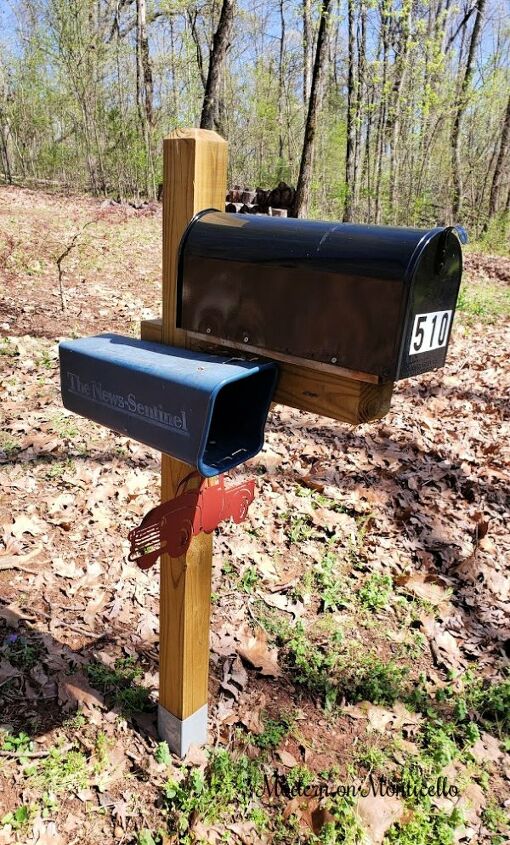
Since we purchase the new mailbox and post from our local Home Depot, it was just your basic setup and very generic. Black mailbox with a wooden post. I did find this great rustic metal sign at a local shop in our area back in the fall of a vintage red truck that my husband attached to the post with screws. This gave it a bit of personality through the winter months but I envisioned a bit more.

With my new Cricut Joy machine, I was able to design and cut out not only our address in white vinyl but also found a great image of a vintage truck.
I did do some research on Google about using the vinyl outdoors and found that the permanent vinyl is supposed to last at least three years in the weather. I guess we shall see what happens with this decal over time.
Before applying the decal to the side of the metal mailbox, I first cleaned the mailbox with soap and water, general cleaner, and then rubbing alcohol to remove any residue that would prevent the vinyl from sticking to the metal.
If you don't have a Cricut machine, or know anyone who can make the vinyl decal for you, there are some great small businesses on Etsy that would appreciate the business of making the custom decal for you.
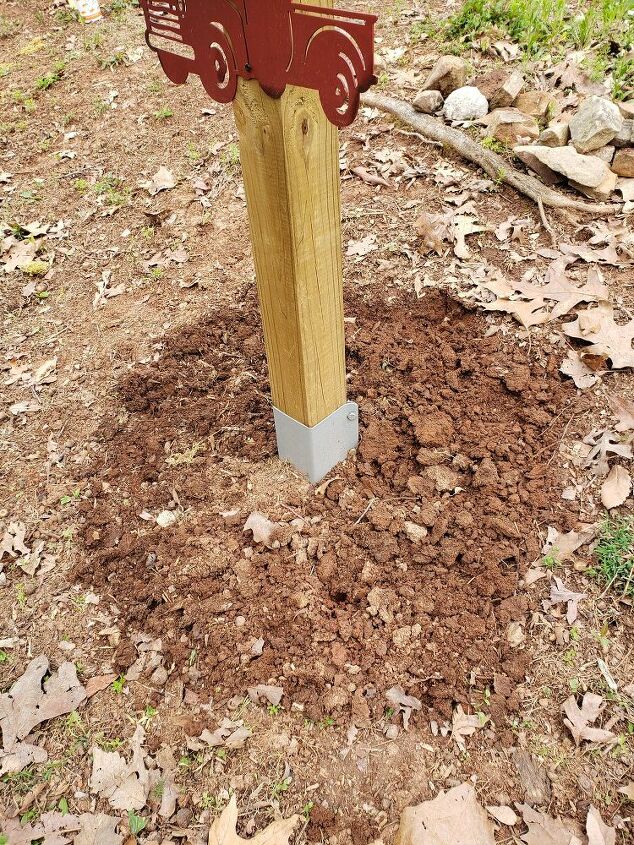
Next up, was to add some landscaping around the post.
Our home sets on a very wooded lot filled with tree roots, red clay, lot of rocks, and weeds. Lots of weeds.
The area around the bottom of the post was weeded and cleaned up to be able to plant flowers.
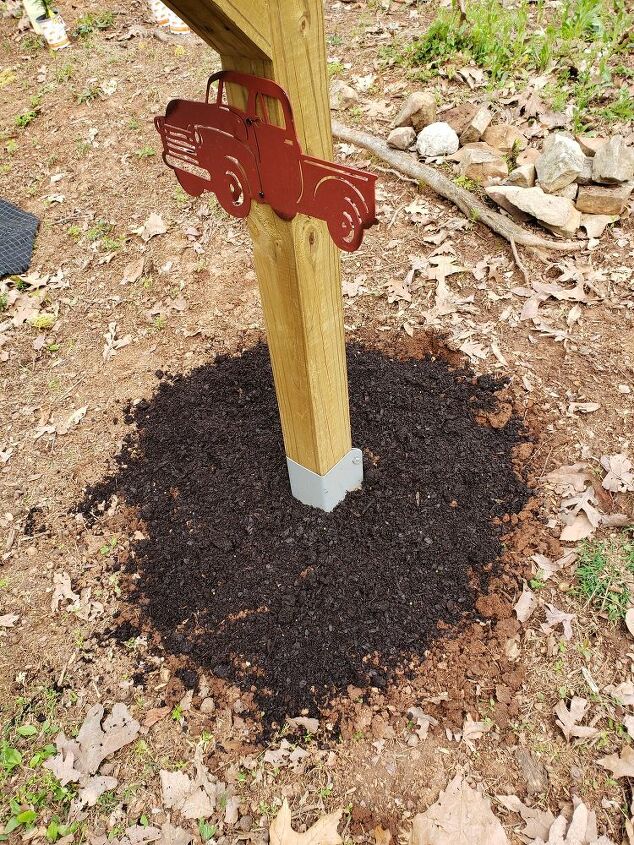
The red clay naturally mixed in the soil in our yard is not conducive to growing anything but weeds so we added in some garden soil purchased from Home Depot for a good foundation.
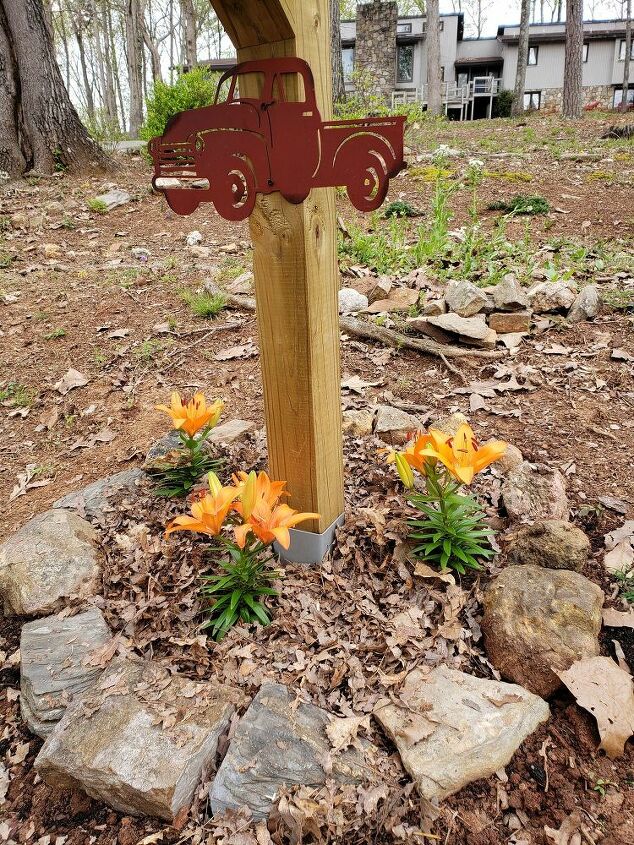
Then we added rocks and stones, naturally found in our wooded lot or moved from old flower beds to the area around the post as a border to the flower bed area.
If you haven't already noticed, we have a lot of trees in our yard. Many many trees, so this year we also made our own leaf mulch for the first time to not only reuse what we have, but to also save some money on our other landscaping projects we have going on.
It is a test run for this year so we shall see how well it works for us.
To recap, the stones and mulch came from the natural landscaping in our yard, the vinyl was cut using my Cricut Joy machine, and the metal red truck sign came from a boutique shop in Pigeon Forge.
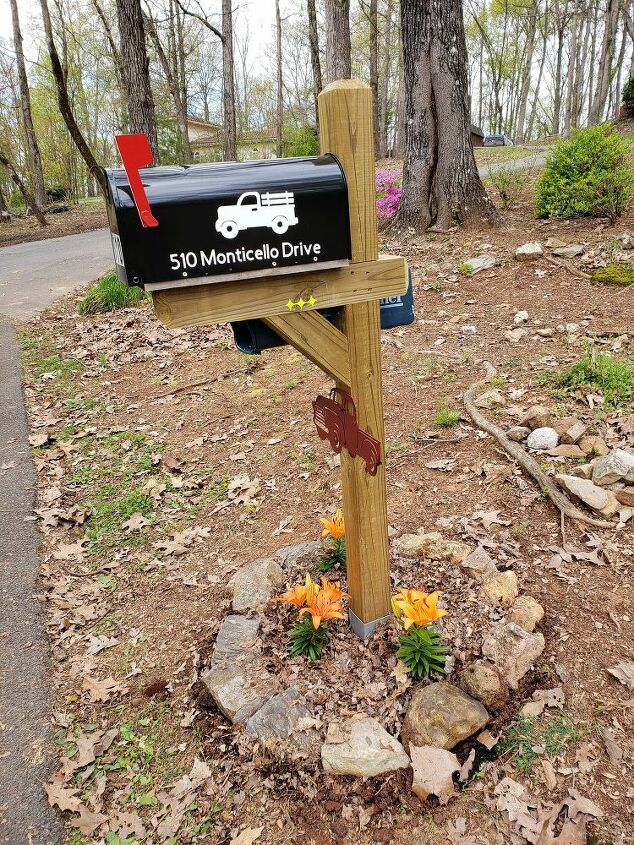
It's a bit rustic in nature, but this DIY mailbox makeover was such an improvement over the basic and generic mailbox we had. It is a custom design for just our home and give the landscaping some charm and character. And a warm welcome to our mail carrier.
Happy Spring!
Resources for this project:
See all materials


Frequently asked questions
Have a question about this project?